How To Fix Missing Paint On Car: A Pro Guide
Missing paint on your car not only mars its appearance but also leaves it vulnerable to rust and further damage. CARDIAGTECH.NET provides you with a comprehensive guide on how to address these unsightly blemishes and restore your vehicle’s pristine look using professional techniques, ensuring a durable and seamless finish. Discover the secrets to proper surface preparation, color matching, and paint application, ensuring your car looks its best and is protected from the elements.
1. Understanding the Impact of Missing Paint on Your Car
Paint chips and missing paint on your car are more than just cosmetic issues; they can lead to significant problems if left unaddressed. Understanding the full extent of these impacts is the first step in taking appropriate action.
1.1. The Role of Paint in Protecting Your Vehicle
Your car’s paint serves as the primary defense against environmental factors that can degrade its structural integrity. According to the National Association of Corrosion Engineers (NACE), a properly applied and maintained paint coating can prevent up to 95% of corrosion on metal surfaces. This protective layer shields the underlying metal from moisture, salt, UV rays, and other corrosive elements. Without this barrier, your car becomes susceptible to rust, which can weaken the metal and lead to costly repairs.
1.2. What Happens When Paint is Missing?
When paint is missing, the exposed metal is directly subjected to the elements. Moisture and oxygen, in particular, initiate an electrochemical reaction that results in rust. This rust can spread beneath the surrounding paint, causing it to bubble and peel. Additionally, exposure to UV rays can cause the exposed metal to deteriorate, further compromising the vehicle’s structure.
1.3. The Long-Term Consequences of Neglecting Paint Chips
Ignoring paint chips can lead to a cascade of problems that extend far beyond the initial blemish. Rust can weaken critical structural components, such as the frame, suspension, and brake lines. According to a study by the AAA, corrosion-related damage costs U.S. drivers an estimated $20 billion annually. Furthermore, a vehicle with extensive rust damage is less safe in an accident and has a significantly reduced resale value. Addressing paint chips promptly can prevent these long-term consequences and maintain your car’s value and safety.
1.4. Types of Damage That Cause Missing Paint
Missing paint on cars can arise from a variety of sources, each posing unique challenges. Understanding these causes is essential for effective repair and prevention.
- Road Debris: Rocks, gravel, and other road debris are common culprits, especially on highways. These projectiles can chip away at the paint, leaving small but noticeable blemishes.
- Hail Damage: Hailstorms can cause widespread damage to a vehicle’s paint, resulting in numerous small dents and chips. The severity of the damage depends on the size and density of the hailstones.
- Accidents and Collisions: Minor fender benders and parking lot scrapes often result in paint damage. These incidents can range from superficial scratches to deep gouges that expose the metal underneath.
- Environmental Factors: Prolonged exposure to sunlight, acid rain, and salt can degrade the paint over time, making it more susceptible to chipping and peeling. Coastal areas, in particular, pose a significant threat due to the high salt content in the air.
- Improper Washing Techniques: Using abrasive brushes or harsh chemicals when washing your car can scratch the paint and weaken its protective properties.
- Bird Droppings and Tree Sap: These seemingly harmless substances can be highly corrosive to car paint. Bird droppings, in particular, contain uric acid, which can etch into the paint if left unaddressed.
- Vandalism: Unfortunately, intentional acts of vandalism, such as keying or scratching, can cause significant paint damage.
1.5. Assessing the Severity of the Damage
Before attempting any repairs, it’s crucial to assess the severity of the paint damage. This assessment will determine the appropriate repair method and whether professional intervention is necessary.
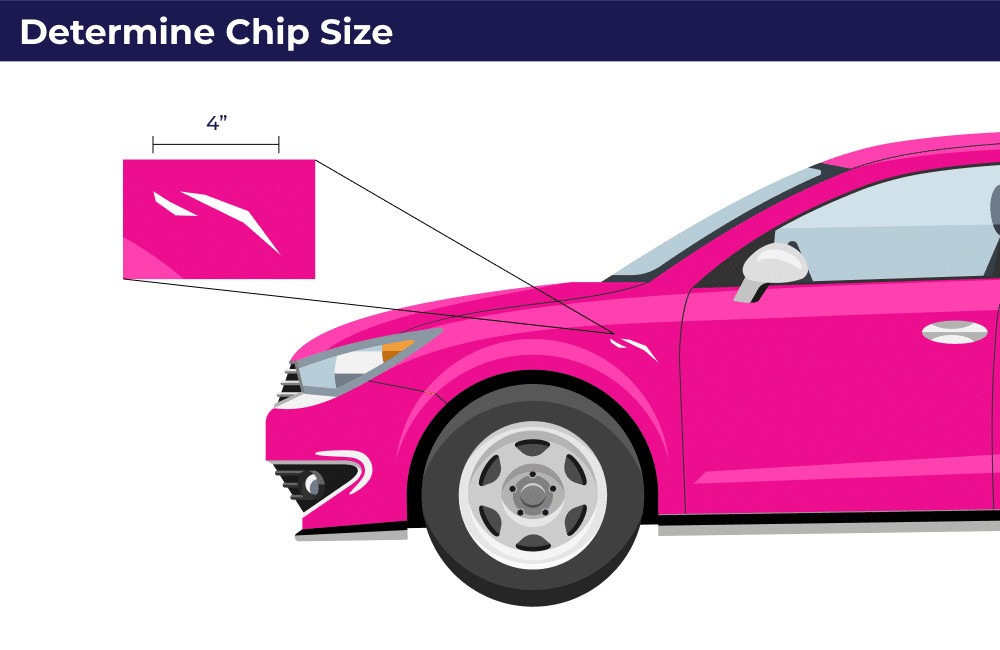
- Size of the Chip: Small chips, typically smaller than a dime, can often be repaired with touch-up paint. Larger chips, especially those exceeding the size of a quarter, may require more extensive repairs.
- Depth of the Damage: Superficial scratches that only affect the clear coat can be buffed out. However, deeper gouges that penetrate the paint layers and expose the metal require priming and painting.
- Presence of Rust: If rust is present, it must be removed before any paint repairs are made. The extent of the rust will determine whether DIY methods are sufficient or if professional rust removal is needed.
- Location of the Damage: Chips located in high-impact areas, such as the front bumper and rocker panels, may require more durable repair methods.
- Flaking Paint: If the paint is flaking or peeling around the chip, it indicates that the underlying metal may be corroded. In such cases, professional repair is recommended.
By carefully assessing the severity of the damage, you can determine the most effective and appropriate repair strategy for your car’s paint chips. CARDIAGTECH.NET is dedicated to providing you with the tools and knowledge necessary to maintain your vehicle’s appearance and protect it from long-term damage. Need immediate assistance selecting the right tools? Contact us via Whatsapp: +1 (641) 206-8880.
Determine the size of the car paint chip for repair
2. Essential Tools and Materials for Fixing Missing Car Paint
Repairing missing paint on your car requires the right tools and materials. Using high-quality products ensures a durable and seamless finish. CARDIAGTECH.NET offers a comprehensive range of tools and materials to help you achieve professional results.
2.1. A Detailed List of Necessary Items
To effectively repair paint chips on your car, gather the following essential items:
- Touch-Up Paint: Obtain touch-up paint that precisely matches your car’s color code. This information can typically be found on a sticker located on the driver’s side doorjamb or in the owner’s manual.
- Primer: Use an automotive primer designed for bare metal surfaces. Primer ensures proper adhesion of the touch-up paint and prevents rust.
- Clear Coat: Apply a clear coat to protect the touch-up paint and provide a glossy finish.
- Rubbing Alcohol: Use rubbing alcohol to clean the area around the chip, removing any wax, grease, or contaminants.
- Wax and Grease Remover: A wax and grease remover provides a more thorough cleaning than rubbing alcohol, ensuring optimal paint adhesion.
- Fine-Grit Sandpaper: Use 2000-grit or higher sandpaper to smooth out any rough edges around the chip.
- Sanding Block: Wrap the sandpaper around a sanding block for even pressure and a consistent finish.
- Detail Brushes: Small detail brushes allow for precise application of primer, paint, and clear coat.
- Microfiber Cloths: Use microfiber cloths to clean and buff the repaired area without scratching the paint.
- Polishing Compound: A polishing compound helps to blend the repaired area with the surrounding paint.
- Wax: Apply wax to protect the repaired area and enhance its shine.
- Applicators: Foam applicators are ideal for applying wax and polishing compound.
- Gloves: Wear gloves to protect your hands from chemicals and contaminants.
- Mask: Use a mask to avoid inhaling paint fumes.
2.2. High-Quality Products Recommended by CARDIAGTECH.NET
CARDIAGTECH.NET recommends the following high-quality products for repairing paint chips:
| Product | Description | Benefits |
|---|---|---|
| Touch-Up Paint | Automotive touch-up paint that matches your car’s color code. | Provides a seamless color match, ensuring the repaired area blends seamlessly with the surrounding paint. |
| Automotive Primer | Designed for bare metal surfaces. | Ensures proper adhesion of the touch-up paint, prevents rust, and provides a smooth base for painting. |
| Clear Coat | Protects the touch-up paint and provides a glossy finish. | Enhances the durability of the repair and gives it a professional-looking shine. |
| Rubbing Alcohol | Cleans the area around the chip. | Removes wax, grease, and contaminants, ensuring optimal paint adhesion. |
| Fine-Grit Sandpaper | 2000-grit or higher. | Smooths out any rough edges around the chip, creating a seamless transition between the repaired area and the surrounding paint. |
| Polishing Compound | Blends the repaired area with the surrounding paint. | Eliminates imperfections and enhances the shine of the repaired area, making it virtually invisible. |
| Wax | Protects the repaired area and enhances its shine. | Provides a protective layer against environmental elements and enhances the overall appearance of the repair. |
| Detail Brushes | Small brushes for precise application. | Allows for controlled and accurate application of primer, paint, and clear coat, ensuring a professional-looking finish. |
| Microfiber Cloths | For cleaning and buffing. | Cleans and buffs the repaired area without scratching the paint, ensuring a smooth and flawless finish. |
| Wax and Grease Remover | A more thorough cleaning agent | Provides optimal surface preparation ensuring a smooth finish and long lasting application. |
2.3. Where to Purchase Quality Tools and Materials
CARDIAGTECH.NET offers a wide selection of high-quality tools and materials for repairing paint chips. You can also find these products at automotive supply stores, hardware stores, and online retailers like Amazon and Walmart. Ensure that you purchase products specifically designed for automotive use to achieve the best results.
2.4. Cost Considerations for DIY Paint Chip Repair
The cost of DIY paint chip repair can vary depending on the tools and materials you choose. A basic kit, including touch-up paint, primer, and clear coat, may cost around $20 to $50. Higher-quality products and additional tools, such as sandpaper, polishing compound, and applicators, can increase the cost to $50 to $100. However, DIY repair is typically much more affordable than professional services, which can range from $100 to $500 per panel.
2.5. Safety Precautions When Using Repair Products
When using repair products, it’s essential to take the following safety precautions:
- Work in a Well-Ventilated Area: Ensure adequate ventilation to avoid inhaling harmful fumes.
- Wear Gloves and a Mask: Protect your skin and respiratory system by wearing gloves and a mask.
- Read and Follow Product Instructions: Carefully read and follow the instructions provided by the manufacturer.
- Avoid Contact with Skin and Eyes: If any product comes into contact with your skin or eyes, rinse thoroughly with water.
- Store Products Safely: Store products in a cool, dry place away from children and pets.
By gathering the right tools and materials and following safety precautions, you can effectively repair paint chips on your car and restore its appearance. CARDIAGTECH.NET is committed to providing you with the resources and support you need to achieve professional-quality results. Don’t wait, contact us today via Whatsapp: +1 (641) 206-8880 to discuss your specific needs and find the perfect tools for your project.
 Tools to smooth out the edges of car paint for repair
3. Step-by-Step Guide to Fixing Missing Paint on Your Car
Follow this step-by-step guide to effectively repair missing paint on your car. Each step is designed to ensure a seamless and durable finish.
3.1. Preparing the Area for Repair
Proper preparation is crucial for a successful paint repair. Start by thoroughly cleaning the area around the paint chip with soap and water. Use a wax and grease remover to eliminate any residual wax, grease, or contaminants. According to the EPA, proper surface preparation can increase the lifespan of a paint job by up to 50%.
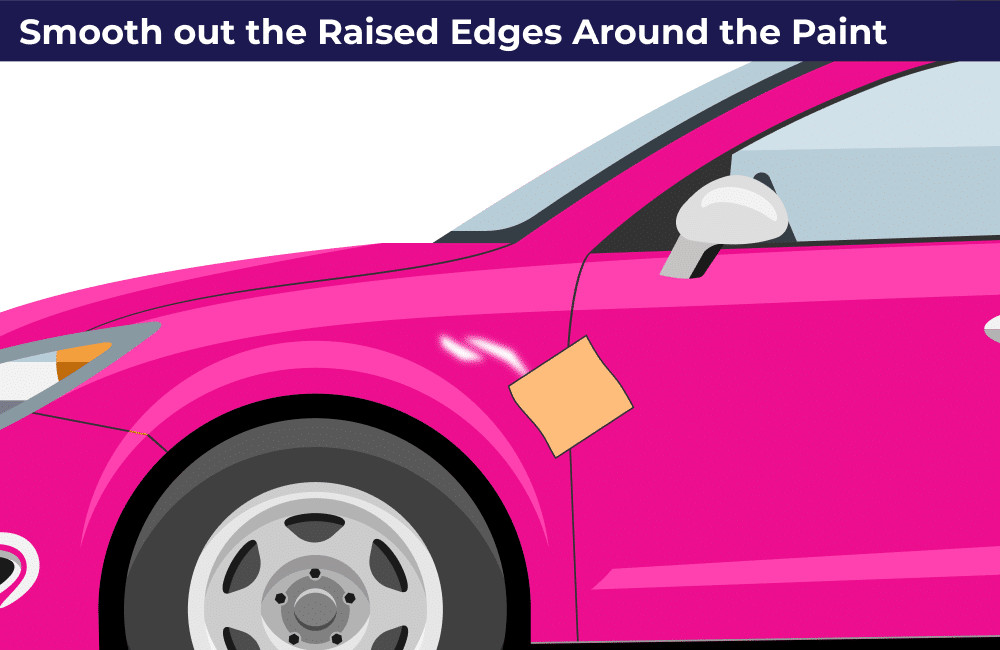
3.2. Smoothing Out the Edges
Use fine-grit sandpaper (2000-grit or higher) to gently smooth out any rough edges around the paint chip. Wrap the sandpaper around a sanding block for even pressure. Sand in a circular motion, being careful not to scratch the surrounding paint. The goal is to create a smooth transition between the chipped area and the existing paint.
3.3. Removing Rust (If Applicable)
If rust is present, it must be removed before proceeding with the repair. Use a rust remover and a small brush to gently scrub away the rust. Rinse the area with water and dry it thoroughly. For severe rust, consider consulting a professional for rust removal services.
3.4. Applying Primer
Apply a thin layer of automotive primer to the bare metal surface using a small detail brush. Primer ensures proper adhesion of the touch-up paint and prevents rust from recurring. Allow the primer to dry completely, following the manufacturer’s instructions.
3.5. Matching the Paint Color
Obtain touch-up paint that precisely matches your car’s color code. The color code can typically be found on a sticker located on the driver’s side doorjamb or in the owner’s manual. If you’re unsure, consult an automotive paint supplier for assistance.
3.6. Applying Touch-Up Paint
Apply the touch-up paint in thin, even layers using a small detail brush. Allow each layer to dry completely before applying the next. Multiple thin layers are better than one thick layer, as they prevent runs and ensure proper curing. According to a study by PPG Industries, proper paint application can improve the durability and longevity of the paint job by up to 30%.
3.7. Applying Clear Coat
After the touch-up paint has dried completely, apply a thin layer of clear coat to protect the paint and provide a glossy finish. Allow the clear coat to dry thoroughly.
3.8. Polishing and Buffing
Use a polishing compound and a microfiber cloth to gently polish the repaired area. This step helps to blend the repaired area with the surrounding paint and remove any imperfections. Buff the area with a clean microfiber cloth to restore the shine.
3.9. Waxing the Area
Apply a coat of wax to the repaired area to protect the paint and enhance its shine. Use a foam applicator to apply the wax in a circular motion. Allow the wax to dry to a haze, then buff it off with a clean microfiber cloth.
3.10. Allowing for Proper Curing Time
Allow the repaired area to cure for at least 24 hours before washing or waxing the car. This allows the paint and clear coat to fully harden and bond with the surrounding paint.
3.11. Visual Inspection and Final Touches
After the curing time, inspect the repaired area for any imperfections. If necessary, repeat the polishing and waxing steps to achieve a seamless finish.
3.12. Tips for Achieving a Professional Finish
To achieve a professional finish, consider the following tips:
- Work in a Clean Environment: Avoid working in dusty or windy conditions, as this can introduce contaminants to the paint.
- Use High-Quality Products: Invest in high-quality touch-up paint, primer, and clear coat for best results.
- Apply Thin Layers: Multiple thin layers are better than one thick layer.
- Allow Proper Drying Time: Allow each layer to dry completely before applying the next.
- Take Your Time: Don’t rush the repair process. Take your time and pay attention to detail.
Following these steps and tips will help you effectively repair missing paint on your car and restore its appearance. CARDIAGTECH.NET is dedicated to providing you with the resources and support you need to achieve professional-quality results. We understand that tackling auto repairs can be daunting. Contact us via Whatsapp: +1 (641) 206-8880 for expert guidance and personalized recommendations on the best tools and techniques for your specific situation.
 Applying primer on the car for paint repair
4. Advanced Techniques for More Severe Paint Damage
While minor paint chips can often be repaired with DIY methods, more severe damage may require advanced techniques and professional intervention. Understanding these techniques can help you determine the best course of action for your car’s paint repair.
4.1. Dealing with Deep Scratches
Deep scratches that penetrate the clear coat and paint layers require more than just touch-up paint. These scratches often expose the bare metal, making it susceptible to rust.
- Sanding and Filling: Use a sanding block and fine-grit sandpaper to feather the edges of the scratch. Apply a thin layer of automotive body filler to fill the scratch. Allow the filler to dry completely, then sand it smooth.
- Priming and Painting: Apply a thin layer of automotive primer to the filled area. Allow the primer to dry, then apply multiple thin layers of touch-up paint, allowing each layer to dry completely.
- Clear Coat and Polishing: Apply a clear coat to protect the paint and provide a glossy finish. Polish and buff the area to blend it with the surrounding paint.
4.2. Repairing Large Areas of Missing Paint
Large areas of missing paint, such as those caused by accidents or vandalism, may require panel repainting. This involves sanding down the affected area, applying body filler to any dents or imperfections, and then repainting the entire panel.
- Panel Preparation: Clean the panel thoroughly with soap and water. Sand down the affected area with coarse-grit sandpaper to remove any rust or loose paint. Apply body filler to any dents or imperfections, and allow it to dry completely. Sand the filler smooth with fine-grit sandpaper.
- Masking: Mask off the surrounding areas with painter’s tape and masking paper to protect them from overspray.
- Priming: Apply multiple thin layers of automotive primer to the panel, allowing each layer to dry completely.
- Painting: Apply multiple thin layers of automotive paint to the panel, allowing each layer to dry completely. Use a spray gun for even coverage and a professional finish.
- Clear Coat: Apply multiple thin layers of clear coat to protect the paint and provide a glossy finish.
- Polishing and Buffing: Polish and buff the panel to remove any imperfections and blend it with the surrounding paint.
4.3. Blending Techniques for Seamless Repairs
Blending is a technique used to seamlessly blend the repaired area with the surrounding paint. This involves gradually fading the new paint into the existing paint, creating a smooth transition.
- Feathering: When applying touch-up paint or clear coat, feather the edges of the application to create a gradual transition.
- Color Sanding: Use fine-grit sandpaper to gently sand the edges of the repaired area, blending it with the surrounding paint.
- Polishing: Use a polishing compound and a microfiber cloth to polish the repaired area, blending it with the surrounding paint.
4.4. When to Seek Professional Help
While DIY methods can be effective for minor paint repairs, more severe damage may require professional intervention. Consider seeking professional help in the following situations:
- Extensive Rust Damage: If the rust is extensive or has compromised the structural integrity of the vehicle, professional rust removal and repair are necessary.
- Large Areas of Missing Paint: Repainting entire panels requires specialized equipment and expertise.
- Structural Damage: If the vehicle has sustained structural damage, such as dents or frame damage, professional bodywork is necessary.
- Lack of Experience: If you lack the experience or confidence to perform the repairs yourself, it’s best to seek professional help.
4.5. Benefits of Professional Paint Repair Services
Professional paint repair services offer several benefits:
- Expertise: Professional technicians have the knowledge and experience to perform high-quality repairs.
- Specialized Equipment: Professional shops have access to specialized equipment, such as spray guns, paint booths, and color-matching systems.
- Quality Materials: Professional shops use high-quality paints and materials that are designed to last.
- Warranty: Professional shops typically offer a warranty on their work, providing peace of mind.
Understanding these advanced techniques and knowing when to seek professional help can ensure that your car’s paint is repaired effectively and efficiently. CARDIAGTECH.NET is committed to providing you with the resources and support you need to maintain your vehicle’s appearance and value. When in doubt, remember that our team at CARDIAGTECH.NET is here to assist you. Contact us via Whatsapp: +1 (641) 206-8880 for personalized advice and to explore the best solutions for your car’s needs.
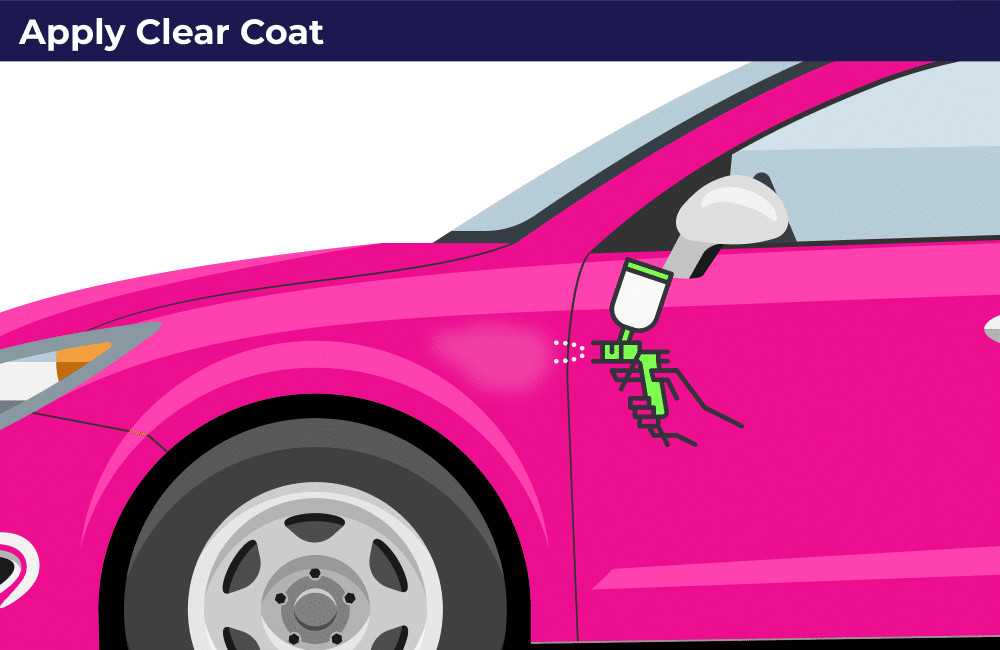 Applying clear coat to protect the repaired area
5. Preventing Future Paint Damage on Your Car
Prevention is key to maintaining your car’s appearance and protecting it from costly repairs. By taking proactive measures, you can minimize the risk of paint damage and keep your car looking its best.
5.1. Regular Washing and Waxing
Regular washing and waxing are essential for protecting your car’s paint. Washing removes dirt, grime, and contaminants that can damage the paint over time. Waxing provides a protective layer that shields the paint from UV rays, acid rain, and other environmental elements.
- Washing Frequency: Wash your car at least every two weeks, or more frequently if you live in an area with harsh weather conditions.
- Waxing Frequency: Wax your car every three to six months to maintain its protective layer.
5.2. Using Paint Protection Film (PPF)
Paint Protection Film (PPF) is a transparent film that is applied to the car’s paint to protect it from scratches, chips, and other damage. PPF is a durable and long-lasting solution that can significantly reduce the risk of paint damage. According to a study by 3M, PPF can protect the paint from up to 90% of scratches and chips.
5.3. Avoiding Harsh Chemicals and Abrasive Cleaners
Avoid using harsh chemicals and abrasive cleaners when washing your car, as these can damage the paint. Use a mild soap specifically designed for automotive use. Avoid using abrasive brushes or scrub pads, as these can scratch the paint.
5.4. Parking in Shaded Areas
Parking in shaded areas can protect your car’s paint from UV rays, which can cause the paint to fade and deteriorate over time. If shaded parking is not available, consider using a car cover to protect the paint.
5.5. Driving Carefully and Avoiding Road Hazards
Drive carefully and avoid road hazards, such as rocks, gravel, and construction debris. These hazards can chip and scratch the paint. Maintain a safe following distance from other vehicles to avoid being hit by flying debris.
5.6. Addressing Minor Damage Promptly
Address minor paint damage promptly to prevent it from spreading and causing further damage. Small chips and scratches can be easily repaired with touch-up paint. Ignoring minor damage can lead to rust and more extensive repairs.
5.7. Protecting Your Car During Construction or Landscaping
If you live in an area with ongoing construction or landscaping, take extra precautions to protect your car’s paint. Cover your car with a car cover or park it in a garage to protect it from dust, debris, and potential damage.
5.8. Maintaining a Safe Distance from Other Vehicles
Maintain a safe distance from other vehicles to avoid being hit by flying debris. Rocks, gravel, and other road debris can be kicked up by other vehicles and damage your car’s paint.
5.9. Regular Inspections for Early Detection
Conduct regular inspections of your car’s paint to detect any early signs of damage. Look for chips, scratches, and rust. Addressing these issues promptly can prevent them from spreading and causing further damage.
5.10. Professional Detailing Services
Consider investing in professional detailing services to maintain your car’s paint. Professional detailers have the expertise and equipment to clean, polish, and protect your car’s paint.
By following these preventive measures, you can minimize the risk of paint damage and keep your car looking its best for years to come. CARDIAGTECH.NET is committed to providing you with the resources and support you need to maintain your vehicle’s appearance and value. Let us help you keep your vehicle in top condition. Contact us via Whatsapp: +1 (641) 206-8880 today to learn more about our products and how they can benefit you.
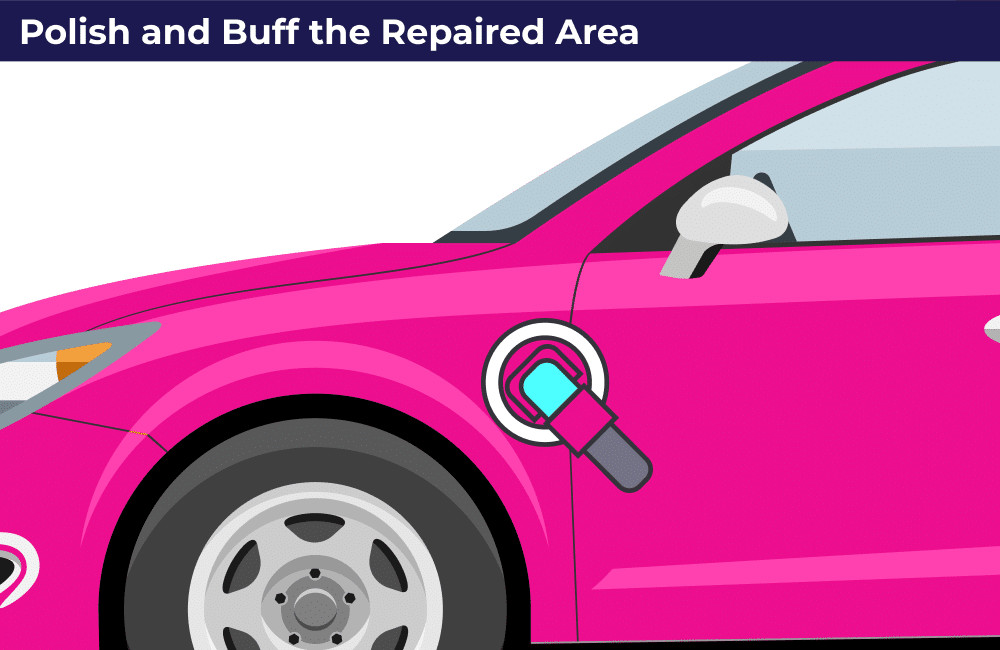 Polishing the repaired car paint area
6. Cost Analysis: DIY vs. Professional Paint Repair
Deciding whether to tackle paint repair yourself or seek professional help often comes down to cost. Understanding the expenses associated with each option can help you make an informed decision.
6.1. Breaking Down the Costs of DIY Repair
DIY paint repair can be a cost-effective option for minor damage. Here’s a breakdown of the typical costs involved:
- Touch-Up Paint: $10 – $30
- Primer: $5 – $15
- Clear Coat: $5 – $15
- Sandpaper: $5 – $10
- Polishing Compound: $10 – $20
- Microfiber Cloths: $5 – $10
- Applicators: $5 – $10
- Total Cost: $45 – $110
6.2. Understanding the Expenses of Professional Repair
Professional paint repair services offer expertise and quality, but they come at a higher cost. Here’s a breakdown of the typical expenses involved:
- Minor Chip Repair: $100 – $300 per chip
- Scratch Repair: $150 – $500 per scratch
- Panel Repainting: $300 – $1000 per panel
6.3. Factors Influencing the Cost of Professional Services
Several factors can influence the cost of professional paint repair services:
- Severity of the Damage: More extensive damage requires more time and materials, increasing the cost.
- Size of the Area: Larger areas of damage require more paint and labor, increasing the cost.
- Type of Paint: Speciality paints, such as metallic or pearlescent finishes, may cost more to repair.
- Location: Labor costs vary depending on the location of the repair shop.
- Shop Reputation: Reputable shops with experienced technicians may charge more for their services.
6.4. Comparing the Long-Term Value
While DIY repair may seem more affordable upfront, professional repair services offer long-term value. Professional repairs are typically more durable and resistant to future damage, saving you money in the long run. Additionally, professional repairs can help maintain your car’s resale value.
6.5. Scenarios Where DIY is Sufficient
DIY paint repair is sufficient for minor chips and scratches that do not penetrate the metal. If you have the skills and patience to perform the repairs yourself, you can save money and achieve satisfactory results.
6.6. Scenarios Where Professional Help is Recommended
Professional paint repair is recommended for extensive damage, rust, or structural issues. If you lack the skills or experience to perform the repairs yourself, it’s best to seek professional help. Professional technicians can ensure that the repairs are done correctly and that your car’s paint is restored to its original condition.
By carefully considering the costs and benefits of each option, you can make an informed decision about whether to tackle paint repair yourself or seek professional help. CARDIAGTECH.NET is committed to providing you with the resources and support you need to maintain your vehicle’s appearance and value. We’re here to guide you through the decision-making process, ensuring you choose the best path for your needs. Contact us via Whatsapp: +1 (641) 206-8880 for expert advice tailored to your specific situation.
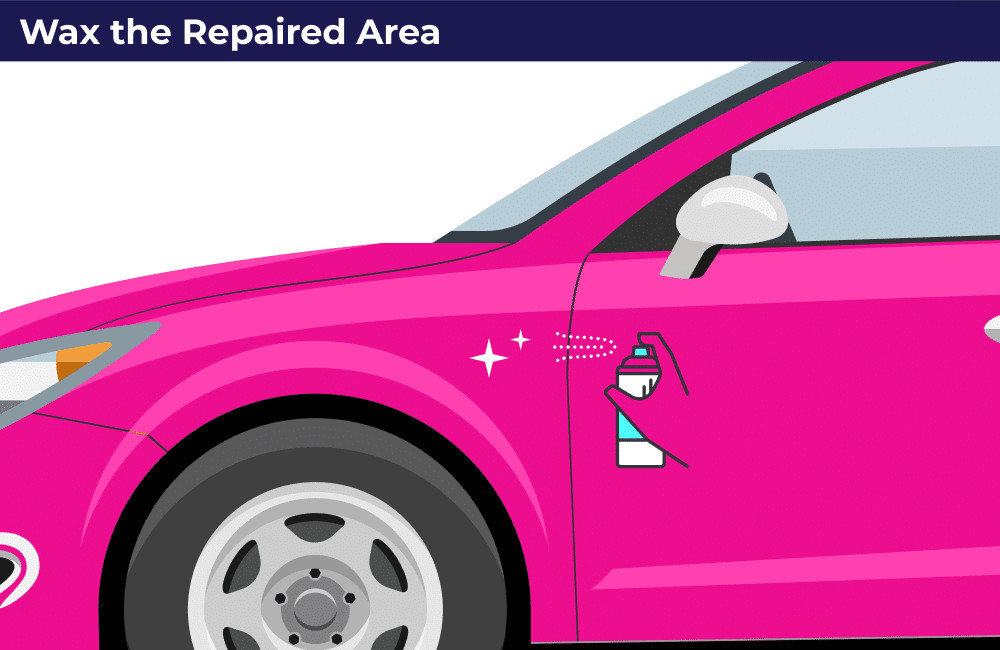 Waxing the repaired car paint area
7. Real-World Examples and Case Studies
Examining real-world examples and case studies can provide valuable insights into the effectiveness of different paint repair methods and the potential outcomes.
7.1. Before and After Photos of DIY Repairs
Before and after photos of DIY paint repairs can demonstrate the potential results that can be achieved with proper preparation and technique. These photos can inspire confidence and provide a visual guide for your own repairs.
7.2. Case Studies of Professional Paint Jobs
Case studies of professional paint jobs can showcase the expertise and quality that professional technicians can provide. These case studies can highlight the benefits of professional services, such as seamless color matching, durable repairs, and warranty coverage.
7.3. Success Stories from CARDIAGTECH.NET Customers
CARDIAGTECH.NET customers have shared numerous success stories of their paint repair experiences. These stories can provide valuable insights into the effectiveness of CARDIAGTECH.NET products and the support that the company provides.
7.4. Common Pitfalls and How to Avoid Them
Examining common pitfalls in paint repair can help you avoid mistakes and achieve better results. These pitfalls include improper preparation, poor color matching, and rushing the repair process.
7.5. Learning from Others’ Experiences
Learning from others’ experiences can provide valuable insights and guidance for your own paint repair projects. Online forums, social media groups, and customer reviews can offer a wealth of information and support.
7.6. The Importance of Realistic Expectations
It’s important to have realistic expectations when it comes to paint repair. While DIY methods can be effective for minor damage, they may not achieve the same results as professional services. Similarly, professional services may not be able to completely restore the paint to its original condition, especially if the damage is extensive.
By examining real-world examples and case studies, you can gain a better understanding of the potential outcomes of different paint repair methods and make informed decisions about your own repairs. CARDIAGTECH.NET is committed to providing you with the resources and support you need to achieve successful paint repairs. Our goal is to ensure you have the knowledge and tools to tackle any paint repair challenge. Contact us via Whatsapp: +1 (641) 206-8880 for personalized advice and support, and let us help you achieve the best possible results.
8. Legal and Environmental Considerations
When performing paint repairs, it’s essential to consider the legal and environmental implications. Compliance with regulations and responsible disposal of materials can help protect the environment and avoid legal issues.
8.1. Understanding Local Regulations on Automotive Paint Repair
Local regulations on automotive paint repair vary depending on the location. Some areas may require permits for certain types of repairs, while others may have restrictions on the types of paints and materials that can be used. It’s important to research and understand the local regulations in your area before performing any paint repairs.
8.2. Safe Disposal of Paint and Chemicals
Proper disposal of paint and chemicals is essential for protecting the environment. Automotive paints and chemicals can contain hazardous substances that can contaminate soil and water. Follow these guidelines for safe disposal:
- Check Local Regulations: Contact your local waste management agency for information on proper disposal methods.
- Use Designated Collection Sites: Many communities have designated collection sites for hazardous waste.
- Do Not Pour Down Drains: Never pour paint or chemicals down drains or into storm sewers.
- Allow Paint to Dry: Allow leftover paint to dry completely before disposing of it.
- Seal Containers: Seal containers tightly to prevent leaks and spills.
8.3. Compliance with Environmental Protection Agency (EPA) Guidelines
The Environmental Protection Agency (EPA) sets guidelines for the safe handling and disposal of automotive paints and chemicals. Compliance with these guidelines is essential for protecting the environment and avoiding legal penalties.
8.4. Choosing Eco-Friendly Repair Products
Choosing eco-friendly repair products can help reduce your environmental impact. Look for products that are low in VOCs (volatile organic compounds) and that are made from sustainable materials.
8.5. The Importance of Ventilation During Repairs
Proper ventilation is essential during paint repairs to protect your health and the environment. Automotive paints and chemicals can release harmful fumes that can cause respiratory problems and other health issues. Work in a well-ventilated area and wear a mask to avoid inhaling fumes.
8.6. Avoiding Fines and Penalties for Non-Compliance
Non-compliance with legal and environmental regulations can result in fines and penalties. It’s important to research and understand the regulations in your area and to follow proper disposal methods to avoid these consequences.
By considering the legal and environmental implications of paint repairs, you can protect the environment and avoid legal issues. CARDIAGTECH.NET is committed to providing you with the resources and support you need to perform responsible and sustainable paint repairs. We believe in protecting both your vehicle and our planet. Contact us via Whatsapp: +1 (641) 206-8880 for information on eco-friendly repair options and guidance on compliance with local regulations.
9. Frequently Asked Questions (FAQs) About Fixing Missing Paint on Cars
9.1. How can I determine the correct paint color for my car?
To determine the correct paint color for your car, locate the paint code on the sticker inside the driver’s side doorjamb or in the owner’s manual. If you’re unsure, consult an automotive paint supplier for assistance.
9.2. Is it necessary to apply primer before painting over a chip?
Yes, it is necessary to apply primer before painting over a chip that exposes the bare metal. Primer ensures proper adhesion of the touch-up paint and prevents rust from recurring.
9.3. How can I prevent car paint chips in the future?
To prevent car paint chips in the future, wash and wax your car regularly, use paint protection film, avoid harsh chemicals, park in shaded areas, drive carefully, and address minor damage promptly.
9.4. Can you use spray paint to fix car paint chips?
While you can use spray paint to fix car paint chips, it’s not recommended for achieving a seamless finish. Touch-up paint applied with a small brush is a better option for minor repairs.
9.5. Are there any potential risks or mistakes to avoid when repairing car paint chips at home?
Potential risks and mistakes to avoid when repairing car paint chips at home include improper preparation, poor color matching, rushing the repair process, and using the wrong tools.
9.6. When is it necessary to consult a professional for car paint chip repairs?
Consult a professional for car paint chip repairs when dealing with extensive damage, rust, or structural issues. Professional technicians have the expertise and equipment to perform high-quality repairs.
9.7. What is the best way to match the texture of the existing paint when repairing a chip?
The best way to match the texture of the existing paint is to apply multiple thin layers of touch-up paint, allowing each layer to dry completely. This will help to create a smooth and even finish.
9.8. How long does it typically take for touch-up paint to dry completely?
Touch-up paint typically takes 24 to 48 hours to dry completely. Allow the paint to cure for at least 24 hours before washing or waxing the car.
9.9. What is the best type of sandpaper to use for smoothing out edges around a paint chip?
The best type of sandpaper to use for smoothing out edges around a paint chip is fine-grit sandpaper, such as 2000-grit or higher.
9.10. What are the benefits of using a clear coat after applying touch-up paint?
The benefits of using a clear coat after applying touch-up paint include protecting the paint, providing a glossy finish, and blending the repaired area with the surrounding paint.
9.11. How do environmental conditions affect the paint repair process?
Environmental conditions such as temperature, humidity, and sunlight can affect the paint repair process. It is best to perform paint repairs in a dry, well-ventilated area with moderate temperatures. Avoid working in direct sunlight or extreme