How to Fix a Minor Scratch On Your Car
Fixing a minor car scratch doesn’t have to be a daunting task; with the right tools and techniques, you can restore your car’s finish to its former glory. At CARDIAGTECH.NET, we provide the essential tools and expert guidance to help you tackle these minor cosmetic issues effectively and affordably, offering car owners and auto technicians alike the means to achieve professional-quality results. Discover solutions for paint correction, clear coat repair, and automotive detailing to keep your vehicle looking its best.
1. Understanding the Anatomy of a Car Scratch
Before diving into the repair process, it’s crucial to understand the different layers of your car’s paint and how scratches affect them. Typically, a car’s paint job consists of the following layers:
- Clear Coat: This is the outermost layer, providing gloss and protection against UV rays and environmental damage.
- Base Coat: This layer contains the actual color of your car.
- Primer: This layer helps the base coat adhere to the metal and provides corrosion resistance.
- Metal: The actual body panel of your car.
A minor scratch usually only affects the clear coat, while deeper scratches can penetrate the base coat and even the primer. Identifying the depth of the scratch is the first step in determining the appropriate repair method.
2. Assessing the Scratch Damage
The first step in fixing a minor scratch is to assess the damage. This will help you determine the best course of action. Here’s how:
-
Clean the Area: Wash and dry the scratched area thoroughly. This removes dirt and debris that can interfere with the assessment.
-
Visual Inspection: Examine the scratch in good lighting. Use your fingernail to gently run over the scratch.
- If your nail doesn’t catch, the scratch is likely in the clear coat.
- If your nail catches slightly, it might have penetrated the base coat.
- If your nail catches significantly, the scratch is deep and might require professional attention.
-
Consider the Size: Note the length and width of the scratch. Minor scratches are usually thin and less than a few inches long.
3. Essential Tools and Materials
Having the right tools and materials is essential for effectively fixing minor scratches. Here’s a list of what you’ll need, all available at CARDIAGTECH.NET:
- Automotive Wash Soap: To clean the area around the scratch.
- Microfiber Towels: Soft and non-abrasive for cleaning and polishing.
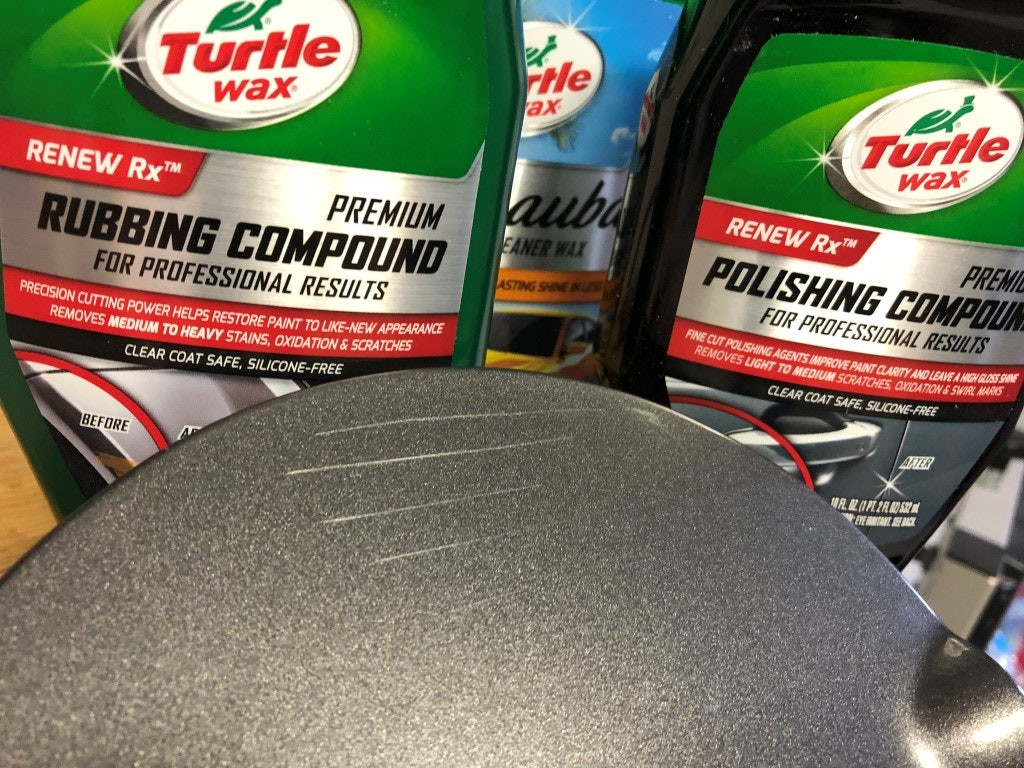
- Rubbing Compound: To remove minor imperfections and scratches.
- Polishing Compound: To refine the finish after using rubbing compound.
- Scratch Remover: Specifically designed for removing minor scratches.
- Wax or Sealant: To protect the repaired area.
- Applicator Pads: For applying compounds and waxes.
- Detailing Clay: To remove contaminants from the paint surface.
- Spray Bottle with Water: For wet sanding, if necessary.
- Fine-Grit Sandpaper (3000-5000 grit): For deeper scratches that require sanding.
- Masking Tape: To protect surrounding areas.
- Gloves: To protect your hands.
- Optional: Dual-Action Polisher: For more efficient polishing.
4. Step-by-Step Guide to Fixing Minor Clear Coat Scratches
If the scratch is only in the clear coat, you can usually fix it with a simple polishing process. Here’s how:
-
Wash and Dry the Area: Use automotive wash soap and water to clean the area around the scratch. Dry it thoroughly with a microfiber towel.
-
Apply Rubbing Compound:
- Apply a small amount of rubbing compound to an applicator pad.
- Gently rub the compound onto the scratch using a circular motion.
- Apply moderate pressure, working the compound into the clear coat.
- Continue rubbing for 2-3 minutes.
-
Remove Rubbing Compound Residue:
- Use a clean microfiber towel to wipe away the excess rubbing compound.
- Inspect the area to see if the scratch is less visible.
-
Apply Polishing Compound:
- Apply a small amount of polishing compound to a clean applicator pad.
- Rub the compound onto the area using a circular motion, similar to the rubbing compound.
- Use lighter pressure than with the rubbing compound.
- Continue rubbing for 2-3 minutes.
-
Remove Polishing Compound Residue:
- Use a clean microfiber towel to wipe away the excess polishing compound.
- The area should now appear smoother and more glossy.
-
Apply Wax or Sealant:
- Apply a thin layer of wax or sealant to the area using a clean applicator pad.
- Let it dry according to the product instructions (usually 5-10 minutes).
- Buff the area with a clean microfiber towel to reveal a shiny, protected finish.
5. Addressing Deeper Scratches That Penetrate the Base Coat
If the scratch has penetrated the base coat but isn’t too deep, you might need to use a more involved process that includes sanding.
-
Wash and Dry the Area: As with clear coat scratches, start by cleaning the area thoroughly.
-
Mask the Surrounding Area: Use masking tape to protect the paint around the scratch. This prevents accidental damage during sanding.
-
Wet Sand the Scratch:
- Soak a piece of 3000-5000 grit sandpaper in water.
- Gently sand the scratch using light pressure. Move the sandpaper in a back-and-forth motion, following the direction of the scratch.
- Sand for 1-2 minutes, keeping the area wet. The goal is to smooth out the edges of the scratch.
-
Dry and Inspect:
- Dry the area with a clean microfiber towel.
- Inspect the scratch. It should appear less defined.
-
Apply Rubbing Compound:
- Apply a small amount of rubbing compound to an applicator pad.
- Rub the compound onto the sanded area using a circular motion.
- Apply moderate pressure, working the compound into the clear coat.
- Continue rubbing for 2-3 minutes.
-
Remove Rubbing Compound Residue:
- Use a clean microfiber towel to wipe away the excess rubbing compound.
- Inspect the area to see if the scratch is less visible.
-
Apply Polishing Compound:
- Apply a small amount of polishing compound to a clean applicator pad.
- Rub the compound onto the area using a circular motion, similar to the rubbing compound.
- Use lighter pressure than with the rubbing compound.
- Continue rubbing for 2-3 minutes.
-
Remove Polishing Compound Residue:
- Use a clean microfiber towel to wipe away the excess polishing compound.
- The area should now appear smoother and more glossy.
-
Apply Wax or Sealant:
- Apply a thin layer of wax or sealant to the area using a clean applicator pad.
- Let it dry according to the product instructions (usually 5-10 minutes).
- Buff the area with a clean microfiber towel to reveal a shiny, protected finish.
6. Utilizing Scratch Repair Kits
For those who prefer a comprehensive solution, scratch repair kits are available at CARDIAGTECH.NET. These kits typically include everything you need to fix minor scratches, such as sandpaper, rubbing compound, polishing compound, and applicator pads.
- Follow the Kit Instructions: Each kit comes with specific instructions. Read and follow them carefully for the best results.
- Clean the Area: Start by cleaning the scratched area thoroughly.
- Sand the Scratch (if required): Some kits include fine-grit sandpaper for smoothing out the scratch. Use it as directed.
- Apply Compound: Apply the included rubbing compound to the scratch.
- Polish the Area: Use the polishing compound to restore the shine.
- Apply Wax or Sealant: Protect the repaired area with wax or sealant.
7. The Role of Professional Detailing Services
While DIY methods can effectively address minor scratches, sometimes the damage is too extensive or complex to handle on your own. In such cases, professional detailing services can provide a superior finish.
- Expert Assessment: Professionals can accurately assess the depth and extent of the scratch.
- Advanced Techniques: They have access to professional-grade tools and products.
- Color Matching: Professionals can precisely match the paint color to ensure a seamless repair.
- Time Savings: Hiring a professional saves you time and effort.
8. Preventing Future Scratches
Prevention is always better than cure. Here are some tips to help prevent future scratches on your car:
- Regular Washing: Wash your car regularly to remove dirt and debris that can cause scratches.
- Quality Washing Tools: Use soft microfiber cloths and sponges.
- Avoid Automatic Car Washes: These can sometimes cause swirl marks and scratches.
- Waxing: Apply wax regularly to protect the paint.
- Parking Strategically: Park in areas where your car is less likely to be scratched.
- Paint Protection Film (PPF): Consider applying PPF to high-impact areas like the hood and bumper.
9. Advanced Techniques: Wet Sanding and Color Matching
For more advanced DIYers, wet sanding and color matching can provide even better results.
Wet Sanding
Wet sanding involves using fine-grit sandpaper with water to smooth out imperfections in the clear coat. This technique is best for blending edges and removing deeper scratches.
- Prepare the Area: Clean and mask the surrounding area.
- Soak Sandpaper: Soak 3000-5000 grit sandpaper in water for at least 10 minutes.
- Sand the Scratch: Gently sand the scratch using light pressure and a back-and-forth motion. Keep the area wet.
- Dry and Inspect: Dry the area and inspect the scratch. It should appear less defined.
- Compound and Polish: Follow up with rubbing compound and polishing compound to restore the shine.
Color Matching
Color matching involves using touch-up paint that matches your car’s color code to fill in deeper scratches.
- Find Your Car’s Color Code: This is usually located on a sticker in the door jamb or under the hood.
- Purchase Touch-Up Paint: Buy touch-up paint that matches your car’s color code.
- Clean the Scratch: Clean the scratch thoroughly.
- Apply Touch-Up Paint: Use a fine brush to apply the touch-up paint to the scratch. Apply thin layers to avoid drips.
- Let It Dry: Let the paint dry completely.
- Wet Sand (if needed): If the touch-up paint is uneven, gently wet sand it with fine-grit sandpaper.
- Compound and Polish: Follow up with rubbing compound and polishing compound to blend the repair.
10. Understanding Clear Coat Failure and Repair
Clear coat failure occurs when the clear coat layer of your car’s paint begins to degrade. This can manifest as peeling, cracking, or a cloudy appearance. Understanding the causes and how to repair it is crucial for maintaining your car’s appearance.
Causes of Clear Coat Failure
- UV Exposure: Prolonged exposure to sunlight can break down the clear coat over time.
- Environmental Factors: Acid rain, bird droppings, and tree sap can damage the clear coat.
- Improper Washing: Using abrasive cleaners or harsh brushes can scratch and damage the clear coat.
- Age: Over time, the clear coat naturally degrades due to wear and tear.
Repairing Clear Coat Failure
- Assess the Damage: Determine the extent of the clear coat failure. Minor damage might be repairable with polishing, while severe damage might require a repaint.
- Clean the Area: Wash and dry the affected area thoroughly.
- Sand the Area: Use fine-grit sandpaper (3000-5000 grit) to smooth out the damaged clear coat.
- Apply New Clear Coat: Use a spray gun to apply a new layer of clear coat. Apply thin, even coats.
- Let It Dry: Let the clear coat dry completely.
- Wet Sand (if needed): If the new clear coat is uneven, gently wet sand it with fine-grit sandpaper.
- Compound and Polish: Follow up with rubbing compound and polishing compound to blend the repair.
Applying Rubbing Compound to Remove Scratches
Image alt: Applying Turtle Wax Rubbing Compound on a test panel to demonstrate light scratch removal.
11. Tools and Techniques for Automotive Detailing
Automotive detailing involves a range of techniques to enhance and protect your car’s appearance. Here are some essential tools and techniques for effective detailing:
Essential Detailing Tools
- Dual-Action Polisher: This tool makes polishing easier and more efficient. It reduces the risk of swirl marks and provides a more even finish.
- Foam Cannon: Attaches to a pressure washer to create a thick layer of soap foam for washing your car.
- Detailing Brushes: For cleaning hard-to-reach areas like vents and trim.
- Clay Bar: Removes embedded contaminants from the paint surface.
- Microfiber Wash Mitt: For washing your car without scratching the paint.
- Glass Cleaner: For streak-free glass cleaning.
- Interior Cleaner: For cleaning and protecting interior surfaces.
Effective Detailing Techniques
- Two-Bucket Wash Method: Use one bucket for soapy water and another for rinsing your wash mitt. This prevents dirt from being reapplied to your car’s paint.
- Top-Down Washing: Start washing from the top of the car and work your way down. This prevents dirt from the lower areas from contaminating the cleaner upper areas.
- Clay Bar Treatment: Use a clay bar to remove embedded contaminants from the paint surface. This will make the paint smoother and more receptive to wax and sealant.
- Polishing: Use a dual-action polisher to remove swirl marks and scratches from the paint.
- Waxing and Sealing: Apply wax or sealant to protect the paint and enhance its shine.
- Interior Detailing: Clean and protect interior surfaces with appropriate cleaners and protectants.
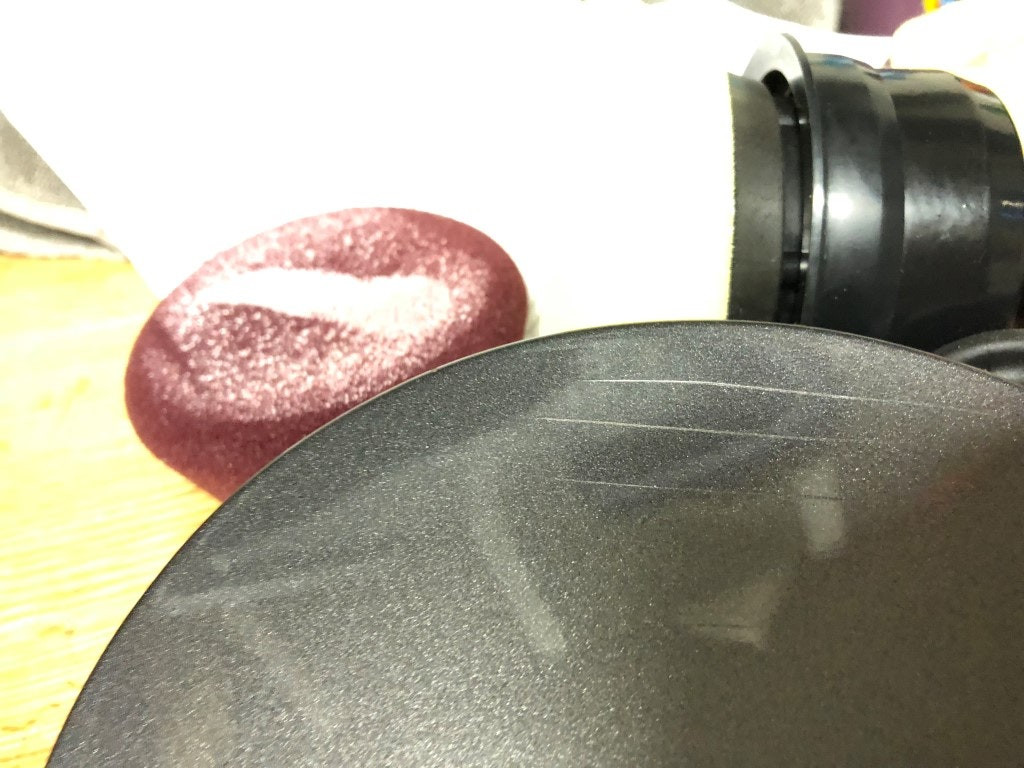 Polishing car with Meguiar's DA Power System
Image alt: Car being polished with Meguiar’s DA Power System attached to a drill, resulting in a virtually invisible scratch.
12. Paint Correction Techniques for Professionals
Paint correction is a more advanced detailing process that involves removing imperfections from the paint surface to restore its original condition. This is typically done by professional detailers who have the necessary skills and equipment.
Common Paint Imperfections
- Swirl Marks: Circular scratches caused by improper washing techniques.
- Holograms: Fine, circular scratches caused by aggressive polishing.
- Water Spots: Mineral deposits left by evaporated water.
- Oxidation: Dullness and fading caused by exposure to the elements.
- Etching: Damage caused by bird droppings or tree sap.
Paint Correction Process
- Wash and Decontaminate: Wash the car thoroughly and use a clay bar to remove embedded contaminants.
- Inspect the Paint: Use a paint thickness gauge to measure the thickness of the clear coat. This will help you determine how much material can be safely removed.
- Test Spot: Perform a test spot on a small area of the paint to determine the best combination of polishing pads and compounds.
- Compounding: Use a cutting pad and compound to remove deeper imperfections.
- Polishing: Use a polishing pad and polish to refine the finish and remove swirl marks.
- Finishing: Use a finishing pad and polish to enhance the gloss and clarity of the paint.
- Protect: Apply wax or sealant to protect the corrected paint.
13. The Importance of Proper Lighting for Scratch Repair
Proper lighting is essential for accurately assessing and repairing scratches. Without adequate lighting, it can be difficult to see the full extent of the damage and ensure that you are effectively removing the scratch.
Types of Lighting for Scratch Repair
- Sunlight: Natural sunlight is the best source of lighting for assessing scratches. However, it can be inconsistent and difficult to control.
- LED Work Lights: These lights provide bright, consistent illumination and are ideal for indoor use. Look for lights with adjustable brightness and color temperature.
- Swirl Finder Lights: These specialized lights are designed to reveal swirl marks and other imperfections in the paint.
- Headlamps: Headlamps can be useful for focusing light on specific areas while keeping your hands free.
Tips for Using Lighting Effectively
- Work in a Well-Lit Area: Ensure that your work area is well-lit with consistent, even lighting.
- Use Multiple Light Sources: Use multiple light sources to eliminate shadows and ensure that you can see the scratch from all angles.
- Adjust the Angle of the Light: Adjust the angle of the light to reveal different aspects of the scratch.
- Inspect the Paint Regularly: Regularly inspect the paint under different lighting conditions to ensure that you are effectively removing the scratch.
14. Choosing the Right Polishing Pads and Compounds
Choosing the right polishing pads and compounds is crucial for achieving the best results when repairing scratches. Different pads and compounds are designed for different levels of correction, so it’s important to select the right combination for your specific needs.
Types of Polishing Pads
- Cutting Pads: These pads are designed to remove deeper imperfections and are typically made of wool or microfiber.
- Polishing Pads: These pads are designed to refine the finish and remove swirl marks. They are typically made of foam.
- Finishing Pads: These pads are designed to enhance the gloss and clarity of the paint. They are typically made of soft foam.
Types of Polishing Compounds
- Cutting Compounds: These compounds are designed to remove deeper imperfections and are typically more abrasive.
- Polishing Compounds: These compounds are designed to refine the finish and remove swirl marks. They are typically less abrasive than cutting compounds.
- Finishing Polishes: These polishes are designed to enhance the gloss and clarity of the paint. They are typically the least abrasive.
Tips for Choosing Polishing Pads and Compounds
- Start with the Least Aggressive Combination: Start with the least aggressive combination of pad and compound that will achieve the desired results.
- Test Spot: Perform a test spot on a small area of the paint to determine the best combination of pad and compound.
- Follow the Manufacturer’s Recommendations: Follow the manufacturer’s recommendations for using the pads and compounds.
- Clean Your Pads Regularly: Clean your pads regularly to remove excess compound and prevent them from becoming clogged.
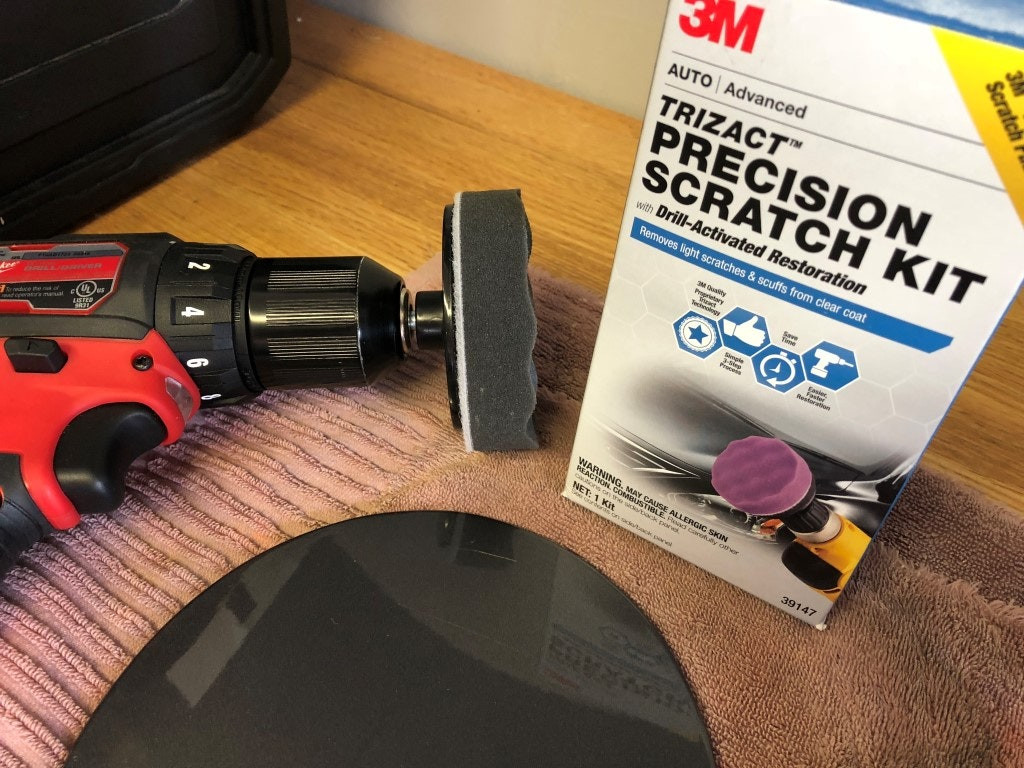 Using 3M Trizact Precision Scratch Kit to remove scratches
Image alt: Car scratch repair using the 3M Trizact Precision Scratch Kit, showing visible improvement on deep scratches.
15. Repairing Scratches on Different Types of Car Paint
Different types of car paint require different repair techniques. Understanding the type of paint on your car is essential for choosing the right approach.
Types of Car Paint
- Single-Stage Paint: This type of paint combines the color and clear coat into a single layer. It is typically found on older cars.
- Two-Stage Paint: This type of paint consists of a base coat of color and a separate clear coat. It is the most common type of paint on modern cars.
- Three-Stage Paint: This type of paint consists of a base coat, a mid-coat, and a clear coat. It is typically found on high-end cars and provides a deeper, more vibrant color.
Repairing Scratches on Different Paint Types
- Single-Stage Paint: Scratches on single-stage paint can be repaired using rubbing compound and polishing compound. Be careful not to remove too much paint, as this can expose the primer.
- Two-Stage Paint: Scratches on two-stage paint can be repaired using the techniques described earlier in this article.
- Three-Stage Paint: Scratches on three-stage paint can be more challenging to repair. It is often best to consult a professional detailer.
16. Cost-Effective Solutions for Minor Scratch Repair
Repairing minor scratches doesn’t have to break the bank. Here are some cost-effective solutions you can implement:
- DIY Repair Kits: Invest in a quality scratch repair kit from CARDIAGTECH.NET, which includes all the necessary materials and tools at a fraction of the cost of professional services.
- Buy in Bulk: Purchase detailing supplies in bulk to save money on frequently used items like microfiber towels, soap, and wax.
- Use Coupons and Discounts: Take advantage of coupons and discounts offered by CARDIAGTECH.NET to reduce the cost of your supplies.
- Proper Maintenance: Regular washing and waxing can prevent minor scratches from turning into major repairs, saving you money in the long run.
17. Time-Saving Tips for Efficient Scratch Repair
Efficient scratch repair saves you time and effort. Here are some tips to streamline the process:
- Prepare Your Workspace: Gather all your tools and materials before you start working. This will prevent you from wasting time searching for items later.
- Use a Dual-Action Polisher: A dual-action polisher can significantly reduce the time it takes to polish your car.
- Work in Sections: Work on one section of the car at a time. This will help you stay organized and ensure that you don’t miss any spots.
- Follow a Routine: Develop a routine for scratch repair and stick to it. This will help you become more efficient over time.
18. DIY vs. Professional Scratch Repair: Making the Right Choice
Deciding whether to repair scratches yourself or hire a professional depends on several factors, including the severity of the scratch, your skill level, and your budget.
When to Choose DIY Repair
- Minor Scratches: If the scratch is only in the clear coat and not too deep, you can likely repair it yourself.
- Budget Constraints: DIY repair is a more affordable option than hiring a professional.
- Desire to Learn: If you enjoy working on cars and want to learn new skills, DIY repair is a great option.
When to Choose Professional Repair
- Deep Scratches: If the scratch has penetrated the base coat or primer, it is best to hire a professional.
- Lack of Skills or Tools: If you don’t have the necessary skills or tools, you are more likely to damage your car’s paint.
- Time Constraints: Professional repair saves you time and effort.
- High-End Cars: If you own a high-end car, it is best to trust the repair to a professional.
19. Maintaining Your Car’s Finish After Scratch Repair
After repairing scratches, it’s important to maintain your car’s finish to prevent future damage and keep it looking its best.
- Regular Washing: Wash your car regularly to remove dirt and debris.
- Waxing: Apply wax regularly to protect the paint.
- Avoid Harsh Chemicals: Avoid using harsh chemicals or abrasive cleaners on your car’s paint.
- Park in Shaded Areas: Park in shaded areas to protect your car from UV damage.
- Cover Your Car: Use a car cover to protect your car from the elements.
20. Common Mistakes to Avoid During Scratch Repair
Avoiding common mistakes during scratch repair can save you time and prevent further damage to your car’s paint.
- Using the Wrong Products: Using the wrong products can damage your car’s paint. Always use products that are specifically designed for automotive use.
- Applying Too Much Pressure: Applying too much pressure can damage the clear coat or even the base coat. Use light pressure and let the products do the work.
- Skipping Steps: Skipping steps can result in an uneven finish. Follow each step carefully and thoroughly.
- Working in Direct Sunlight: Working in direct sunlight can cause the products to dry too quickly, making them difficult to remove.
- Using Dirty Tools: Using dirty tools can scratch the paint. Always use clean microfiber towels and applicator pads.
By following these tips and techniques, you can effectively fix minor scratches on your car and keep it looking its best. At CARDIAGTECH.NET, we provide the tools and expertise you need to achieve professional-quality results. Remember, a well-maintained car not only looks great but also retains its value over time.
Are you facing challenges in finding the right tools for your auto repair needs? Do you struggle with time constraints and the pressure to deliver quality repairs? Contact CARDIAGTECH.NET today at +1 (641) 206-8880 or visit us at 276 Reock St, City of Orange, NJ 07050, United States. Let our experts help you select the perfect tools to enhance your efficiency and effectiveness, ensuring top-notch service for your clients. We’re here to provide solutions that keep your business thriving.
Frequently Asked Questions (FAQ)
-
What is the best way to remove a minor scratch from my car?
The best way to remove a minor scratch involves cleaning the area, applying rubbing compound, polishing compound, and then waxing or sealing the area.
-
Can I use toothpaste to remove scratches from my car?
While some people suggest using toothpaste, it’s not recommended as it can be too abrasive and potentially damage the paint. Use dedicated automotive scratch removers instead.
-
How do I know if a scratch is too deep to fix myself?
If your fingernail catches significantly when you run it over the scratch, it’s likely too deep to fix yourself and may require professional attention.
-
What is the difference between rubbing compound and polishing compound?
Rubbing compound is more abrasive and used to remove scratches, while polishing compound is less abrasive and used to refine the finish after using rubbing compound.
-
How often should I wax my car to protect the paint?
You should wax your car every 3-4 months to protect the paint from scratches, UV rays, and environmental damage.
-
Can I use a household cleaner to wash my car?
No, household cleaners can be too harsh and damage your car’s paint. Use dedicated automotive wash soap.
-
What is paint protection film (PPF) and is it worth it?
Paint protection film (PPF) is a transparent film applied to the car’s surface to protect it from scratches, chips, and other damage. It’s worth it if you want to maintain your car’s appearance and value.
-
How do I find my car’s paint color code?
Your car’s paint color code is usually located on a sticker in the door jamb, under the hood, or in the glove compartment.
-
What is wet sanding and when should I use it?
Wet sanding involves using fine-grit sandpaper with water to smooth out imperfections in the clear coat. Use it for blending edges and removing deeper scratches.
-
Is it necessary to hire a professional for scratch repair?
It depends on the severity of the scratch and your skill level. Minor scratches can be fixed yourself, but deeper scratches may require professional attention.