How To Fix A Car Window That Fell Down
Fixing a car window that fell down can seem daunting, but with the right knowledge and tools, it’s a manageable task. At CARDIAGTECH.NET, we empower you with expert advice and top-quality equipment to restore your window’s function. Discover proven solutions, essential tools, and step-by-step instructions to get your car window working like new again. Explore related keywords like window regulator replacement, car window repair, auto glass services, and power window troubleshooting for a comprehensive understanding.
1. Understanding Why Your Car Window Fell Down
Before diving into how to fix a car window that fell down, it’s crucial to understand the underlying causes. Several factors can contribute to this common issue, ranging from worn-out components to electrical malfunctions. Identifying the root cause will help you choose the right repair strategy and prevent future problems.
1.1. Common Culprits Behind a Dropped Car Window
- Window Regulator Failure: The window regulator is the mechanical assembly that raises and lowers the window. It typically consists of a motor, gears, and cables or arms. Over time, the regulator’s components can wear out, break, or become misaligned, causing the window to fall.
- Motor Malfunction: The electric motor powers the window regulator. If the motor fails, the window won’t move. Motors can fail due to electrical issues, wear and tear, or overheating.
- Broken Cables or Arms: Some window regulators use cables or arms to connect the motor to the window. These components can snap or bend, rendering the regulator ineffective.
- Switch Problems: The window switch controls the flow of electricity to the motor. If the switch is faulty, it may not send the signal to raise or lower the window.
- Glass Detachment: In some cases, the glass can detach from the regulator due to broken clips or adhesive failure. This causes the window to fall into the door cavity.
- Track Issues: The window moves along a track inside the door. If the track is damaged, bent, or obstructed, the window’s movement can be impaired.
- Electrical Issues: Faulty wiring, blown fuses, or corroded connections can disrupt the power supply to the window motor.
1.2. How Each Component Contributes to Window Functionality
Understanding how each component works together is key to diagnosing the problem:
| Component | Function | Potential Issues |
|---|---|---|
| Window Regulator | Converts motor power into vertical window movement. | Worn gears, broken cables, misalignment. |
| Motor | Powers the window regulator. | Electrical failure, overheating, wear and tear. |
| Cables/Arms | Connect the motor to the window, enabling movement. | Snapping, bending, detachment. |
| Window Switch | Controls the flow of electricity to the motor. | Faulty contacts, electrical shorts. |
| Glass Attachments | Secures the glass to the regulator. | Broken clips, adhesive failure. |
| Window Track | Guides the window’s movement inside the door. | Damage, bending, obstructions. |
| Electrical System | Provides power to the motor. | Faulty wiring, blown fuses, corroded connections. |
1.3. Diagnosing the Specific Issue
Diagnosing the specific issue involves a systematic approach:
- Listen: When you try to operate the window, listen for any unusual noises, such as grinding, clicking, or whirring.
- Check the Switch: Test the window switch on all doors to rule out a faulty switch.
- Inspect Fuses: Check the fuse box for blown fuses related to the power windows.
- Examine the Window: If the window is visibly detached from the regulator, the attachments are likely broken.
- Feel for Resistance: If you can manually move the window slightly, feel for any resistance or obstructions.
2. Essential Tools and Materials for the Repair
Before you start fixing a car window that fell down, gather all the necessary tools and materials. Having everything on hand will make the job smoother and more efficient. CARDIAGTECH.NET offers a wide range of high-quality tools to assist you with your auto repairs.
2.1. Must-Have Tools for Window Repair
-
Trim Removal Tools: These plastic or nylon tools help you remove interior panels without damaging them. A set of various shapes and sizes is ideal.
-
Screwdrivers: A variety of Phillips head and flathead screwdrivers are essential for removing screws and fasteners.
-
Socket Set: A socket set with various sizes is needed for removing bolts and nuts.
-
Pliers: Pliers, including needle-nose pliers, are useful for gripping and manipulating small parts.
-
Multimeter: A multimeter is crucial for testing electrical circuits and diagnosing electrical problems.
-
Power Drill/Driver: A power drill or driver with various bits can speed up the removal and installation of screws and bolts.
-
Work Gloves: Protect your hands from sharp edges and grease with a pair of work gloves.
-
Safety Glasses: Safety glasses are essential to protect your eyes from debris.
-
Flashlight or Work Light: A good light source is necessary for illuminating the work area inside the door.
-
Window Shims or Wedges: These are used to hold the window in place while you work on the regulator.
-
Masking Tape: Masking tape can be used to secure the window in place and protect painted surfaces.
-
Shop Rags: Keep shop rags on hand for wiping up grease and cleaning parts.
2.2. Necessary Materials and Replacement Parts
- Replacement Window Regulator: Obtain a new window regulator that matches your vehicle’s make, model, and year. CARDIAGTECH.NET can help you find the correct replacement part.
- Replacement Motor (if needed): If the motor is faulty, purchase a new motor that is compatible with your regulator.
- Window Clips or Attachments: If the window detached from the regulator, buy replacement clips or attachments.
- Electrical Contact Cleaner: Use electrical contact cleaner to clean corroded electrical connections.
- Grease: Apply grease to moving parts of the regulator to ensure smooth operation.
- New Fasteners: Have new fasteners on hand in case any of the old ones break during removal.
- Adhesive: If the plastic liner inside the door panel is detached, you may need adhesive to reattach it.
2.3. Where to Source Quality Tools and Parts
You can source quality tools and parts from several places:
- CARDIAGTECH.NET: Offers a wide range of automotive tools and parts, ensuring you get reliable equipment for your repair. Contact us at +1 (641) 206-8880 or visit our location at 276 Reock St, City of Orange, NJ 07050, United States.
- Local Auto Parts Stores: Local auto parts stores like AutoZone, Advance Auto Parts, and O’Reilly Auto Parts carry a variety of tools and parts.
- Online Retailers: Online retailers like Amazon and eBay offer a vast selection of tools and parts at competitive prices.
- Specialty Automotive Tool Suppliers: Suppliers like Snap-on and Mac Tools offer high-quality professional-grade tools.
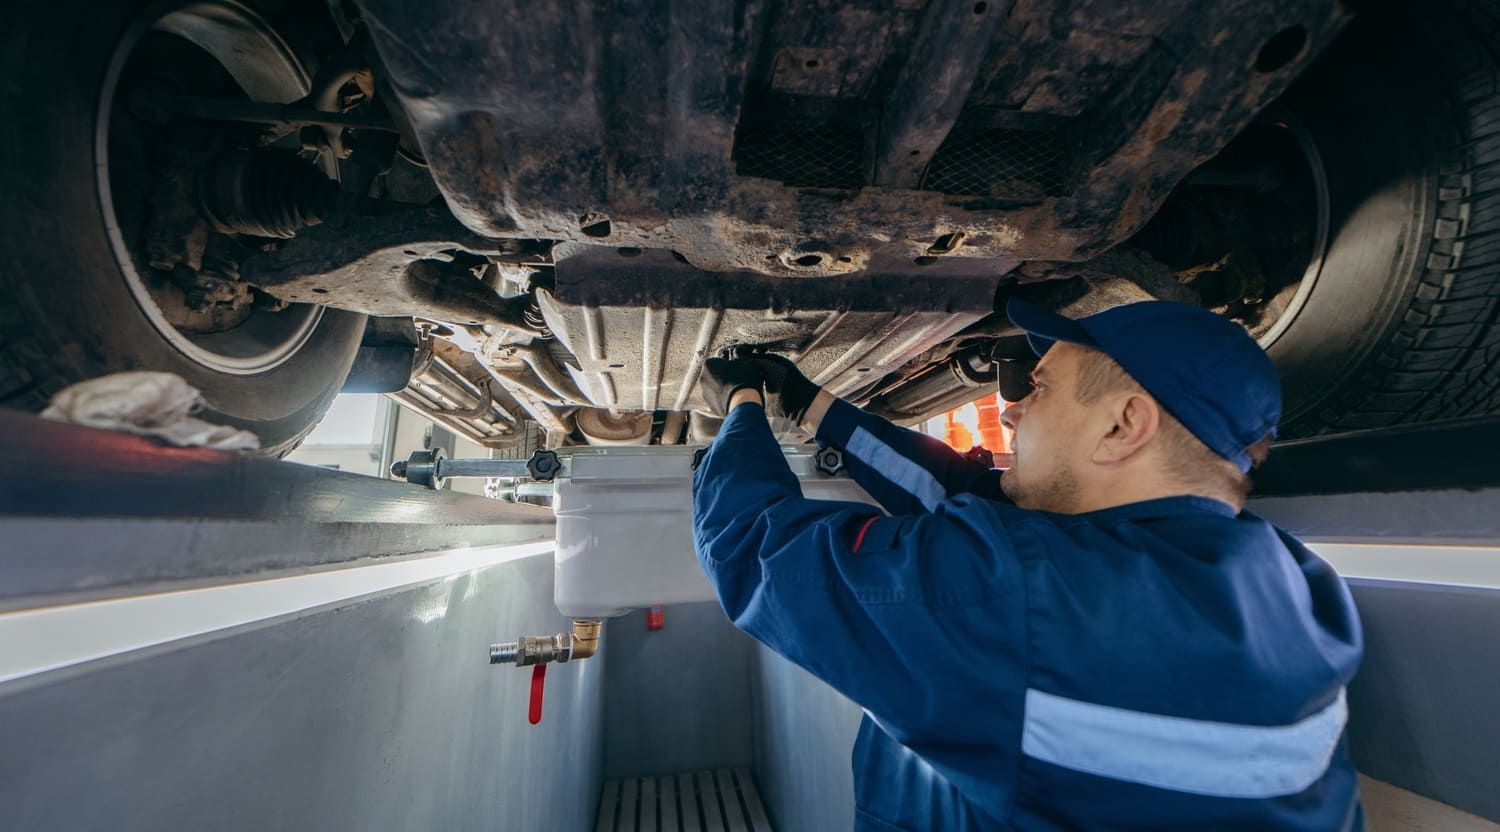
3. Step-by-Step Guide to Fixing a Car Window That Fell Down
Now that you have the tools and materials, follow this step-by-step guide to fix your car window. Remember to work carefully and consult your vehicle’s service manual for specific instructions.
3.1. Preparing the Vehicle for Repair
- Park Safely: Park the vehicle on a level surface and engage the parking brake.
- Disconnect the Battery: Disconnect the negative battery terminal to prevent electrical shocks and protect the vehicle’s electrical system.
- Gather Information: Consult your vehicle’s service manual for diagrams and specific instructions related to the window regulator.
3.2. Removing the Door Panel
- Locate Fasteners: Identify all screws, bolts, and clips that secure the door panel. These are typically located around the edges of the panel, in the door handle recess, and behind the door release lever.
- Remove Screws and Bolts: Use the appropriate screwdrivers and socket set to remove all screws and bolts. Store them in a safe place to avoid losing them.
- Use Trim Removal Tools: Insert trim removal tools between the door panel and the door frame to release the clips. Work your way around the perimeter of the panel, gently prying it away from the door.
- Disconnect Electrical Connectors: Once the panel is loose, disconnect any electrical connectors attached to the window switch, door lock, and speaker.
- Remove the Door Panel: Lift the door panel up and away from the door frame.
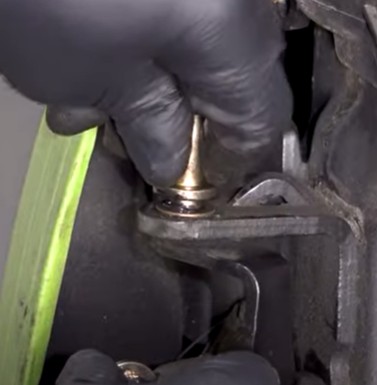
3.3. Accessing the Window Regulator
-
Remove the Plastic Liner: Carefully peel back the plastic liner that covers the inside of the door. This liner protects the door’s internal components from moisture. If the adhesive is weak, use new adhesive to reattach it later.
-
Inspect the Window Regulator: Examine the window regulator and motor for any visible damage, such as broken cables, bent arms, or loose connections.
-
Secure the Window: If the window is not already secured, use window shims or wedges to hold it in the UP position. You can also use masking tape to secure the window to the door frame.
3.4. Removing the Old Window Regulator
- Disconnect the Motor: Disconnect the electrical connector attached to the window motor.
- Remove Regulator Fasteners: Use a socket set to remove the bolts or screws that secure the regulator to the door frame.
- Detach the Window from the Regulator: Depending on the design, the window may be attached to the regulator with clips or bolts. Remove these attachments to separate the window from the regulator.
- Remove the Regulator: Carefully maneuver the old regulator out of the door cavity.
3.5. Installing the New Window Regulator
- Position the New Regulator: Place the new regulator into the door cavity, aligning it with the mounting holes.
- Attach the Window to the Regulator: Secure the window to the new regulator using the clips or bolts. Ensure the window is properly aligned.
- Install Regulator Fasteners: Use a socket set to install the bolts or screws that secure the regulator to the door frame. Tighten them securely.
- Connect the Motor: Connect the electrical connector to the window motor.
3.6. Testing the Window
- Reconnect the Battery: Reconnect the negative battery terminal.
- Test the Window Switch: Operate the window switch to raise and lower the window. Check for smooth and consistent movement.
- Adjust as Necessary: If the window does not move properly, double-check the connections and alignment of the regulator and window.
3.7. Reassembling the Door Panel
- Reattach the Plastic Liner: Carefully reattach the plastic liner to the inside of the door. Use new adhesive if necessary.
- Connect Electrical Connectors: Reconnect all electrical connectors to the window switch, door lock, and speaker.
- Position the Door Panel: Align the door panel with the door frame and press it into place, ensuring the clips engage properly.
- Install Screws and Bolts: Reinstall all screws and bolts that secure the door panel.
- Test All Functions: Test the window switch, door lock, and speaker to ensure they are working correctly.
4. Troubleshooting Common Issues
Even with careful installation, you may encounter some issues. Here are common problems and how to troubleshoot them:
4.1. Window Moves Slowly or Jerkily
- Possible Causes:
- Insufficient lubrication of the regulator mechanism.
- Misalignment of the window in the track.
- Obstructions in the window track.
- Troubleshooting Steps:
- Apply grease to the moving parts of the regulator.
- Check the window alignment and adjust as necessary.
- Clean the window track to remove any debris.
4.2. Window Only Moves Partway
- Possible Causes:
- Faulty window motor.
- Obstructions in the window track.
- Incorrect regulator installation.
- Troubleshooting Steps:
- Test the window motor with a multimeter.
- Check the window track for obstructions.
- Reinstall the regulator, ensuring proper alignment.
4.3. Window Does Not Move at All
- Possible Causes:
- Blown fuse.
- Faulty window switch.
- Faulty window motor.
- Disconnected wiring.
- Troubleshooting Steps:
- Check the fuse box for blown fuses related to the power windows.
- Test the window switch with a multimeter.
- Test the window motor with a multimeter.
- Inspect the wiring for any disconnected or damaged wires.
4.4. Window Makes Grinding Noises
- Possible Causes:
- Worn gears in the window regulator.
- Debris in the regulator mechanism.
- Troubleshooting Steps:
- Replace the window regulator.
- Clean the regulator mechanism to remove any debris.
4.5. Electrical Issues
- Possible Causes:
- Faulty wiring.
- Corroded connections.
- Short circuits.
- Troubleshooting Steps:
- Inspect the wiring for any damage or corrosion.
- Clean the electrical connections with electrical contact cleaner.
- Use a multimeter to check for short circuits.
5. Preventing Future Problems
To prevent future issues with your car windows, consider these tips:
5.1. Regular Maintenance Tips
- Lubricate Moving Parts: Periodically lubricate the moving parts of the window regulator with grease.
- Clean Window Tracks: Clean the window tracks to remove any debris that could obstruct the window’s movement.
- Inspect Wiring: Regularly inspect the wiring for any damage or corrosion.
- Test Window Operation: Test the window operation regularly to identify any issues early on.
5.2. When to Seek Professional Help
If you are not comfortable performing the repair yourself, or if you encounter complex electrical issues, it’s best to seek professional help. A qualified mechanic can diagnose and repair the problem quickly and efficiently.
5.3. The Importance of Quality Replacement Parts
Using high-quality replacement parts is crucial for ensuring the longevity and reliability of your window repair. CARDIAGTECH.NET offers a wide selection of quality parts to meet your needs.
6. The Benefits of DIY Car Window Repair
Opting for a DIY car window repair offers several benefits:
6.1. Cost Savings
DIY repair can save you a significant amount of money compared to professional services. Labor costs can be substantial, and doing it yourself eliminates that expense.
6.2. Learning New Skills
Repairing your car window can be a rewarding experience, allowing you to learn new skills and gain a better understanding of your vehicle.
6.3. Convenience
DIY repair offers the convenience of working on your own schedule and at your own pace. You don’t have to wait for an appointment or leave your car at a repair shop.
6.4. Satisfaction
There’s a sense of satisfaction that comes from successfully repairing something yourself. It can boost your confidence and encourage you to tackle other DIY projects.
7. Choosing the Right Replacement Parts
Selecting the right replacement parts is vital for a successful and long-lasting repair. Consider these factors when choosing replacement parts:
7.1. OEM vs. Aftermarket Parts
- OEM (Original Equipment Manufacturer) Parts: These parts are made by the same manufacturer that made the original parts for your vehicle. They are typically more expensive but offer the best fit and quality.
- Aftermarket Parts: These parts are made by third-party manufacturers. They are usually less expensive but can vary in quality.
7.2. Ensuring Compatibility
Make sure the replacement parts are compatible with your vehicle’s make, model, and year. Check the part numbers and specifications to ensure a proper fit.
7.3. Considering Quality and Reliability
Choose parts from reputable brands and suppliers known for their quality and reliability. Reading reviews and seeking recommendations can help you make an informed decision.
8. Advanced Troubleshooting Techniques
For more complex issues, consider these advanced troubleshooting techniques:
8.1. Using a Multimeter for Electrical Diagnostics
A multimeter is an essential tool for diagnosing electrical problems. It can be used to test voltage, current, and resistance in electrical circuits.
- Testing Voltage: Use a multimeter to check the voltage at the window motor and switch. If there is no voltage, there may be a problem with the wiring or a blown fuse.
- Testing Continuity: Use a multimeter to check the continuity of the wiring. If there is no continuity, there may be a break in the wire.
- Testing Resistance: Use a multimeter to check the resistance of the window motor. If the resistance is too high or too low, the motor may be faulty.
8.2. Interpreting Wiring Diagrams
Wiring diagrams provide detailed information about the electrical circuits in your vehicle. Understanding how to read and interpret wiring diagrams can help you troubleshoot complex electrical issues.
8.3. Accessing Technical Service Bulletins (TSBs)
Technical Service Bulletins (TSBs) are issued by vehicle manufacturers to address common problems and provide repair procedures. Accessing TSBs can help you identify known issues with your vehicle’s power windows and find solutions.
9. Safety Precautions During the Repair
Safety should always be a top priority when working on your vehicle:
9.1. Disconnecting the Battery
Always disconnect the negative battery terminal before working on the electrical system to prevent electrical shocks and protect the vehicle’s electronics.
9.2. Wearing Safety Gear
Wear safety glasses and work gloves to protect your eyes and hands from injury.
9.3. Using Proper Lifting Techniques
Use proper lifting techniques to avoid back injuries when removing and installing heavy components.
9.4. Avoiding Sharp Edges
Be careful when working around sharp edges inside the door panel.
10. The Role of CARDIAGTECH.NET in Your Auto Repair Journey
CARDIAGTECH.NET is your reliable partner in auto repair, providing expert advice, quality tools, and replacement parts to help you tackle any project with confidence.
10.1. High-Quality Tools and Equipment
CARDIAGTECH.NET offers a wide range of high-quality tools and equipment designed to make your auto repair tasks easier and more efficient. From trim removal tools to multimeters, we have everything you need.
10.2. Expert Advice and Support
Our team of experienced technicians is available to provide expert advice and support. Whether you need help diagnosing a problem or choosing the right parts, we are here to assist you.
10.3. Comprehensive Range of Replacement Parts
CARDIAGTECH.NET carries a comprehensive range of replacement parts for various makes and models. We ensure that you get the correct parts for your specific vehicle.
10.4. Convenient Online Ordering and Fast Shipping
Our convenient online ordering system and fast shipping ensure that you get the tools and parts you need quickly and efficiently. Visit CARDIAGTECH.NET to explore our products and services.
Are you ready to fix that fallen car window? Don’t let a broken window slow you down. Contact CARDIAGTECH.NET today at +1 (641) 206-8880 or visit us at 276 Reock St, City of Orange, NJ 07050, United States, and let our experts guide you to the perfect tools and parts for a seamless repair. Get your car window back in action and enjoy the open road again!
11. Cost Analysis: DIY vs. Professional Repair
Understanding the cost implications of DIY versus professional repair can help you make an informed decision.
11.1. Breakdown of DIY Repair Costs
The costs associated with DIY repair include:
- Replacement Parts: The cost of a new window regulator can range from $50 to $200, depending on the make and model of your vehicle.
- Tools: If you don’t already have the necessary tools, you may need to purchase them. A basic set of tools can cost between $50 and $100.
- Materials: Additional materials like grease, adhesive, and electrical contact cleaner can cost around $20 to $30.
Total DIY Repair Cost: $120 to $330
11.2. Breakdown of Professional Repair Costs
Professional repair costs typically include:
- Labor Costs: Labor costs can range from $100 to $300, depending on the complexity of the repair and the hourly rate of the mechanic.
- Replacement Parts: The cost of replacement parts may be higher at a repair shop compared to purchasing them yourself.
- Diagnostic Fees: Some repair shops charge a diagnostic fee to identify the problem.
Total Professional Repair Cost: $250 to $600
11.3. Factors Affecting Repair Costs
Several factors can affect repair costs:
- Vehicle Make and Model: Luxury vehicles and vehicles with complex window systems may have higher repair costs.
- Complexity of the Repair: More complex repairs, such as those involving electrical issues, may require more time and expertise, increasing labor costs.
- Geographic Location: Repair costs can vary depending on your geographic location and the cost of labor in your area.
12. Impact of a Broken Car Window on Safety and Security
A broken car window can have significant implications for safety and security:
12.1. Safety Risks
- Exposure to the Elements: A broken window exposes you to the elements, such as rain, wind, and extreme temperatures.
- Reduced Visibility: A damaged window can reduce visibility, making it more difficult to drive safely.
- Risk of Injury: Broken glass can pose a risk of injury to you and your passengers.
12.2. Security Concerns
- Theft: A broken window makes it easier for thieves to break into your vehicle and steal your belongings.
- Vandalism: A damaged window can make your vehicle a target for vandalism.
- Compromised Privacy: A broken window compromises your privacy, allowing others to see inside your vehicle.
12.3. Legal Implications
Driving with a broken window may be illegal in some jurisdictions. Check your local laws and regulations to ensure compliance.
13. Eco-Friendly Disposal of Old Parts
When replacing parts, it’s important to dispose of the old parts in an eco-friendly manner:
13.1. Recycling Options
- Recycle Metal Parts: Metal parts like the window regulator and motor can be recycled at a local metal recycling facility.
- Recycle Glass: Glass can be recycled at a glass recycling facility.
- Recycle Plastic: Plastic parts can be recycled at a plastic recycling facility.
13.2. Proper Disposal of Hazardous Materials
Dispose of hazardous materials like grease and electrical contact cleaner properly. Check with your local waste management authority for guidelines on how to dispose of these materials safely.
13.3. Donating Usable Parts
If the old parts are still in usable condition, consider donating them to a local charity or automotive school.
14. Future Trends in Car Window Technology
Car window technology is constantly evolving, with new features and innovations emerging regularly:
14.1. Smart Windows
Smart windows use electrochromic technology to automatically adjust the tint based on the amount of sunlight. This helps to reduce glare and heat inside the vehicle.
14.2. Heads-Up Displays (HUDs)
Some vehicles use the windshield as a heads-up display, projecting important information like speed and navigation onto the glass.
14.3. Acoustic Glass
Acoustic glass is designed to reduce noise inside the vehicle, providing a quieter and more comfortable ride.
14.4. Advanced Driver Assistance Systems (ADAS)
Many ADAS features, such as lane departure warning and automatic emergency braking, rely on sensors and cameras mounted on the windshield.
15. Maintaining Your Car’s Electrical System for Window Health
The health of your car’s electrical system is crucial for maintaining the proper function of your power windows. Here’s how to ensure it:
15.1. Regular Battery Checks
Ensure your car battery is in good condition, as a weak battery can cause various electrical issues, including problems with power windows. Have your battery tested regularly, especially before the onset of winter or summer.
15.2. Inspecting Fuses and Relays
Regularly check the fuses and relays related to your car’s power windows. Replace any blown fuses with the correct amperage to prevent electrical overloads. Faulty relays can also cause intermittent window issues.
15.3. Checking Wiring and Connections
Inspect the wiring and connections associated with your power windows. Look for signs of corrosion, damage, or loose connections. Clean corroded terminals with a wire brush and apply dielectric grease to prevent future corrosion.
15.4. Ensuring Proper Grounding
Proper grounding is essential for the electrical system to function correctly. Check that the grounding points are clean and secure. Poor grounding can lead to various electrical problems, including issues with power windows.
16. Importance of Addressing Car Window Issues Promptly
Addressing car window issues promptly is crucial for maintaining the safety, security, and overall condition of your vehicle. Here’s why:
16.1. Preventing Further Damage
Ignoring a faulty car window can lead to further damage. For example, a window that doesn’t fully close can allow water to enter the vehicle, causing rust and mold. Addressing the issue promptly can prevent these problems and save you money in the long run.
16.2. Maintaining Safety and Security
A properly functioning car window is essential for safety and security. A window that won’t close can expose you to the elements and make your vehicle vulnerable to theft. Addressing window issues promptly ensures that you and your belongings are protected.
16.3. Complying with Legal Requirements
In many jurisdictions, it is illegal to drive with a broken or malfunctioning car window. Addressing window issues promptly ensures that you comply with legal requirements and avoid fines.
16.4. Preserving Vehicle Value
Addressing car window issues promptly helps preserve the value of your vehicle. A well-maintained vehicle is more attractive to potential buyers and retains its value longer.
17. Understanding Car Window Regulators: A Deeper Dive
To effectively fix a car window that fell down, it’s essential to understand the intricacies of car window regulators.
17.1. Types of Window Regulators
There are two primary types of window regulators:
- Cable Regulators: These use a system of cables and pulleys to move the window up and down.
- Scissor Regulators: These utilize a scissor-like mechanism to control the window’s movement.
17.2. How Window Regulators Work
Both types of regulators function similarly. When you press the window switch, it activates an electric motor. This motor then turns a gear that drives either the cables or the scissor mechanism, causing the window to move up or down.
17.3. Signs of a Failing Window Regulator
- Slow or Erratic Window Movement: If the window moves slower than usual or stops intermittently, the regulator may be failing.
- Unusual Noises: Grinding, clicking, or popping sounds when operating the window can indicate a problem with the regulator.
- Window Falling Down: The most obvious sign is when the window falls down into the door and cannot be raised.
18. Advanced Tips for a Smooth Window Repair Process
To ensure a smooth and efficient window repair process, consider these advanced tips:
18.1. Taking Photos During Disassembly
Before disassembling the door panel and window components, take photos of each step. These photos can serve as a valuable reference when reassembling the components, ensuring that everything is put back in its correct place.
18.2. Labeling and Organizing Parts
As you remove screws, bolts, and other small parts, label them and organize them in separate containers. This will prevent confusion and make it easier to reassemble the components later on.
18.3. Using a Service Manual
A service manual provides detailed instructions and diagrams for repairing your vehicle. Consult the service manual for specific information about your vehicle’s window system.
18.4. Seeking Online Resources
Online forums and video tutorials can provide valuable tips and guidance for repairing your car window. Search for resources specific to your vehicle’s make and model.
19. Understanding the Legal Aspects of Car Window Repair
Understanding the legal aspects of car window repair can help you avoid potential problems:
19.1. State and Local Laws
Check your state and local laws regarding car window repair. Some jurisdictions may have specific regulations about window tinting or the use of aftermarket parts.
19.2. Insurance Coverage
Check your insurance policy to see if car window repair is covered. Some policies may cover the cost of repair or replacement if the window is damaged by vandalism or an accident.
19.3. Warranty Considerations
If your vehicle is still under warranty, check the terms of the warranty to see if car window repair is covered. Using aftermarket parts or performing DIY repairs may void the warranty.
20. Frequently Asked Questions (FAQs) About Car Window Repair
Here are some frequently asked questions about car window repair:
1. How much does it cost to fix a car window that fell down?
The cost can range from $120 to $600, depending on whether you DIY or hire a professional. DIY costs typically range from $120 to $330, while professional repairs can cost between $250 and $600.
2. Can I fix a car window myself?
Yes, with the right tools, materials, and guidance, you can fix a car window yourself.
3. What tools do I need to fix a car window?
Essential tools include trim removal tools, screwdrivers, a socket set, pliers, a multimeter, a power drill/driver, work gloves, safety glasses, and a flashlight.
4. How long does it take to fix a car window?
The repair can take anywhere from 2 to 6 hours, depending on your experience and the complexity of the repair.
5. What causes a car window to fall down?
Common causes include window regulator failure, motor malfunction, broken cables or arms, switch problems, glass detachment, track issues, and electrical issues.
6. How do I know if my window regulator is bad?
Signs of a bad window regulator include slow or erratic window movement, unusual noises, and the window falling down.
7. Can I drive with a broken car window?
Driving with a broken car window may be illegal in some jurisdictions and can be unsafe due to exposure to the elements and reduced visibility.
8. Where can I buy replacement parts for my car window?
You can buy replacement parts from CARDIAGTECH.NET, local auto parts stores, online retailers, and specialty automotive tool suppliers.
9. How do I prevent future problems with my car windows?
Regular maintenance tips include lubricating moving parts, cleaning window tracks, inspecting wiring, and testing window operation.
10. When should I seek professional help for car window repair?
If you are not comfortable performing the repair yourself or encounter complex electrical issues, it’s best to seek professional help.
Remember, CARDIAGTECH.NET is here to support you every step of the way. Contact us today at +1 (641) 206-8880 or visit our location at 276 Reock St, City of Orange, NJ 07050, United States, for all your auto repair needs. We’re committed to providing top-quality tools, expert advice, and comprehensive support to help you keep your vehicle in excellent condition. Don’t wait – reach out now and let us assist you in getting your car window back in perfect working order!