How To Fix Car Trunk Hydraulics: A Detailed Guide
Fixing car trunk hydraulics can seem daunting, but with the right knowledge and tools, it’s a manageable task. At CARDIAGTECH.NET, we provide comprehensive solutions for automotive repair, ensuring your vehicle operates smoothly. Dive into this guide to master car trunk hydraulics repair and discover valuable insights into related components like liftgate supports and hydraulic system maintenance.
Table of Contents
- Understanding Car Trunk Hydraulics
- Identifying Common Problems
- Essential Tools and Materials
- Step-by-Step Guide to Diagnosing Hydraulic Issues
- Repairing Minor Leaks
- Replacing Hydraulic Struts
- Bleeding the Hydraulic System
- Checking and Topping Up Hydraulic Fluid
- Troubleshooting Electrical Issues
- Maintaining Your Car Trunk Hydraulics
- Upgrading Your Hydraulic System
- Safety Precautions
- Cost Considerations for Repair and Replacement
- When to Seek Professional Help
- Advanced Diagnostic Techniques
- The Role of Hydraulic Fluid in Trunk Performance
- DIY vs Professional Repair: Making the Right Choice
- Extending the Life of Your Car Trunk Hydraulics
- Common Mistakes to Avoid During Hydraulic Repair
- Future Trends in Car Trunk Hydraulic Technology
- FAQ
- CARDIAGTECH.NET: Your Partner in Automotive Repair
1. Understanding Car Trunk Hydraulics
Car trunk hydraulics are essential for smooth and effortless operation of your vehicle’s trunk. These systems use hydraulic pressure to lift and lower the trunk lid, providing convenience and ease of access. Understanding the components, such as hydraulic struts and lift supports, is the first step to effective maintenance and repair. Let’s explore the basic principles of hydraulic systems and how they function in a car trunk.
Hydraulic systems operate based on Pascal’s principle, which states that pressure applied to a confined fluid is transmitted equally in all directions. In a car trunk, this means that a small amount of force applied by an electric motor or manual pump can generate significant pressure within the hydraulic fluid, allowing the system to lift a heavy trunk lid with ease.
Key Components of Car Trunk Hydraulics:
- Hydraulic Struts: These are the primary components that provide the lifting force. They consist of a piston inside a cylinder filled with hydraulic fluid.
- Hydraulic Pump: This pump, often electrically powered, generates the necessary pressure to move the hydraulic fluid.
- Hydraulic Fluid: This specialized fluid transmits the pressure within the system.
- Hoses and Lines: These components transport the hydraulic fluid between the pump, struts, and control valves.
- Control Valves: These valves regulate the flow of hydraulic fluid, controlling the movement of the trunk lid.
- Electronic Control Unit (ECU): In modern vehicles, the ECU manages the hydraulic system, often integrating it with the car’s central computer.
Understanding these components and how they interact will help you diagnose and address issues effectively. Regular inspection and maintenance are crucial for keeping your car trunk hydraulics in optimal condition.
2. Identifying Common Problems
Identifying common problems with car trunk hydraulics is the first step towards effective repair. Recognizing the symptoms of a malfunctioning system can save you time and prevent further damage. Let’s explore some of the most frequent issues and their telltale signs.
One of the most common problems is hydraulic strut failure. Over time, the seals in the struts can wear out, leading to leaks and a loss of pressure. This results in the trunk lid being unable to stay open or closing too quickly. According to a study by the National Highway Traffic Safety Administration (NHTSA), faulty lift supports can pose a safety risk if they fail unexpectedly.
Another frequent issue is hydraulic fluid leaks. These leaks can occur in the struts, hoses, or pump, leading to a reduction in hydraulic pressure. You may notice visible fluid under the car or in the trunk area. Low fluid levels can cause the trunk to operate slowly or not at all.
Electrical problems can also affect the hydraulic system. Faulty wiring, blown fuses, or a malfunctioning control unit can prevent the hydraulic pump from operating. Symptoms include the trunk not opening or closing with the electric button or key fob.
Common Symptoms of Hydraulic System Problems:
| Symptom | Possible Cause |
|---|---|
| Trunk lid does not stay open | Worn hydraulic struts |
| Trunk lid closes too quickly | Leaking hydraulic struts |
| Visible fluid leaks | Damaged struts, hoses, or pump |
| Slow or no trunk operation | Low hydraulic fluid or pump failure |
| Trunk does not open with electric button | Electrical issues, faulty wiring, or blown fuse |
| Unusual noises during trunk operation | Worn pump, low fluid, or air in the system |
| Trunk operates intermittently | Electrical problems, control unit malfunction, or pump issues |
Regularly inspecting your car’s trunk hydraulics can help you catch these problems early. Check for leaks, unusual noises, and any signs of slow or erratic movement. Early detection can prevent costly repairs and ensure your trunk operates smoothly and safely.
3. Essential Tools and Materials
Having the right tools and materials is crucial for successfully repairing your car trunk hydraulics. Using the correct equipment ensures the job is done safely and efficiently. Let’s outline the essential items you’ll need for diagnosing and fixing hydraulic system issues.
Tools:
- Socket Set: A comprehensive socket set with various sizes is essential for removing and installing hydraulic components.
- Wrench Set: A set of wrenches, including open-end and box-end types, is necessary for tightening and loosening bolts and fittings.
- Screwdriver Set: Both flathead and Phillips head screwdrivers are needed for removing various screws and clips.
- Pliers: Needle-nose and regular pliers are useful for gripping, bending, and removing small parts.
- Multimeter: This tool is essential for diagnosing electrical problems, such as testing for voltage and continuity.
- Hydraulic Jack: A hydraulic jack is needed to safely lift and support the trunk lid while working on the struts.
- Jack Stands: Use jack stands to provide additional support and safety when working under the trunk lid.
- Safety Glasses: Protect your eyes from fluid splashes and debris with safety glasses.
- Gloves: Wear gloves to protect your hands from hydraulic fluid and sharp edges.
- Drain Pan: Use a drain pan to catch any spilled hydraulic fluid.
- Torque Wrench: A torque wrench is important for tightening bolts to the manufacturer’s specifications.
Materials:
- Hydraulic Fluid: Use the correct type of hydraulic fluid specified for your vehicle. Refer to your owner’s manual.
- Replacement Struts: Purchase high-quality replacement struts that are compatible with your car model.
- Replacement Hoses: If hoses are damaged, replace them with OEM or equivalent quality hoses.
- Seal Kit: A seal kit is useful for repairing minor leaks in the hydraulic system.
- WD-40 or Penetrating Oil: Use WD-40 to loosen rusted or stuck bolts and fittings.
- Shop Rags: Keep plenty of shop rags on hand for cleaning up spills and wiping down parts.
- Electrical Contact Cleaner: Use electrical contact cleaner to clean electrical connections and ensure good conductivity.
- Dielectric Grease: Apply dielectric grease to electrical connections to prevent corrosion.
Where to Buy:
You can find these tools and materials at automotive supply stores like AutoZone, Advance Auto Parts, and O’Reilly Auto Parts. Online retailers such as Amazon and CARDIAGTECH.NET also offer a wide selection of tools and parts.
Having these essential tools and materials readily available will make the repair process smoother and more efficient. Always prioritize safety and use the correct equipment to avoid injury and further damage to your vehicle.
4. Step-by-Step Guide to Diagnosing Hydraulic Issues
Diagnosing hydraulic issues in your car trunk is a systematic process that helps pinpoint the exact problem. Following a step-by-step guide ensures you don’t miss any potential causes. Let’s walk through the process of diagnosing hydraulic issues.
Step 1: Visual Inspection
- Check for Leaks: Look for any signs of hydraulic fluid leaks around the struts, hoses, pump, and control valves.
- Inspect Struts: Examine the struts for any physical damage, such as dents or bends.
- Examine Hoses: Check the hoses for cracks, kinks, or swelling.
Step 2: Functional Test
- Observe Trunk Operation: Note how the trunk lid opens and closes. Does it move smoothly, slowly, or not at all?
- Listen for Noises: Pay attention to any unusual noises, such as grinding, hissing, or clicking, during trunk operation.
- Check Electric Operation: Test the electric trunk release button and key fob to see if they function correctly.
Step 3: Hydraulic Fluid Check
- Locate Reservoir: Find the hydraulic fluid reservoir, usually located near the hydraulic pump.
- Check Fluid Level: Ensure the fluid level is within the recommended range. Low fluid levels can cause the system to malfunction.
- Inspect Fluid Condition: Check the fluid for contamination, such as dirt, debris, or a milky appearance.
Step 4: Electrical System Check
- Check Fuses: Inspect the fuses related to the hydraulic system. A blown fuse can prevent the pump from operating.
- Test Wiring: Use a multimeter to check the wiring connections to the hydraulic pump and control unit for voltage and continuity.
- Inspect Control Unit: If possible, check the control unit for any error codes using an OBD-II scanner.
Step 5: Component Testing
- Test Hydraulic Pump: Use a multimeter to check if the hydraulic pump is receiving power. If it is, the pump may be faulty and need replacement.
- Test Control Valves: Check the control valves for proper operation. Faulty valves can restrict the flow of hydraulic fluid.
- Test Struts: If the struts are suspected to be the problem, you can perform a simple test by disconnecting them and manually lifting the trunk lid. If the lid does not stay open, the struts are likely worn.
Example Diagnostic Scenario:
Let’s say you observe that the trunk lid opens very slowly and makes a grinding noise. You perform a visual inspection and find a small leak near one of the hydraulic struts. The hydraulic fluid level is also slightly low.
Based on these observations, the most likely cause is a leaking hydraulic strut and low hydraulic fluid. Replacing the strut and topping up the fluid should resolve the issue.
By following this step-by-step guide, you can systematically diagnose hydraulic issues and identify the necessary repairs. Always refer to your vehicle’s service manual for specific instructions and torque specifications.
5. Repairing Minor Leaks
Repairing minor leaks in your car trunk hydraulic system can often be done without replacing major components. Addressing small leaks promptly can prevent further damage and maintain optimal system performance. Let’s explore how to repair minor leaks effectively.
Step 1: Identify the Source of the Leak
- Clean the Area: Use a clean rag to wipe down the suspected leak area. This makes it easier to spot the exact source of the leak.
- Inspect Fittings: Check the fittings and connections for any signs of seepage or drips.
- Examine Hoses: Inspect the hoses for small cracks or pinholes.
Step 2: Tighten Fittings
- Use the Correct Wrench: Use the appropriate size wrench to tighten any loose fittings.
- Avoid Over-Tightening: Be careful not to over-tighten, as this can damage the fittings or hoses.
- Check for Improvement: After tightening, wipe the area clean and monitor for any continued leakage.
Step 3: Replace Seals and Washers
- Identify Seal Type: Determine the type of seal or washer used in the leaking connection (e.g., O-ring, copper washer).
- Purchase Replacement: Buy a replacement seal or washer that matches the original in size and material.
- Disassemble Connection: Carefully disassemble the connection, taking note of the order of the components.
- Replace Seal: Install the new seal or washer, ensuring it is properly seated.
- Reassemble Connection: Reassemble the connection, tightening the fitting to the specified torque.
Step 4: Use Sealant Products
- Choose Sealant: Select a sealant product specifically designed for hydraulic systems.
- Apply Sealant: Apply the sealant to the leaking area, following the manufacturer’s instructions.
- Allow to Cure: Allow the sealant to cure completely before operating the hydraulic system.
Example Repair Scenario:
You notice a small leak at the connection between a hydraulic hose and a strut. After cleaning the area, you determine that the fitting is slightly loose. You use a wrench to tighten the fitting and monitor the area. The leak stops, indicating that tightening the fitting resolved the issue.
Products to Consider:
- Lucas Oil Power Steering Stop Leak: This product can help seal minor leaks in hydraulic systems.
- ATP AT-205 Re-Seal: This product is designed to rejuvenate seals and stop leaks.
Important Considerations:
- Hydraulic Fluid Compatibility: Ensure that any sealant or additive you use is compatible with the hydraulic fluid in your system.
- Professional Advice: If you are unsure about repairing a leak, consult a professional mechanic.
By following these steps, you can effectively repair minor leaks in your car trunk hydraulic system and prevent further damage. Regular inspection and prompt attention to small issues can extend the life of your hydraulic components.
6. Replacing Hydraulic Struts
Replacing hydraulic struts is a common repair that can restore the functionality of your car trunk. Worn or damaged struts can cause the trunk lid to sag, close unexpectedly, or not open at all. Here’s a step-by-step guide to replacing hydraulic struts.
Step 1: Prepare the Vehicle
- Park on a Level Surface: Park your car on a level surface and engage the parking brake.
- Gather Tools and Materials: Ensure you have all the necessary tools and replacement struts on hand.
- Protect the Work Area: Use fender covers or towels to protect the surrounding paintwork.
Step 2: Support the Trunk Lid
- Use a Hydraulic Jack: Position a hydraulic jack under the trunk lid to support its weight.
- Add Jack Stands: Place jack stands on either side of the jack to provide additional support and safety.
- Adjust Height: Adjust the jack and jack stands to a height that allows you to work comfortably.
Step 3: Remove the Old Struts
- Locate Strut Mounts: Identify the mounting points of the hydraulic struts on the trunk lid and body.
- Detach Strut: Depending on the design, you may need to remove a retaining clip, bolt, or nut to detach the strut. Use a screwdriver or pliers to remove the clip or a wrench to loosen the bolt.
- Remove Strut: Carefully remove the old strut, being mindful of the trunk lid’s weight.
- Repeat: Repeat the process for the other strut.
Step 4: Install the New Struts
- Attach New Strut: Align the new strut with the mounting points and attach it using the retaining clips, bolts, or nuts.
- Secure Mounts: Ensure the mounts are securely fastened, but avoid over-tightening.
- Repeat: Repeat the process for the other strut.
Step 5: Test the Trunk Operation
- Remove Support: Carefully remove the hydraulic jack and jack stands.
- Open and Close Trunk: Test the trunk lid to ensure it opens and closes smoothly and stays open on its own.
- Check for Leaks: Inspect the strut mounts for any signs of leaks.
Example Replacement Scenario:
You notice that your car trunk lid no longer stays open and tends to close on its own. You purchase a pair of replacement hydraulic struts designed for your vehicle model. Following the steps above, you support the trunk lid, remove the old struts, install the new ones, and test the trunk operation. The trunk lid now opens and stays open without any issues.
Products to Consider:
- Stabilus Lift-O-Mat Gas Spring: Stabilus is a well-known manufacturer of high-quality hydraulic struts.
- StrongArm Lift Support: StrongArm offers a range of durable and reliable lift supports.
Important Considerations:
- Strut Compatibility: Ensure that the replacement struts are compatible with your vehicle’s make, model, and year.
- Pair Replacement: Always replace struts in pairs to ensure even support and prevent uneven wear.
- Safety: Use proper safety precautions, such as supporting the trunk lid with a jack and jack stands, to avoid injury.
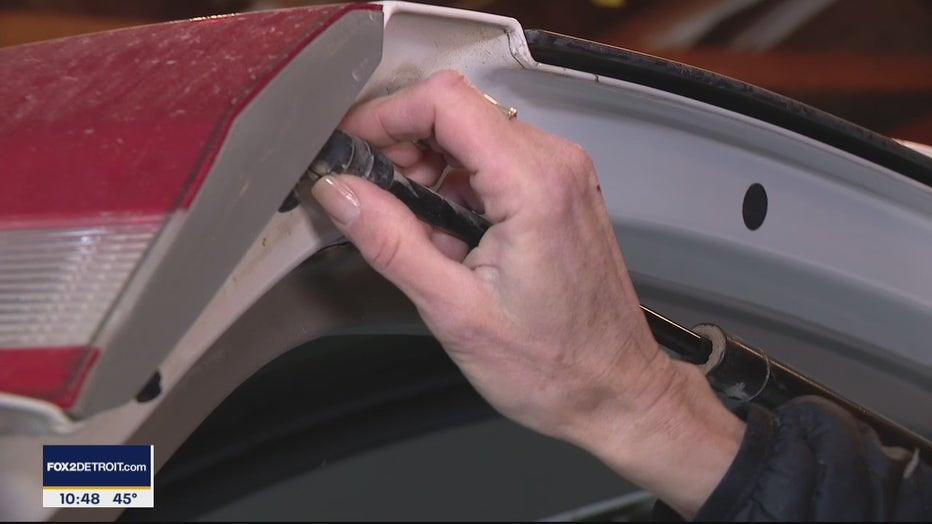
By following these steps, you can successfully replace hydraulic struts and restore the functionality of your car trunk. Regular maintenance and timely replacement of worn struts can ensure smooth and safe trunk operation.
Replacing hydraulic struts on a car trunk using a wrench and support stand
7. Bleeding the Hydraulic System
Bleeding the hydraulic system is necessary when air becomes trapped inside, causing the system to malfunction. Air in the hydraulic lines can lead to spongy operation, reduced lifting power, and unusual noises. Here’s a guide to effectively bleed your car trunk hydraulic system.
Step 1: Identify the Need for Bleeding
- Spongy Operation: Notice if the trunk lid moves in a jerky or spongy manner.
- Reduced Lifting Power: Observe if the trunk lid struggles to lift or doesn’t fully open.
- Unusual Noises: Listen for gurgling or hissing sounds during trunk operation.
Step 2: Locate Bleeder Valves
- Check Service Manual: Consult your vehicle’s service manual to locate the bleeder valves in the hydraulic system.
- Common Locations: Bleeder valves are often found on the hydraulic pump, struts, or control valves.
Step 3: Prepare for Bleeding
- Gather Tools and Materials: Collect the necessary tools, including a wrench, clear tubing, and a container to catch the fluid.
- Safety Gear: Wear safety glasses and gloves to protect yourself from hydraulic fluid.
Step 4: Bleeding Procedure
- Attach Tubing: Connect one end of the clear tubing to the bleeder valve and place the other end into the container.
- Open Bleeder Valve: Use a wrench to slightly open the bleeder valve.
- Operate Hydraulic System: Activate the hydraulic system (e.g., by pressing the trunk release button) to allow fluid and air to flow out of the valve.
- Close Bleeder Valve: Once the fluid flowing through the tubing is free of air bubbles, close the bleeder valve.
- Repeat: Repeat this process several times until all air is purged from the system.
- Check Fluid Level: Regularly check the hydraulic fluid level in the reservoir and top up as needed.
Step 5: Repeat for All Bleeder Valves
- Systematic Bleeding: Bleed each bleeder valve in the hydraulic system to ensure all air is removed.
- Follow Sequence: Follow the recommended bleeding sequence in your vehicle’s service manual.
Example Bleeding Scenario:
You notice that your car trunk lid operates in a jerky manner and makes a gurgling noise. After locating the bleeder valve on the hydraulic pump, you attach clear tubing, open the valve, and activate the hydraulic system. Air bubbles flow out of the valve. You repeat the process until only clear fluid flows, then close the valve. The trunk now operates smoothly and quietly.
Products to Consider:
- ARES Bleeder Wrench: A specialized wrench designed for opening and closing bleeder valves.
- OEMTOOLS Bleeder Kit: A comprehensive kit that includes tubing and adapters for bleeding hydraulic systems.
Important Considerations:
- Fluid Compatibility: Use the correct type of hydraulic fluid specified for your vehicle.
- Bleeding Sequence: Follow the recommended bleeding sequence to ensure all air is removed.
- Safety: Avoid getting hydraulic fluid in your eyes or on your skin.
By following these steps, you can effectively bleed your car trunk hydraulic system and restore smooth and reliable operation. Regular maintenance and prompt bleeding can prevent hydraulic issues and extend the life of your system.
8. Checking and Topping Up Hydraulic Fluid
Maintaining the correct hydraulic fluid level is crucial for the proper functioning of your car trunk hydraulics. Low fluid levels can lead to reduced performance, increased wear, and potential damage to the hydraulic pump and struts. Here’s a guide to checking and topping up hydraulic fluid.
Step 1: Locate the Hydraulic Fluid Reservoir
- Consult Owner’s Manual: Refer to your vehicle’s owner’s manual to find the location of the hydraulic fluid reservoir.
- Common Locations: The reservoir is typically located near the hydraulic pump, often in the trunk or under the rear seat.
Step 2: Prepare for Inspection
- Safety Gear: Wear gloves and safety glasses to protect yourself from hydraulic fluid.
- Clean Area: Clean the area around the reservoir to prevent dirt and debris from entering when you open it.
Step 3: Check the Fluid Level
- Reservoir Markings: Most reservoirs have markings indicating the minimum and maximum fluid levels.
- Visual Inspection: Check the fluid level against these markings. If the fluid is below the minimum level, you need to add more.
Step 4: Inspect the Fluid Condition
- Color and Clarity: The hydraulic fluid should be clean and clear. Dark, cloudy, or contaminated fluid should be replaced.
- Contamination: Check for any signs of contamination, such as dirt, debris, or a milky appearance.
Step 5: Top Up the Fluid
- Use Correct Fluid: Use the hydraulic fluid specified in your vehicle’s owner’s manual.
- Remove Reservoir Cap: Carefully remove the reservoir cap.
- Add Fluid: Pour the hydraulic fluid into the reservoir, using a funnel to avoid spills.
- Check Level: Monitor the fluid level as you add fluid, ensuring it reaches the maximum level mark.
- Replace Cap: Replace the reservoir cap securely.
Example Fluid Top-Up Scenario:
You check the hydraulic fluid reservoir in your car trunk and notice that the fluid level is below the minimum mark. You purchase the correct type of hydraulic fluid specified in your owner’s manual. Using a funnel, you carefully add fluid to the reservoir until it reaches the maximum mark. You then replace the reservoir cap securely.
Products to Consider:
- Pentosin CHF 11S Hydraulic Fluid: A high-quality synthetic hydraulic fluid suitable for many European vehicles.
- Genuine Honda Power Steering Fluid: Recommended for Honda and Acura vehicles with hydraulic systems.
Important Considerations:
- Fluid Compatibility: Always use the correct type of hydraulic fluid for your vehicle.
- Cleanliness: Keep the reservoir and surrounding area clean to prevent contamination.
- Overfilling: Avoid overfilling the reservoir, as this can cause leaks and system malfunction.
By following these steps, you can ensure that your car trunk hydraulic system has the correct fluid level and is functioning optimally. Regular checks and timely fluid top-ups can prevent hydraulic issues and extend the life of your system.
 Checking hydraulic fluid level in a car using dipstick
9. Troubleshooting Electrical Issues
Electrical problems can often be the cause of malfunctioning car trunk hydraulics, especially in modern vehicles with electronically controlled systems. Troubleshooting these issues requires a systematic approach to identify and resolve the root cause. Here’s a guide to troubleshooting electrical issues.
Step 1: Check the Fuses
- Locate Fuse Box: Consult your vehicle’s owner’s manual to find the location of the fuse box.
- Identify Fuse: Identify the fuse that corresponds to the hydraulic system, often labeled for the trunk or liftgate.
- Inspect Fuse: Remove the fuse and inspect it for any signs of damage, such as a broken filament.
- Replace Fuse: If the fuse is blown, replace it with a new fuse of the same amperage.
Step 2: Test the Wiring
- Visual Inspection: Check the wiring connections to the hydraulic pump, control unit, and other components for any signs of damage, such as frayed wires or corroded connectors.
- Multimeter Testing: Use a multimeter to check the wiring for voltage and continuity. Ensure that the pump and control unit are receiving power.
- Ground Connections: Check the ground connections for the hydraulic system to ensure they are clean and secure.
Step 3: Check the Control Unit
- OBD-II Scanner: Use an OBD-II scanner to check for any error codes related to the hydraulic system.
- Control Unit Function: If possible, test the control unit’s functionality using diagnostic software.
- Replacement: If the control unit is faulty, it may need to be replaced.
Step 4: Test the Switches and Relays
- Switches: Check the trunk release button and key fob to ensure they are functioning correctly.
- Relays: Test the relays related to the hydraulic system using a multimeter. A faulty relay can prevent the pump from operating.
Example Electrical Troubleshooting Scenario:
You press the trunk release button on your key fob, but the trunk does not open. You check the fuse box and find that the fuse for the trunk is blown. You replace the fuse, but the trunk still does not open. You then use a multimeter to check the wiring to the hydraulic pump and discover a broken wire. After repairing the wire, the trunk opens correctly.
Products to Consider:
- INNOVA 3100j OBD2 Scanner: A reliable OBD-II scanner for reading and clearing error codes.
- Fluke 101 Digital Multimeter: A durable and accurate multimeter for testing electrical circuits.
Important Considerations:
- Wiring Diagrams: Refer to your vehicle’s wiring diagrams for accurate information on wiring connections.
- Safety: Disconnect the battery before working on electrical components to avoid shocks.
- Professional Help: If you are not comfortable working with electrical systems, consult a professional mechanic.
By following these steps, you can effectively troubleshoot electrical issues in your car trunk hydraulic system. Regular checks and prompt attention to electrical problems can prevent hydraulic failures and ensure reliable trunk operation.
10. Maintaining Your Car Trunk Hydraulics
Proper maintenance is essential to keep your car trunk hydraulics functioning smoothly and to extend the life of the components. Regular checks and preventive measures can help avoid costly repairs and ensure reliable operation. Here’s a guide to maintaining your car trunk hydraulics.
1. Regular Visual Inspections:
- Frequency: Conduct visual inspections at least every three months.
- Check for Leaks: Look for any signs of hydraulic fluid leaks around the struts, hoses, pump, and control valves.
- Inspect Components: Examine the struts for physical damage, such as dents or bends, and check the hoses for cracks or swelling.
2. Hydraulic Fluid Checks:
- Fluid Level: Check the hydraulic fluid level in the reservoir regularly, ensuring it is within the recommended range.
- Fluid Condition: Inspect the fluid for contamination, such as dirt, debris, or a milky appearance. Replace the fluid if it is contaminated.
3. Lubrication:
- Strut Joints: Lubricate the ball-and-socket joints of the hydraulic struts with a silicone-based lubricant to ensure smooth operation.
- Hinges and Latches: Lubricate the trunk lid hinges and latches with a lithium grease to prevent sticking and corrosion.
4. Cleaning:
- Components: Clean the hydraulic components, such as the struts and pump, with a mild detergent and water to remove dirt and grime.
- Connectors: Clean electrical connectors with electrical contact cleaner to ensure good conductivity.
5. Preventative Measures:
- Avoid Overloading: Avoid overloading the trunk, as this can put excessive strain on the hydraulic system.
- Gentle Operation: Operate the trunk lid gently, avoiding slamming or forcing it open or closed.
- Weather Protection: Protect the hydraulic components from extreme weather conditions, such as direct sunlight and freezing temperatures.
6. Scheduled Maintenance:
- Hydraulic Fluid Replacement: Replace the hydraulic fluid according to the manufacturer’s recommendations, typically every two to three years.
- Component Replacement: Replace worn or damaged components, such as struts and hoses, as needed.
Example Maintenance Scenario:
Every three months, you conduct a visual inspection of your car trunk hydraulics. You check for leaks, inspect the struts and hoses, and lubricate the strut joints. You also check the hydraulic fluid level and condition and clean the components with a mild detergent. This regular maintenance helps you identify and address potential issues before they become major problems.
Products to Consider:
- WD-40 Specialist Silicone Lubricant: A silicone-based lubricant for lubricating strut joints and other components.
- CRC Electrical Contact Cleaner: A cleaner for removing dirt and corrosion from electrical connectors.
Maintenance Schedule:
| Task | Frequency |
|---|---|
| Visual Inspection | Every 3 months |
| Hydraulic Fluid Check | Every 6 months |
| Lubrication | Every 6 months |
| Cleaning | Every 6 months |
| Hydraulic Fluid Replacement | Every 2-3 years |
| Component Replacement (as needed) | As necessary |
By following these maintenance tips, you can keep your car trunk hydraulics in optimal condition and extend the life of the system. Regular maintenance not only ensures smooth and reliable operation but also helps prevent costly repairs down the road.
11. Upgrading Your Hydraulic System
Upgrading your car trunk hydraulic system can enhance its performance, reliability, and convenience. Whether you’re looking for increased lifting power, smoother operation, or advanced features, there are several upgrade options available. Here’s a guide to upgrading your hydraulic system.
1. High-Performance Struts:
- Benefits: Upgrading to high-performance hydraulic struts can provide increased lifting power, smoother operation, and longer lifespan.
- Features: Look for struts with enhanced sealing, durable construction, and improved damping characteristics.
- Brands: Consider brands like Stabilus, StrongArm, and Monroe for high-quality struts.
2. Electric Hydraulic Pump Upgrade:
- Benefits: Upgrading to a more powerful or efficient electric hydraulic pump can improve the speed and reliability of the trunk operation.
- Features: Look for pumps with higher flow rates, lower noise levels, and improved energy efficiency.
- Considerations: Ensure the pump is compatible with your vehicle’s electrical system and hydraulic lines.
3. Remote Control System:
- Benefits: Adding a remote control system allows you to open and close the trunk lid remotely, providing added convenience.
- Features: Look for systems with reliable wireless connectivity, secure encryption, and user-friendly controls.
- Installation: Professional installation may be required for some remote control systems.
4. Automatic Soft-Close Feature:
- Benefits: An automatic soft-close feature gently closes the trunk lid, preventing slamming and reducing wear on the hydraulic system.
- Features: Look for systems with adjustable closing speed and obstacle detection.
- Integration: This feature can often be integrated with the existing hydraulic system.
5. Custom Hydraulic Lines:
- Benefits: Upgrading to custom hydraulic lines can improve the durability and reliability of the system, especially in high-performance applications.
- Features: Look for lines made from high-quality materials, such as stainless steel or braided nylon, with reinforced fittings.
- Customization: Custom lines can be tailored to fit your vehicle’s specific requirements.
Example Upgrade Scenario:
You want to upgrade your car trunk hydraulic system to provide smoother and more reliable operation. You decide to replace the stock hydraulic struts with high-performance struts from Stabilus and install a remote control system. The new struts provide increased lifting power and smoother operation, while the remote control system allows you to open and close the trunk lid from a distance.
Products to Consider:
- Stabilus Lift-O-Mat Gas Spring: High-performance hydraulic struts for improved lifting power and durability.
- KeylessOption Remote Start Key Fob: A remote control system for convenient trunk operation.
Important Considerations:
- Compatibility: Ensure that any upgrades are compatible with your vehicle’s make, model, and year.
- Professional Installation: Consider professional installation for complex upgrades, such as electric hydraulic pump or remote control systems.
- Warranty: Check the warranty on any upgraded components to ensure coverage in case of defects or failures.
By upgrading your car trunk hydraulic system, you can enhance its performance, reliability, and convenience. Whether you’re looking for increased lifting power, smoother operation, or advanced features, there are several upgrade options available to meet your needs.
12. Safety Precautions
Working with car trunk hydraulics involves potential risks, so it’s essential to follow safety precautions to protect yourself and prevent damage to your vehicle. Hydraulic systems operate under high pressure, and improper handling can lead to injuries. Here’s a guide to safety precautions when working with car trunk hydraulics.
1. Wear Safety Gear:
- Safety Glasses: Always wear safety glasses to protect your eyes from hydraulic fluid splashes and debris.
- Gloves: Wear gloves to protect your hands from hydraulic fluid, sharp edges, and hot components.
2. Support the Trunk Lid:
- Hydraulic Jack: Use a hydraulic jack to support the trunk lid while working on the struts or other components.
- Jack Stands: Place jack stands on either side of the jack to provide additional support and safety.
- Avoid Reliance on Struts: Never rely solely on the hydraulic struts to support the trunk lid, as they can fail unexpectedly.
3. Relieve Pressure:
- Bleed System: Before disconnecting any hydraulic lines or components, relieve the pressure in the system by bleeding it according to the manufacturer’s instructions.
- Avoid High Pressure: Never attempt to repair or modify hydraulic components while they are under pressure.
4. Handle Hydraulic Fluid Carefully:
- Avoid Contact: Avoid getting hydraulic fluid in your eyes or on your skin.
- Clean Up Spills: Clean up any spills immediately with absorbent materials.
- Proper Disposal: Dispose of used hydraulic fluid properly according to local regulations.
5. Disconnect Battery:
- Electrical Work: Disconnect the battery before working on electrical components to avoid shocks.
- Prevent Accidental Activation: Disconnecting the battery also prevents accidental activation of the hydraulic pump.
6. Use Proper Tools:
- Correct Size: Use the correct size wrenches and sockets to avoid damaging fittings and bolts.
- Torque Wrench: Use a torque wrench to tighten bolts to the specified torque to prevent over-tightening or under-tightening.
7. Follow Instructions:
- Service Manual: Refer to your vehicle’s service manual for specific instructions and torque specifications.
- Component Instructions: Follow the instructions provided with any replacement components.
Example Safety Scenario:
You are replacing the hydraulic struts on