**How To Fix A Sagging Interior Car Roof: A Comprehensive Guide**

A sagging interior car roof, also known as a headliner, can be a real eyesore and a sign of underlying issues. At CARDIAGTECH.NET, we understand the importance of maintaining your vehicle’s interior. This comprehensive guide provides expert techniques on how to fix a sagging interior car roof, offering effective solutions without complete removal. Learn how to restore your car’s interior and maintain its value with our detailed instructions and practical tips. With solutions ranging from adhesive reapplication to innovative pinning methods, discover how to address issues like headliner adhesive failure and fabric detachment effectively.
1. Understanding the Anatomy of a Car Headliner
A car headliner is more than just fabric stretched across your car’s roof. It’s a carefully engineered component designed to enhance your driving experience. Understanding its construction helps in diagnosing and fixing sagging issues.
1.1 What Exactly Is a Car Headliner?
The headliner is a fabric material affixed to the interior roof of your car. Its primary functions include:
- Aesthetics: Providing a smooth, finished look to the interior.
- Insulation: Helping to maintain a comfortable cabin temperature.
- Sound Dampening: Reducing road noise and improving acoustics.
1.2 Common Materials Used in Headliners
Modern headliners typically consist of several layers:
- Fabric Layer: The visible, often decorative, layer made from cloth, suede, or synthetic materials.
- Foam Backing: A layer of foam (usually polyurethane) that provides cushioning and insulation.
- Headliner Board: A rigid backing board made from fiberglass or cardboard that gives the headliner its shape and structure.
- Adhesive: Glue or adhesive used to bound different layers to each other
1.3 The Headliner’s Role in Vehicle Comfort
A well-maintained headliner significantly contributes to the vehicle’s overall comfort:
- Thermal Insulation: Prevents excessive heat buildup in summer and heat loss in winter.
- Acoustic Comfort: Reduces external noise, making for a quieter ride.
- Interior Aesthetics: Enhances the vehicle’s interior appeal and resale value.
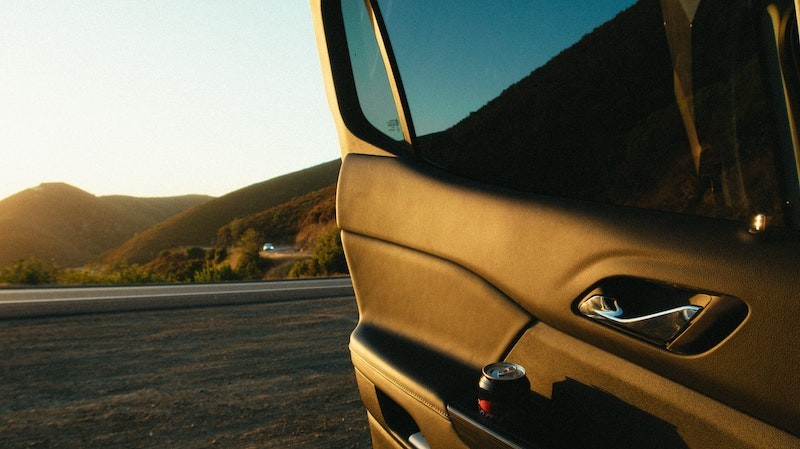
Car headliner is a fabric that is secured to the roof framing
2. Identifying the Causes of a Sagging Interior Car Roof
Several factors can lead to a sagging headliner. Identifying the root cause is crucial for effective repair.
2.1 Heat and Sunlight: The Primary Culprits
Exposure to extreme heat and direct sunlight is the most common cause of headliner sagging. The heat can degrade the adhesive bonding the fabric to the backing board, causing it to loosen and sag.
2.2 Moisture and Humidity
Moisture can seep into the headliner, especially in vehicles with leaks. This moisture can weaken the adhesive and cause the foam backing to deteriorate, leading to sagging.
2.3 Aging and Material Degradation
Over time, the materials used in the headliner can degrade, regardless of environmental conditions. The foam backing can become brittle and crumble, while the adhesive loses its strength.
2.4 Poor Initial Installation
Sometimes, the headliner wasn’t properly installed at the factory or during a previous repair. Insufficient adhesive or improper techniques can lead to premature sagging.
2.5 Physical Damage
Accidental damage, such as snagging the headliner while loading items into the car, can also cause it to sag. Similarly, pets or children may pull or scratch at the headliner, causing it to detach.
3. Essential Tools and Materials for Headliner Repair
Before you start the repair, gather the necessary tools and materials. Having everything on hand will make the process smoother and more efficient. CARDIAGTECH.NET offers a range of high-quality tools perfect for this task, ensuring professional results every time.
3.1 Safety Gear
- Gloves: To protect your hands from adhesives and cleaning solutions.
- Eye Protection: Safety glasses or goggles to prevent debris and chemicals from entering your eyes.
- Mask: A respirator or dust mask to avoid inhaling adhesive fumes and dust particles.
3.2 Cleaning Supplies
- Vacuum Cleaner: With a brush attachment to remove loose debris and dust.
- Soft Brush: For gently scrubbing the headliner fabric.
- Microfiber Cloths: For wiping and cleaning surfaces.
- Mild Detergent: For spot cleaning stains.
3.3 Adhesives and Fasteners
- Headliner Adhesive: A high-temperature, spray-on adhesive specifically designed for headliners.
- Sequin Pins: Or headliner repair pins to temporarily hold the fabric in place.
- Clear Twist Pins: An alternative to pins, providing a less visible hold.
3.4 Tools
- Spray Bottle: For applying cleaning solutions.
- Paint Roller: To smooth the fabric after applying adhesive.
- Steam Cleaner: Optional, for loosening old adhesive and refreshing the fabric.
- Scissors or Utility Knife: For trimming excess fabric.
- Screwdrivers and Socket Set: For removing interior trim, if necessary.
4. Step-by-Step Guide: How to Fix a Sagging Interior Car Roof Without Removing It
Follow these detailed steps to repair your sagging headliner without the hassle of removing it.
4.1 Preparation
- Clean the Area: Vacuum the headliner to remove loose dirt and debris. Use a soft brush to gently scrub the fabric.
- Protect the Interior: Cover seats, carpets, and trim with drop cloths or plastic sheeting to protect them from adhesive overspray.
- Ventilate the Car: Open all doors and windows to ensure good ventilation.
4.2 Method 1: Using Headliner Adhesive
This method is ideal for small to medium-sized sagging areas.
- Apply Adhesive: Spray a light, even coat of headliner adhesive to both the back of the sagging fabric and the corresponding area on the headliner board.
- Wait for Tackiness: Allow the adhesive to become tacky, usually a few minutes. Follow the manufacturer’s instructions for the recommended wait time.
- Reattach Fabric: Carefully press the fabric back onto the headliner board, starting from the center and working your way outwards.
- Smooth the Surface: Use a paint roller to smooth the fabric and ensure good adhesion.
- Secure with Pins: Use sequin pins or clear twist pins to hold the fabric in place while the adhesive fully cures.
- Allow to Cure: Let the adhesive cure for at least 24 hours before removing the pins.
4.3 Method 2: Using Clear Twist Pins
This method is suitable for larger sagging areas or when adhesive alone is not sufficient.
- Position the Fabric: Gently push the sagging fabric back into place against the headliner board.
- Insert Twist Pins: Insert clear twist pins through the fabric and into the headliner board, spacing them evenly across the sagging area.
- Twist to Secure: Twist the pins to secure them in place.
- Check Appearance: Ensure the pins are not too tight and that the fabric is smooth and wrinkle-free.
4.4 Method 3: Steam Cleaning and Rolling
This method can rejuvenate the fabric and improve adhesion.
- Steam the Fabric: Use a steam cleaner to gently steam the sagging area, holding the nozzle a few inches away from the fabric.
- Reattach Fabric: As the adhesive softens, gently press the fabric back onto the headliner board.
- Roll the Surface: Use a paint roller to smooth the fabric and ensure good adhesion.
- Secure with Pins: Use sequin pins or clear twist pins to hold the fabric in place while it dries.
- Allow to Dry: Let the headliner dry completely, usually for several hours, before removing the pins.
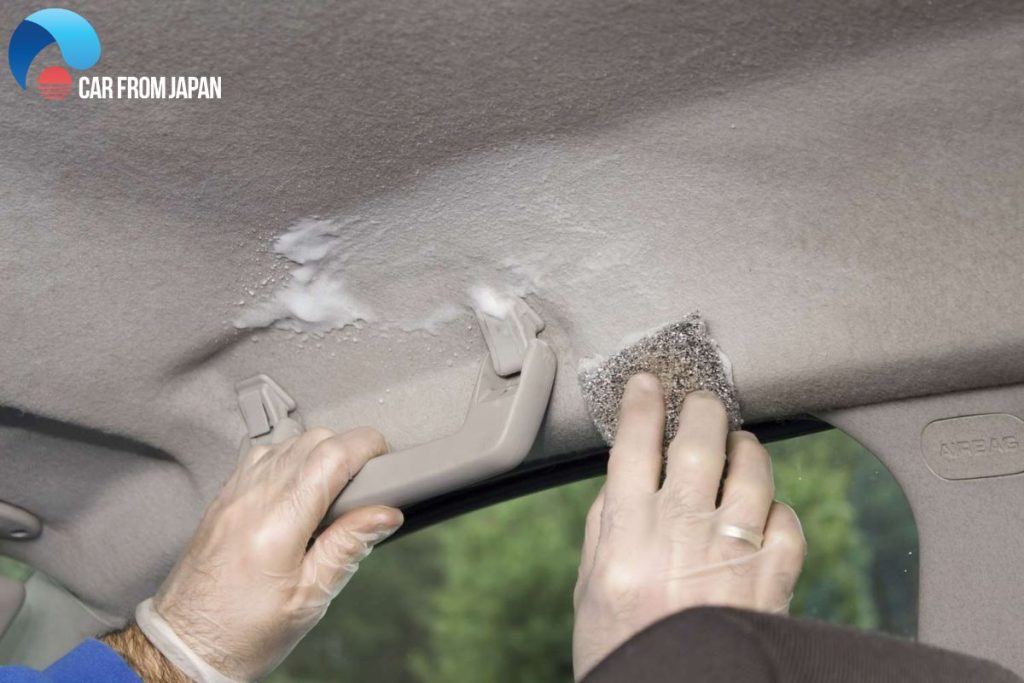 How to fix sagging headliner
5. Advanced Techniques for Stubborn Sagging Issues
For more severe cases, you may need to employ advanced techniques to achieve a lasting repair.
5.1 Injecting Adhesive
If the sagging is localized and the fabric is still in good condition, you can try injecting adhesive behind the fabric.
- Prepare the Syringe: Fill a syringe with headliner adhesive.
- Inject Adhesive: Carefully insert the needle through the fabric and inject a small amount of adhesive behind it.
- Press and Smooth: Press the fabric against the headliner board and smooth it out with a paint roller.
- Secure with Pins: Use pins to hold the fabric in place while the adhesive cures.
5.2 Using Fabric Glue on Edges
For edges and corners that are peeling away, fabric glue can provide a strong, flexible bond.
- Apply Glue: Apply a thin bead of fabric glue to the edge of the fabric and the corresponding area on the headliner board.
- Press Together: Press the fabric and board together firmly.
- Clamp if Necessary: Use clamps or weights to hold the pieces together while the glue dries.
5.3 Professional Re-Upholstery Consultation
If the damage is extensive or you’re not comfortable performing the repair yourself, consider consulting a professional upholstery shop. They can provide a complete headliner replacement or re-upholstery service.
6. Preventing Future Sagging: Maintenance Tips
Preventing future sagging is as important as fixing the current issue. Follow these maintenance tips to keep your headliner in good condition.
6.1 Park in the Shade
Whenever possible, park your car in the shade to minimize exposure to direct sunlight and heat.
6.2 Use a Sunshade
When you have to park in the sun, use a sunshade to protect the interior from heat buildup.
6.3 Regular Cleaning
Regularly clean your headliner to remove dust and debris that can contribute to material degradation.
6.4 Fix Leaks Promptly
Address any leaks in your car’s roof or windows immediately to prevent moisture from damaging the headliner.
6.5 Avoid Harsh Chemicals
When cleaning your car’s interior, avoid using harsh chemicals that can damage the headliner fabric and adhesive.
7. The Financial Aspect: Cost of Repair vs. Replacement
Understanding the costs involved can help you make an informed decision about repairing or replacing your headliner.
7.1 DIY Repair Costs
Repairing a sagging headliner yourself can be quite affordable. The cost typically includes:
- Headliner Adhesive: $10 – $20
- Pins: $5 – $10
- Cleaning Supplies: $10 – $20
- Total: $25 – $50
7.2 Professional Repair Costs
Professional repair costs can vary depending on the extent of the damage and the labor rates in your area. Generally, you can expect to pay:
- Minor Sagging Repair: $100 – $300
- Major Sagging Repair: $300 – $600
7.3 Headliner Replacement Costs
Replacing the entire headliner is the most expensive option. Costs can range from:
- Economy Cars: $300 – $750
- Mid-Size Cars and SUVs: $500 – $900
- Luxury Vehicles: $1,000 – $6,000
Here is a cost-summary table of sagging headliners replacing procedures:
| Vehicle Type | Cost Range |
|---|---|
| Simple Sedan/Hatchback/Coupe | $300 – $750 |
| Typical SUV/Crossover with Sunroof/Moonroof | $500 – $900 |
| Luxury Vehicle | $1,000 – $6,000 |
7.4 When to Consider Replacement
Consider replacing the headliner if:
- The damage is extensive and covers a large area.
- The fabric is severely stained or torn.
- The headliner board is damaged beyond repair.
- The cost of repair approaches the cost of replacement.
8. Choosing the Right Products: A CARDIAGTECH.NET Recommendation
At CARDIAGTECH.NET, we offer a curated selection of products designed to help you tackle your headliner repair with confidence.
8.1 Recommended Headliner Adhesives
Look for high-temperature, spray-on adhesives specifically formulated for automotive headliners. These adhesives provide a strong, flexible bond that can withstand extreme temperatures.
8.2 Best Pinning Solutions
Clear twist pins are an excellent choice for securing the fabric without causing visible damage. Sequin pins can also be used, but they may be more noticeable.
8.3 Cleaning and Maintenance Products
Use mild detergents and microfiber cloths to clean your headliner without damaging the fabric or adhesive.
8.4 Tools for the Job
Invest in a good-quality paint roller and steam cleaner for best results. CARDIAGTECH.NET offers a range of automotive detailing tools designed to make your job easier and more efficient.
9. DIY vs. Professional Repair: Making the Right Choice
Deciding whether to tackle the repair yourself or hire a professional depends on your skills, budget, and the extent of the damage.
9.1 Assessing Your Skill Level
If you’re comfortable with basic automotive repairs and have some experience working with adhesives and fabrics, you may be able to handle the repair yourself.
9.2 Evaluating the Extent of the Damage
Minor sagging can often be repaired DIY. However, extensive damage may require professional attention.
9.3 Budget Considerations
DIY repair is the most cost-effective option, but professional repair can save you time and ensure a high-quality result.
9.4 Time Commitment
DIY repair can take several hours, while professional repair may only take a few hours, depending on the shop’s schedule.
10. Common Mistakes to Avoid During Headliner Repair
Avoiding these common mistakes can save you time, money, and frustration.
10.1 Using the Wrong Adhesive
Using the wrong adhesive can lead to poor adhesion and future sagging. Always use a headliner adhesive specifically designed for automotive applications.
10.2 Applying Too Much Adhesive
Applying too much adhesive can cause it to seep through the fabric, leaving unsightly stains. Apply a light, even coat.
10.3 Not Cleaning the Surface Properly
Failing to clean the headliner before applying adhesive can prevent proper adhesion.
10.4 Stretching the Fabric Too Much
Stretching the fabric too much can cause it to tear or create wrinkles. Gently smooth the fabric into place.
10.5 Neglecting Ventilation
Working in a poorly ventilated area can expose you to harmful fumes. Always ensure good ventilation when working with adhesives and cleaning solutions.
11. Maintaining Your Car’s Interior: Beyond the Headliner
Caring for your car’s interior goes beyond just the headliner. Here are some additional tips to keep your car looking its best.
11.1 Regular Vacuuming
Vacuum your car’s interior regularly to remove dirt, dust, and debris.
11.2 Cleaning Upholstery
Clean your car’s upholstery regularly to remove stains and spills.
11.3 Protecting Dashboard and Trim
Use a protectant to shield your dashboard and trim from UV damage.
11.4 Maintaining Leather Seats
Condition your leather seats regularly to keep them soft and supple.
11.5 Air Fresheners and Odor Eliminators
Use air fresheners and odor eliminators to keep your car smelling fresh and clean.
12. The Environmental Impact of Headliner Repair
Consider the environmental impact of your repair choices.
12.1 Choosing Eco-Friendly Products
Opt for eco-friendly adhesives and cleaning solutions whenever possible.
12.2 Proper Disposal of Materials
Dispose of old headliners and materials properly to minimize waste.
12.3 Recycling Options
Check if there are any recycling options for automotive upholstery in your area.
12.4 Reducing Waste
By repairing your headliner instead of replacing it, you can reduce waste and minimize your environmental impact.
13. Real-Life Examples: Success Stories
Here are a few real-life examples of successful headliner repairs.
13.1 Case Study 1: Minor Sagging in a Sedan
A car owner noticed minor sagging in their sedan’s headliner. They used headliner adhesive and pins to reattach the fabric, saving hundreds of dollars compared to professional repair.
13.2 Case Study 2: Extensive Sagging in an SUV
An SUV owner had extensive sagging in their headliner due to a leaky sunroof. They used clear twist pins to secure the fabric, providing a temporary fix until they could address the leak and replace the headliner.
13.3 Case Study 3: Re-Upholstery Success
A classic car enthusiast decided to re-upholster their car’s headliner themselves. They purchased a headliner kit and followed online tutorials, achieving a professional-quality result.
14. Future Trends in Headliner Materials and Repair
Stay informed about the latest trends in headliner materials and repair techniques.
14.1 Sustainable Materials
Manufacturers are increasingly using sustainable materials in headliners, such as recycled fabrics and plant-based foams.
14.2 Advanced Adhesives
New adhesives are being developed that offer improved heat resistance and durability.
14.3 DIY Repair Kits
DIY repair kits are becoming more comprehensive and user-friendly, making it easier for car owners to tackle headliner repairs themselves.
14.4 Professional Techniques
Professional upholstery shops are adopting advanced techniques, such as laser cutting and robotic adhesive application, to improve the quality and efficiency of headliner replacement.
15. Conclusion: Restoring Your Car’s Interior with Confidence
Fixing a sagging interior car roof doesn’t have to be a daunting task. With the right tools, materials, and techniques, you can restore your car’s interior and maintain its value. Whether you choose to tackle the repair yourself or hire a professional, CARDIAGTECH.NET is here to provide you with the products and information you need to succeed. By understanding the causes of sagging, following our step-by-step guide, and taking preventive measures, you can keep your headliner looking its best for years to come. Remember, a well-maintained interior not only enhances your driving experience but also preserves the value of your vehicle. Don’t let a sagging headliner detract from your car’s appeal—take action today and enjoy a refreshed, comfortable interior.
A sagging headliner can be more than just an aesthetic issue, it can indicate deeper problems within your vehicle. Luckily, there are several effective methods to address it without needing a full removal.
FAQs: Addressing Your Headliner Concerns
15.1 How do you know if your ceiling is sagging?
Several signs can indicate that your car’s ceiling is sagging:
- Visible Drooping: The most obvious sign is the fabric visibly hanging down from the roof.
- Loose Fabric: The material feels loose or detached when touched.
- Cracking Sounds: Unusual noises when the car moves or when doors are closed.
- Blisters or Bubbles: Small circles or blisters forming on the headliner surface.
15.2 Is it OK to fix the headliner sagging myself?
Yes, fixing a sagging headliner yourself is often a viable option, especially for minor issues. DIY repair can save you money and provide a sense of accomplishment. However, assess the extent of the damage and your comfort level before proceeding.
15.3 Can I paint a headliner?
While it might seem like a quick fix, painting a headliner is generally not recommended. Paint can stiffen the fabric, alter its texture, and may not adhere well over time due to temperature changes inside the car. It is better to repair or replace the fabric.
15.4 Does car insurance cover the cost of car headliner replacement?
In most cases, standard car insurance policies do not cover headliner replacement, as it is considered wear and tear. However, if the damage is caused by a covered event, such as a collision or vandalism, your insurance may provide coverage.
15.5 How long does a headliner last?
The lifespan of a headliner can vary depending on several factors, including:
- Climate: Cars in hot, sunny climates tend to experience faster degradation.
- Usage: Regular use and exposure to moisture can shorten its lifespan.
- Material Quality: Higher-quality materials tend to last longer.
Generally, a well-maintained headliner can last between 5 to 10 years.
15.6 Can I use regular glue instead of headliner adhesive?
No, regular glue is not suitable for headliner repair. Headliner adhesive is specifically formulated to withstand high temperatures and provide a flexible, durable bond. Regular glue may melt or lose its adhesion in hot weather.
15.7 What is the best way to clean a headliner?
The best way to clean a headliner is to use a mild detergent diluted in water and a soft microfiber cloth. Gently wipe the surface, avoiding excessive moisture. Vacuum the headliner regularly to remove dust and debris.
15.8 How do I prevent my headliner from sagging again?
To prevent your headliner from sagging again:
- Park in the Shade: Minimize exposure to direct sunlight and heat.
- Use a Sunshade: Protect the interior from heat buildup.
- Fix Leaks Promptly: Address any leaks in your car’s roof or windows immediately.
- Regular Cleaning: Clean your headliner regularly to remove dust and debris.
15.9 Are there any special considerations for repairing a headliner with a sunroof?
Yes, repairing a headliner with a sunroof requires extra care. The area around the sunroof is prone to moisture damage, so ensure it is completely dry before applying any adhesive. Also, be careful not to damage the sunroof mechanism during the repair.
15.10 Where can I buy headliner repair supplies?
You can buy headliner repair supplies at automotive parts stores, fabric stores, and online retailers like CARDIAGTECH.NET. Look for headliner adhesive, pins, cleaning supplies, and other tools specifically designed for automotive upholstery repair.
Is your car headliner starting to sag? Don’t let this issue diminish your driving experience. CARDIAGTECH.NET is here to help you find the perfect tools and materials for a DIY fix. We offer a range of high-quality headliner adhesives, pins, and cleaning solutions to restore your car’s interior to its former glory.
Contact us today for expert advice and product recommendations. Our team is ready to assist you with any questions you may have.
Address: 276 Reock St, City of Orange, NJ 07050, United States
WhatsApp: +1 (641) 206-8880
Website: CARDIAGTECH.NET
Let CARDIAGTECH.NET be your partner in maintaining a pristine and comfortable car interior.