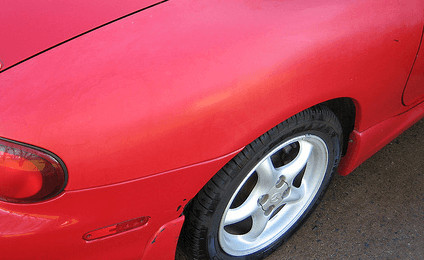
Can A Dent In A Car Be Fixed: Solutions & Guide
Can a dent in a car be fixed? Absolutely, and at CARDIAGTECH.NET, we’ll explore various methods, from DIY solutions to professional repairs, to restore your car’s appearance. Whether it’s a minor ding or a significant crease, understanding the options available helps you make informed decisions. This guide will cover paintless dent repair, body filler techniques, and when to seek professional help, ensuring you find the best approach for your needs and budget.
1. Understanding Car Dents and Their Causes
Car dents can be frustrating, affecting your vehicle’s appearance and potentially its value. Identifying the causes and types of dents is the first step toward effective repair.
Common Causes of Car Dents:
- Hail: Hailstorms can cause numerous small dents across your car’s surface.
- Debris: Flying stones or road debris can leave noticeable marks.
- Shopping Carts: Uncontrolled shopping carts can easily collide with your vehicle in parking lots.
- Door Dings: Opening doors into other cars or objects often results in small dents.
- Car Accidents: Collisions, even minor ones, can cause significant dents.
- Falling Objects: Tree branches or other falling objects can lead to larger, more severe dents.
Types of Car Dents:
Understanding the type of dent is essential for choosing the right repair method. Here’s a breakdown:
- Ding: A small, shallow area of damage, often easily repaired with DIY methods.
- Round Dent: A circular indentation that can sometimes be “popped” back into shape.
- Sharp Dent: A small but deep divot that requires more careful repair techniques.
- Crease Dent: A long, folded dent often accompanied by paint damage, typically requiring professional attention.
- Serious Dent: Large or multiple dents that may indicate underlying structural damage, necessitating professional assessment.
| Type | Description | Removal Complexity |
|---|---|---|
| Ding | Small, shallow damage | Simple DIY |
| Round Dent | Circular indentation | Can be “popped” out |
| Sharp Dent | Small but deep divot | Challenging to repair |
| Crease Dent | Long fold with paint damage | Professional repair |
| Serious Dent | Large or multiple dents, potential structural damage | Professional repair |
2. The Importance of Prompt Dent Repair
Addressing car dents promptly is crucial for both aesthetic and practical reasons. Delaying repairs can lead to more significant issues and increased costs.
Reasons to Repair Dents Quickly:
- Prevent Rust: Damage to the paint exposes the metal underneath, leading to rust and corrosion.
- Maintain Vehicle Value: Dents diminish your car’s resale value, making it less attractive to potential buyers.
- Avoid Structural Damage: Larger dents, especially from significant impacts, can compromise the vehicle’s structural integrity.
- Improve Fuel Economy: Dents can disrupt airflow, slightly reducing fuel efficiency. According to The Drive, even minor dents can impact aerodynamics, leading to increased fuel consumption.
- Enhance Appearance: Repairing dents restores your car’s sleek and stylish look, boosting your pride in ownership.
Cost Considerations:
- DIY Repair: Typically under $100 for minor dents and dings.
- Professional Repair: Can range from hundreds to thousands of dollars, depending on the severity and location of the dent.
3. DIY Dent Repair Options
For minor dents and dings, several DIY methods can be effective. These options are generally more affordable and can be done at home with the right tools and techniques.
Tools Available at CARDIAGTECH.NET:
At CARDIAGTECH.NET, we offer a range of tools perfect for DIY dent repair, including:
- Dent Pullers: Suction-based tools to pull out shallow dents.
- Dent Repair Kits: Comprehensive kits with various tools and adhesives.
- Slide Hammers: For more stubborn dents requiring extra force.
- Heat Guns: To warm up the metal and make it more pliable.
- Body Fillers: To fill in dents and create a smooth surface.
- Sandpapers: Different grits for smoothing and preparing surfaces.
- Paint Repair Kits: To touch up the paint after dent repair.
DIY Repair Methods:
- Plunger Method:
- How it works: Use a standard plunger to create suction and pull out the dent.
- Best for: Round, shallow dents on flat surfaces.
- Steps:
- Clean the area around the dent.
- Wet the plunger and the car surface.
- Place the plunger over the dent and push and pull firmly.
- Repeat until the dent pops out.
- Hair Dryer and Compressed Air:
- How it works: Heat the dent with a hair dryer, then quickly cool it with compressed air. The rapid temperature change can cause the metal to contract and pop back into place.
- Best for: Small, shallow dents on metal or plastic bumpers.
- Steps:
- Heat the dent with a hair dryer on a high setting for several minutes.
- Immediately spray compressed air onto the heated area.
- Repeat until the dent pops out.
- Boiling Water Method:
- How it works: Pour boiling water over the dent to make the plastic more pliable, then reach behind the bumper to push the dent out.
- Best for: Plastic bumpers.
- Steps:
- Boil water and carefully pour it over the dented area.
- Reach behind the bumper and gently push the dent out.
- Cool the area with cold water to help the plastic retain its shape.
- Dent Puller Kits:
- How it works: These kits use adhesive tabs and a pulling device to gently pull the dent out.
- Best for: Various types of dents, especially those on body panels.
- Steps:
- Clean the dented area.
- Attach an adhesive tab to the center of the dent.
- Attach the pulling device to the tab and slowly pull the dent out.
- Remove the tab and clean any adhesive residue.
- Body Filler (Bondo):
- How it works: Fill the dent with body filler to create a smooth, even surface, then sand and paint to match the surrounding area.
- Best for: Dents that are too deep or complex for simple pulling methods.
- Steps:
- Clean the dented area and sand off the paint.
- Mix the body filler according to the manufacturer’s instructions.
- Apply the filler to the dent, slightly overfilling the area.
- Let the filler dry completely, then sand it down to match the surrounding surface.
- Prime and paint the area to blend seamlessly with the rest of the car.
Step-by-Step Guide: Repairing a Metal Dent with a Kit:
- Heat the Dent: Use a hair dryer to warm the metal.
- Apply Dent Puller: Use a suction-based dent puller to pull the dent outward.
- Clean the Area: Wipe the metal with a microfiber towel.
- Prepare the Bridge Puller: Apply glue to the deepest point of the dent.
- Attach the Puller Head: Push the head into the glue and let it cool for 4-8 minutes.
- Use the Bridge Puller: Turn the dial to slowly move the metal back into place.
- Detach and Clean: Remove the puller and heat the glue to remove the puller head.
- Touch Up Paint: Repair any paint damage with a paint repair kit from CARDIAGTECH.NET.
How to Use Body Filler (Bondo) for Car Dent Repair:
- Clean the Dented Area: Use soap and water, then dry with a microfiber cloth.
- Sand the Paint Off: Use 80-grit sandpaper to remove paint from the dent and surrounding area.
- Minimize the Dent: Use dent removal techniques to reduce the dent’s size.
- Apply Body Filler: Press firmly into the dent, ensuring it’s flush with the vehicle’s body.
- Sand the Filler: Use 80-grit sandpaper to smooth the shape, then repeat if necessary.
- Smooth the Finish: Use 180-grit sandpaper to smooth the putty.
- Apply Glaze: Cover the putty and surrounding area with glaze and spot putty.
- Sand Again: Use 180-grit, then 320-grit sandpaper to remove scratches.
- Prime and Paint: Use a paint repair kit from CARDIAGTECH.NET to prime and paint the vehicle.
4. Professional Dent Repair Options
For larger, more complex dents, or when paint damage is involved, professional dent repair services are the best option. These services ensure a high-quality finish and can address underlying structural issues.
Types of Professional Repair Services:
- Paintless Dent Repair (PDR):
- How it works: Technicians use specialized tools to massage the metal back into its original shape without damaging the paint.
- Best for: Small to medium-sized dents without paint damage.
- Benefits: Affordable, quick, and preserves the original paint finish.
- Auto Body Shop Repair:
- How it works: Traditional dent repair involving filling, sanding, and repainting the damaged area.
- Best for: Large dents, dents with paint damage, and dents affecting structural integrity.
- Benefits: Comprehensive repair, restores the vehicle to its original condition.
Paintless Dent Repair (PDR):
PDR is a cost-effective and convenient solution for repairing dents without affecting the paint. Technicians use specialized tools to gently massage the metal back to its original form.
- Small, Light Dents: $50-$100
- Medium Dents: $75-$300
- Large Dents: $300-$500
Auto Body Shop Repair:
For more severe dents or those involving paint damage, an auto body shop offers comprehensive repair services. These shops can address structural damage and ensure a seamless finish.
- Cost: Can easily reach $2,000 or more, depending on the extent of the damage.
- Considerations: If the cost is significant, consider whether replacing the entire body panel might be more affordable.
5. Choosing the Right Repair Method
Selecting the appropriate dent repair method depends on several factors, including the size, location, and type of dent, as well as your budget and skill level.
Factors to Consider:
- Dent Size and Depth: Small, shallow dents are often suitable for DIY or PDR, while larger, deeper dents may require auto body shop repair.
- Paint Damage: If the paint is scratched or chipped, auto body shop repair is necessary to repaint the area.
- Location: Dents on easily accessible panels are simpler to repair than those in hard-to-reach areas.
- Material: Plastic bumpers can often be repaired with heat methods, while metal panels may require more specialized tools.
- Budget: DIY methods are the most affordable, followed by PDR, with auto body shop repairs being the most expensive.
- Skill Level: If you’re comfortable with DIY auto repair, you can tackle minor dents yourself. Otherwise, it’s best to leave it to the professionals.
Decision Matrix:
| Factor | DIY Repair | Paintless Dent Repair (PDR) | Auto Body Shop Repair |
|---|---|---|---|
| Dent Size | Small, shallow | Small to medium | Large, deep |
| Paint Damage | None | None | Yes |
| Location | Easily accessible | Most locations | All locations |
| Material | Plastic or metal | Metal | Plastic or metal |
| Budget | Low | Medium | High |
| Skill Level | Basic | Intermediate | Professional |
| Expected Outcome | Good, if done correctly | Excellent, seamless repair | Excellent, restores to original condition |
| Time | Several hours to days, depending on complexity | 1-2 hours | Several days |
| Tools Needed | Basic hand tools, dent repair kit | Specialized PDR tools | Extensive tools and equipment |
| Best For | Minor cosmetic issues | Maintaining original paint, quick turnaround | Comprehensive repair, structural damage, paint restoration |
| Potential Risks | Improper repair, further damage | Limited effectiveness on severe dents | Higher cost, potential for mismatched paint |
| When to Choose | Small budget, willing to learn, minor damage | Preserving original paint, avoiding extensive repairs | Significant damage, structural concerns, desire for perfect finish |
6. Step-by-Step Guide to DIY Dent Repair
For those opting to tackle minor dents themselves, here’s a detailed, step-by-step guide to help you achieve the best results.
Materials and Tools You’ll Need:
Before you begin, gather all the necessary materials and tools to ensure a smooth and efficient repair process.
- Cleaning Supplies:
- Soap and water
- Microfiber cloths
- Wax and grease remover
- Heat Source:
- Hair dryer or heat gun
- Cooling Agent:
- Compressed air
- Ice packs
- Dent Removal Tools:
- Plunger
- Dent puller kit with adhesive tabs
- Slide hammer
- Bridge puller
- Body Filler Supplies (if needed):
- Body filler (Bondo)
- Hardener
- Mixing board and applicators
- 80-grit, 180-grit, and 320-grit sandpaper
- Sanding block
- Glaze and spot putty
- Painting Supplies (if needed):
- Primer
- Automotive paint matching your car’s color code
- Clear coat
- Masking tape and paper
- Spray gun or aerosol cans
- Safety Gear:
- Gloves
- Safety glasses
- Respirator or mask
Step-by-Step Instructions:
- Preparation and Cleaning:
- Wash the area: Thoroughly clean the dented area with soap and water to remove dirt and debris.
- Dry the area: Use a microfiber cloth to dry the area completely.
- Remove wax and grease: Apply wax and grease remover to ensure a clean surface for repair.
- Assessing the Dent:
- Evaluate the damage: Determine the size, depth, and location of the dent.
- Check for paint damage: Look for scratches, chips, or cracks in the paint.
- Applying Heat (if applicable):
- Heat the dent: Use a hair dryer or heat gun to warm the metal around the dent. Keep the heat source moving to avoid overheating.
- Test the pliability: Check if the metal becomes more pliable.
- Using Cooling Agents (if applicable):
- Apply compressed air or ice: Quickly cool the heated area with compressed air or an ice pack to encourage the metal to contract.
- Repeat as necessary: Repeat the heating and cooling process until the dent starts to pop out.
- Using a Plunger (for shallow dents):
- Wet the plunger and surface: Wet the plunger and the area around the dent with water.
- Position the plunger: Place the plunger directly over the dent.
- Apply pressure: Push and pull the plunger firmly to create suction and attempt to pull out the dent.
- Repeat: Repeat the process until the dent pops out.
- Using a Dent Puller Kit:
- Clean the surface: Ensure the area is clean and dry.
- Attach adhesive tab: Apply an adhesive tab to the center of the dent.
- Attach pulling device: Attach the dent puller tool to the adhesive tab.
- Pull the dent: Slowly and gently pull the dent out using the tool.
- Remove the tab: Once the dent is pulled out, carefully remove the adhesive tab.
- Clean residue: Clean any remaining adhesive residue with a suitable cleaner.
- Using Body Filler (Bondo) for Deeper Dents:
- Sand the area: Use 80-grit sandpaper to remove paint and create a rough surface for the filler to adhere to.
- Mix the filler: Mix the body filler with the hardener according to the manufacturer’s instructions.
- Apply the filler: Use an applicator to apply the filler to the dent, slightly overfilling the area.
- Let it dry: Allow the filler to dry completely, usually 20-30 minutes.
- Sand the filler: Use 80-grit sandpaper to shape the filler, then switch to 180-grit and 320-grit sandpaper for a smooth finish.
- Apply glaze (optional): Apply a thin layer of glaze and spot putty to fill in any imperfections.
- Sand again: Sand the glaze with 320-grit sandpaper for a final smooth surface.
- Priming and Painting (if necessary):
- Mask the area: Use masking tape and paper to protect the surrounding areas from overspray.
- Apply primer: Apply several thin coats of primer, allowing each coat to dry before applying the next.
- Sand the primer: Lightly sand the primed area with 320-grit sandpaper to create a smooth surface.
- Apply paint: Apply several thin coats of automotive paint, matching your car’s color code. Allow each coat to dry before applying the next.
- Apply clear coat: Apply several thin coats of clear coat to protect the paint and give it a glossy finish.
- Let it dry: Allow the paint and clear coat to dry completely, usually overnight.
- Final Touches:
- Remove masking: Carefully remove the masking tape and paper.
- Buff the area: Use a polishing compound to buff the painted area and blend it seamlessly with the surrounding paint.
- Wax the area: Apply a coat of wax to protect the new paint and enhance the shine.
7. Maintaining Your Car’s Appearance
Preventing dents and maintaining your car’s appearance can save you time and money in the long run. Here are some tips to keep your vehicle looking its best:
Preventative Measures:
- Park Carefully: Choose parking spots away from other cars and shopping cart corrals.
- Use a Car Cover: Protect your car from hail, debris, and other potential sources of dents.
- Maintain a Safe Distance: When driving, keep a safe distance from other vehicles to avoid collisions.
- Regular Washing and Waxing: Keep your car clean and protected with regular washing and waxing.
- Consider Paint Protection Film (PPF): Apply PPF to high-impact areas to protect against scratches and dents.
Regular Maintenance:
- Inspect Regularly: Check your car for dents and dings regularly.
- Address Issues Promptly: Repair dents as soon as possible to prevent further damage.
- Touch Up Paint: Use touch-up paint to repair any scratches or chips in the paint.
- Professional Detailing: Consider professional detailing services to keep your car looking its best.
8. Benefits of Purchasing Tools From CARDIAGTECH.NET
At CARDIAGTECH.NET, we understand the importance of having the right tools for the job. That’s why we offer a wide selection of high-quality dent repair tools and equipment to meet your needs.
Why Choose CARDIAGTECH.NET:
- Wide Selection: We offer a comprehensive range of dent repair tools and equipment, from basic DIY kits to professional-grade tools.
- High-Quality Products: Our products are sourced from trusted manufacturers and are designed to deliver reliable performance and long-lasting durability.
- Competitive Prices: We offer competitive prices on all our products, ensuring you get the best value for your money.
- Expert Advice: Our knowledgeable staff can provide expert advice and guidance to help you choose the right tools for your specific needs.
- Excellent Customer Service: We are committed to providing excellent customer service and ensuring your satisfaction with every purchase.
- Convenient Shopping: Our online store makes it easy to shop for dent repair tools from the comfort of your own home.
- Fast Shipping: We offer fast and reliable shipping to get your tools to you quickly.
Featured Products:
- Dent Puller Kits: Comprehensive kits with various tools and adhesives for DIY dent repair.
- Slide Hammers: For more stubborn dents requiring extra force.
- Heat Guns: To warm up the metal and make it more pliable.
- Body Fillers: To fill in dents and create a smooth surface.
- Sandpapers: Different grits for smoothing and preparing surfaces.
- Paint Repair Kits: To touch up the paint after dent repair.
9. Real-Life Examples and Case Studies
To further illustrate the effectiveness of various dent repair methods, let’s examine a few real-life examples and case studies.
Case Study 1: Hail Damage Repair
- Scenario: A car owner in Denver, Colorado, experienced significant hail damage, resulting in numerous small dents across the hood and roof of their vehicle.
- Solution: The owner opted for paintless dent repair (PDR) to avoid repainting the car.
- Results: The PDR technician was able to remove the dents without damaging the original paint, restoring the car to its pre-hail condition.
- Cost: $800
- Time: Two days
Case Study 2: Parking Lot Ding Repair
- Scenario: A car owner in Los Angeles, California, found a small but noticeable ding on their door after parking in a busy shopping center.
- Solution: The owner used a DIY dent repair kit purchased from CARDIAGTECH.NET to fix the ding.
- Results: The owner was able to successfully remove the ding and restore the door to its original condition.
- Cost: $50 (for the dent repair kit)
- Time: One hour
Case Study 3: Minor Collision Repair
- Scenario: A car owner in Houston, Texas, was involved in a minor collision, resulting in a large dent and paint damage to the rear quarter panel.
- Solution: The owner took the car to an auto body shop for repair.
- Results: The auto body shop repaired the dent, repainted the damaged area, and blended the new paint seamlessly with the surrounding paint.
- Cost: $1,500
- Time: Three days
Example 1: Using a Plunger on a Round Dent
- Scenario: A round dent on a car’s trunk, caused by a runaway basketball.
- Solution: Using a plunger to create suction and pop the dent out.
- Steps:
- Clean the area around the dent.
- Wet the plunger and the car surface.
- Place the plunger over the dent and push and pull firmly.
- Repeat until the dent pops out.
- Results: The dent popped out, restoring the trunk’s appearance.
Example 2: Hair Dryer and Compressed Air on a Bumper
- Scenario: A small, shallow dent on a plastic bumper.
- Solution: Using a hair dryer to heat the dent, followed by compressed air to cool it rapidly.
- Steps:
- Heat the dent with a hair dryer on a high setting for several minutes.
- Immediately spray compressed air onto the heated area.
- Repeat until the dent pops out.
- Results: The dent popped out, restoring the bumper’s appearance.
10. Addressing Customer Challenges with CARDIAGTECH.NET
We understand the challenges you face in maintaining and repairing your vehicle. At CARDIAGTECH.NET, we provide solutions tailored to your needs.
Common Customer Challenges:
- Physical Demands: Auto repair can be physically demanding, requiring strength and stamina.
- Our Solution: We offer ergonomic tools designed to reduce strain and improve comfort.
- Exposure to Chemicals: Frequent contact with oils and chemicals can be harmful.
- Our Solution: We provide safety gear, including gloves and respirators, to protect you from harmful substances.
- Keeping Up with Technology: The automotive industry is constantly evolving, requiring technicians to stay updated.
- Our Solution: We offer the latest tools and equipment to keep you ahead of the curve.
- Time Constraints: Meeting deadlines and managing time effectively can be challenging.
- Our Solution: Our tools are designed to improve efficiency and reduce repair times.
- Competition: Standing out from other repair shops requires offering high-quality service.
- Our Solution: We provide the tools and resources you need to deliver exceptional results.
- Finding Quality Tools: Sourcing reliable tools that meet your needs can be difficult.
- Our Solution: We offer a curated selection of top-quality tools from trusted brands.
Don’t let these challenges hold you back. Contact CARDIAGTECH.NET today at 276 Reock St, City of Orange, NJ 07050, United States, or call us at +1 (641) 206-8880 for expert advice and the best tools for your auto repair needs. Visit our website at CARDIAGTECH.NET to explore our full range of products and services. Let us help you enhance your efficiency, precision, and safety in every repair job.
Frequently Asked Questions (FAQ)
-
Can a dent in a car be fixed at home?
Yes, small, shallow dents can often be fixed at home using DIY methods such as a plunger, hair dryer, or dent puller kit.
-
What is paintless dent repair (PDR)?
PDR is a method of removing dents without damaging the paint, using specialized tools to massage the metal back to its original shape.
-
How much does paintless dent repair cost?
The cost of PDR varies depending on the size and location of the dent, typically ranging from $50 to $500.
-
When should I take my car to an auto body shop for dent repair?
You should take your car to an auto body shop for large dents, dents with paint damage, or dents affecting the vehicle’s structural integrity.
-
How much does it cost to repair a dent at an auto body shop?
The cost of auto body shop dent repair can range from hundreds to thousands of dollars, depending on the extent of the damage.
-
Can I use body filler to repair a dent myself?
Yes, body filler (Bondo) can be used to fill in dents and create a smooth surface, but it requires sanding and painting to achieve a seamless finish.
-
What tools do I need to repair a dent at home?
Tools you may need include a plunger, hair dryer, compressed air, dent puller kit, body filler, sandpaper, primer, and paint.
-
How can I prevent car dents?
You can prevent car dents by parking carefully, using a car cover, maintaining a safe driving distance, and regularly washing and waxing your car.
-
Is it worth repairing a dent in my car?
Yes, repairing a dent is generally worth it to maintain your car’s appearance, value, and structural integrity.
-
Where can I find high-quality dent repair tools?
You can find high-quality dent repair tools at CARDIAGTECH.NET, offering a wide selection of tools and equipment for both DIY and professional use.