How to Fix Cigarette Burn in Car Carpet: A Guide
Is your car carpet marred by an unsightly cigarette burn? Don’t fret. With the right tools and techniques, you can restore your car’s interior to its former glory. CARDIAGTECH.NET provides the essential equipment and knowledge to tackle this common problem. We’ll guide you through simple yet effective solutions, focusing on both DIY methods and when professional help might be needed. Repairing cigarette burns is easy and affordable with carpet repair kits, spot treatments and the right guidance.
1. Identifying the Severity of the Cigarette Burn
Before diving into any repair methods, it’s crucial to assess the extent of the damage. Cigarette burns can range from minor surface scorches to deep, penetrating damage that affects the carpet padding. Understanding the severity helps determine the most appropriate course of action. This initial evaluation saves time and resources by directing you toward the most effective repair strategy.
1.1. Minor Surface Scorch
A minor surface scorch typically involves the singeing or discoloration of the carpet fibers’ tips. The burn hasn’t penetrated deeply into the carpet backing, and the structural integrity of the carpet remains largely intact. These burns often appear as small, discolored spots, usually black or brown.
Characteristics of a Minor Surface Scorch:
- Affects only the tips of the carpet fibers.
- Minimal damage to the carpet backing.
- Small, discolored spots.
- No significant change in carpet texture.
Tools Needed:
- Small scissors
- Fine-grit sandpaper or emery board
- Vacuum cleaner with a brush attachment
Repair Steps:
- Trim Damaged Fibers: Use small scissors to carefully trim away the singed or discolored fiber tips. Avoid cutting too deep, focusing only on removing the damaged portions.
- Lightly Sand the Area: Gently sand the affected area with fine-grit sandpaper or an emery board to blend the trimmed fibers with the surrounding carpet. This step helps to smooth out the texture and reduce any visible difference.
- Vacuum Thoroughly: Use a vacuum cleaner with a brush attachment to remove any loose fibers or debris created during the trimming and sanding process. This ensures a clean surface for the repaired area.
- Optional – Spot Treatment: Apply a small amount of carpet spot cleaner to the area, following the product’s instructions. This can help to further reduce any discoloration and restore the carpet’s appearance.
- Allow to Dry: Let the area dry completely before using the carpet again. This prevents dirt and debris from sticking to the damp fibers.
1.2. Moderate Burn with Fiber Damage
A moderate burn involves more significant damage to the carpet fibers. The burn may have penetrated deeper, causing noticeable melting, fusing, or charring of the fibers. The carpet backing may also show some signs of damage.
Characteristics of a Moderate Burn:
- Significant damage to the carpet fibers, including melting, fusing, or charring.
- Possible damage to the carpet backing.
- Noticeable change in carpet texture.
- Larger discolored area compared to a surface scorch.
Tools Needed:
- Small scissors or utility knife
- Carpet adhesive
- Replacement carpet fibers or a small piece of matching carpet
- Vacuum cleaner with a brush attachment
- Tamping tool or heavy object
Repair Steps:
- Remove Damaged Fibers: Use small scissors or a utility knife to carefully remove the damaged carpet fibers. Cut away all the charred or melted portions, creating a clean, even surface.
- Prepare Replacement Fibers: Obtain replacement carpet fibers that closely match the color, texture, and material of the original carpet. These can be sourced from a hidden area of the car (under the seat) or from a carpet remnants store.
- Apply Carpet Adhesive: Apply a small amount of carpet adhesive to the affected area, ensuring even coverage.
- Insert Replacement Fibers: Carefully insert the replacement fibers into the adhesive, matching the direction and pattern of the surrounding carpet.
- Tamp Down the Area: Use a tamping tool or a heavy object to gently press the replacement fibers into the adhesive. This ensures a strong bond and helps to blend the repaired area with the rest of the carpet.
- Vacuum Thoroughly: Once the adhesive has dried, vacuum the area with a brush attachment to remove any loose fibers or debris.
1.3. Severe Burn with Backing Damage
A severe burn is characterized by extensive damage to both the carpet fibers and the carpet backing. The burn may have created a hole in the carpet, exposing the underlying floor. The structural integrity of the carpet is significantly compromised.
Characteristics of a Severe Burn:
- Extensive damage to both the carpet fibers and the carpet backing.
- A hole in the carpet.
- Significant compromise to the structural integrity of the carpet.
- Visible damage to the underlying floor.
Tools Needed:
- Utility knife
- Carpet patch (slightly larger than the damaged area)
- Carpet adhesive
- Seam sealer
- Vacuum cleaner with a brush attachment
- Tamping tool or heavy object
Repair Steps:
- Cut Out Damaged Area: Use a utility knife to carefully cut out the damaged area, creating a clean, square or rectangular shape.
- Prepare Carpet Patch: Obtain a carpet patch that closely matches the color, texture, and material of the original carpet. The patch should be slightly larger than the area you cut out.
- Apply Carpet Adhesive: Apply carpet adhesive to the edges of the cut-out area, ensuring even coverage.
- Insert Carpet Patch: Carefully insert the carpet patch into the cut-out area, aligning the edges as precisely as possible.
- Apply Seam Sealer: Apply seam sealer to the edges of the patch to prevent fraying and ensure a secure bond.
- Tamp Down the Area: Use a tamping tool or a heavy object to gently press the patch into the adhesive. This ensures a strong bond and helps to blend the repaired area with the rest of the carpet.
- Vacuum Thoroughly: Once the adhesive has dried, vacuum the area with a brush attachment to remove any loose fibers or debris.
Understanding the burn severity is the first step toward effective repair. Each type requires a tailored approach, ensuring you address the problem efficiently and achieve the best possible outcome.
2. Essential Tools and Materials
Before you start, gather the necessary tools and materials. Having everything on hand will streamline the repair process and ensure you achieve the best results. CARDIAGTECH.NET offers a comprehensive range of tools and materials tailored for car interior repairs.
2.1. For Minor Burns
These are the basic tools you’ll need for small cigarette burns:
- Small Scissors: For carefully trimming burnt fibers.
- Fine-Grit Sandpaper: To smooth out rough edges after trimming.
- Vacuum Cleaner with Brush Attachment: For removing loose debris.
- Carpet Spot Cleaner (Optional): To address discoloration.
- Tweezers: To pick out tiny debris.
2.2. For Moderate Burns
For slightly more extensive damage, you’ll need these additional items:
- Utility Knife: For cutting out larger sections of damaged carpet.
- Carpet Adhesive: To secure replacement fibers.
- Replacement Carpet Fibers: Matching the color and texture of your car’s carpet. These can often be sourced from under the seats or from a carpet remnant.
- Tamping Tool: For pressing the new fibers into the adhesive.
2.3. For Severe Burns
For the most significant damage, you’ll need the following:
- Carpet Patch: A piece of carpet that matches the original, slightly larger than the damaged area.
- Seam Sealer: To prevent fraying around the edges of the patch.
- Measuring Tape: To measure the dimensions of the damaged area.
Having these tools on hand ensures you are prepared for any level of damage. CARDIAGTECH.NET is your go-to source for high-quality tools and materials. Ensuring you have everything on hand will make the task easier and faster.
3. Step-by-Step Guide to Repairing Cigarette Burns
Now, let’s dive into the practical steps to fix that unsightly cigarette burn. We’ll cover three methods, each suited to different levels of damage.
3.1. Method 1: Trimming and Blending (For Minor Burns)
This method is best for minor surface scorches where the burn hasn’t deeply penetrated the carpet fibers.
Step 1: Trim the Burnt Fibers
Using small scissors, carefully trim away the burnt or singed tips of the carpet fibers. Be precise and avoid cutting into the healthy fibers. The goal is to remove the damaged portion while minimizing further disruption to the carpet’s texture.
Step 2: Lightly Sand the Area
Use fine-grit sandpaper to gently smooth the trimmed area. This helps to blend the treated spot with the surrounding carpet fibers, creating a more uniform appearance. Sand in a circular motion to avoid creating harsh lines.
Step 3: Vacuum the Area
Use a vacuum cleaner with a brush attachment to remove any loose fibers or debris created during the trimming and sanding process. This ensures a clean surface and prevents the spread of debris to other areas of your car’s interior.
Step 4: Spot Clean (Optional)
If discoloration persists, apply a small amount of carpet spot cleaner to a clean cloth and gently blot the affected area. Follow the product’s instructions and avoid over-saturating the carpet. Allow the area to dry completely.
3.2. Method 2: Fiber Replacement (For Moderate Burns)
This method is suitable for burns that have caused more significant damage to the carpet fibers but haven’t created a hole in the backing.
Step 1: Cut Out the Damaged Fibers
Using a utility knife, carefully cut out the damaged carpet fibers, creating a clean, even surface. Remove all the charred or melted portions, ensuring you have a solid base for the replacement fibers.
Step 2: Source Replacement Fibers
Obtain replacement carpet fibers that closely match the color, texture, and material of your car’s original carpet. You can often source these from a hidden area of the car, such as under the seats, or from a carpet remnants store.
Step 3: Apply Carpet Adhesive
Apply a small amount of carpet adhesive to the affected area, ensuring even coverage. Use a brush or applicator to spread the adhesive evenly, creating a consistent surface for the new fibers.
Step 4: Insert Replacement Fibers
Carefully insert the replacement fibers into the adhesive, matching the direction and pattern of the surrounding carpet. Use tweezers or a small tool to position the fibers precisely, ensuring they blend seamlessly with the existing carpet.
Step 5: Tamp Down the Area
Use a tamping tool or a heavy object to gently press the replacement fibers into the adhesive. This ensures a strong bond and helps to blend the repaired area with the rest of the carpet. Allow the adhesive to dry completely before proceeding.
3.3. Method 3: Patching (For Severe Burns)
For severe burns that have created a hole in the carpet, patching is the most effective solution.
Step 1: Cut Out the Damaged Area
Using a utility knife, carefully cut out the damaged area, creating a clean, square or rectangular shape. Be precise and ensure the edges are straight and even.
Step 2: Prepare a Carpet Patch
Obtain a carpet patch that closely matches the color, texture, and material of your car’s original carpet. The patch should be slightly larger than the area you cut out.
Step 3: Apply Carpet Adhesive
Apply carpet adhesive to the edges of the cut-out area, ensuring even coverage. Use a brush or applicator to spread the adhesive evenly, creating a consistent surface for the patch.
Step 4: Insert the Carpet Patch
Carefully insert the carpet patch into the cut-out area, aligning the edges as precisely as possible. Take your time to ensure the patch fits snugly and the pattern matches the surrounding carpet.
Step 5: Apply Seam Sealer
Apply seam sealer to the edges of the patch to prevent fraying and ensure a secure bond. Follow the product’s instructions and allow the sealer to dry completely.
Step 6: Tamp Down the Area
Use a tamping tool or a heavy object to gently press the patch into the adhesive. This ensures a strong bond and helps to blend the repaired area with the rest of the carpet. Allow the adhesive to dry completely before using the carpet.
By following these step-by-step guides, you can effectively repair cigarette burns in your car carpet and restore its appearance. Remember to take your time and use the right tools for the best results. For professional-grade tools and materials, visit CARDIAGTECH.NET.
4. Color Matching and Blending Techniques
One of the biggest challenges in repairing carpet burns is achieving a seamless blend between the repaired area and the surrounding carpet. Color matching and blending techniques are crucial for achieving a professional-looking result. These techniques enhance the appearance of the repaired area, making it blend seamlessly with the rest of the carpet.
4.1. Sourcing Matching Fibers
The key to successful color matching is sourcing replacement fibers or a carpet patch that closely matches the original carpet.
- Hidden Areas: Check for hidden areas in your car, such as under the seats or in the trunk, where you can cut out small carpet fibers or a patch without affecting the visible areas.
- Carpet Remnants Stores: Visit local carpet remnants stores to find a matching piece of carpet. Bring a sample of your car’s carpet to compare colors and textures.
- Online Retailers: Explore online retailers that specialize in carpet remnants or automotive carpet. Be sure to request samples to ensure a close match.
4.2. Blending Techniques
Even with a close color match, blending techniques are essential to create a seamless transition between the repaired area and the surrounding carpet.
- Feathering: When inserting replacement fibers, feather the edges by gradually reducing the density of the fibers as you move outward. This creates a softer transition and prevents a harsh line.
- Texturing: Use a small brush or comb to mimic the texture of the surrounding carpet. Gently brush the replacement fibers to match the direction and pattern of the original carpet.
- Color Adjustment: If the replacement fibers are slightly off in color, you can use fabric dyes to adjust the shade. Test the dye on a small, inconspicuous area first to ensure it matches the desired color.
4.3. Professional Color Matching Services
If you’re struggling to find a close color match or blend the repaired area seamlessly, consider seeking professional color matching services.
- Carpet Repair Specialists: Many carpet repair specialists offer color matching services. They use specialized tools and techniques to create a custom dye that perfectly matches your carpet.
- Automotive Upholstery Shops: Automotive upholstery shops can often provide color matching services for car interiors. They have experience working with a variety of materials and can create a seamless repair.
By mastering color matching and blending techniques, you can achieve a professional-looking repair that seamlessly integrates with your car’s original carpet.
5. Preventing Future Cigarette Burns
Once you’ve successfully repaired the cigarette burn, it’s essential to take steps to prevent future damage. Implementing preventive measures protects your car’s interior, saving you time and money in the long run.
5.1. Car Ashtrays and Receptacles
- Use Car Ashtrays: Encourage passengers to use car ashtrays or receptacles for cigarette butts. Ensure the ashtrays are easily accessible and regularly emptied to prevent overflowing.
- Portable Ashtrays: Provide portable ashtrays for passengers who prefer to smoke outside the car. These ashtrays can be easily carried and disposed of properly.
5.2. Seat Covers and Floor Mats
- Protective Seat Covers: Install protective seat covers to shield your car’s upholstery from burns and stains. Choose seat covers made from durable, heat-resistant materials.
- Durable Floor Mats: Use durable floor mats to protect your car’s carpet from burns, spills, and dirt. Opt for floor mats with a non-slip backing to prevent them from shifting.
5.3. Educating Passengers
- Inform Passengers: Inform passengers about your no-smoking policy or designated smoking areas. Politely request them to use ashtrays or portable receptacles.
- Provide Reminders: Place small reminders, such as stickers or signs, in your car to remind passengers about your smoking policy.
5.4. Regular Cleaning and Maintenance
- Vacuum Regularly: Vacuum your car’s interior regularly to remove loose debris and prevent dirt from accumulating. Use a brush attachment to clean carpets and upholstery.
- Spot Cleaning: Address spills and stains immediately to prevent them from setting. Use a carpet spot cleaner or a mild detergent solution to clean affected areas.
By implementing these preventive measures, you can significantly reduce the risk of future cigarette burns and maintain the appearance of your car’s interior. These steps are simple yet effective, preserving the value and comfort of your vehicle.
6. DIY vs. Professional Repair: Which is Right for You?
Deciding whether to tackle a cigarette burn repair yourself or hire a professional depends on several factors, including the severity of the damage, your skill level, and your budget. This comparison helps you make an informed decision based on your circumstances.
6.1. DIY Repair
Pros:
- Cost-Effective: DIY repairs are generally more affordable than professional services, as you only need to pay for the necessary tools and materials.
- Convenient: You can complete the repair at your own pace and on your own schedule, without having to wait for an appointment.
- Sense of Accomplishment: Successfully repairing a cigarette burn yourself can provide a sense of satisfaction and accomplishment.
Cons:
- Time-Consuming: DIY repairs can be time-consuming, especially if you’re not experienced with carpet repair techniques.
- Potential for Mistakes: If you’re not careful, you could make mistakes that worsen the damage or result in a less-than-perfect repair.
- Limited Results: DIY repairs may not achieve the same level of seamlessness and durability as professional repairs.
6.2. Professional Repair
Pros:
- Expertise and Experience: Professional carpet repair technicians have the expertise and experience to handle even the most challenging repairs.
- High-Quality Results: Professionals can achieve a seamless and durable repair that seamlessly integrates with your car’s original carpet.
- Time-Saving: Hiring a professional saves you time and effort, as they can complete the repair quickly and efficiently.
Cons:
- Higher Cost: Professional repairs are generally more expensive than DIY repairs, as you’re paying for the technician’s expertise and labor.
- Scheduling Conflicts: You may need to schedule an appointment and wait for the technician to become available.
- Less Control: You have less control over the repair process, as you’re relying on the technician to make decisions and perform the work.
6.3. Making the Decision
Consider the following factors when deciding whether to DIY or hire a professional:
- Severity of the Damage: For minor surface scorches, DIY repair is often sufficient. For moderate to severe burns, professional repair may be necessary.
- Skill Level: If you’re comfortable with basic carpet repair techniques and have the necessary tools, DIY repair may be a good option. If you’re not confident in your skills, it’s best to hire a professional.
- Budget: DIY repair is generally more affordable, but professional repair may be worth the investment if you want the best possible results.
7. Cost Analysis: DIY vs. Professional Repair
Understanding the costs associated with both DIY and professional repair options helps you make an informed decision based on your budget and needs. This analysis breaks down the expenses, providing a clear comparison.
7.1. DIY Repair Costs
DIY repair costs vary depending on the severity of the damage and the tools and materials you need to purchase.
Minor Burn:
- Small Scissors: $5 – $10
- Fine-Grit Sandpaper: $3 – $5
- Vacuum Cleaner with Brush Attachment: (Assuming you already have one)
- Carpet Spot Cleaner: $5 – $10
Total Estimated Cost: $13 – $25
Moderate Burn:
- Utility Knife: $10 – $15
- Carpet Adhesive: $8 – $12
- Replacement Carpet Fibers: $10 – $20
- Tamping Tool: $10 – $15
Total Estimated Cost: $38 – $62
Severe Burn:
- Carpet Patch: $15 – $30
- Seam Sealer: $8 – $12
Total Estimated Cost: $61 – $99
7.2. Professional Repair Costs
Professional repair costs vary depending on the severity of the damage, the complexity of the repair, and the rates charged by the technician.
Average Costs:
- Minor Burn: $50 – $100
- Moderate Burn: $100 – $200
- Severe Burn: $200 – $400
7.3. Cost Comparison
| Repair Type | DIY Estimated Cost | Professional Estimated Cost |
|---|---|---|
| Minor Burn | $13 – $25 | $50 – $100 |
| Moderate Burn | $38 – $62 | $100 – $200 |
| Severe Burn | $61 – $99 | $200 – $400 |
7.4. Additional Considerations
- Tool Investment: If you don’t already own some of the necessary tools, such as a utility knife or tamping tool, you’ll need to factor in the cost of purchasing them.
- Time Investment: Consider the value of your time when deciding whether to DIY or hire a professional. DIY repairs can be time-consuming, especially if you’re not experienced with carpet repair techniques.
- Quality of Results: Professional repairs typically achieve a higher level of seamlessness and durability than DIY repairs.
8. Advanced Techniques for Difficult Burns
Certain types of burns, such as those on intricate carpet patterns or those that have caused significant discoloration, require advanced repair techniques. These methods are used for more complex repairs, ensuring the best possible outcome.
8.1. Pattern Matching
- Intricate Patterns: Repairing burns on carpets with intricate patterns requires careful attention to detail. Use a utility knife to precisely cut out the damaged area, following the lines of the pattern.
- Patch Placement: When inserting the carpet patch, align the pattern perfectly with the surrounding carpet. Use a magnifying glass or a detailed photograph to ensure accurate alignment.
8.2. Color Correction
- Discoloration: If the burn has caused significant discoloration, you may need to use color correction techniques to restore the carpet’s original color.
- Fabric Dyes: Use fabric dyes to carefully blend the repaired area with the surrounding carpet. Test the dye on a small, inconspicuous area first to ensure it matches the desired color.
8.3. Fiber Blending
- Texture Matching: To create a seamless transition between the repaired area and the surrounding carpet, use fiber blending techniques to match the texture of the original carpet.
- Combing: Use a small brush or comb to gently blend the replacement fibers with the existing carpet. Match the direction and pattern of the original carpet fibers.
8.4. Professional Assistance
- Complex Repairs: For complex repairs that require advanced techniques, consider seeking professional assistance. Carpet repair specialists have the expertise and tools to handle even the most challenging repairs.
9. Maintaining Your Car Carpet After Repair
After successfully repairing a cigarette burn, proper maintenance is essential to preserve the appearance and longevity of your car carpet. Regular maintenance prevents future damage and keeps your car’s interior looking its best.
9.1. Regular Vacuuming
- Frequency: Vacuum your car carpet regularly, at least once a week, to remove loose debris and prevent dirt from accumulating.
- Technique: Use a vacuum cleaner with a brush attachment to thoroughly clean the carpet fibers. Pay special attention to high-traffic areas and areas prone to spills.
9.2. Spot Cleaning
- Immediate Action: Address spills and stains immediately to prevent them from setting. Use a carpet spot cleaner or a mild detergent solution to clean affected areas.
- Blotting: Blot the stain gently with a clean cloth, working from the outside inward. Avoid rubbing the stain, as this can spread it and damage the carpet fibers.
9.3. Deep Cleaning
- Frequency: Deep clean your car carpet every few months to remove embedded dirt and grime. Use a carpet cleaner or hire a professional carpet cleaning service.
- Steam Cleaning: Steam cleaning is an effective method for deep cleaning car carpets. The hot steam penetrates the carpet fibers, loosening dirt and killing bacteria.
9.4. Protective Measures
- Floor Mats: Use durable floor mats to protect your car carpet from dirt, spills, and wear. Choose floor mats that are specifically designed for automotive use and have a non-slip backing.
- Seat Covers: Install protective seat covers to shield your car’s upholstery from stains and damage. Choose seat covers made from durable, stain-resistant materials.
9.5. Professional Detailing
- Regular Detailing: Consider having your car professionally detailed every year to keep it in top condition. Professional detailers have the expertise and equipment to thoroughly clean and protect your car’s interior.
10. Eco-Friendly Solutions for Carpet Repair
For those conscious about the environment, eco-friendly solutions offer a sustainable approach to carpet repair. These methods minimize environmental impact while effectively addressing cigarette burns.
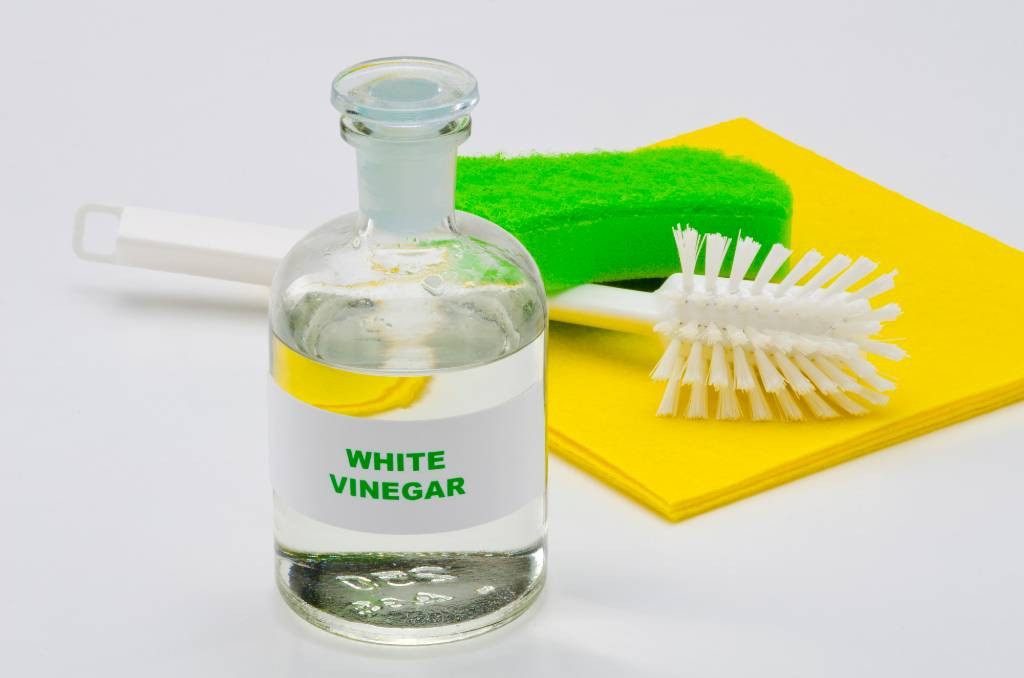
10.1. Natural Cleaning Products
- Vinegar Solution: A mixture of white vinegar and water can be used as a natural carpet cleaner. Vinegar is effective at removing stains and odors without the use of harsh chemicals.
- Baking Soda: Baking soda is a natural deodorizer and can be used to absorb odors from your car carpet. Sprinkle baking soda on the carpet, let it sit for a few hours, and then vacuum it up.
10.2. Sustainable Materials
- Recycled Carpet Fibers: When sourcing replacement carpet fibers, look for options made from recycled materials. Recycled carpet fibers are an eco-friendly alternative to virgin materials.
- Natural Adhesives: Use natural adhesives, such as those made from plant-based ingredients, to secure replacement fibers or carpet patches.
10.3. DIY Green Repair Kit
- Eco-Friendly Tools: Assemble a DIY green repair kit with eco-friendly tools and materials. Include items such as bamboo scissors, recycled sandpaper, and natural cleaning products.
- Sustainable Practices: Follow sustainable practices throughout the repair process. Minimize waste by using only the necessary materials and disposing of waste responsibly.
10.4. Professional Green Services
- Eco-Conscious Detailers: Seek out professional car detailers who use eco-friendly cleaning products and sustainable practices. These detailers can provide a thorough cleaning while minimizing environmental impact.
11. Legal and Insurance Considerations
While repairing a cigarette burn in your car carpet may seem like a minor issue, it’s essential to consider any potential legal or insurance implications. Being aware of these aspects ensures you handle the situation responsibly.
11.1. Lease Agreements
- Review Your Lease: If you’re leasing your car, review your lease agreement to determine any specific requirements regarding interior damage. Some lease agreements may require you to repair any damage before returning the car.
- Professional Repair: If your lease agreement requires professional repair, be sure to obtain documentation from the repair technician to prove that the work was completed.
11.2. Insurance Claims
- Comprehensive Coverage: If the cigarette burn was caused by an accident or other covered event, you may be able to file an insurance claim to cover the cost of repair.
- Deductible: Keep in mind that you’ll likely need to pay a deductible before your insurance coverage kicks in. Determine whether the cost of repair exceeds your deductible before filing a claim.
11.3. Resale Value
- Impact on Value: Cigarette burns can negatively impact your car’s resale value. Repairing the damage can help to restore the car’s appearance and maintain its value.
- Disclosure: When selling your car, be honest about any previous damage and repairs. Disclosing this information can help to build trust with potential buyers.
12. Common Mistakes to Avoid When Repairing Carpet Burns
Even with the best intentions, it’s easy to make mistakes when repairing carpet burns. Knowing what to avoid can save you time, money, and frustration.
12.1. Using the Wrong Tools
- Appropriate Tools: Using the wrong tools can damage the carpet or result in a less-than-perfect repair. Be sure to use the appropriate tools for the specific type of burn and repair method.
- Sharp Blades: Use sharp blades when cutting out damaged fibers or carpet patches. Dull blades can tear the carpet and make it difficult to achieve a clean cut.
12.2. Over-Saturating the Carpet
- Moisture Control: Over-saturating the carpet with cleaning solutions can cause mold and mildew growth. Use cleaning solutions sparingly and blot the carpet dry with a clean cloth.
- Drying Time: Allow the carpet to dry completely before using it again. Use a fan or dehumidifier to speed up the drying process.
12.3. Neglecting Color Matching
- Close Match: Neglecting color matching can result in a repair that stands out and detracts from the overall appearance of your car’s interior. Take the time to source replacement fibers or a carpet patch that closely matches the original carpet.
- Blending Techniques: Use blending techniques to create a seamless transition between the repaired area and the surrounding carpet.
12.4. Rushing the Repair
- Patience: Rushing the repair process can lead to mistakes and a less-than-perfect result. Take your time and follow the steps carefully to ensure a successful repair.
- Attention to Detail: Pay attention to detail throughout the repair process. Precision and accuracy are essential for achieving a seamless and durable repair.
13. The Future of Car Interior Repair Technology
The field of car interior repair is constantly evolving, with new technologies and techniques emerging to improve the quality and efficiency of repairs. Staying informed about these advancements can help you make the best decisions for your car.
13.1. Advanced Materials
- Self-Healing Materials: Researchers are developing self-healing materials that can automatically repair minor damage, such as scratches and burns. These materials could revolutionize the way car interiors are maintained.
- Smart Textiles: Smart textiles are fabrics that incorporate electronic components, such as sensors and actuators. These textiles could be used to monitor the condition of car interiors and automatically trigger repairs when damage is detected.
13.2. Robotic Repair Systems
- Automated Repairs: Robotic repair systems are being developed to automate the process of car interior repair. These systems use robots to perform tasks such as cutting, patching, and blending carpet fibers.
- Precision and Efficiency: Robotic repair systems offer greater precision and efficiency than manual repair methods. They can complete repairs quickly and accurately, reducing the time and cost of maintenance.
13.3. 3D Printing
- Custom Parts: 3D printing technology can be used to create custom replacement parts for car interiors. This allows for precise matching of colors, textures, and patterns, resulting in a seamless repair.
- On-Demand Manufacturing: 3D printing enables on-demand manufacturing of car interior parts. This reduces the need for large inventories and allows for rapid customization.
14. How CARDIAGTECH.NET Can Help
CARDIAGTECH.NET is your trusted partner for all your car interior repair needs. We offer a comprehensive range of tools, materials, and expertise to help you restore your car’s interior to its former glory.
14.1. High-Quality Tools and Materials
- Wide Selection: CARDIAGTECH.NET offers a wide selection of high-quality tools and materials for car interior repair, including scissors, utility knives, carpet adhesives, and replacement carpet fibers.
- Durable Products: Our products are designed to be durable and long-lasting, ensuring that you get the best value for your money.
14.2. Expert Advice and Guidance
- Knowledgeable Staff: Our knowledgeable staff is available to provide expert advice and guidance on all aspects of car interior repair. We can help you choose the right tools and materials for your specific needs.
- Step-by-Step Instructions: CARDIAGTECH.NET provides step-by-step instructions and tutorials to guide you through the repair process. Our resources are designed to be easy to understand and follow, even for beginners.
14.3. Convenient Online Shopping
- Easy Ordering: CARDIAGTECH.NET offers convenient online shopping, allowing you to browse our products and place orders from the comfort of your own home.
- Fast Shipping: We offer fast shipping to ensure that you receive your order quickly and efficiently.
14.4. Customer Satisfaction Guarantee
- Commitment: CARDIAGTECH.NET is committed to customer satisfaction. If you’re not completely satisfied with your purchase, we offer a hassle-free return policy.
- Support: Our customer support team is available to answer any questions or concerns you may have.
15. FAQ: Fixing Cigarette Burns in Car Carpet
Here are some frequently asked questions about repairing cigarette burns in car carpets:
- Can I use household cleaning products to clean my car carpet?
- While some household cleaners may work, it’s best to use products specifically designed for car carpets to avoid damage or discoloration.
- How do I find replacement carpet fibers that match my car’s original carpet?
- Check hidden areas of your car, such as under the seats or in the trunk, for spare fibers. You can also visit local carpet remnants stores or online retailers.
- What is the best way to remove odors from my car carpet after repairing a cigarette burn?
- Sprinkle baking soda on the carpet, let it sit for a few hours, and then vacuum it up. You can also use a carpet deodorizer or a professional detailing service.
- Can I repair a cigarette burn myself, or should I hire a professional?
- The decision depends on the severity of the damage, your skill level, and your budget. For minor burns, DIY repair may be sufficient, but for more severe damage, professional repair is recommended.
- How much does it cost to repair a cigarette burn in a car carpet?
- DIY repair costs range from $13 to $99, depending on the severity of the damage and the tools and materials you need to purchase. Professional repair costs range from $50 to $400.
- What are some common mistakes to avoid when repairing carpet burns?
- Avoid using the wrong tools, over-saturating the carpet, neglecting color matching, and rushing the repair process.
- How can I prevent future cigarette burns in my car?
- Use car ashtrays or receptacles, install protective seat covers and floor mats, educate passengers about your no-smoking policy, and vacuum your car regularly.
- Are there any eco-friendly solutions for repairing carpet burns?
- Yes, you can use natural cleaning products, sustainable materials, and DIY green repair kits