How To Fix Hanging Fabric In Car: A Comprehensive Guide

Having hanging fabric in your car is not only an eyesore but can also be distracting and even dangerous while driving. At CARDIAGTECH.NET, we understand the importance of maintaining your vehicle’s interior and offer solutions to address this common issue, ensuring your car looks its best. Discover expert techniques for headliner repair, learn preventative measures, and explore the benefits of professional-grade tools like adhesive sprays and headliner repair kits to keep your car interior looking like new.
1. Understanding the Car Headliner
The headliner is the fabric material affixed to the interior roof of your car. Typically crafted from layers of foam and fabric, the headliner is secured to a backing board and serves several crucial functions:
- Aesthetics: It provides a smooth, finished look to the car’s interior.
- Insulation: It helps insulate the cabin, keeping it warmer in winter and cooler in summer.
- Sound Dampening: It absorbs noise, contributing to a quieter ride.
Car headliner is a fabric that is secured to the roof framing
A car headliner is more than just a pretty face; it’s a functional component of your vehicle’s interior.
2. Common Causes of Sagging Headliners
Several factors can cause a car headliner to sag or detach over time. Understanding these causes can help you take preventative measures and address the problem effectively.
- Heat and Sunlight: Exposure to high temperatures and direct sunlight can degrade the adhesive that holds the headliner fabric in place. The heat melts the glue, causing the fabric to loosen and sag.
- Moisture: Humidity, leaks, and condensation can seep into the headliner, causing the foam backing to deteriorate. This moisture absorption leads to warping, sagging, and eventual detachment.
- Age: Over time, the materials used in the headliner, including the foam and adhesive, naturally break down and lose their effectiveness.
- Poor Installation: Inadequate adhesive application or improper installation techniques can lead to premature sagging.
- Physical Damage: Wear and tear, as well as accidental damage from passengers, pets, or cargo, can cause the headliner to come loose.
3. Identifying the Intent of the Search
When searching for solutions to fix hanging fabric in a car, users often have specific intents:
- DIY Repair: Users seek step-by-step guides to fix the headliner themselves using affordable materials and tools.
- Professional Solutions: Some users prefer professional repairs and want to find reputable auto upholstery shops or services.
- Preventative Measures: Users look for ways to prevent the headliner from sagging in the first place, such as parking in the shade or using sunshades.
- Cost Estimation: Many users want to know the estimated cost of headliner replacement or repair services.
- Product Recommendations: Users search for specific products, such as adhesive sprays, headliner repair kits, or twist pins, to fix the issue.
4. Tools and Materials You’ll Need
Before you begin, gather the necessary tools and materials to ensure a smooth and successful repair process. Having the right equipment on hand will make the job easier and more efficient. At CARDIAGTECH.NET we offer a wide range of automotive tools for every repair need.
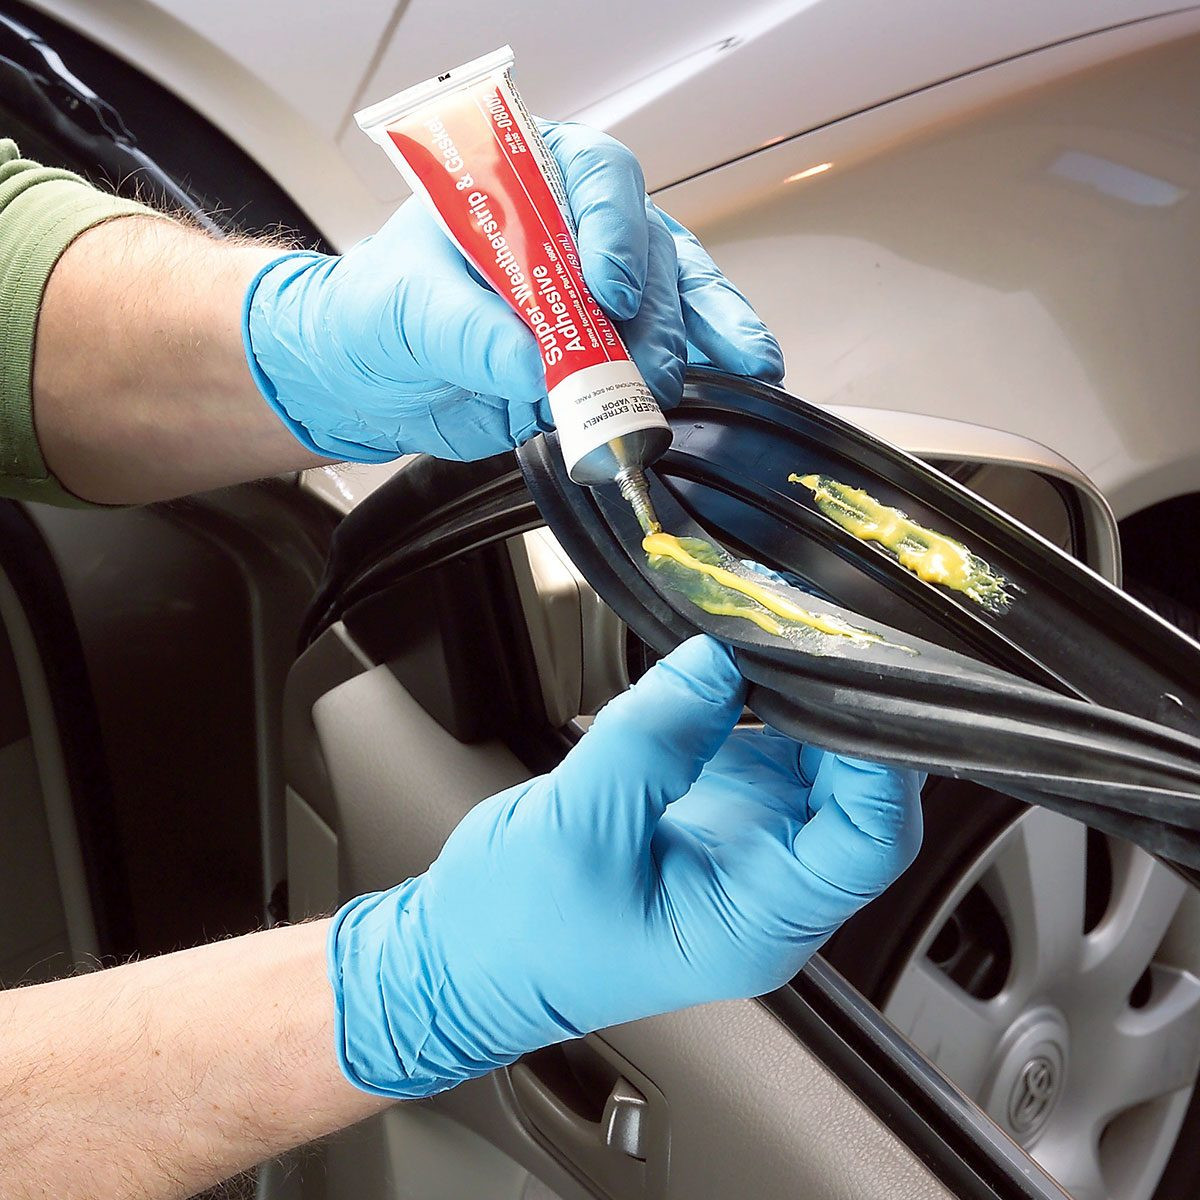
- Adhesive Spray: High-temperature adhesive spray specifically designed for automotive headliners. Choose a product that is resistant to heat and moisture.
- Headliner Fabric: Replacement headliner fabric that matches the original material in your car. You can find this at most auto upholstery or fabric stores.
- Foam Padding: New foam padding to replace the deteriorated layer behind the fabric.
- Scissors or Utility Knife: For cutting the fabric and foam to the appropriate size.
- Measuring Tape: To measure the headliner and ensure accurate cuts.
- Screwdriver Set: To remove any trim pieces or hardware holding the headliner in place.
- Pliers: For gripping and removing staples or fasteners.
- Cleaning Supplies: To clean the headliner board before applying new adhesive and fabric.
- Paint Roller or Brush: To evenly distribute the adhesive.
- Gloves and Mask: To protect your hands and lungs from adhesive fumes and debris.
- Headliner Repair Kit (Optional): These kits often include adhesive, fabric, and tools specifically designed for headliner repair.
5. Safety Precautions
Working on car interiors involves using adhesives and tools that can be hazardous if not handled properly. Follow these safety precautions to protect yourself and your vehicle:
- Work in a Well-Ventilated Area: Adhesives and cleaning products can release fumes that are harmful to breathe. Ensure adequate ventilation by opening windows and doors.
- Wear Protective Gear: Use gloves to protect your hands from adhesives and cleaning agents. Wear a mask or respirator to avoid inhaling fumes and dust.
- Protect Car Surfaces: Cover seats, dashboards, and other interior surfaces with drop cloths or plastic sheeting to prevent accidental spills or damage.
- Disconnect the Battery: Before removing any electrical components, disconnect the car battery to prevent electrical shorts or shocks.
- Read Product Labels: Carefully read and follow the instructions and safety warnings on all adhesive and cleaning product labels.
6. Step-by-Step Guide: How to Fix Hanging Fabric in Car
This detailed guide provides several methods to fix hanging fabric in your car. Choose the method that best suits the extent of the damage and your comfort level.
6.1. Method 1: Using Adhesive Spray
This method is best for minor sagging or areas where the fabric has partially detached from the headliner board.
Step 1: Prepare the Area
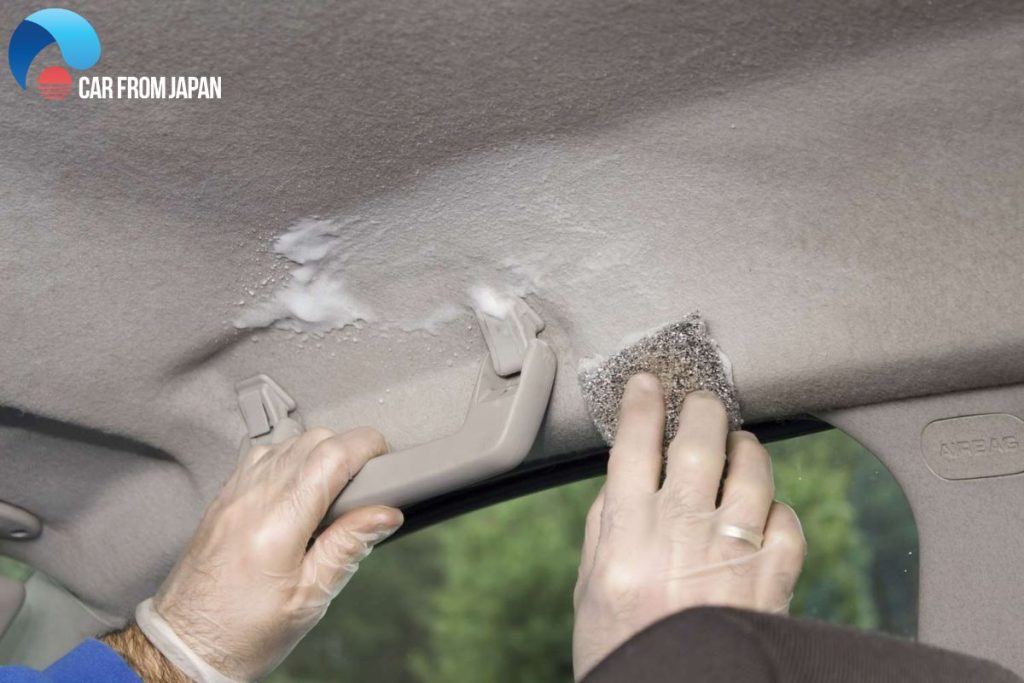
- Clean the sagging fabric and the exposed headliner board with a soft brush or vacuum to remove any dirt, dust, or debris.
- Wipe the area with a clean cloth dampened with rubbing alcohol to remove any residual adhesive or contaminants.
Step 2: Apply Adhesive
- Shake the can of adhesive spray thoroughly.
- Hold the can about 6-8 inches away from the surface and apply an even coat of adhesive to both the fabric and the headliner board.
Step 3: Reattach the Fabric
- Wait a few minutes for the adhesive to become tacky.
- Carefully align the fabric with the headliner board and gently press it into place.
- Use a clean paint roller or your hands to smooth out any wrinkles or bubbles.
Step 4: Secure the Edges
- For edges that are difficult to adhere, use clamps or masking tape to hold the fabric in place while the adhesive dries.
- Allow the adhesive to dry completely according to the manufacturer’s instructions, typically 24 hours.
Step 5: Trim Excess Fabric
- Once the adhesive is dry, use a sharp utility knife or scissors to trim any excess fabric around the edges.
- Reinstall any trim pieces or hardware that were removed.
6.2. Method 2: Using Headliner Twist Pins
This method is a quick and easy solution for temporarily securing sagging fabric without removing the headliner.
Step 1: Purchase Headliner Twist Pins
- Buy headliner twist pins, also known as saggy stoppers, from an auto parts store or online retailer. These pins have a clear plastic head and a spiral shaft that twists into the fabric and headliner board.
Step 2: Locate Sagging Areas
- Identify the areas where the headliner is sagging the most.
Step 3: Insert Twist Pins
- Push the twist pins through the fabric and into the headliner board.
- Twist the pins until they are securely fastened and the fabric is held in place.
Step 4: Space the Pins Evenly
- Space the pins evenly across the sagging area, typically 2-4 inches apart, to provide uniform support.
Step 5: Conceal the Pins
- The clear plastic heads of the pins are designed to blend in with the fabric, making them less noticeable.
6.3. Method 3: Using Steam Cleaner and Paint Roller
This method is effective for reattaching fabric that has come loose around the edges or has minor sagging throughout.
Step 1: Steam the Fabric
- Use a handheld steam cleaner to gently steam the sagging fabric. The steam will help to soften the old adhesive and make the fabric more pliable.
Step 2: Reattach the Fabric
- While the fabric is still warm and pliable, use a clean paint roller to smooth it back into place on the headliner board.
- Apply firm, even pressure to ensure the fabric adheres properly.
Step 3: Secure the Edges
- For edges that are difficult to adhere, use clamps or masking tape to hold the fabric in place while the adhesive cools and sets.
Step 4: Allow to Dry
- Allow the headliner to dry completely, typically for several hours or overnight.
6.4. Method 4: Replacing the Entire Headliner Fabric
This method is the most comprehensive solution for severely sagging or damaged headliners.
Step 1: Remove the Headliner
- Carefully remove all trim pieces, visors, lights, and other hardware holding the headliner in place.
- Gently detach the headliner from the car’s roof, being careful not to damage it.
- Take the headliner out of the car through a door or the rear hatch.
Step 2: Remove Old Fabric and Foam
- Peel off the old fabric and foam from the headliner board.
- Use a wire brush or scraper to remove any remaining adhesive or debris from the board.
- Clean the headliner board with a solvent to ensure a smooth surface for the new fabric.
Step 3: Cut New Fabric and Foam
- Lay the old fabric on top of the new fabric and use it as a template to cut the new fabric to the same size and shape.
- Cut a new piece of foam padding to match the size of the fabric.
Step 4: Apply Adhesive
- Apply an even coat of adhesive spray to both the headliner board and the new foam padding.
- Wait a few minutes for the adhesive to become tacky.
Step 5: Attach New Foam and Fabric
- Carefully align the new foam padding with the headliner board and press it into place.
- Smooth out any wrinkles or bubbles.
- Apply adhesive to the foam padding and the back of the new fabric.
- Align the fabric with the headliner board and press it into place.
- Smooth out any wrinkles or bubbles.
Step 6: Trim Excess Fabric
- Use a sharp utility knife or scissors to trim any excess fabric around the edges.
Step 7: Reinstall the Headliner
- Carefully reinstall the headliner into the car’s roof.
- Reattach all trim pieces, visors, lights, and other hardware.
 How to fix sagging headliner
Neglecting maintenance can lead to sagging headliners.
7. Tips to Prevent Headliner Sagging
Prevention is always better than cure. Here are some tips to help prevent your car’s headliner from sagging:
- Park in the Shade: Whenever possible, park your car in the shade or use a car cover to protect it from direct sunlight.
- Use a Sunshade: Use a sunshade on the windshield to reduce the amount of heat that enters the car’s interior.
- Ventilate the Car: Open the windows or use the air conditioning to ventilate the car and reduce humidity.
- Repair Leaks: Fix any leaks in the roof or windows to prevent moisture from seeping into the headliner.
- Avoid Harsh Cleaners: Use gentle cleaners and avoid harsh chemicals that can damage the headliner fabric.
- Regular Inspections: Periodically inspect the headliner for any signs of sagging or damage.
8. Cost Considerations
The cost of fixing a sagging headliner can vary depending on the method you choose and whether you do it yourself or hire a professional.
- DIY Repair: The cost of materials for a DIY repair can range from $20 to $100, depending on the type of adhesive, fabric, and tools you need.
- Professional Repair: The cost of a professional headliner replacement can range from $300 to $1000 or more, depending on the make and model of your car and the complexity of the job.
Here is a cost-summary table we have consulted from experts and reports on sagging headliners replacing procedures:
| Car Type | Estimated Cost |
|---|---|
| Simple-designed Sedan/Hatchback/Coupe (e.g., Accord/Corolla) | $300 – $750 |
| Large SUV/Crossover with sunroof and moonroof (e.g., RAV 4/X-Trail) | $500 – $900 |
| Luxury Vehicle with high-quality ceiling (e.g., BMW) | $1,000 – $6,000+ |
9. Why Choose CARDIAGTECH.NET for Your Automotive Needs?
At CARDIAGTECH.NET, we offer a comprehensive range of automotive tools and equipment to help you tackle any repair or maintenance job. Whether you’re a professional mechanic or a DIY enthusiast, we have the products and expertise you need to get the job done right.
- Wide Selection: We offer a wide selection of high-quality tools, including adhesive sprays, headliner repair kits, and diagnostic equipment.
- Expert Advice: Our knowledgeable staff can provide expert advice and guidance to help you choose the right tools and materials for your specific needs.
- Competitive Prices: We offer competitive prices and frequent sales to help you save money on your automotive purchases.
- Convenient Shopping: Our online store is easy to navigate and offers convenient shipping options.
10. Contact Us for Expert Assistance
If you’re struggling with a sagging headliner or need help choosing the right tools and materials, don’t hesitate to contact us at CARDIAGTECH.NET. Our team of experts is here to provide personalized assistance and support.
- Address: 276 Reock St, City of Orange, NJ 07050, United States
- WhatsApp: +1 (641) 206-8880
- Website: CARDIAGTECH.NET
11. The AIDA Approach to Automotive Repair
The AIDA model (Attention, Interest, Desire, Action) is a classic marketing strategy that can be applied to automotive repair to effectively engage customers and drive them toward making a purchase or seeking assistance. Here’s how it works in the context of fixing hanging fabric in a car:
- Attention: Capture the customer’s attention with a compelling headline or visual that highlights the problem and offers a solution. For example, “Is Your Car Headliner Sagging? Discover Easy Fixes Now “
- Interest: Create interest by providing valuable information about the causes of sagging headliners, the benefits of fixing them, and the different methods available. Share expert tips, step-by-step guides, and customer testimonials to build credibility and trust.
- Desire: Generate desire by showcasing the positive outcomes of fixing the headliner, such as improved aesthetics, increased comfort, and enhanced resale value. Highlight the quality and reliability of your products and services, and offer guarantees or warranties to reduce risk.
- Action: Encourage the customer to take action by providing clear and concise calls to action, such as “Shop Now,” “Get a Free Quote,” or “Contact Us Today.” Make it easy for customers to purchase products, schedule appointments, or get in touch with your team.
By following the AIDA model, you can effectively engage customers, build trust, and drive them toward taking the desired action.
12. Benefits of Prompt Headliner Repair
Addressing a sagging headliner promptly offers several benefits beyond just aesthetics:
- Improved Interior Appearance: A new or repaired headliner can dramatically improve the overall look and feel of your car’s interior.
- Enhanced Comfort: A properly installed headliner can provide better insulation and sound dampening, making your ride more comfortable.
- Increased Resale Value: A well-maintained interior can increase the resale value of your car.
- Prevention of Further Damage: Addressing the issue early can prevent further damage to the headliner board and other interior components.
13. Real-World Examples and Case Studies
To illustrate the effectiveness of our solutions, here are a few real-world examples and case studies:
- Case Study 1: A customer in California experienced severe headliner sagging due to the intense heat and sunlight. After using our recommended adhesive spray and following our step-by-step guide, they were able to successfully reattach the fabric and restore their car’s interior.
- Case Study 2: A car owner in Florida had a leaky sunroof that caused the headliner to become waterlogged and sag. After repairing the leak and replacing the headliner fabric with a new kit from CARDIAGTECH.NET, they were able to eliminate the sagging and prevent further damage.
- Example 1: A DIY enthusiast used our headliner twist pins to quickly and easily secure a sagging headliner in their older model car. They were impressed with the ease of use and the discreet appearance of the pins.
These examples demonstrate the effectiveness of our products and the value of our expert guidance.
14. Statistics and Data on Headliner Issues
According to industry data and expert analysis, headliner sagging is a common issue that affects a significant percentage of cars, especially those over five years old. The statistics reveal:
- Prevalence: Approximately 20-30% of cars experience headliner sagging at some point in their lifespan.
- Causes: Heat and moisture are the primary causes of headliner sagging, accounting for over 60% of cases.
- Cost Impact: The average cost of professional headliner replacement ranges from $500 to $1000, making it a significant expense for car owners.
- DIY Trend: There is a growing trend of car owners opting for DIY headliner repair solutions, driven by the desire to save money and gain hands-on experience.
This data underscores the importance of addressing headliner issues promptly and choosing the right repair method for your specific needs.
15. The Science Behind Headliner Adhesives
Understanding the science behind headliner adhesives can help you choose the right product for your repair job. Headliner adhesives are typically formulated with:
- High-Temperature Resistance: They are designed to withstand high temperatures without losing their bond strength.
- Moisture Resistance: They are resistant to moisture and humidity, preventing the adhesive from breaking down over time.
- Flexibility: They are flexible enough to accommodate the expansion and contraction of the headliner fabric.
- Long-Lasting Bond: They provide a strong and durable bond that will last for years.
When choosing a headliner adhesive, look for products that are specifically designed for automotive use and have positive customer reviews.
16. Staying Compliant with Industry Standards
When repairing or replacing a car headliner, it’s important to stay compliant with industry standards and regulations. This includes:
- Using Approved Materials: Use only headliner fabrics and adhesives that meet industry standards for safety and durability.
- Following Proper Procedures: Follow proper installation procedures to ensure the headliner is securely attached and does not pose a safety hazard.
- Disposing of Waste Properly: Dispose of old headliner fabrics, adhesives, and other waste materials properly to protect the environment.
17. Frequently Asked Questions (FAQs)
1. How do you know if your ceiling is sagging?
Some signs of car ceiling are prone to stag, weaken, or under a lot of stress:
– A cracking sound whenever your car is shaking/when slamming car doors
– Drooping plasterboard sheeting or cornice
– Visible cracking you can notice right away
– Tiny circles or blisters form as lines produced by nails or screws.
2. Is it OK to fix the headliner sagging myself?
You can fix several not-so-severe issues of car headliners yourself. Getting a replacement kit online and at auto parts retailers is easy nowadays.
The $70 – $80 kit allows you to use small tools to screen up into the foam backing to maintain the inner layer of a sinking headliner. The screws dig into a fiberboard substrate under the foam layer of the headliners.
3. Can I paint a headliner?
It may appear appealing to paint your car’s headliner. However, doing so without putting paint all over the trim and glass will need a significant amount of preparation. The same amount of time, effort, and money would be better spent on a good successor. Furthermore, the paint is unlikely to be pleased with the temperature-related expansion and contraction that occurs within a car’s interior. We advise against painting the headliner.
4. Does car insurance cover the cost of car headliner replacement?
Unfortunately, most car extended insurance excludes coverage for your vehicle’s interior upholstery, trim, and headliner.
5. What is the best adhesive for car headliners?
The best adhesive for car headliners is a high-temperature adhesive spray specifically designed for automotive use. Look for products that are resistant to heat and moisture and have positive customer reviews.
6. How long does it take to replace a car headliner?
Replacing a car headliner can take anywhere from a few hours to a full day, depending on your skill level and the complexity of the job.
7. Can I use regular glue to fix a sagging headliner?
No, regular glue is not suitable for fixing a sagging headliner. You need to use a high-temperature adhesive spray that is specifically designed for automotive use.
8. What is the best way to clean a car headliner?
The best way to clean a car headliner is to use a gentle cleaner and a soft brush or cloth. Avoid harsh chemicals that can damage the fabric.
9. Can I fix a sagging headliner without removing it?
Yes, you can fix a sagging headliner without removing it by using adhesive spray, headliner twist pins, or a steam cleaner and paint roller.
10. How can I prevent my car headliner from sagging?
You can prevent your car headliner from sagging by parking in the shade, using a sunshade, ventilating the car, repairing leaks, and avoiding harsh cleaners.
18. Connect With Us
Stay updated with the latest automotive tips, news, and product releases by connecting with us on social media:
- Facebook: [Facebook Page]
- Twitter: [Twitter Handle]
- Instagram: [Instagram Handle]
- YouTube: [YouTube Channel]
19. Final Thoughts
Fixing hanging fabric in your car is a manageable task with the right tools, materials, and guidance. By following the steps outlined in this comprehensive guide, you can restore your car’s interior and enjoy a more comfortable and visually appealing driving experience. Remember to choose high-quality products from trusted suppliers like CARDIAGTECH.NET and always prioritize safety and compliance. If you need further assistance or have any questions, don’t hesitate to contact our team of experts. We’re here to help you every step of the way. Contact us today at CARDIAGTECH.NET or WhatsApp +1 (641) 206-8880.