How To Fix A Paint Scrape On A Car
Fixing a paint scrape on a car doesn’t have to be a daunting task. At CARDIAGTECH.NET, we understand the frustration of discovering unsightly blemishes on your vehicle’s pristine surface. Whether it’s a minor scratch or a more significant scrape, we’re here to guide you through effective repair techniques, ensuring your car looks its best with the help of quality auto repair tools and equipment. Let’s explore paint touch-up, scratch removal, and auto body repair solutions.
1. Understanding Paint Scrapes on Cars
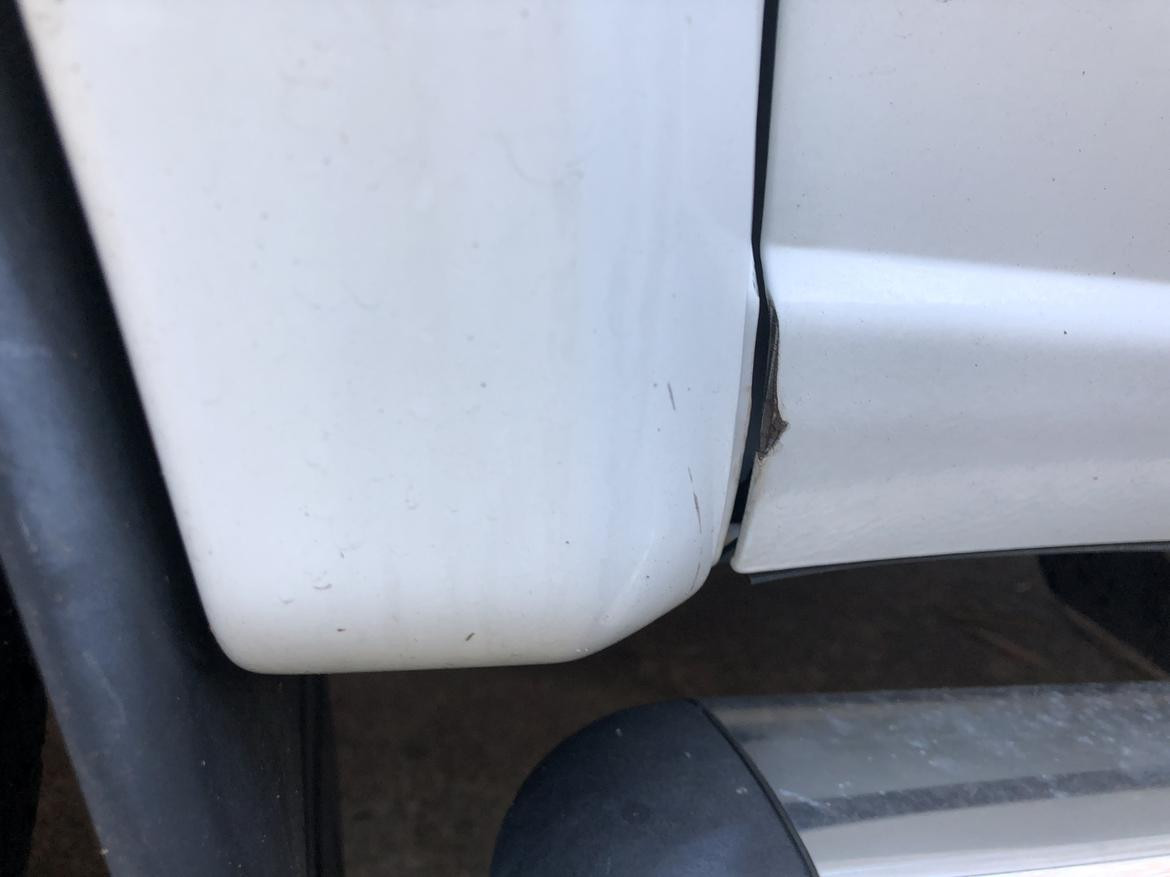
Paint scrapes on a car are more than just cosmetic issues; they can lead to further damage if not addressed promptly. Knowing the different types of scrapes and their potential impact is crucial for effective repair.
1.1. Types of Paint Scrapes
There are several types of paint scrapes, each requiring a different approach for repair:
- Clear Coat Scratches: These are the most superficial, affecting only the clear coat layer. They often appear as light scratches or swirl marks.
- Paint Scratches: These penetrate the clear coat and reach the paint layer. They are more visible and require more attention to repair.
- Deep Scratches: These go through the paint layer and reach the primer or even the metal. These are the most severe and require a more comprehensive repair process.
- Paint Transfer Scrapes: These occur when paint from another object, such as another car, rubs off onto your vehicle.
1.2. Potential Damage from Unattended Scrapes
Leaving paint scrapes unattended can lead to several problems:
- Rust: When a scrape reaches the metal, it exposes the car to moisture and oxygen, leading to rust. Rust can spread quickly and cause significant structural damage.
- Paint Degradation: Scratches can weaken the surrounding paint, causing it to peel or fade over time.
- Reduced Resale Value: Visible paint scrapes can significantly reduce the resale value of your car.
- Aesthetic Issues: Even minor scrapes can detract from the overall appearance of your vehicle.
1.3. Assessing the Severity of the Scrape
Before attempting any repairs, it’s essential to assess the severity of the paint scrape. This will help you determine the appropriate repair method and the tools and materials you’ll need.
- Clean the Area: Start by washing the area around the scrape with soap and water to remove any dirt or debris.
- Dry the Area: Use a clean microfiber cloth to dry the area thoroughly.
- Inspect the Scrape: Examine the scrape closely to determine how deep it is.
- Feel the Surface: Gently run your fingernail over the scrape. If your nail catches, the scrape is likely deep and may require professional attention.
By understanding the different types of paint scrapes and their potential impact, you can take the necessary steps to protect your vehicle and maintain its appearance.
2. Essential Tools and Materials for Paint Scrape Repair
Having the right tools and materials is crucial for effectively repairing paint scrapes on your car. Here’s a comprehensive list to get you started, with an emphasis on quality tools available at CARDIAGTECH.NET.
2.1. Cleaning Supplies
- Car Wash Soap: Use a pH-balanced car wash soap to clean the area around the scrape without damaging the paint.
- Microfiber Towels: Soft microfiber towels are essential for washing, drying, and polishing without scratching the paint.
- Detailing Clay: Detailing clay can remove embedded contaminants from the paint surface, providing a smooth base for repairs.
- Rubbing Alcohol: Use rubbing alcohol to clean the area before applying touch-up paint or other repair products.
2.2. Sanding Tools
- Sandpaper: Different grits of sandpaper are needed for various stages of the repair process. Start with coarser grits (e.g., 1000 grit) for removing imperfections and gradually move to finer grits (e.g., 3000 grit) for smoothing.
- Sanding Block: A sanding block provides a flat, even surface for sanding, ensuring consistent results.
- Wet/Dry Sandpaper: Use wet/dry sandpaper with water to reduce friction and prevent clogging.
2.3. Paint and Application Tools
- Touch-Up Paint: Purchase touch-up paint that matches your car’s color code. You can find this code on a sticker inside the driver’s side door or in the owner’s manual.
- Primer: Primer helps the touch-up paint adhere to the surface and provides a uniform base.
- Clear Coat: Apply clear coat over the touch-up paint to protect it and blend it with the surrounding paint.
- Fine-Tipped Brushes: Use fine-tipped brushes for precise application of touch-up paint, primer, and clear coat.
- Blending Solution: Blending solution helps to blend the edges of the touch-up paint with the surrounding paint, creating a seamless finish.
2.4. Polishing and Buffing Tools
- Polishing Compound: Polishing compound removes fine scratches and swirl marks, restoring the paint’s shine.
- Buffing Compound: Buffing compound is more abrasive than polishing compound and is used to remove more significant imperfections.
- Polishing Pad: Use a soft foam polishing pad with a polishing compound to restore the paint’s shine.
- Buffing Pad: Use a more aggressive foam or microfiber buffing pad with a buffing compound to remove imperfections.
- Dual-Action Polisher: A dual-action polisher makes the polishing and buffing process easier and more efficient. Consider the high-quality polishers available at CARDIAGTECH.NET.
2.5. Safety Gear
- Gloves: Wear gloves to protect your hands from chemicals and abrasives.
- Safety Glasses: Protect your eyes from dust and debris with safety glasses.
- Respirator: Use a respirator when sanding or spraying paint to avoid inhaling harmful particles and fumes.
2.6. Additional Tools
- Masking Tape: Use masking tape to protect surrounding areas from overspray.
- Razor Blade: A sharp razor blade can be used to carefully remove excess touch-up paint.
- Heat Gun: A heat gun can help to speed up the drying process.
Table: Essential Tools and Materials for Paint Scrape Repair
| Category | Item | Purpose |
|---|---|---|
| Cleaning Supplies | Car Wash Soap | Cleans the area around the scrape |
| Microfiber Towels | Washing, drying, and polishing | |
| Detailing Clay | Removes embedded contaminants | |
| Rubbing Alcohol | Cleans the area before applying paint | |
| Sanding Tools | Sandpaper (Various Grits) | Removes imperfections and smooths the surface |
| Sanding Block | Provides a flat, even sanding surface | |
| Wet/Dry Sandpaper | Reduces friction and prevents clogging | |
| Paint & Application | Touch-Up Paint | Matches your car’s color |
| Primer | Helps paint adhere and provides a uniform base | |
| Clear Coat | Protects and blends touch-up paint | |
| Fine-Tipped Brushes | Precise application of paint | |
| Blending Solution | Blends the edges of touch-up paint | |
| Polishing & Buffing | Polishing Compound | Removes fine scratches and swirl marks |
| Buffing Compound | Removes more significant imperfections | |
| Polishing Pad | Restores paint’s shine | |
| Buffing Pad | Removes imperfections | |
| Dual-Action Polisher | Efficient polishing and buffing (CARDIAGTECH.NET) | |
| Safety Gear | Gloves | Protects hands from chemicals |
| Safety Glasses | Protects eyes from debris | |
| Respirator | Avoids inhaling harmful particles | |
| Additional Tools | Masking Tape | Protects surrounding areas |
| Razor Blade | Removes excess touch-up paint | |
| Heat Gun | Speeds up drying process |
Having these tools and materials on hand will ensure that you’re well-prepared to tackle paint scrapes on your car effectively. Remember to source high-quality tools from trusted suppliers like CARDIAGTECH.NET to achieve the best results.
3. Step-by-Step Guide to Fixing a Minor Paint Scrape
Repairing a minor paint scrape involves a series of steps that, when followed carefully, can restore your car’s appearance. Here’s a detailed guide to help you through the process.
3.1. Cleaning the Affected Area
- Wash the Area: Use car wash soap and water to thoroughly clean the area around the scrape. This removes dirt, grease, and other contaminants that could interfere with the repair.
- Rinse the Area: Rinse the area with clean water to remove all traces of soap.
- Dry the Area: Use a clean microfiber towel to dry the area completely. Ensure no moisture remains, as this can affect the adhesion of the repair materials.
- Decontaminate the Area: Use detailing clay to remove any embedded contaminants from the paint surface. This step ensures a smooth and clean surface for the repair.
- Clean with Rubbing Alcohol: Wipe the area with rubbing alcohol to remove any remaining residue. This provides a clean base for the touch-up paint.
3.2. Sanding the Scrape
- Prepare the Sandpaper: Cut a small piece of 2000-grit wet/dry sandpaper and soak it in water for a few minutes.
- Sand the Scrape: Gently sand the scrape using light, even pressure. Keep the sandpaper wet to reduce friction and prevent clogging.
- Feather the Edges: Feather the edges of the scrape by sanding slightly beyond the damaged area. This helps to blend the repair with the surrounding paint.
- Clean the Area: Wipe the area with a clean, damp microfiber towel to remove any sanding residue.
- Dry the Area: Use a clean, dry microfiber towel to dry the area completely.
3.3. Applying Touch-Up Paint
- Shake the Touch-Up Paint: Shake the touch-up paint bottle vigorously for several minutes to ensure the paint is thoroughly mixed.
- Apply a Thin Coat: Use a fine-tipped brush to apply a thin, even coat of touch-up paint to the scrape. Avoid applying too much paint at once, as this can lead to drips and uneven coverage.
- Allow to Dry: Allow the touch-up paint to dry completely according to the manufacturer’s instructions. This usually takes about 30 minutes to an hour.
- Apply Additional Coats: Apply additional thin coats of touch-up paint as needed to build up the paint level to match the surrounding paint. Allow each coat to dry completely before applying the next.
3.4. Applying Clear Coat
- Clean the Area: Use a clean microfiber towel to gently wipe the area.
- Apply a Thin Coat of Clear Coat: Apply a thin, even coat of clear coat over the touch-up paint. This protects the paint and blends it with the surrounding clear coat.
- Allow to Dry: Allow the clear coat to dry completely according to the manufacturer’s instructions. This usually takes several hours.
- Apply Additional Coats: Apply additional thin coats of clear coat as needed to build up the clear coat level to match the surrounding clear coat. Allow each coat to dry completely before applying the next.
3.5. Polishing and Buffing
- Prepare the Polishing Compound: Apply a small amount of polishing compound to a clean foam polishing pad.
- Polish the Area: Use a dual-action polisher to polish the area around the repair. Use light, even pressure and work in small sections.
- Remove Polishing Compound Residue: Use a clean microfiber towel to remove any polishing compound residue.
- Prepare the Buffing Compound: Apply a small amount of buffing compound to a clean foam buffing pad.
- Buff the Area: Use a dual-action polisher to buff the area around the repair. Use light, even pressure and work in small sections.
- Remove Buffing Compound Residue: Use a clean microfiber towel to remove any buffing compound residue.
Table: Step-by-Step Guide to Fixing a Minor Paint Scrape
| Step | Action | Tools/Materials |
|---|---|---|
| 1. Cleaning the Affected Area | Wash, rinse, dry, decontaminate, and clean with rubbing alcohol | Car wash soap, water, microfiber towels, detailing clay, rubbing alcohol |
| 2. Sanding the Scrape | Prepare sandpaper, sand the scrape, feather the edges, clean, and dry | 2000-grit wet/dry sandpaper, water, microfiber towels |
| 3. Applying Touch-Up Paint | Shake paint, apply thin coat, allow to dry, apply additional coats | Touch-up paint, fine-tipped brush |
| 4. Applying Clear Coat | Clean the area, apply thin coat, allow to dry, apply additional coats | Clear coat, fine-tipped brush |
| 5. Polishing and Buffing | Prepare polishing compound, polish, remove residue, prepare buffing compound, buff, remove residue | Polishing compound, buffing compound, polishing pad, buffing pad, dual-action polisher, microfiber towels |
By following these steps carefully, you can effectively repair minor paint scrapes and restore your car’s appearance. Always ensure you have the right tools and materials, such as those available at CARDIAGTECH.NET, for the best results.
4. Dealing with Deeper Scratches and Scrapes
Deeper scratches and scrapes require a more comprehensive approach to repair, as they often penetrate beyond the clear coat and paint layers. Here’s how to handle these more significant damages.
4.1. Preparing the Area
- Cleaning: Begin by thoroughly cleaning the area around the scratch with car wash soap and water. Remove any dirt, grease, or contaminants.
- Drying: Dry the area completely with a clean microfiber towel.
- Masking: Use masking tape to protect the surrounding paint from accidental sanding or damage.
- Inspection: Carefully inspect the scratch to determine its depth and extent.
4.2. Sanding the Damaged Area
- Initial Sanding: Use 400-grit sandpaper to remove any rust or rough edges. Apply light, even pressure and sand only the damaged area.
- Filling (if Necessary): If the scratch is deep, you may need to use a body filler to level the surface. Apply the filler according to the manufacturer’s instructions and allow it to dry completely.
- Sanding the Filler: Once the filler is dry, use 400-grit sandpaper to sand it down to the level of the surrounding paint.
- Smoothing: Switch to 800-grit sandpaper to smooth the area and feather the edges.
- Final Sanding: Finish with 2000-grit sandpaper to prepare the surface for primer.
4.3. Applying Primer
- Cleaning: Clean the sanded area with a tack cloth to remove any dust or residue.
- Application: Apply a thin, even coat of automotive primer to the sanded area. Hold the spray can about 8-10 inches away from the surface and use smooth, overlapping strokes.
- Drying: Allow the primer to dry completely according to the manufacturer’s instructions. This usually takes about 30 minutes to an hour.
- Sanding (if Necessary): If the primer is not smooth, lightly sand it with 2000-grit sandpaper.
4.4. Painting
- Cleaning: Clean the primed area with a tack cloth to remove any dust or residue.
- Application: Apply several thin, even coats of touch-up paint to the primed area. Use the same technique as with the primer, holding the spray can about 8-10 inches away from the surface and using smooth, overlapping strokes.
- Blending: Blend the paint into the surrounding area to create a seamless finish.
- Drying: Allow the paint to dry completely according to the manufacturer’s instructions. This usually takes several hours.
4.5. Applying Clear Coat
- Cleaning: Clean the painted area with a tack cloth to remove any dust or residue.
- Application: Apply several thin, even coats of clear coat to the painted area. Use the same technique as with the primer and paint.
- Blending: Blend the clear coat into the surrounding area to create a seamless finish.
- Drying: Allow the clear coat to dry completely according to the manufacturer’s instructions. This usually takes 24-48 hours.
4.6. Polishing and Buffing
- Wet Sanding (if Necessary): If there are any imperfections in the clear coat, lightly wet sand the area with 3000-grit sandpaper.
- Polishing: Apply a small amount of polishing compound to a clean foam polishing pad and use a dual-action polisher to polish the area.
- Buffing: Apply a small amount of buffing compound to a clean foam buffing pad and use a dual-action polisher to buff the area.
- Cleaning: Clean the area with a clean microfiber towel to remove any polishing or buffing compound residue.
Table: Step-by-Step Guide to Fixing Deeper Scratches and Scrapes
| Step | Action | Tools/Materials |
|---|---|---|
| 1. Preparing the Area | Clean, dry, mask, and inspect the area | Car wash soap, water, microfiber towel, masking tape |
| 2. Sanding | Sand with 400-grit, fill (if necessary), smooth with 800-grit, finish with 2000-grit | 400-grit sandpaper, body filler, 800-grit sandpaper, 2000-grit sandpaper |
| 3. Applying Primer | Clean, apply primer, dry, and sand (if necessary) | Tack cloth, automotive primer, 2000-grit sandpaper |
| 4. Painting | Clean, apply paint, blend, and dry | Tack cloth, touch-up paint |
| 5. Applying Clear Coat | Clean, apply clear coat, blend, and dry | Tack cloth, clear coat |
| 6. Polishing and Buffing | Wet sand (if necessary), polish, buff, and clean | 3000-grit sandpaper, polishing compound, buffing compound, dual-action polisher, microfiber towel |
Addressing deeper scratches and scrapes requires patience and attention to detail. Using high-quality tools and materials from trusted sources like CARDIAGTECH.NET will ensure a professional-looking repair.
5. Addressing Paint Transfer Scrapes
Paint transfer scrapes occur when your car’s paint comes into contact with another object, leaving a foreign layer of paint on your vehicle’s surface. Here’s how to effectively address these scrapes.
5.1. Initial Cleaning
- Wash the Area: Begin by washing the affected area with car wash soap and water to remove any loose dirt and debris.
- Rinse Thoroughly: Rinse the area with clean water to ensure all soap residue is removed.
- Dry the Surface: Dry the area with a clean microfiber towel.
5.2. Using a Clay Bar
- Prepare the Clay Bar: Knead the clay bar until it is soft and pliable. Flatten it into a disc shape for easier handling.
- Lubricate the Area: Spray the affected area with a clay bar lubricant or detailing spray. This helps the clay bar glide smoothly over the surface without scratching the paint.
- Clay Bar Application: Gently rub the clay bar back and forth over the paint transfer, using light pressure. You should feel the clay bar picking up contaminants as it glides.
- Inspect the Clay Bar: Periodically inspect the clay bar and fold it over to reveal a clean surface. This prevents reintroducing contaminants to the paint.
- Wipe Clean: After using the clay bar, wipe the area with a clean microfiber towel to remove any remaining lubricant or residue.
5.3. Polishing the Area
- Apply Polishing Compound: Apply a small amount of polishing compound to a clean foam polishing pad.
- Polish the Area: Use a dual-action polisher to polish the area, working in small sections. Use light to medium pressure and overlap your passes to ensure even coverage.
- Remove Residue: Wipe the area with a clean microfiber towel to remove any polishing compound residue.
5.4. Applying Wax or Sealant
- Apply Wax or Sealant: Apply a thin, even coat of wax or sealant to the polished area. This helps to protect the paint and enhance its shine.
- Allow to Cure: Allow the wax or sealant to cure according to the manufacturer’s instructions.
- Buff to Shine: Use a clean microfiber towel to buff the area to a high shine.
Table: Step-by-Step Guide to Addressing Paint Transfer Scrapes
| Step | Action | Tools/Materials |
|---|---|---|
| 1. Initial Cleaning | Wash, rinse, and dry the affected area | Car wash soap, water, microfiber towel |
| 2. Using a Clay Bar | Prepare clay bar, lubricate area, apply clay bar, inspect clay bar, wipe clean | Clay bar, clay bar lubricant or detailing spray, microfiber towel |
| 3. Polishing the Area | Apply polishing compound, polish the area, remove residue | Polishing compound, foam polishing pad, dual-action polisher, microfiber towel |
| 4. Applying Wax/Sealant | Apply wax or sealant, allow to cure, buff to shine | Wax or sealant, microfiber towel |
Effectively addressing paint transfer scrapes requires a gentle yet thorough approach. Utilizing the right tools and materials, such as those available at CARDIAGTECH.NET, ensures a successful outcome and helps maintain your car’s appearance.
6. Advanced Techniques for Paint Repair
For more challenging paint repairs, advanced techniques may be necessary to achieve a flawless finish. These techniques require a higher level of skill and precision.
6.1. Wet Sanding for Blending
- Prepare the Area: Ensure the repaired area is clean and dry. Mask off the surrounding areas to protect them from accidental damage.
- Choose Sandpaper Grit: Select the appropriate grit of wet/dry sandpaper. For blending touch-up paint, start with 2000-grit or 3000-grit sandpaper.
- Soak Sandpaper: Soak the sandpaper in water for at least 10-15 minutes before use. This helps to lubricate the surface and prevent clogging.
- Wet Sand: Lightly sand the area, using a sanding block for even pressure. Keep the surface wet by spraying it with water as you sand.
- Inspect Regularly: Periodically inspect the surface to ensure you are not removing too much material. The goal is to blend the edges of the touch-up paint with the surrounding clear coat.
- Progress to Finer Grits: If necessary, progress to finer grits of sandpaper (e.g., 5000-grit) to further refine the surface.
- Clean and Dry: Thoroughly clean the area with water and dry it with a clean microfiber towel.
6.2. Blending Clear Coat
- Prepare the Area: Ensure the area is clean and dry. Mask off the surrounding areas to protect them from overspray.
- Apply Blending Solution: Apply a blending solution to the edges of the repaired area. This helps to dissolve the edges of the clear coat and blend it with the surrounding paint.
- Apply Clear Coat: Apply several thin, even coats of clear coat to the repaired area, feathering the edges to blend with the surrounding paint.
- Allow to Dry: Allow the clear coat to dry completely according to the manufacturer’s instructions.
- Wet Sand (if Necessary): If there are any imperfections in the clear coat, lightly wet sand the area with 3000-grit or 5000-grit sandpaper.
- Polish and Buff: Polish and buff the area to restore the shine and remove any sanding marks.
6.3. Using a Heat Gun for Drying
- Prepare the Area: Ensure the area is clean and free of any loose particles.
- Set Heat Gun to Low: Set the heat gun to a low setting to avoid damaging the paint.
- Apply Heat: Hold the heat gun about 8-10 inches away from the surface and move it in a sweeping motion. Avoid holding the heat gun in one place for too long, as this can cause the paint to bubble or blister.
- Monitor Temperature: Monitor the temperature of the surface with a heat gun thermometer to ensure it does not exceed the manufacturer’s recommended temperature.
- Allow to Cool: Allow the area to cool completely before proceeding with any further steps.
Table: Advanced Techniques for Paint Repair
| Technique | Action | Tools/Materials |
|---|---|---|
| 1. Wet Sanding for Blending | Prepare area, choose sandpaper grit, soak sandpaper, wet sand, inspect, progress to finer grits, clean and dry | Wet/dry sandpaper (2000-grit, 3000-grit, 5000-grit), sanding block, water, microfiber towel |
| 2. Blending Clear Coat | Prepare area, apply blending solution, apply clear coat, allow to dry, wet sand (if necessary), polish and buff | Blending solution, clear coat, wet/dry sandpaper (3000-grit, 5000-grit), polishing compound, buffing compound, dual-action polisher, microfiber towel |
| 3. Using a Heat Gun for Drying | Prepare area, set heat gun to low, apply heat, monitor temperature, allow to cool | Heat gun, heat gun thermometer |
These advanced techniques require practice and precision. Always use high-quality tools and materials from trusted suppliers like CARDIAGTECH.NET to achieve the best results.
7. Preventive Measures to Avoid Paint Scrapes
Preventing paint scrapes is always better than having to repair them. Here are some practical measures to help you protect your car’s paint.
7.1. Parking Strategies
- Choose Your Spot Wisely: When parking, try to choose a spot that is away from other cars. Look for end spots or spaces with extra room.
- Avoid Tight Spaces: Avoid parking in tight spaces where other drivers may have difficulty maneuvering and could potentially scrape your car.
- Consider the Environment: Be mindful of your surroundings. Avoid parking under trees that may drop sap or debris, and stay away from areas with high traffic or construction.
7.2. Car Covers and Protection
- Use a Car Cover: Invest in a high-quality car cover to protect your car’s paint from scratches, dings, and other damage. Choose a cover that is specifically designed for your car’s make and model.
- Apply Paint Protection Film (PPF): Consider applying paint protection film (PPF) to vulnerable areas of your car, such as the front bumper, hood, and side mirrors. PPF is a clear, durable film that provides an extra layer of protection against scratches, chips, and other damage.
- Regular Waxing: Regularly waxing your car can help to protect the paint from scratches and other damage. Wax creates a barrier between the paint and the environment, making it more resistant to scratches and swirl marks.
7.3. Safe Driving Habits
- Maintain a Safe Distance: When driving, maintain a safe distance from other vehicles to avoid being hit by flying debris or other hazards.
- Drive Defensively: Drive defensively and be aware of your surroundings. Watch out for potential hazards, such as road debris, construction zones, and careless drivers.
- Avoid Narrow Roads: Avoid driving on narrow roads or in areas with tight turns, where your car may be more susceptible to scratches and dings.
Table: Preventive Measures to Avoid Paint Scrapes
| Measure | Action | Benefits |
|---|---|---|
| 1. Parking Strategies | Choose spots wisely, avoid tight spaces, consider the environment | Reduces the risk of scratches and dings from other cars, trees, and other hazards |
| 2. Car Covers and Protection | Use a car cover, apply paint protection film (PPF), regular waxing | Provides a physical barrier against scratches, chips, and other damage, enhances paint protection and durability |
| 3. Safe Driving Habits | Maintain a safe distance, drive defensively, avoid narrow roads | Reduces the risk of being hit by flying debris or other hazards, avoids potential scratches and dings in tight areas |
By implementing these preventive measures, you can significantly reduce the risk of paint scrapes and keep your car looking its best.
8. Cost-Effective Solutions vs. Professional Repair
Deciding whether to tackle a paint scrape yourself or seek professional help often comes down to balancing cost, time, and the desired quality of the repair. Here’s a breakdown to help you make the right choice.
8.1. DIY Repair Costs
- Materials: The cost of materials for a DIY paint scrape repair can vary depending on the severity of the damage and the quality of the products you choose. Basic supplies such as car wash soap, microfiber towels, sandpaper, and touch-up paint can cost anywhere from $20 to $50.
- Tools: If you don’t already have the necessary tools, such as a dual-action polisher, sanding block, or heat gun, you may need to invest in these as well. The cost of these tools can range from $50 to $200 or more, depending on the brand and quality.
- Time: DIY repairs can be time-consuming, especially if you’re not experienced. A minor paint scrape repair can take several hours to complete, while more extensive repairs can take several days.
8.2. Professional Repair Costs
- Estimates: The cost of professional paint scrape repair can vary depending on the severity of the damage, the type of paint, and the location of the repair shop. Minor repairs may cost between $100 and $300, while more extensive repairs can cost $500 or more.
- Hidden Costs: Be aware of potential hidden costs, such as additional labor charges or the cost of replacing damaged parts.
- Insurance: In some cases, your car insurance may cover the cost of paint scrape repair, especially if the damage was caused by another driver.
8.3. Assessing the Trade-offs
- DIY Benefits: DIY repairs can be a cost-effective option for minor paint scrapes. You have complete control over the repair process and can save money on labor costs.
- DIY Drawbacks: DIY repairs can be time-consuming and require a certain level of skill and experience. If you’re not careful, you could potentially make the damage worse.
- Professional Benefits: Professional repairs offer a higher level of quality and expertise. Repair shops have the tools, equipment, and experience necessary to achieve a flawless finish.
- Professional Drawbacks: Professional repairs can be expensive and may require you to leave your car at the repair shop for several days.
Table: Cost-Effective Solutions vs. Professional Repair
| Factor | DIY Repair | Professional Repair |
|---|---|---|
| 1. Costs | Materials ($20-$50), Tools ($50-$200+), Time (Several Hours to Days) | Estimates ($100-$300 for Minor, $500+ for Extensive), Hidden Costs, Potential Insurance Coverage |
| 2. Benefits | Cost-Effective, Complete Control Over Repair Process, Save Money on Labor Costs | Higher Level of Quality and Expertise, Flawless Finish |
| 3. Drawbacks | Time-Consuming, Requires Skill and Experience, Potential to Make Damage Worse | Expensive, May Require Leaving Car at Repair Shop for Several Days |
Ultimately, the decision of whether to DIY or seek professional help depends on your budget, skill level, and the severity of the paint scrape.
9. Maintaining Your Car’s Paint After Repair
Once you’ve repaired a paint scrape, proper maintenance is essential to keep your car looking its best and prevent future damage.
9.1. Regular Washing and Waxing
- Wash Regularly: Wash your car regularly to remove dirt, grime, and other contaminants that can damage the paint. Use a pH-balanced car wash soap and a soft microfiber wash mitt.
- Wax Frequently: Wax your car frequently to protect the paint from scratches, swirl marks, and UV damage. Apply a thin, even coat of wax and buff to a high shine.
- Avoid Abrasive Cleaners: Avoid using abrasive cleaners or harsh chemicals that can damage the paint.
9.2. Protecting from the Elements
- Park in Shade: When possible, park your car in the shade to protect it from the sun’s harmful UV rays.
- Use a Car Cover: Use a car cover to protect your car from scratches, dings, and other damage, especially when parking outdoors for extended periods.
- Protect from Extreme Temperatures: Protect your car from extreme temperatures, which can cause the paint to fade or crack.
9.3. Addressing Minor Scratches Promptly
- Inspect Regularly: Regularly inspect your car’s paint for minor scratches and swirl marks.
- Use Scratch Removers: Use a scratch remover to address minor scratches and swirl marks before they become more severe.
- Apply Touch-Up Paint: Apply touch-up paint to any chips or scratches that penetrate the paint layer to prevent rust and further damage.
Table: Maintaining Your Car’s Paint After Repair
| Measure | Action | Benefits |
|---|---|---|
| 1. Regular Washing & Waxing | Wash regularly with pH-balanced soap, wax frequently, avoid abrasive cleaners | Removes dirt, grime, and contaminants, protects from scratches, swirl marks, and UV damage |
| 2. Protecting from Elements | Park in shade, use a car cover, protect from extreme temperatures | Protects from UV rays, scratches, dings, and temperature-related damage |
| 3. Addressing Scratches | Inspect regularly, use scratch removers for minor scratches, apply touch-up paint for chips | Prevents minor scratches from becoming severe, prevents rust and further damage from chips and scratches |
By following these maintenance tips, you can keep your car’s paint looking its best for years to come.
10. Where to Buy Quality Auto Repair Tools
Finding the right tools is essential for effective car maintenance