How to Fix a Vacuum Leak in My Car Effectively

Is your car’s performance suffering? Learn how to fix a vacuum leak in your car with this comprehensive guide from CARDIAGTECH.NET. Discover common symptoms, causes, and repair options to restore your vehicle’s performance and fuel efficiency with our expert insights and practical advice. Let’s dive in and explore vacuum leak repair techniques that will keep your car running smoothly.
1. Understanding Vacuum Leaks: What They Are and Why They Matter
Vacuum leaks are a common issue in automotive systems that can significantly impact your vehicle’s performance. These leaks occur when there’s an unintended reduction in vacuum pressure within the engine or related systems. In simpler terms, it’s like a small hole in a straw – it prevents the system from working efficiently.
In a vehicle, vacuum pressure is critical for the proper operation of several important systems. These include the brake booster, which amplifies the force applied to the brakes, and various emission control systems, such as the Exhaust Gas Recirculation (EGR) and Evaporative Emission Control (EVAP) systems.
1.1. The Role of Vacuum Pressure in Your Car
Vacuum pressure is essential for:
- Braking: Assisting in amplifying the force applied to the brakes for more effective stopping.
- Emission Control: Regulating and redirecting exhaust gases and fuel vapors to reduce emissions and improve fuel efficiency.
- Engine Performance: Maintaining the correct air-fuel mixture for optimal combustion and power.
1.2. Why Addressing Vacuum Leaks is Crucial
Ignoring a vacuum leak can lead to a host of problems, including:
- Reduced Fuel Efficiency: The engine compensates for the leak by injecting more fuel, leading to higher fuel consumption.
- Poor Engine Performance: Imbalanced air-fuel ratio results in rough idling, decreased acceleration, and potential stalling.
- Increased Emissions: Leaks in emission control systems can lead to higher emissions, causing failures during emissions testing.
- Potential Damage: Prolonged operation with a vacuum leak can cause additional stress on engine components.
CARDIAGTECH.NET offers a range of diagnostic tools that can help you quickly identify and address vacuum leaks. Contact us today at +1 (641) 206-8880 to learn more about our products and how they can improve your car’s performance.
2. Recognizing the Symptoms of a Vacuum Leak: Early Detection is Key
Detecting a vacuum leak early can save you time and money. Knowing the common symptoms can help you identify the problem before it leads to more significant issues. Here are some key indicators of a vacuum leak:
2.1. Rough Idle
A vacuum leak can cause the engine to struggle to maintain a consistent RPM, leading to vibrations and an unstable running condition. This is because the air-fuel mixture is adversely affected, causing the engine to work harder to maintain equilibrium.
2.2. Decreased Acceleration
When a vacuum leak affects the engine’s ability to generate power efficiently, the air-fuel ratio becomes imbalanced, resulting in reduced acceleration performance. Your vehicle may feel sluggish and take longer to reach desired speeds.
Decreased acceleration due to vacuum leak impacting air-fuel ratio
2.3. Stalling
A significant vacuum leak can disrupt engine operation, preventing proper combustion due to the improper air-fuel mixture. This can cause the engine to misfire, lose power, and potentially stall. It may also make the engine difficult to start.
2.4. Increased Fuel Consumption
When a vacuum leak causes the engine to run lean (an excess of air relative to fuel), the fuel efficiency of the vehicle is negatively impacted. The engine compensates by injecting more fuel to maintain the proper air-fuel ratio, resulting in increased fuel consumption.
2.5. Malfunction Indicator Lamp (MIL)
A vacuum leak can trigger the MIL to illuminate, indicating a potential issue. Retrieving Diagnostic Trouble Codes (DTCs) using a Code Reader or Scan Tool from CARDIAGTECH.NET can help identify the specific problem related to the vacuum leak.
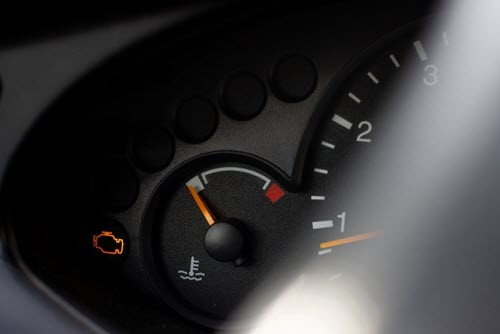 Check engine light indicating a potential issue due to vacuum leak
2.6. Hissing or Whistling Noises
Audible hissing or whistling sounds near vacuum lines or components can be a clear indication of a vacuum leak. The sound is caused by air being drawn in through the gap or crack in the system. Inspect the source of the noise carefully to pinpoint the leak’s location.
CARDIAGTECH.NET provides high-quality diagnostic tools to help you accurately diagnose vacuum leaks. Contact us at +1 (641) 206-8880 for expert advice and to find the right equipment for your needs.
3. Identifying the Culprits: Common Causes of Vacuum Leaks
Understanding the common causes of vacuum leaks can help you target your diagnostic efforts more effectively. Here are some of the primary reasons why vacuum leaks occur:
3.1. Damaged or Cracked Vacuum Hoses
Vacuum hoses are susceptible to wear and tear over time. Exposure to heat, engine vibrations, and accidental damage can cause hoses to develop cracks or become disconnected, leading to vacuum leaks.
3.2. Loose or Faulty Hose Connections
Improper installation or loose connections between vacuum hoses and components can create openings for air to escape, resulting in a vacuum leak. Ensuring all hose connections are secure and properly fitted is essential.
3.3. Faulty Intake Manifold Gasket
The intake manifold gasket provides the seal between the engine’s intake manifold and the cylinder head. If the gasket becomes damaged or worn, it can develop gaps, allowing air to enter the system and causing a vacuum leak.
3.4. Leaking Brake Booster
The brake booster uses vacuum pressure to assist brake pedal operation. A leaking brake booster can introduce a vacuum leak, impacting brake performance and potentially leading to a spongy or unresponsive brake pedal, which is a potentially dangerous condition.
3.5. Faulty EGR Valve
The EGR valve plays an important role in controlling emissions by redirecting a small amount of exhaust gases back into the engine cylinders. When the EGR valve is faulty or has cracks, it can result in unmetered air being drawn into the engine. This can negatively affect the air-fuel ratio and engine pressure, leading to various issues.
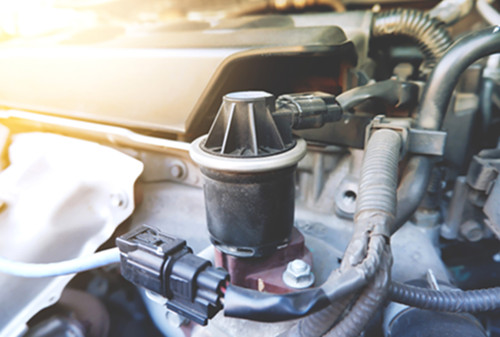 Faulty EGR valve causing vacuum leak and poor engine performance
To help you better understand, here’s a table summarizing the common causes:
| Cause | Description | Potential Symptoms |
|---|---|---|
| Damaged Vacuum Hoses | Cracks, tears, or disconnections in vacuum hoses due to wear and tear. | Rough idle, decreased acceleration, hissing noises. |
| Loose Hose Connections | Improperly fitted or loose connections allowing air to escape. | Rough idle, increased fuel consumption. |
| Faulty Intake Manifold Gasket | Damaged or worn gasket creating gaps between the intake manifold and cylinder head. | Rough idle, decreased acceleration, stalling. |
| Leaking Brake Booster | Leaks in the brake booster affecting brake performance. | Spongy brake pedal, poor braking performance. |
| Faulty EGR Valve | Cracks or malfunctions in the EGR valve leading to unmetered air entering the engine. | Poor engine performance, high idle speed, low combustion levels, poor fuel economy. |
CARDIAGTECH.NET offers a wide range of replacement parts and diagnostic tools to address these common causes. Call us at +1 (641) 206-8880 for assistance in finding the right solutions for your vehicle.
4. Diagnosing Vacuum Leaks: Step-by-Step Guide
Diagnosing vacuum leaks requires a systematic approach to identify the source of the problem. Here’s a step-by-step guide to help you pinpoint the leak:
4.1. Visual Inspection
Start by visually inspecting all vacuum hoses and connections. Look for:
- Cracks, tears, or breaks in the hoses.
- Loose or disconnected hoses.
- Dry-rotted or brittle hoses.
Pay close attention to hoses near heat sources, as these are more prone to damage.
4.2. Listening for Hissing Sounds
With the engine running, listen carefully for hissing or whistling sounds near vacuum lines and components. These sounds indicate air being sucked into the system through a leak. A mechanic’s stethoscope can be useful for isolating the sound.
4.3. Using a Vacuum Gauge
A vacuum gauge can help you measure the vacuum pressure in the intake manifold. Connect the gauge to a vacuum port on the intake manifold and observe the reading. A lower-than-specified reading indicates a vacuum leak.
Here’s a table illustrating typical vacuum gauge readings:
| Engine Condition | Vacuum Reading (inches Hg) | Interpretation |
|---|---|---|
| Normal Idle | 17-22 | Healthy vacuum system. |
| Low Reading | Below 17 | Potential vacuum leak or other engine issue. |
| Fluctuating | Erratic movement | Possible valve or ignition timing problem. |
4.4. The Spray Test
This method involves spraying a small amount of carburetor cleaner or starting fluid around vacuum lines and connections while the engine is running. If the engine RPM changes (increases or smooths out), you’ve likely found the location of the leak. Be cautious when using flammable sprays around a hot engine.
4.5. Smoke Testing
Smoke testing is a more advanced method that involves injecting smoke into the vacuum system using a smoke machine. The smoke will escape from any leaks, making them easy to identify. This method is particularly useful for finding small or hard-to-reach leaks.
CARDIAGTECH.NET offers high-quality smoke machines that make vacuum leak detection easier and more accurate. Contact us at +1 (641) 206-8880 to learn more about our diagnostic tools.
5. Repairing Vacuum Leaks: Practical Solutions
Once you’ve identified the source of the vacuum leak, it’s time to repair it. Here are some practical solutions to address common vacuum leak issues:
5.1. Replacing Damaged Vacuum Hoses
If you find cracked, torn, or dry-rotted vacuum hoses, the best solution is to replace them. Measure the length and diameter of the old hose and purchase a replacement of the same size. Ensure the new hose is securely connected to the appropriate fittings.
| Hose Type | Average Cost | Considerations |
|---|---|---|
| Standard Vacuum Hose | $5 – $15 per foot | Suitable for most applications. |
| Silicone Vacuum Hose | $10 – $25 per foot | More durable and heat-resistant. |
5.2. Securing Loose Hose Connections
If the vacuum leak is due to a loose hose connection, simply re-secure the hose to the fitting. You may need to replace the hose clamp if it’s damaged or worn. Ensure the hose is fully seated on the fitting before tightening the clamp.
5.3. Replacing the Intake Manifold Gasket
Replacing the intake manifold gasket is a more involved repair that requires removing the intake manifold. Follow these steps:
- Disconnect the battery.
- Remove all components attached to the intake manifold, such as vacuum lines, fuel lines, and electrical connectors.
- Unbolt the intake manifold from the cylinder head.
- Remove the old gasket and clean the mating surfaces.
- Install the new gasket and reassemble the intake manifold.
- Torque the bolts to the manufacturer’s specification.
- Reconnect all components and the battery.
5.4. Replacing a Leaking Brake Booster
Replacing a leaking brake booster involves disconnecting the brake lines and vacuum lines from the booster. Follow these steps:
- Disconnect the brake lines from the master cylinder.
- Remove the master cylinder from the brake booster.
- Disconnect the vacuum line from the brake booster.
- Unbolt the brake booster from the firewall.
- Install the new brake booster and reassemble the components.
- Bleed the brakes to remove any air from the system.
5.5. Replacing a Faulty EGR Valve
Replacing a faulty EGR valve is a straightforward repair. Follow these steps:
- Disconnect the electrical connector from the EGR valve.
- Unbolt the EGR valve from the intake manifold or exhaust manifold.
- Remove the old EGR valve and clean the mating surfaces.
- Install the new EGR valve and torque the bolts to the manufacturer’s specification.
- Reconnect the electrical connector.
Here’s a table summarizing the repair options and their average costs:
| Repair | Average Cost | Difficulty |
|---|---|---|
| Replace Vacuum Hose | $10 – $30 | Easy |
| Secure Loose Connection | $5 – $10 | Easy |
| Replace Intake Manifold Gasket | $150 – $400 | Medium |
| Replace Brake Booster | $200 – $500 | Medium |
| Replace EGR Valve | $100 – $300 | Easy |
CARDIAGTECH.NET offers a comprehensive selection of high-quality replacement parts and tools to help you complete these repairs effectively. Contact us at +1 (641) 206-8880 for expert assistance.
6. Essential Tools for Fixing Vacuum Leaks: Gear Up for Success
Having the right tools can make diagnosing and repairing vacuum leaks much easier. Here’s a list of essential tools you should have in your toolbox:
6.1. Vacuum Gauge
A vacuum gauge is essential for measuring the vacuum pressure in the intake manifold, helping you identify potential leaks.
6.2. Smoke Machine
A smoke machine is invaluable for locating small or hard-to-reach vacuum leaks by injecting smoke into the system and revealing the leak’s location.
6.3. Mechanic’s Stethoscope
A mechanic’s stethoscope can help you isolate hissing sounds and pinpoint the exact location of a vacuum leak.
6.4. Carburetor Cleaner or Starting Fluid
Carburetor cleaner or starting fluid can be used in the spray test to identify vacuum leaks by observing changes in engine RPM.
6.5. Socket Set and Wrenches
A comprehensive socket set and wrench set are necessary for removing and installing various components, such as the intake manifold, brake booster, and EGR valve.
6.6. Screwdrivers
Various screwdrivers, including flathead and Phillips head, are needed for removing and installing hose clamps and other fasteners.
6.7. Hose Clamp Pliers
Hose clamp pliers make it easier to remove and install hose clamps without damaging the hoses.
6.8. Multimeter
A multimeter can be used to check the electrical connections and sensors related to the vacuum system, ensuring they are functioning correctly.
6.9. Code Reader or Scan Tool
A code reader or scan tool can help you retrieve Diagnostic Trouble Codes (DTCs) related to vacuum leaks, providing valuable information for diagnosis and repair.
CARDIAGTECH.NET offers a wide range of high-quality tools for diagnosing and repairing vacuum leaks. Here is a list of some of our recommended tools:
| Tool | Description | Average Price |
|---|---|---|
| Vacuum Gauge | Measures vacuum pressure in the intake manifold. | $20 – $50 |
| Smoke Machine | Injects smoke into the vacuum system to locate leaks. | $100 – $300 |
| Mechanic’s Stethoscope | Isolates hissing sounds to pinpoint leak locations. | $15 – $30 |
| Socket and Wrench Set | Comprehensive set for removing and installing components. | $50 – $200 |
| Hose Clamp Pliers | Simplifies the removal and installation of hose clamps. | $15 – $30 |
| Multimeter | Checks electrical connections and sensors. | $25 – $100 |
| Code Reader/Scan Tool | Retrieves Diagnostic Trouble Codes (DTCs). | $50 – $300 |
Having these tools on hand will enable you to tackle vacuum leaks efficiently and effectively. Contact CARDIAGTECH.NET at +1 (641) 206-8880 to get expert advice on selecting the best tools for your needs.
7. Preventive Measures: Avoiding Future Vacuum Leaks
Preventing vacuum leaks is always better than having to fix them. Here are some preventive measures you can take to minimize the risk of future leaks:
7.1. Regular Inspections
Regularly inspect vacuum hoses and connections for signs of wear, cracks, or looseness. Perform these inspections during routine maintenance, such as oil changes or tune-ups.
7.2. Use High-Quality Replacement Parts
When replacing vacuum hoses or other components, use high-quality parts that are designed to withstand heat, vibrations, and other harsh conditions.
7.3. Proper Installation
Ensure that all vacuum hoses and connections are properly installed and secured. Use the correct hose clamps and torque specifications to prevent leaks.
7.4. Protect Hoses from Heat
Protect vacuum hoses from excessive heat by using heat shields or routing them away from hot engine components.
7.5. Avoid Over-Tightening Clamps
Avoid over-tightening hose clamps, as this can damage the hoses and lead to premature failure.
Here’s a table summarizing these preventive measures:
| Measure | Description | Frequency |
|---|---|---|
| Regular Inspections | Check vacuum hoses and connections for wear, cracks, or looseness. | Every 3-6 months |
| High-Quality Parts | Use durable parts designed to withstand harsh conditions. | As needed |
| Proper Installation | Ensure correct installation and secure connections. | As needed |
| Heat Protection | Protect hoses from excessive heat with shields or rerouting. | As needed |
| Avoid Over-Tightening | Prevent damage by avoiding over-tightening hose clamps. | As needed |
By following these preventive measures, you can significantly reduce the likelihood of future vacuum leaks and keep your vehicle running smoothly. CARDIAGTECH.NET is committed to providing the best tools and parts to help you maintain your vehicle. Contact us at +1 (641) 206-8880 for more information.
8. Advanced Diagnostic Techniques: When to Seek Professional Help
While many vacuum leaks can be diagnosed and repaired at home, some situations may require advanced diagnostic techniques and professional help. Here are some scenarios where you should consider seeking assistance from a qualified mechanic:
8.1. Complex Vacuum Systems
Some vehicles have complex vacuum systems with numerous hoses, valves, and components. Diagnosing leaks in these systems can be challenging and may require specialized knowledge and equipment.
8.2. Intermittent Problems
Intermittent vacuum leaks can be particularly difficult to diagnose, as the symptoms may come and go. A professional mechanic can use advanced diagnostic tools to monitor the system and identify the source of the leak.
8.3. Multiple Leaks
If you suspect that there are multiple vacuum leaks in your vehicle, it may be best to seek professional help. Identifying and repairing multiple leaks can be time-consuming and require a systematic approach.
8.4. Lack of Experience
If you lack experience working on automotive systems, it’s always best to err on the side of caution and seek professional help. Attempting to repair a vacuum leak without the necessary knowledge and skills can lead to further damage.
Here’s a table summarizing when to seek professional help:
| Situation | Description | Recommendation |
|---|---|---|
| Complex Systems | Numerous hoses, valves, and components make diagnosis challenging. | Seek professional help |
| Intermittent Problems | Symptoms come and go, making it difficult to pinpoint the leak. | Consult a qualified mechanic |
| Multiple Leaks | Identifying and repairing several leaks requires a systematic approach. | Get professional assistance |
| Lack of Experience | Repairing without knowledge and skills can cause further damage. | Seek professional help for safety and accuracy |
CARDIAGTECH.NET partners with certified mechanics and provides them with the latest diagnostic tools and equipment. If you need professional assistance with a vacuum leak, contact us at +1 (641) 206-8880, and we can help you find a trusted mechanic in your area.
9. The Impact of Vacuum Leaks on Vehicle Emissions: A Deeper Look
Vacuum leaks can have a significant impact on vehicle emissions, leading to environmental concerns and potential regulatory issues. Here’s a closer look at how vacuum leaks affect emissions:
9.1. Increased Hydrocarbon Emissions
Vacuum leaks can cause the engine to run lean, leading to incomplete combustion and increased hydrocarbon (HC) emissions. Hydrocarbons are a major component of smog and contribute to air pollution.
9.2. Increased Carbon Monoxide Emissions
A lean-running engine can also produce higher levels of carbon monoxide (CO), a toxic gas that can be harmful to human health. Carbon monoxide interferes with the blood’s ability to carry oxygen, leading to various health problems.
9.3. Impact on Emission Control Systems
Vacuum leaks can disrupt the proper functioning of emission control systems, such as the EGR and EVAP systems. This can lead to increased emissions of nitrogen oxides (NOx) and volatile organic compounds (VOCs), which contribute to smog and ozone depletion.
Here’s a table summarizing the impact of vacuum leaks on vehicle emissions:
| Emission | Impact of Vacuum Leaks | Environmental Concern |
|---|---|---|
| Hydrocarbons | Increased due to incomplete combustion in a lean-running engine. | Contributes to smog and air pollution. |
| Carbon Monoxide | Increased levels due to inefficient combustion. | Toxic gas harmful to human health. |
| Nitrogen Oxides | Disrupts EGR system, leading to higher NOx emissions. | Contributes to smog and acid rain. |
| VOCs | Interferes with EVAP system, increasing emissions of volatile organic compounds. | Contributes to smog and ozone depletion. |
Maintaining a properly functioning vacuum system is essential for minimizing vehicle emissions and protecting the environment. CARDIAGTECH.NET offers a range of diagnostic tools and replacement parts to help you keep your vehicle’s emissions in check. Contact us at +1 (641) 206-8880 to learn more.
10. Real-World Examples: Case Studies of Vacuum Leak Repairs
To illustrate the importance of diagnosing and repairing vacuum leaks, here are a few real-world case studies:
Case Study 1: Rough Idle and Poor Fuel Economy
- Vehicle: 2010 Honda Civic
- Symptoms: Rough idle, decreased acceleration, and a noticeable drop in fuel economy.
- Diagnosis: Visual inspection revealed a cracked vacuum hose near the intake manifold.
- Repair: Replaced the damaged vacuum hose.
- Outcome: The rough idle disappeared, acceleration improved, and fuel economy returned to normal.
Case Study 2: Stalling and Check Engine Light
- Vehicle: 2015 Ford F-150
- Symptoms: Stalling at idle and the check engine light was on.
- Diagnosis: A smoke test revealed a leak in the intake manifold gasket.
- Repair: Replaced the intake manifold gasket.
- Outcome: The stalling issue was resolved, and the check engine light turned off.
Case Study 3: Spongy Brakes
- Vehicle: 2012 Toyota Camry
- Symptoms: Spongy brake pedal and reduced braking performance.
- Diagnosis: Inspection revealed a leaking brake booster.
- Repair: Replaced the brake booster.
- Outcome: The brake pedal feel improved, and braking performance was restored.
These case studies demonstrate the variety of symptoms that can be caused by vacuum leaks and the importance of accurate diagnosis and effective repair. CARDIAGTECH.NET is committed to providing the tools and resources you need to tackle these issues with confidence.
FAQ: Addressing Your Questions About Vacuum Leaks
Here are some frequently asked questions about vacuum leaks:
-
What is a vacuum leak?
A vacuum leak is an unintended reduction in vacuum pressure within an automotive system, usually caused by cracks or gaps in hoses, lines, or components. -
What are the common symptoms of a vacuum leak?
Common symptoms include rough idle, decreased acceleration, stalling, increased fuel consumption, and a hissing noise. -
How can I diagnose a vacuum leak?
You can diagnose a vacuum leak by visually inspecting hoses, listening for hissing sounds, using a vacuum gauge, performing a spray test, or using a smoke machine. -
Can I fix a vacuum leak myself?
Yes, many vacuum leaks can be fixed at home by replacing damaged hoses or securing loose connections. More complex repairs may require professional help. -
What tools do I need to fix a vacuum leak?
Essential tools include a vacuum gauge, smoke machine, mechanic’s stethoscope, socket set, wrenches, and screwdrivers. -
How much does it cost to fix a vacuum leak?
The cost to fix a vacuum leak can range from $10 for a simple hose replacement to $500 for more complex repairs like replacing a brake booster. -
Can a vacuum leak affect my car’s emissions?
Yes, vacuum leaks can lead to increased hydrocarbon, carbon monoxide, and nitrogen oxide emissions, contributing to air pollution. -
How can I prevent vacuum leaks?
You can prevent vacuum leaks by regularly inspecting hoses, using high-quality replacement parts, and ensuring proper installation. -
When should I seek professional help for a vacuum leak?
Seek professional help if you have a complex vacuum system, intermittent problems, multiple leaks, or lack experience working on automotive systems. -
Where can I find quality tools and parts for fixing vacuum leaks?
CARDIAGTECH.NET offers a wide range of high-quality tools and replacement parts for diagnosing and repairing vacuum leaks. Contact us at +1 (641) 206-8880.
CARDIAGTECH.NET is your trusted partner for all your automotive diagnostic and repair needs.
Conclusion: Taking Control of Vacuum Leak Repairs
Addressing vacuum leaks promptly is crucial for maintaining your vehicle’s performance, fuel efficiency, and emissions standards. By understanding the symptoms, causes, and repair options, you can take control of vacuum leak repairs and keep your car running smoothly.
Remember, early detection and preventive measures are key to avoiding costly repairs and ensuring your vehicle’s longevity. With the right tools and knowledge, you can tackle many vacuum leak issues at home. However, don’t hesitate to seek professional help when needed.
Ready to take control of your car’s performance? Contact CARDIAGTECH.NET today at +1 (641) 206-8880 or visit us at 276 Reock St, City of Orange, NJ 07050, United States, and let our experts guide you to the best diagnostic tools and replacement parts. Empower yourself with the right equipment and expertise to keep your vehicle running at its peak. Don’t wait—reach out now and experience the difference! Visit CARDIAGTECH.NET today.