How To Fix Paint Peeling On Car Professionally
Paint peeling on your car is not just an eyesore; it’s a sign of underlying issues that, if left unattended, can lead to more significant problems like rust and corrosion. CARDIAGTECH.NET understands the importance of maintaining your vehicle’s appearance and structural integrity, so we offer you comprehensive guidance and solutions. Explore effective techniques, from DIY fixes to professional services, that can restore your car’s paint job and protect its value, considering factors like surface preparation, matching the original color, and applying a durable topcoat.
1. Understanding the Causes of Paint Peeling
Several factors can contribute to paint peeling on a car. Knowing these causes helps in addressing the issue effectively and preventing it in the future.
- Poor Surface Preparation: The most common cause is inadequate preparation before painting. This includes failing to properly sand the surface, remove rust, or apply a suitable primer. According to the EPA, proper surface preparation is crucial for paint adhesion and longevity.
- Contamination: Dirt, oil, wax, or other contaminants on the surface can prevent the paint from bonding correctly. A thorough cleaning is essential.
- Incorrect Paint Application: Using the wrong type of paint, applying too thin or too thick of a coat, or failing to follow the manufacturer’s instructions can lead to peeling.
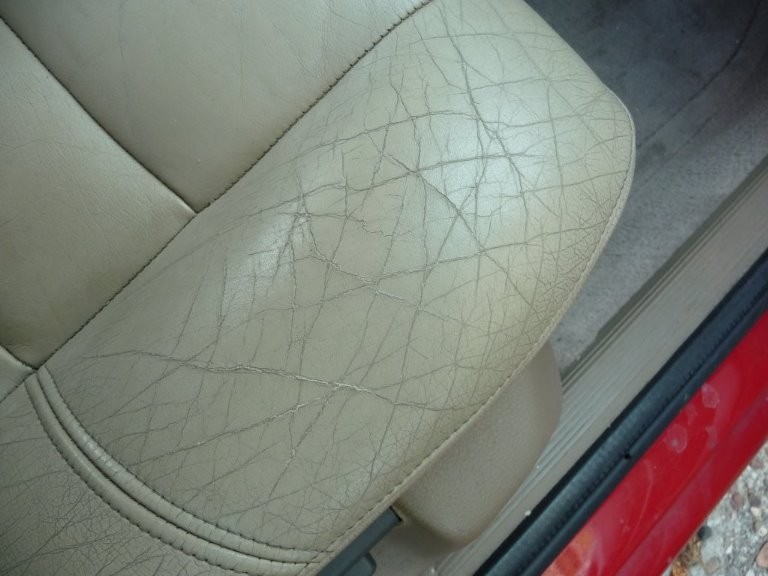
- Environmental Factors: Exposure to extreme temperatures, UV radiation, and harsh weather conditions can degrade the paint over time, causing it to peel.
- Factory Defects: In some cases, the paint may peel due to defects in the original factory paint job.
- Impact and Damage: Scratches, dents, and other forms of physical damage can compromise the paint’s integrity, leading to peeling around the affected areas.
- Chemical Exposure: Exposure to harsh chemicals, such as road salt or industrial pollutants, can also cause paint to deteriorate and peel.
Car Paint Peeling Due to Environmental Factors
2. Assessing the Damage: Is It DIY-able?
Before deciding to tackle the paint peeling issue yourself, it’s crucial to assess the extent of the damage. This assessment will help you determine whether a DIY approach is feasible or if professional help is needed.
- Small, Isolated Spots: If the peeling is limited to a few small, isolated spots, a DIY repair may be sufficient.
- Large Areas of Peeling: Extensive peeling, especially if it covers entire panels, may require professional attention.
- Presence of Rust: If rust is present beneath the peeling paint, it needs to be addressed properly. DIY rust removal can be effective for surface rust, but severe corrosion may necessitate professional treatment.
- Location of the Damage: Peeling paint on easily accessible areas like doors or fenders is generally easier to repair than on more complex areas like roofs or around windows.
- Your Skill Level: Consider your experience with auto body repairs. If you’re not comfortable with sanding, painting, and applying clear coat, it’s best to seek professional help.
3. Essential Tools and Materials
To fix paint peeling on your car effectively, gather the necessary tools and materials. Here’s a comprehensive list:
| Tool/Material | Description | Estimated Cost |
|---|---|---|
| Sandpaper | Various grits (120, 220, 320, 400) for removing rust, smoothing edges, and preparing the surface. | $10-20 |
| Sanding Block | Provides a flat, even surface for sanding. | $5-10 |
| Wire Brush | For removing loose rust and debris. | $5-15 |
| Rust Converter/Treatment | Converts rust into a stable compound, preventing further corrosion. | $10-25 |
| Body Filler (Bondo) | For filling in dents, scratches, and imperfections. | $15-30 |
| Putty Knife/Spreader | For applying and smoothing body filler. | $5-10 |
| Automotive Primer | Provides a base for the paint to adhere to and helps prevent rust. | $10-20 |
| Automotive Paint | Matching the exact color code of your car is essential. | $20-50 |
| Clear Coat | Protects the paint and provides a glossy finish. | $15-30 |
| Masking Tape | For protecting surrounding areas from overspray. | $5-10 |
| Masking Paper/Plastic | For covering larger areas. | $10-20 |
| Tack Cloth | For removing dust and debris before painting. | $5-10 |
| Spray Gun/Aerosol Cans | For applying primer, paint, and clear coat. Aerosol cans are suitable for small repairs, while a spray gun provides a more even finish. | $20-100+ |
| Safety Glasses | For eye protection. | $10-20 |
| Respirator/Mask | For protecting against harmful fumes. | $20-50 |
| Gloves | For hand protection. | $5-10 |
| Cleaning Supplies | Wax and grease remover, soap, and water for cleaning the surface. | $10-20 |
4. Step-by-Step Guide to Fixing Paint Peeling
Here’s a detailed guide on how to fix paint peeling on your car:
4.1. Preparation
-
Cleaning: Wash the area thoroughly with soap and water to remove dirt and grime. Follow up with a wax and grease remover to eliminate any remaining contaminants.
-
Masking: Use masking tape and paper/plastic to protect the surrounding areas from overspray.
-
Sanding:
- Initial Sanding: Start with 120-grit sandpaper to remove any loose paint, rust, or imperfections. Use a sanding block to ensure an even surface.
- Feathering: Gradually move to finer grits (220, 320, 400) to feather the edges of the repaired area into the surrounding paint.
-
Rust Treatment: If rust is present, use a wire brush to remove loose rust. Apply a rust converter/treatment according to the manufacturer’s instructions.
-
Body Filler (If Necessary): If there are dents or imperfections, apply body filler in thin layers, allowing each layer to dry before applying the next. Use a putty knife to smooth the filler. Once dry, sand the filler smooth with progressively finer grits of sandpaper.
-
Final Cleaning: Use a tack cloth to remove any remaining dust and debris.
4.2. Priming
- Application: Apply 2-3 thin, even coats of automotive primer to the prepared area, allowing each coat to dry before applying the next. Follow the manufacturer’s instructions for drying times.
- Sanding (Optional): Once the primer is fully dry, lightly sand it with 400-grit sandpaper to create a smooth surface for the paint.
- Final Cleaning: Use a tack cloth to remove any remaining dust.
4.3. Painting
- Color Matching: Ensure you have the correct paint color code for your car. This can usually be found on a sticker in the doorjamb or under the hood.
- Application: Apply 2-3 thin, even coats of automotive paint to the primed area, allowing each coat to dry before applying the next. Follow the manufacturer’s instructions for drying times.
- Blending (If Necessary): If blending the paint with the surrounding area, use a blending solvent to create a seamless transition.
4.4. Clear Coat
- Application: Apply 2-3 thin, even coats of clear coat to the painted area, allowing each coat to dry before applying the next. Follow the manufacturer’s instructions for drying times.
- Wet Sanding (Optional): Once the clear coat is fully dry, you can wet sand it with 2000-grit sandpaper to remove any imperfections and create a smooth surface.
- Polishing: Use a polishing compound and a polishing pad to buff the clear coat to a high shine.
- Waxing: Apply a coat of wax to protect the paint and enhance the shine.
5. Advanced Techniques for a Professional Finish
To achieve a truly professional finish, consider these advanced techniques:
- Color Sanding: After applying the clear coat, color sanding involves using very fine sandpaper (2000-grit or higher) to remove any imperfections in the clear coat, such as orange peel or dust particles. This is followed by polishing to restore the shine.
- Blending: Blending involves gradually fading the new paint into the surrounding original paint to create a seamless transition. This requires skill and experience, but it can make the repair virtually invisible.
- Using a Spray Gun: While aerosol cans are convenient for small repairs, a spray gun provides a more even and consistent finish, especially for larger areas.
- Temperature and Humidity Control: Paint application is best done in a temperature-controlled environment with low humidity. Extreme temperatures or high humidity can affect the paint’s drying time and finish.
6. Common Mistakes to Avoid
Avoiding these common mistakes can save you time, money, and frustration:
- Skipping Surface Preparation: Proper surface preparation is crucial for paint adhesion. Don’t skip steps like cleaning, sanding, and priming.
- Applying Paint Too Thickly: Applying paint too thickly can lead to runs, drips, and poor drying. Apply thin, even coats instead.
- Not Matching the Paint Color: Use the correct paint color code for your car to ensure a seamless repair.
- Painting in Direct Sunlight: Avoid painting in direct sunlight, as it can cause the paint to dry too quickly and unevenly.
- Ignoring Safety Precautions: Always wear safety glasses, a respirator, and gloves when working with paint and chemicals.
7. Cost Analysis: DIY vs. Professional Repair
The cost of fixing paint peeling can vary significantly depending on whether you choose the DIY route or opt for professional repair.
| Expense | DIY | Professional Repair |
|---|---|---|
| Materials | $50-200 (depending on the extent of the repair) | Included in the overall service cost |
| Labor | Your time and effort | $50-100+ per hour (depending on the shop) |
| Equipment (if needed) | $50-200+ (for spray gun, etc.) | Included in the overall service cost |
| Total Estimated Cost | $50-400+ | $200-1000+ (depending on the extent of damage) |
DIY: DIY repair can be cost-effective for small, isolated areas of peeling paint. However, it requires time, effort, and some level of skill.
Professional Repair: Professional repair ensures a high-quality finish and can address more extensive damage. However, it is generally more expensive.
8. Maintaining Your Car’s Paint Job to Prevent Future Peeling
Preventing paint peeling is often easier and cheaper than fixing it. Here are some tips for maintaining your car’s paint job:
- Regular Washing: Wash your car regularly to remove dirt, grime, and contaminants.
- Waxing: Apply a coat of wax every few months to protect the paint from UV radiation and other environmental factors.
- Avoid Harsh Chemicals: Avoid using harsh chemicals or abrasive cleaners on your car’s paint.
- Park in the Shade: When possible, park your car in the shade to protect it from UV radiation.
- Repair Scratches and Chips Promptly: Repair any scratches or chips promptly to prevent rust and further damage.
- Consider Paint Protection Film (PPF): PPF is a transparent film that can be applied to your car’s paint to protect it from scratches, chips, and other damage.
9. Understanding Automotive Paint Types
Choosing the right type of automotive paint is essential for a durable and attractive finish. Here’s an overview of common automotive paint types:
| Paint Type | Description | Advantages | Disadvantages | Common Applications |
|---|---|---|---|---|
| Lacquer | An older type of paint that dries quickly and provides a smooth finish. It requires multiple coats and a clear coat for protection. | Dries quickly, easy to polish, smooth finish. | Not very durable, prone to chipping and fading, requires a clear coat, may not be legal in all areas due to VOC emissions. | Classic cars, custom paint jobs (where regulations allow). |
| Enamel | A durable paint that provides a hard, glossy finish. It is available in both air-dry and bake-on formulations. | Durable, glossy finish, good resistance to chemicals and solvents. | Can be difficult to apply evenly, longer drying time than lacquer. | Older vehicles, industrial applications. |
| Acrylic Urethane | A two-part paint system that combines acrylic resins with a urethane hardener. It provides a durable, glossy finish and is resistant to UV radiation and chemicals. | Durable, glossy finish, good resistance to UV radiation and chemicals, relatively easy to apply. | Requires a hardener, can be more expensive than other paint types. | Modern vehicles, custom paint jobs. |
| Water-Based Paint | An environmentally friendly paint that uses water as a solvent. It is becoming increasingly popular due to its low VOC emissions. | Low VOC emissions, environmentally friendly, good color retention. | Can be more difficult to apply than solvent-based paints, requires specialized equipment. | Newer vehicles, environmentally conscious applications. |
| Base Coat/Clear Coat | A two-stage paint system that consists of a base coat (which provides the color) and a clear coat (which provides the gloss and protection). This is the most common type of paint used on modern vehicles. | Excellent color matching, durable, glossy finish, good UV protection. | Requires two separate applications (base coat and clear coat), can be more expensive than single-stage paints. | Modern vehicles. |
| Single-Stage Paint | A paint that combines the color and clear coat into a single product. It is less common on modern vehicles but is still used in some applications. | Simpler to apply than base coat/clear coat systems, can be more cost-effective. | Not as durable or glossy as base coat/clear coat systems, may not offer as good UV protection. | Fleet vehicles, industrial applications. |
10. The Role of Primer in Paint Adhesion
Primer plays a vital role in ensuring proper paint adhesion and preventing paint peeling. Here’s why primer is so important:
- Surface Preparation: Primer helps to create a smooth, uniform surface for the paint to adhere to.
- Adhesion Promotion: Primer contains additives that promote adhesion between the substrate and the paint.
- Corrosion Protection: Some primers contain rust inhibitors that help to prevent corrosion.
- Sealing: Primer seals the surface, preventing moisture and other contaminants from penetrating the paint.
- Color Uniformity: Primer helps to create a uniform color base, ensuring that the paint color is consistent.
11. Addressing Rust Underneath Peeling Paint
Rust is a common problem that can occur underneath peeling paint. Addressing rust properly is essential to prevent it from spreading and causing further damage.
- Remove Loose Rust: Use a wire brush, sandpaper, or a grinder to remove any loose rust from the affected area.
- Apply Rust Converter: Apply a rust converter to the area to convert any remaining rust into a stable compound. Follow the manufacturer’s instructions for application and drying times.
- Prime: Apply a rust-inhibiting primer to the area to protect it from future corrosion.
- Paint: Apply the appropriate automotive paint to match the surrounding area.
- Clear Coat: Apply a clear coat to protect the paint and provide a glossy finish.
12. The Impact of Environmental Factors on Car Paint
Environmental factors can significantly impact your car’s paint job, leading to peeling, fading, and other forms of damage.
- UV Radiation: UV radiation from the sun can cause the paint to fade and break down over time.
- Temperature Extremes: Extreme temperatures can cause the paint to expand and contract, leading to cracking and peeling.
- Moisture: Moisture can cause rust and corrosion, which can undermine the paint’s adhesion.
- Pollution: Air pollution, acid rain, and industrial fallout can damage the paint’s surface.
- Road Salt: Road salt used in winter can cause corrosion and damage the paint.
13. Choosing the Right Sandpaper Grit for Each Step
Selecting the right sandpaper grit for each step is essential for achieving a smooth, professional finish.
| Step | Sandpaper Grit | Purpose |
|---|---|---|
| Removing Loose Paint/Rust | 80-120 | For removing loose paint, rust, and other imperfections. Use with caution to avoid damaging the underlying metal. |
| Feathering Edges | 220-320 | For feathering the edges of the repaired area into the surrounding paint. This helps to create a smooth transition and prevent the repaired area from being visible. |
| Smoothing Body Filler | 180-320 | For smoothing body filler after it has dried. Start with a coarser grit (180) to remove any major imperfections, then move to a finer grit (320) to smooth the surface. |
| Preparing for Primer | 400 | For creating a smooth surface for the primer to adhere to. This step helps to ensure that the primer will bond properly and provide a good base for the paint. |
| Sanding Primer | 400-600 | For sanding the primer after it has dried. This step helps to create a smooth surface for the paint to adhere to. Use a light touch and avoid sanding through the primer. |
| Preparing for Clear Coat | 600-800 | For creating a smooth surface for the clear coat to adhere to. This step helps to ensure that the clear coat will bond properly and provide a glossy finish. |
| Wet Sanding Clear Coat | 2000-3000 | For wet sanding the clear coat after it has dried. This step helps to remove any imperfections, such as orange peel or dust particles. Use plenty of water and a light touch. |
14. Understanding the Importance of a Clean Workspace
A clean workspace is essential for achieving a high-quality paint job. Dust, dirt, and other contaminants can ruin the finish.
- Sweep and Vacuum: Regularly sweep and vacuum the workspace to remove dust and debris.
- Use Tack Cloths: Use tack cloths to remove any remaining dust from the surface before painting.
- Control Airflow: Control airflow in the workspace to minimize the amount of dust that can settle on the paint.
- Wear Clean Clothing: Wear clean clothing to avoid transferring dirt and lint to the paint.
15. The Benefits of Paint Protection Film (PPF)
Paint Protection Film (PPF) is a transparent film that can be applied to your car’s paint to protect it from scratches, chips, and other damage.
- Scratch Resistance: PPF provides a barrier against scratches and swirl marks.
- Chip Resistance: PPF helps to prevent chips caused by rocks and debris.
- UV Protection: PPF can help to protect the paint from UV radiation.
- Self-Healing: Some PPF products have self-healing properties that allow them to repair minor scratches and swirl marks.
- Long-Lasting: PPF can last for several years, providing long-term protection for your car’s paint.
16. How to Properly Store Automotive Paint
Properly storing automotive paint can help to extend its shelf life and ensure that it is ready to use when you need it.
- Keep it Cool: Store paint in a cool, dry place away from direct sunlight.
- Seal Tightly: Make sure the paint can is tightly sealed to prevent the paint from drying out.
- Store Upside Down: Store the paint can upside down to help prevent the paint from forming a skin on the surface.
- Shake Before Use: Always shake the paint can thoroughly before use to ensure that the paint is properly mixed.
17. Understanding VOC Regulations and Automotive Paint
Volatile Organic Compounds (VOCs) are chemicals that evaporate into the air and can contribute to air pollution. Many areas have regulations limiting the amount of VOCs that can be emitted by automotive paints.
- Check Local Regulations: Check your local regulations to ensure that the paint you are using complies with VOC limits.
- Use Low-VOC Paints: Consider using low-VOC paints, which are environmentally friendly and comply with most VOC regulations.
- Proper Disposal: Dispose of used paint and paint-related materials properly to prevent VOC emissions.
18. Techniques for Blending New Paint with Old Paint
Blending new paint with old paint is essential for creating a seamless repair.
- Feathering: Feather the edges of the repaired area into the surrounding paint using progressively finer grits of sandpaper.
- Blending Solvent: Use a blending solvent to help the new paint melt into the old paint.
- Polishing: Polish the repaired area to blend the new paint with the old paint.
- Waxing: Apply a coat of wax to protect the paint and enhance the shine.
19. Using Automotive Touch-Up Paint for Minor Peeling
Automotive touch-up paint is a convenient solution for repairing minor areas of peeling paint.
- Clean the Area: Clean the area thoroughly with soap and water.
- Apply Touch-Up Paint: Apply the touch-up paint to the affected area using a small brush or applicator.
- Allow to Dry: Allow the touch-up paint to dry completely.
- Apply Clear Coat (Optional): Apply a clear coat to protect the touch-up paint and provide a glossy finish.
- Polishing (Optional): Polish the repaired area to blend the touch-up paint with the surrounding paint.
20. Professional Paint Repair Services: When to Call an Expert
While DIY repair can be effective for minor paint peeling, there are times when it’s best to call a professional.
- Extensive Damage: If the paint peeling is extensive or covers large areas of the car, professional repair is recommended.
- Rust Repair: If rust is present underneath the peeling paint, professional rust repair services are often necessary.
- Structural Damage: If the car has structural damage, such as dents or collision damage, professional repair is essential.
- Lack of Experience: If you lack the experience or confidence to perform the repair yourself, it’s best to call a professional.
21. The Importance of Proper Lighting During Paint Repair
Proper lighting is crucial for achieving a high-quality paint job.
- Adequate Illumination: Ensure that the workspace is adequately illuminated with bright, even lighting.
- Color Accuracy: Use lighting that provides accurate color rendering to ensure that the paint color matches the surrounding area.
- Shadow Reduction: Minimize shadows in the workspace to ensure that you can see the surface clearly.
- Inspection Lighting: Use inspection lighting to identify any imperfections in the paint.
22. Using Clay Bar to Prepare the Surface for Paint Repair
A clay bar is a detailing tool used to remove contaminants from the surface of the paint, preparing it for repair.
- Wash the Car: Wash the car thoroughly to remove dirt and grime.
- Lubricate the Surface: Spray the surface with a clay bar lubricant.
- Clay the Surface: Rub the clay bar over the surface in a back-and-forth motion, applying light pressure.
- Wipe Clean: Wipe the surface clean with a microfiber towel.
23. Techniques for Removing Orange Peel from Automotive Paint
Orange peel is a texture that can occur on automotive paint, resembling the surface of an orange.
- Wet Sanding: Wet sand the paint with 2000-grit sandpaper to remove the orange peel.
- Polishing: Polish the paint to restore the shine.
- Buffing: Buff the paint to remove any remaining imperfections.
24. Automotive Paint Sealants: An Extra Layer of Protection
Automotive paint sealants provide an extra layer of protection for your car’s paint.
- UV Protection: Sealants help to protect the paint from UV radiation.
- Water Repellency: Sealants make the paint more water repellent, preventing water spots.
- Scratch Resistance: Sealants can help to reduce scratches and swirl marks.
- Gloss Enhancement: Sealants can enhance the gloss and shine of the paint.
25. The Future of Automotive Paint Technology
Automotive paint technology is constantly evolving.
- Self-Healing Paints: Self-healing paints can repair minor scratches and swirl marks automatically.
- Color-Changing Paints: Color-changing paints can change color depending on the viewing angle or temperature.
- Environmentally Friendly Paints: Environmentally friendly paints are low in VOCs and use sustainable materials.
26. Why Choose CARDIAGTECH.NET for Your Automotive Repair Needs?
At CARDIAGTECH.NET, we understand the challenges you face in maintaining and repairing vehicles. Our selection of tools and equipment is specifically designed to enhance your efficiency, accuracy, and safety.
- High-Quality Tools: We offer a wide range of high-quality tools that are built to last.
- Competitive Prices: We offer competitive prices to help you save money.
- Expert Advice: Our team of experts can provide you with advice and support.
- Excellent Customer Service: We are committed to providing excellent customer service.
27. Call to Action
Are you struggling with paint peeling or other automotive repair challenges? Contact CARDIAGTECH.NET today for expert advice and top-quality tools that will make your job easier and more efficient. Call us at +1 (641) 206-8880, visit our website at CARDIAGTECH.NET, or stop by our location at 276 Reock St, City of Orange, NJ 07050, United States. Let us help you take your automotive repair work to the next level.
FAQ: Frequently Asked Questions About Fixing Paint Peeling on Cars
Here are some frequently asked questions about fixing paint peeling on cars:
-
What causes paint to peel on a car?
Paint peeling can be caused by poor surface preparation, contamination, incorrect paint application, environmental factors, factory defects, impact damage, and chemical exposure.
-
Is it possible to fix paint peeling myself?
Yes, it is possible to fix paint peeling yourself, especially if the damage is minor and isolated. However, for extensive damage or rust repair, professional help is recommended.
-
What tools and materials do I need to fix paint peeling?
You will need sandpaper, a sanding block, a wire brush, rust converter, body filler (if needed), automotive primer, automotive paint, clear coat, masking tape, masking paper, a tack cloth, a spray gun or aerosol cans, safety glasses, a respirator, gloves, and cleaning supplies.
-
How do I prepare the surface before painting?
Wash the area thoroughly with soap and water, followed by a wax and grease remover. Sand the area to remove loose paint, rust, and imperfections. Apply body filler if needed and then prime the area.
-
How do I match the paint color for my car?
Find the paint color code for your car, usually located on a sticker in the doorjamb or under the hood. Use this code to purchase the correct automotive paint.
-
How many coats of paint should I apply?
Apply 2-3 thin, even coats of automotive paint, allowing each coat to dry before applying the next.
-
What is clear coat and why is it important?
Clear coat is a protective layer that is applied over the paint to provide a glossy finish and protect the paint from UV radiation, scratches, and other damage.
-
How do I prevent paint peeling in the future?
Wash your car regularly, apply wax every few months, avoid harsh chemicals, park in the shade, repair scratches and chips promptly, and consider paint protection film (PPF).
-
When should I call a professional for paint repair?
Call a professional for extensive damage, rust repair, structural damage, or if you lack the experience or confidence to perform the repair yourself.
-
Where can I find quality automotive repair tools and equipment?
Visit CARDIAGTECH.NET for a wide selection of high-quality automotive repair tools and equipment at competitive prices.