How To Fix Car Dashboard Cracks Like A Pro
Cracked car dashboards are more than just an eyesore; they can significantly diminish your vehicle’s value and overall aesthetic. With the right knowledge and tools, you can tackle these imperfections head-on. CARDIAGTECH.NET offers insights into repairing and preventing dashboard cracks and provides top-tier equipment to get the job done right, enhancing your car’s interior and maintaining its value. Discover effective techniques for dashboard restoration and explore how high-quality tools from CARDIAGTECH.NET can assist you in this endeavor.
1. Understanding Car Dashboard Cracks
Dashboard cracks are a common issue, especially in regions with extreme temperatures and intense sunlight. These cracks not only detract from the appearance of your car’s interior but can also affect its resale value. Recognizing the causes and types of cracks is the first step toward effective repair.
1.1. Causes of Dashboard Cracks
Several factors contribute to dashboard cracks:
- Sun Exposure: Prolonged exposure to ultraviolet (UV) rays causes the dashboard material to dry out and become brittle.
- Temperature Fluctuations: Extreme heat and cold cycles can cause the dashboard to expand and contract, leading to stress and cracking.
- Material Degradation: Over time, the materials used in dashboards, such as vinyl and plastic, can degrade and lose their flexibility.
- Poor Maintenance: Lack of regular cleaning and conditioning can accelerate the deterioration of the dashboard.
- Stress and Pressure: Placing heavy objects on the dashboard or applying excessive pressure can cause stress fractures.
1.2. Types of Dashboard Cracks
Identifying the type of crack is essential for choosing the appropriate repair method:
- Surface Cracks: These are small, hairline cracks that affect only the surface layer of the dashboard.
- Deep Cracks: These penetrate deeper into the dashboard material and may require more extensive repair.
- Spider Cracks: These are networks of fine cracks that resemble a spiderweb, often caused by severe sun damage.
- Edge Cracks: These occur along the edges of the dashboard, where the material is more vulnerable to stress and wear.
Alt text: Close-up of surface cracks on a car dashboard, highlighting the effects of sun damage and material degradation.
2. Assessing the Damage
Before starting any repair, it’s crucial to assess the extent of the damage to determine the best course of action. This involves a thorough inspection and careful consideration of the materials involved.
2.1. Inspecting the Dashboard
Begin by thoroughly inspecting the dashboard to identify all cracks and their severity. Use a bright light to highlight any hidden or subtle cracks. Pay attention to the size, depth, and location of each crack.
2.2. Determining Material Type
Most dashboards are made of either rigid ABS plastic or vinyl laminated to a thick foam pad. Identifying the material is crucial because different materials require different repair techniques and products.
- ABS Plastic: Rigid and durable, ABS plastic is commonly used in older vehicles.
- Vinyl: Softer and more flexible, vinyl is often used in newer cars and can be more susceptible to cracking due to its composition.
2.3. Evaluating Repair Options
Based on the damage and material type, evaluate the available repair options:
- DIY Repair: Suitable for minor surface cracks and cosmetic issues.
- Professional Repair: Recommended for deep, extensive cracks or when dealing with complex dashboard designs.
- Dashboard Replacement: Necessary when the damage is beyond repair or when the structural integrity of the dashboard is compromised.
- Dashboard Cover: A simple and cost-effective option to hide cracks without a full repair.
3. Essential Tools and Materials for Dashboard Crack Repair
Having the right tools and materials is essential for a successful dashboard crack repair. CARDIAGTECH.NET offers a range of high-quality tools that can make the job easier and more effective.
3.1. Cleaning Supplies
Before starting any repair, the dashboard must be thoroughly cleaned to remove dirt, dust, and debris.
- Mild Detergent: Use a mild detergent mixed with water to clean the dashboard surface.
- Soft Cloths: Use microfiber cloths to avoid scratching the dashboard.
- Detailing Brushes: Small brushes can help clean hard-to-reach areas and crevices.
3.2. Sanding Tools
Sanding is necessary to prepare the surface for repair and to smooth out any imperfections.
- Sandpaper: Various grits of sandpaper, ranging from coarse (220 grit) to fine (500 grit), are needed.
- Sanding Block: A sanding block ensures even pressure and a uniform finish.
- Wet/Dry Sandpaper: This type of sandpaper can be used with water for a smoother finish.
3.3. Filling and Repair Materials
Filling materials are used to fill the cracks and restore the dashboard’s original surface.
- Flexible Epoxy: This is ideal for filling cracks in both ABS plastic and vinyl dashboards. SEM Problem Plastic Epoxy is a recommended product.
- Vinyl Repair Kit: For vinyl dashboards, a specialized vinyl repair kit with color-matched filler is essential.
- Plastic Weld: For ABS plastic dashboards, a plastic weld can provide a strong and durable repair.
3.4. Application and Finishing Tools
These tools help apply the repair materials and achieve a professional finish.
- Putty Knife or Spreader: Used to apply and smooth the filling material.
- Texturizing Pad: Used to replicate the original texture of the dashboard.
- Spray Grain: Spray grain can add texture to the repaired area.
- Color-Matching Dye: Used to match the color of the repaired area to the rest of the dashboard.
- Clear Coat: Applied to protect the repaired area and provide a uniform finish.
3.5. Safety Gear
Safety gear is essential to protect yourself during the repair process.
- Gloves: Protect your hands from chemicals and irritants.
- Safety Glasses: Protect your eyes from dust and debris.
- Respirator: Protect your lungs from harmful fumes when using spray paints and chemicals.
Alt text: A collection of essential tools and materials for repairing car dashboard cracks, including sandpaper, epoxy, and safety gear.
4. Step-by-Step Guide to Fixing Car Dashboard Cracks
Follow these steps to repair car dashboard cracks effectively. This guide provides detailed instructions for both ABS plastic and vinyl dashboards.
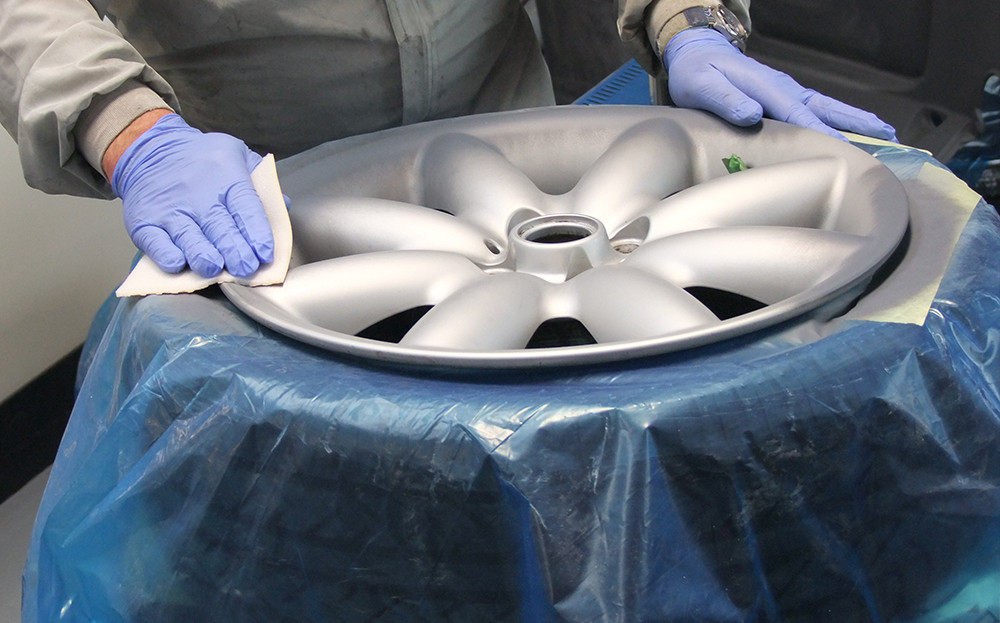
4.1. Preparing the Dashboard
- Clean the Dashboard: Use a mild detergent and water to thoroughly clean the dashboard. Remove any dirt, dust, and debris.
- Trim Loose Edges: Use a sharp knife or razor blade to carefully trim away any lifting or loose edges around the cracks. This ensures a smooth surface for the repair.
- Masking: Use masking tape to protect the surrounding areas from accidental damage during the repair process.
4.2. Filling the Cracks
- Apply Epoxy or Filler: For ABS plastic, use a flexible epoxy like SEM Problem Plastic Epoxy. For vinyl, use a vinyl repair kit. Apply the filler slightly above the surface level of the dashboard.
- Smooth the Surface: Use a putty knife or spreader to smooth the filler and remove any excess material. Ensure the filler is evenly distributed and there are no air pockets.
- Curing Time: Allow the filler to cure for the recommended time, typically one hour. Refer to the product instructions for specific curing times.
4.3. Sanding and Smoothing
- Initial Sanding: Use 220 grit wet/dry sandpaper to evenly sand the filled area. This removes any imperfections and blends the filler with the surrounding surface.
- Repeat Filling (If Necessary): If the surface is not level after the first sanding, repeat the filling and sanding process until a smooth, even surface is achieved.
- Fine Sanding: Use 500 grit wet/dry sandpaper to polish the surface. This creates a smooth base for texturizing and coloring.
4.4. Texturizing the Repaired Area
- Apply Texture: If the sanding process removed the original texture, you need to reapply it. There are several methods to do this:
- Spray Grain: Apply spray grain in thin coats, allowing each coat to dry for at least 10 minutes before applying the next.
- Super Glue Method: Apply tiny dots of super glue, pat and disperse them with a paper towel, catalyze with baking soda, and then sand. This can impart texture. Follow with spray grain for best results.
- Gently Polish: After applying the texture, gently polish the area with 500 grit sandpaper to smooth out any rough spots.
4.5. Coloring and Finishing
- Apply Color: Use a color-matching dye to paint the repaired area. Apply thin, even coats, allowing each coat to dry before applying the next.
- Blend the Color: Use a blending technique to seamlessly blend the color with the surrounding dashboard.
- Apply Clear Coat (Optional): If desired, apply a clear coat to protect the repaired area and provide a uniform finish.
- Final Polish: Once the clear coat is dry, use a polishing compound to achieve a smooth, glossy finish.
Alt text: A series of images illustrating the step-by-step process of repairing car dashboard cracks, from cleaning to coloring.
5. Alternative Solutions: Dashboard Covers and Replacements
While repairing dashboard cracks can be a rewarding DIY project, there are alternative solutions to consider, such as using dashboard covers or replacing the entire dashboard.
5.1. Dashboard Covers
Dashboard covers, also known as dash caps, are vacuum-molded covers that fit over the existing dashboard. They provide a quick and easy way to hide cracks and protect the dashboard from further damage.
- Pros:
- Easy Installation: Dashboard covers are easy to install and require no special tools.
- Cost-Effective: They are a more affordable alternative to dashboard replacement.
- Protection: They protect the dashboard from further sun damage and cracking.
- Cons:
- Appearance: They may not perfectly match the original dashboard and can look like an aftermarket addition.
- Fit Issues: Some covers may not fit perfectly, leaving gaps or uneven edges.
5.2. Dashboard Replacement
Replacing the entire dashboard is the most comprehensive solution for severely damaged dashboards. It involves removing the old dashboard and installing a new one.
- Pros:
- Restores Original Look: A new dashboard restores the original appearance of the car’s interior.
- Improved Value: It can significantly increase the car’s resale value.
- Durability: New dashboards are made of high-quality materials and are designed to last.
- Cons:
- High Cost: Dashboard replacement is the most expensive option.
- Complex Installation: It requires specialized tools and expertise.
- Time-Consuming: The replacement process can take several hours.
| Solution | Pros | Cons |
|---|---|---|
| Dashboard Repair | Cost-effective, Maintains original dashboard, DIY option | Time-consuming, Requires skill, May not be a perfect match |
| Dashboard Cover | Easy installation, Affordable, Protects from further damage | May not match perfectly, Can look like an aftermarket addition |
| Dashboard Replacement | Restores original look, Improves value, Durable | High cost, Complex installation, Time-consuming |
6. Preventing Dashboard Cracks
Prevention is always better than cure. Taking proactive steps to protect your dashboard can help prevent cracks and extend its lifespan.
6.1. Park in the Shade
Whenever possible, park your car in the shade to reduce exposure to direct sunlight. This helps prevent the dashboard from overheating and drying out.
6.2. Use a Sunshade
Use a sunshade to block sunlight from entering the car through the windshield. This can significantly reduce the temperature inside the car and protect the dashboard from UV rays.
6.3. Regular Cleaning and Conditioning
Regularly clean and condition the dashboard to keep it moisturized and prevent it from drying out. Use a vinyl or leather conditioner to protect the material from UV damage and maintain its flexibility.
6.4. Avoid Harsh Chemicals
Avoid using harsh chemicals or abrasive cleaners on the dashboard. These can damage the material and accelerate its degradation. Stick to mild detergents and specialized automotive cleaning products.
6.5. Monitor Interior Temperature
Try to regulate the interior temperature of your car, especially in extreme weather conditions. Use air conditioning or heating to maintain a consistent temperature and prevent the dashboard from expanding and contracting excessively.
Alt text: A car with a sunshade in the windshield, illustrating a simple yet effective method for preventing dashboard cracks.
7. The Science Behind Dashboard Materials and Cracking
Understanding the science behind dashboard materials and why they crack can provide valuable insights into prevention and repair.
7.1. Material Composition
Dashboards are typically made of polymers, such as ABS plastic or vinyl. These materials are chosen for their durability, flexibility, and aesthetic appeal. However, they are also susceptible to degradation when exposed to environmental factors like UV radiation and temperature fluctuations.
7.2. UV Degradation
UV radiation from sunlight breaks down the chemical bonds in the polymer molecules, leading to a process called photodegradation. This causes the material to become brittle, lose its flexibility, and eventually crack.
7.3. Thermal Expansion and Contraction
Temperature fluctuations cause the dashboard material to expand and contract. Over time, this repeated expansion and contraction can lead to stress fractures and cracks, especially in areas that are already weakened by UV degradation.
7.4. Chemical Reactions
Chemicals in the air, such as ozone and pollutants, can also react with the dashboard material, leading to further degradation. This is particularly true in urban areas with high levels of air pollution.
7.5. Material Fatigue
Repeated stress and strain on the dashboard material can lead to fatigue, causing microscopic cracks to form and gradually grow over time. This is more likely to occur in areas that are subject to high levels of vibration or pressure.
8. Advanced Techniques for Dashboard Repair
For those looking to achieve professional-level results, advanced techniques can be employed to enhance the durability and appearance of the repaired dashboard.
8.1. Plastic Welding
Plastic welding is a technique used to fuse two pieces of plastic together using heat. This is particularly effective for repairing cracks in ABS plastic dashboards.
- Preparation: Clean the area around the crack and bevel the edges to create a V-shaped groove.
- Heating: Use a plastic welder to heat the edges of the crack and melt them together.
- Filling: Use a plastic filler rod to fill the groove with molten plastic.
- Smoothing: Allow the plastic to cool and then sand and smooth the surface.
8.2. Color Matching
Achieving a perfect color match is crucial for a seamless repair. Here are some tips for color matching:
- Use a Color Chart: Use a color chart to identify the exact color of your dashboard.
- Mix Colors: Mix different colors of dye to create a custom color that matches your dashboard.
- Test the Color: Test the color on a hidden area of the dashboard to ensure it is a perfect match.
8.3. Texturing Techniques
Replicating the original texture of the dashboard is essential for a professional-looking repair. Here are some advanced texturing techniques:
- Heat Gun: Use a heat gun to soften the surface of the filler and then press a texturing pad onto the surface to create a pattern.
- Custom Texture Pads: Create custom texture pads using molds or stamps to replicate the exact texture of your dashboard.
- Airbrushing: Use an airbrush to apply texture to the repaired area. This allows for precise control and a natural-looking finish.
9. Integrating Technology in Dashboard Repair
Modern technology offers innovative solutions for dashboard repair, enhancing precision and efficiency.
9.1. 3D Scanning and Printing
3D scanning technology can create a precise digital model of the damaged dashboard. This model can be used to design and 3D print custom repair parts or even a complete dashboard replacement.
- Scanning: Use a 3D scanner to capture the shape and dimensions of the dashboard.
- Modeling: Use CAD software to create a 3D model of the repair part.
- Printing: Use a 3D printer to print the repair part using durable materials like ABS or polycarbonate.
- Finishing: Sand, paint, and texture the 3D printed part to match the original dashboard.
9.2. Computer-Aided Color Matching
Computer-aided color matching systems use spectrophotometers to analyze the color of the dashboard and create a custom color formula. This ensures a perfect color match, even for complex or faded colors.
- Scanning: Use a spectrophotometer to scan the color of the dashboard.
- Analysis: The system analyzes the color and generates a custom color formula.
- Mixing: Mix the colors according to the formula to create a perfect match.
- Application: Apply the color to the repaired area using an airbrush or spray gun.
9.3. Augmented Reality (AR) Assistance
Augmented reality (AR) apps can provide step-by-step instructions and visual guidance for dashboard repair. These apps use the camera on your smartphone or tablet to overlay instructions onto the dashboard, making the repair process easier and more intuitive.
- Installation: Download an AR app for dashboard repair.
- Scanning: Scan the dashboard using the app.
- Guidance: Follow the on-screen instructions and visual cues to complete the repair.
- Verification: The app can verify the quality of the repair and provide feedback.
10. Legal and Ethical Considerations
When repairing or replacing a dashboard, it’s important to consider the legal and ethical implications.
10.1. Safety Standards
Ensure that any repair or replacement complies with safety standards. The dashboard plays a crucial role in passenger safety, and improper repairs can compromise its effectiveness in an accident.
10.2. Disclosure Requirements
If you are selling a vehicle with a repaired or replaced dashboard, disclose this information to the buyer. Failure to do so could result in legal issues.
10.3. Environmental Impact
Consider the environmental impact of the materials used in the repair process. Choose eco-friendly products and dispose of waste materials responsibly.
10.4. Warranty Implications
Check the warranty on your vehicle before making any repairs. Unauthorized repairs could void the warranty.
FAQ: Fixing Car Dashboard Cracks
1. Can I fix a cracked dashboard myself?
Yes, you can fix minor cracks yourself with the right tools and materials. However, extensive damage may require professional repair.
2. What is the best filler for dashboard cracks?
Flexible epoxy is generally the best filler for both ABS plastic and vinyl dashboards. SEM Problem Plastic Epoxy is a recommended product.
3. How can I prevent dashboard cracks?
Park in the shade, use a sunshade, regularly clean and condition the dashboard, and avoid harsh chemicals.
4. Is it better to repair or replace a cracked dashboard?
It depends on the extent of the damage. Repair is suitable for minor cracks, while replacement is necessary for extensive damage.
5. How much does it cost to repair a dashboard crack?
DIY repair can cost between $50 and $100, while professional repair can range from $200 to $500. Replacement can cost upwards of $1000.
6. Can a dashboard cover hide cracks effectively?
Yes, dashboard covers can effectively hide cracks and protect the dashboard from further damage.
7. What tools do I need for dashboard crack repair?
You will need cleaning supplies, sandpaper, filling materials, application tools, and safety gear.
8. How long does it take to repair a dashboard crack?
DIY repair can take several hours, while professional repair may take a day or two.
9. Will repairing a dashboard crack increase my car’s value?
Yes, repairing a dashboard crack can improve your car’s appearance and potentially increase its resale value.
10. Are there any safety concerns with repairing a dashboard?
Yes, it’s important to use safety gear and follow all product instructions to avoid injury or damage to the vehicle.
Is your car’s dashboard riddled with unsightly cracks? Don’t let these imperfections diminish your vehicle’s value and aesthetic appeal. At CARDIAGTECH.NET, we understand the frustration and offer expert guidance and top-quality tools to help you restore your dashboard to its former glory. Whether you’re a seasoned auto technician or a dedicated DIY enthusiast, we have the solutions you need. Contact us today at +1 (641) 206-8880 or visit our website CARDIAGTECH.NET for personalized advice and to explore our range of professional-grade repair tools. Let CARDIAGTECH.NET be your trusted partner in automotive care. Our address is 276 Reock St, City of Orange, NJ 07050, United States.