How To Fix A Car Radiator Leak: Your Comprehensive Guide
Is your car showing signs of a radiator leak? Don’t sweat it. This in-depth guide from CARDIAGTECH.NET will provide you with the knowledge and solutions to address this common automotive issue, keeping your engine running cool and efficiently. Learn expert tips and preventative measures, and discover how the right tools from CARDIAGTECH.NET can make the repair process easier and more effective.
1. Recognizing the Telltale Signs of a Radiator Leak
Identifying a radiator leak early can prevent significant engine damage and costly repairs. Radiator leaks can stem from several factors, including corrosion, physical damage, or worn-out components. Spotting the symptoms early can make all the difference. Here’s what to watch for:
1.1. Elevated Temperature Gauge Readings
An unusually high reading on your car’s temperature gauge is often the first sign of trouble. While a slight increase might be due to other issues, a consistently high or rapidly rising temperature should be taken seriously.
Impact: Driving with an overheated engine can lead to warped cylinder heads, blown head gaskets, and even a seized engine.
1.2. Visible Coolant Puddles
Keep an eye out for puddles of brightly colored liquid (usually green, orange, or pink) under your vehicle, especially near the front. Coolant has a distinctive sweet smell.
Important Note: Not all leaks are coolant. Condensation from the air conditioner is normal, but it will be clear and odorless.
1.3. Low Coolant Levels
Regularly check your coolant reservoir. If you notice the level is consistently dropping, even after topping it off, you likely have a leak somewhere in the system.
1.4. Unusual Odors
A sweet, syrupy smell inside or outside the car can indicate a coolant leak. You may also smell a burning odor if coolant is leaking onto hot engine parts.
1.5. Visible Corrosion and Rust
Inspect the radiator itself, as well as hoses and connections, for signs of corrosion, rust, or dried coolant residue. These can be telltale signs of a leak’s origin.
Signs of radiator leak, including rising temperature gauge and coolant puddles
2. Pinpointing the Source: How to Identify a Radiator Leak
Once you suspect a leak, the next step is to find its source. This can be tricky, as leaks can be small and difficult to see, especially when the engine is cold. Here are some methods to help you pinpoint the origin:
2.1. Visual Inspection
Carefully examine the radiator, hoses, clamps, and surrounding areas for any signs of wetness, corrosion, or dried coolant. Pay close attention to seams and connections.
2.2. Pressure Testing
A cooling system pressure tester is an invaluable tool for identifying leaks. This tool pressurizes the cooling system, making leaks more apparent.
-
How it Works: The tester is attached to the radiator filler neck, and pressure is applied using a hand pump. Watch the pressure gauge for any drops, indicating a leak.
-
Safety First: Always ensure the engine is cool before using a pressure tester. Never exceed the recommended pressure for your vehicle’s cooling system (typically around 15-20 psi).
2.3. UV Dye and Light
Adding UV dye to your coolant and then using a UV light can make leaks glow, making them easy to spot, even in hard-to-reach areas.
- Procedure: Add the dye to the coolant reservoir, run the engine for a few minutes to circulate it, then use the UV light to inspect the system for leaks.
2.4. The Sniff Test
Your nose can be a useful tool. Carefully sniff around the radiator and hoses, trying to detect the sweet smell of coolant. This can help you narrow down the leak’s location.
2.5. Smoke Test
A smoke machine can be connected to the cooling system to introduce smoke. The smoke will escape from any leaks, making them highly visible.
3. Essential Tools for Radiator Leak Repair
Having the right tools will make the job easier and safer. Here’s a list of must-have items for fixing a radiator leak:
| Tool | Description | Why You Need It |
|---|---|---|
| Safety Glasses | Protects your eyes from coolant splashes and debris. | Safety is paramount when working on your car. |
| Gloves | Protects your hands from chemicals and heat. | Protect your skin from harmful substances and burns. |
| Radiator Pressure Tester | Allows you to pressurize the cooling system to find leaks. | Essential for accurately locating the source of the leak. |
| Socket Set | For removing and tightening hoses and clamps. | Needed for various tasks during the repair. |
| Screwdrivers (Various Sizes) | For removing and tightening screws and clamps. | A variety of sizes ensures you have the right tool for the job. |
| Pliers | For gripping and manipulating hoses and clamps. | Useful for disconnecting hoses and removing stubborn clamps. |
| Drain Pan | To catch coolant when draining the system. | Prevents spills and makes cleanup easier. |
| Funnel | For adding coolant to the system. | Ensures a clean and easy coolant refill. |
| Coolant | The correct type for your vehicle. | Use the coolant specified in your owner’s manual to avoid corrosion and damage to the cooling system. |
| Distilled Water | For mixing with coolant. | Distilled water is free of minerals that can cause corrosion. |
| Radiator Stop Leak | A temporary fix for small leaks. | Can buy you some time, but it’s not a permanent solution. |
| Radiator Epoxy | For repairing small cracks and holes. | Another temporary fix, best suited for small, easily accessible leaks. |
| Brake Cleaner | For cleaning the area around the leak before applying epoxy. | Ensures the epoxy adheres properly. |
| Rags | For wiping up spills and cleaning parts. | Always handy to have around. |
| Work Light | To illuminate the work area. | Makes it easier to see what you’re doing, especially in dimly lit areas. |
| Torque Wrench | Ensures bolts and nuts are tightened to the correct specification. | Prevents over-tightening, which can damage components. |
CARDIAGTECH.NET offers a wide range of high-quality automotive tools, including those listed above, designed to make your radiator repair process as smooth and efficient as possible. Contact us at +1 (641) 206-8880 for expert advice on selecting the right tools for your needs.
4. Quick Fixes: Temporary Solutions for Radiator Leaks
If you discover a radiator leak and need a temporary solution to get you by until you can perform a proper repair, here are a few options:
4.1. Radiator Stop Leak Additives
These additives are designed to seal small leaks from within the cooling system.
-
How They Work: They contain particles that circulate in the coolant and clog small holes and cracks.
-
Pros: Easy to use, can provide a temporary seal.
-
Cons: Not a permanent fix, can clog the cooling system if used excessively, and may not work on larger leaks.
-
Application:
- Ensure the engine is cool.
- Pour the recommended amount of stop leak into the radiator (follow product instructions).
- Top off the radiator with coolant.
- Run the engine for 10-15 minutes to circulate the additive.
4.2. Radiator Repair Epoxy
For visible cracks or small holes, radiator repair epoxy can provide a temporary seal.
-
How it Works: This epoxy is a two-part compound that, when mixed, creates a strong, durable bond.
-
Pros: Can be effective for small, localized leaks.
-
Cons: Requires proper surface preparation, not suitable for large or complex leaks, and not a permanent fix.
-
Application:
- Clean the area around the leak thoroughly with brake cleaner.
- Mix the epoxy according to the product instructions.
- Apply the epoxy to the crack or hole, ensuring it is completely covered.
- Allow the epoxy to cure completely before running the engine.
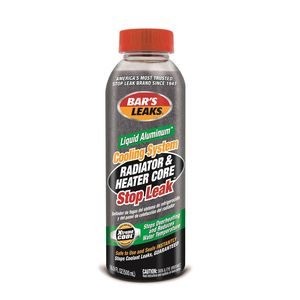
4.3. Bar’s Leaks Radiator Stop Leak
This is a specific brand of radiator stop leak that is widely available and known for its effectiveness. It works similarly to other stop leak additives.
Important Note: These temporary fixes are not substitutes for proper repairs. They should only be used to get you by until you can address the underlying problem.
5. Step-by-Step Guide: How to Fix a Radiator Leak
Here’s a detailed guide on how to fix a radiator leak. Remember to prioritize safety and take your time.
5.1. Preparation
-
Park the vehicle on a level surface and engage the parking brake.
-
Allow the engine to cool completely.
-
Gather all necessary tools and materials.
-
Wear safety glasses and gloves.
5.2. Drain the Cooling System
-
Locate the radiator drain cock (usually at the bottom of the radiator).
-
Place a drain pan under the drain cock.
-
Open the drain cock and allow the coolant to drain completely.
-
Once drained, close the drain cock.
5.3. Locate and Access the Leak
-
Use the methods described in Section 2 to pinpoint the exact location of the leak.
-
Remove any components that are blocking access to the leak, such as hoses, shrouds, or fans.
5.4. Repairing the Leak
The repair method will depend on the type and location of the leak. Here are a few common scenarios:
5.4.1. Small Leaks in Hoses
-
Replace the hose with a new one.
-
Ensure the hose is properly seated and secured with clamps.
5.4.2. Leaks at Hose Connections
-
Tighten the hose clamps.
-
If the hose is damaged, replace it.
-
If the radiator fitting is damaged, it may need to be repaired or the radiator replaced.
5.4.3. Small Cracks or Holes in the Radiator
-
Clean the area around the leak thoroughly with brake cleaner.
-
Apply radiator repair epoxy according to the product instructions.
-
Allow the epoxy to cure completely before refilling the cooling system.
5.5. Reassemble the Cooling System
-
Reinstall any components that were removed to access the leak.
-
Ensure all connections are tight and secure.
5.6. Refill the Cooling System
-
Mix coolant and distilled water in a 50/50 ratio (or as recommended by your vehicle manufacturer).
-
Pour the coolant mixture into the radiator until it is full.
-
Start the engine and let it run for a few minutes, checking for leaks.
-
Top off the coolant as needed.
5.7. Bleed the Cooling System
-
Air pockets can form in the cooling system, causing overheating.
-
Most vehicles have a bleeder valve to remove air pockets.
-
Open the bleeder valve and allow air to escape until coolant flows out.
-
Close the bleeder valve.
5.8. Test Drive
-
Take the vehicle for a short test drive, monitoring the temperature gauge.
-
Check for leaks after the test drive.
6. When to Call in the Pros: Recognizing the Limits of DIY Repair
While many radiator leaks can be fixed at home, some situations require professional help. Here are some signs that it’s time to take your car to a mechanic:
-
Large or Complex Leaks: If the leak is large, difficult to access, or involves multiple components, it’s best left to a professional.
-
Overheating Issues: If your car is overheating even after you’ve attempted to fix the leak, there may be other underlying problems that require diagnosis and repair.
-
Lack of Experience: If you’re not comfortable working on your car or lack the necessary tools, it’s always best to err on the side of caution and seek professional assistance.
-
Damaged Radiator Core: If the radiator core itself is damaged, it may not be repairable, and the entire radiator may need to be replaced.
7. Radiator Replacement: A More Involved Repair
In some cases, a radiator cannot be repaired and must be replaced. This is a more involved repair that requires more time, tools, and expertise. Here’s a general overview of the radiator replacement process:
-
Drain the Cooling System: As described in Section 5.2.
-
Disconnect Hoses and Lines: Disconnect all hoses and lines connected to the radiator, including coolant hoses, transmission cooler lines (if equipped), and any other related components.
-
Remove the Radiator Shroud and Fan: Remove the radiator shroud and fan assembly to gain access to the radiator.
-
Disconnect Electrical Connectors: Disconnect any electrical connectors attached to the radiator or related components.
-
Remove the Radiator: Unbolt the radiator from its mounting brackets and carefully lift it out of the vehicle.
-
Install the New Radiator: Place the new radiator into the mounting brackets and bolt it in place.
-
Reconnect Hoses and Lines: Reconnect all hoses and lines to the new radiator, ensuring they are properly seated and secured with clamps.
-
Reinstall the Radiator Shroud and Fan: Reinstall the radiator shroud and fan assembly.
-
Reconnect Electrical Connectors: Reconnect any electrical connectors that were disconnected.
-
Refill the Cooling System: As described in Section 5.6.
-
Bleed the Cooling System: As described in Section 5.7.
-
Test Drive: Take the vehicle for a short test drive, monitoring the temperature gauge and checking for leaks.
Note: Radiator replacement can vary depending on the make and model of your vehicle. Always consult your vehicle’s repair manual for specific instructions.
8. Choosing The Right Coolant
Selecting the right coolant is critical for maintaining your car’s cooling system. Coolant, also known as antifreeze, does more than just prevent freezing; it also protects against corrosion and helps regulate engine temperature.
8.1. Types of Coolant:
- IAT (Inorganic Additive Technology): Typically green, older formulation, needs frequent replacement (every 2 years or 24,000 miles).
- OAT (Organic Additive Technology): Usually orange, red, or pink, longer lifespan (5 years or 150,000 miles), suitable for many newer vehicles.
- HOAT (Hybrid Organic Additive Technology): Yellow or turquoise, combines IAT and OAT benefits, extended life (5 years or 150,000 miles), good for a variety of vehicles.
8.2. How to Choose:
- Consult Your Vehicle’s Manual: Always refer to your vehicle’s owner’s manual for the manufacturer’s recommended coolant type.
- Color Isn’t Everything: While coolant color is a guide, don’t rely on it solely. Check the coolant type specified on the label.
- Mixing Coolants: Avoid mixing different types of coolant, as this can lead to corrosion and reduced performance.
8.3. Coolant and Distilled Water Ratio:
- 50/50 Mix: A 50/50 mix of coolant and distilled water is generally recommended for most climates. This provides adequate freeze protection and heat transfer.
- Adjusting the Ratio: In extremely cold climates, a 60/40 coolant-to-water ratio can be used for better freeze protection. Never exceed a 70/30 ratio, as this can reduce cooling efficiency.
8.4. Why Distilled Water?
- Purity: Distilled water is free of minerals and impurities that can cause corrosion and scale buildup in the cooling system.
- Tap Water: Avoid using tap water, as it contains minerals that can damage the cooling system over time.
9. Preventive Measures: Keeping Radiator Leaks at Bay
Prevention is always better than cure. Here are some tips to help prevent radiator leaks:
- Regular Coolant Flushes: Flush the cooling system every 2-3 years or as recommended by your vehicle manufacturer to remove deposits and maintain coolant effectiveness.
- Inspect Hoses and Clamps: Regularly inspect hoses and clamps for signs of wear, cracks, or leaks. Replace them as needed.
- Use the Right Coolant: Use the coolant specified in your owner’s manual.
- Check Coolant Level: Regularly check the coolant level and top it off as needed.
- Pressure Test: Periodically pressure test the cooling system to identify potential leaks before they become major problems.
- Avoid Harsh Chemicals: Avoid using harsh chemicals or additives in the cooling system, as they can damage components and cause leaks.
- Proper Maintenance: Follow your vehicle’s recommended maintenance schedule to ensure all cooling system components are in good working order.
10. Radiator Leak FAQs: Addressing Your Concerns
10.1. What are the common causes of radiator leaks?
Common causes include corrosion, physical damage (such as from road debris), worn-out hoses, and loose clamps.
10.2. How can I temporarily seal a radiator leak until I can get it fixed?
You can use a radiator stop leak additive or apply radiator repair epoxy to small cracks or holes. However, these are only temporary solutions.
10.3. How do I know if the radiator leak repair is successful?
If the coolant level remains steady, there are no visible leaks, and the engine does not overheat, the repair is likely successful.
10.4. Can I drive my car with a radiator leak?
It’s generally not safe to drive with a radiator leak, as it can lead to engine overheating and severe damage. Only drive short distances if absolutely necessary, and monitor the temperature gauge closely.
10.5. How often should I check my radiator for leaks?
Check your radiator for leaks during regular maintenance intervals, such as when you check your oil or other fluids.
10.6. Is it safe to mix different types of coolant?
No, it is not safe to mix different types of coolant, as this can lead to corrosion and reduced cooling system performance.
10.7. Can a radiator leak cause other problems in my car?
Yes, a radiator leak can lead to engine overheating, which can cause severe damage to the engine, including warped cylinder heads, blown head gaskets, and a seized engine.
10.8. How much does it cost to fix a radiator leak?
The cost to fix a radiator leak can vary depending on the type of repair needed. A simple hose replacement may cost $50-$100, while a radiator replacement can cost $300-$800 or more.
10.9. Can I use tap water instead of distilled water in my cooling system?
No, you should not use tap water in your cooling system, as it contains minerals that can cause corrosion and scale buildup.
10.10. How long does radiator stop leak last?
Radiator stop leak is a temporary fix and may only last for a few days or weeks. It is not a substitute for a proper repair.
Conclusion:
A radiator leak can be a frustrating problem, but with the right knowledge and tools, you can often fix it yourself. Remember to prioritize safety, use high-quality parts and tools from CARDIAGTECH.NET, and don’t hesitate to seek professional help when needed. By following the tips and guidelines in this article, you can keep your cooling system in good working order and avoid costly repairs down the road.
Do you need help selecting the right tools or parts for your radiator repair? Contact the experts at CARDIAGTECH.NET today at +1 (641) 206-8880 or visit us at 276 Reock St, City of Orange, NJ 07050, United States. We’re here to help you keep your car running smoothly! Let CARDIAGTECH.NET equip you with the tools and knowledge for automotive success. Don’t wait, reach out now for expert assistance!

