How to Fix Car Seat Back Adjuster: A Comprehensive Guide
Fixing a car seat back adjuster can seem daunting, but with the right tools and guidance, it’s manageable. CARDIAGTECH.NET is here to provide you with expert advice and high-quality equipment to tackle this repair efficiently. Discover proven methods and essential car seat repair insights to restore your car seat’s functionality. We will cover seat recline mechanism, automotive seat repair, and car interior maintenance.
1. Understanding the Car Seat Back Adjuster Mechanism
The car seat back adjuster is a crucial component that allows drivers and passengers to customize their seating position for optimal comfort and safety. This mechanism typically involves a lever or knob that, when activated, engages a series of gears or a ratchet system to alter the seat back’s angle.
1.1 Types of Car Seat Back Adjusters
Several types of adjusters are used in modern vehicles, each with its own set of advantages and potential issues:
- Manual Levers: These are common in older or economy vehicles. A lever is lifted to disengage a locking mechanism, allowing the seat back to be adjusted.
- Knobs or Dials: Found in some mid-range vehicles, these knobs control a gear system that incrementally adjusts the seat back.
- Electric Adjusters: Typically seen in luxury vehicles, these systems use electric motors to move the seat back, offering precise adjustments at the touch of a button.
1.2 Common Issues with Car Seat Adjusters
Understanding the common problems can help you diagnose and address the issue effectively:
- Stripped Gears: Over time, the teeth on the gears can wear down or break, preventing the adjuster from locking properly.
- Broken Levers or Knobs: These can snap due to excessive force or material fatigue.
- Faulty Cables: In electric systems, cables can become frayed or disconnected, leading to adjuster failure.
- Jamming: Dirt, debris, or corrosion can cause the mechanism to jam, making it difficult to adjust the seat back.
- Wear and Tear: General wear and tear can lead to the loosening of components and reduced effectiveness of the adjuster.
Regular maintenance and timely repairs are essential to ensure the longevity and proper functioning of your car seat back adjuster. High-quality auto repair tools from CARDIAGTECH.NET can make these tasks easier and more effective.
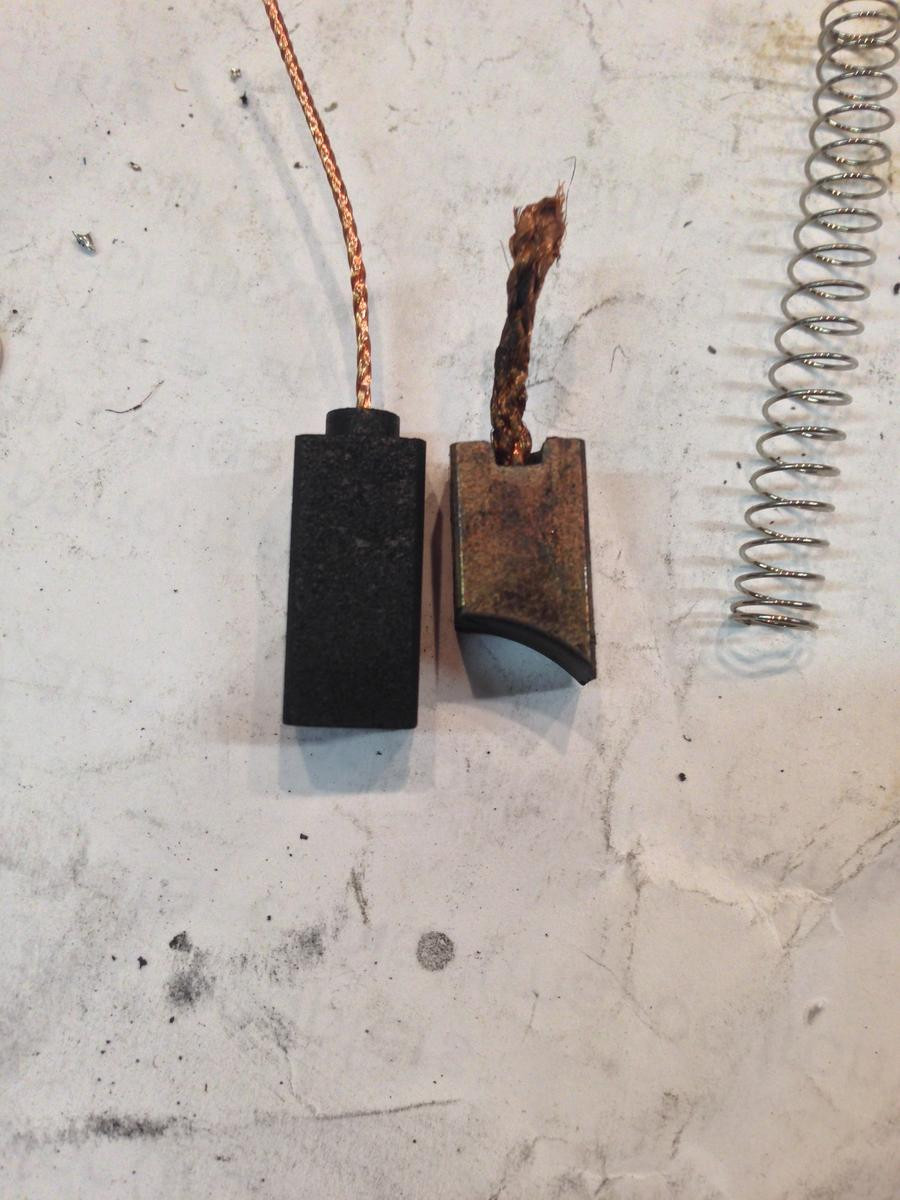
2. Essential Tools and Materials
Before you begin, gather the necessary tools and materials to ensure a smooth and efficient repair process. Having the right equipment not only simplifies the job but also helps prevent further damage to your car seat.
2.1 Basic Hand Tools
- Screwdrivers: A set of Phillips head and flathead screwdrivers of various sizes.
- Socket Set: Including metric sockets and a ratchet.
- Pliers: Both regular and needle-nose pliers are useful for gripping and manipulating small parts.
- Wrench Set: Metric wrenches for loosening and tightening bolts.
- Hammer: For gently tapping components into place.
2.2 Specialty Tools
- Seat Recliner Repair Kit: Often includes replacement gears, levers, and other small parts specific to seat adjusters.
- Upholstery Tools: Hog ring pliers and hog rings for reattaching the seat cover.
- Panel Removal Tools: To safely remove plastic panels without causing damage.
- Multimeter: For testing electrical components in power seat adjusters.
2.3 Materials and Supplies
- Lubricant: WD-40 or lithium grease to free up jammed mechanisms.
- Cleaning Supplies: A brush, vacuum, and upholstery cleaner to remove dirt and debris.
- Replacement Parts: Gears, levers, cables, or motors as needed.
- Safety Glasses: To protect your eyes from debris.
- Gloves: To keep your hands clean and protected.
Investing in high-quality tools from CARDIAGTECH.NET will ensure that you have the right equipment for the job, making the repair process more straightforward and effective.
3. Step-by-Step Guide to Diagnosing the Issue
Before attempting any repairs, it’s essential to accurately diagnose the problem with your car seat back adjuster. This involves careful observation and testing to identify the root cause of the issue.
3.1 Initial Inspection
- Check the Lever or Knob:
- Ensure it is not broken or excessively loose.
- Try to move the seat back using the lever or knob to see if there is any response.
- Listen for Unusual Noises:
- Grinding, clicking, or popping sounds can indicate stripped gears or a jammed mechanism.
- Examine the Range of Motion:
- Determine if the seat back is limited in its movement or completely stuck.
3.2 Removing the Seat
- Disconnect the Battery:
- To prevent accidental deployment of airbags, disconnect the negative battery terminal.
- Locate and Remove Fasteners:
- Typically, there are bolts or screws securing the seat to the floor.
- Use the appropriate socket or screwdriver to remove them.
- Disconnect Electrical Connectors:
- If the seat has electrical functions (e.g., power adjustment, heating), disconnect the wiring harnesses.
- Carefully Lift the Seat Out:
- Be mindful of the seat’s weight and any remaining wires or cables.
3.3 Inspecting the Adjuster Mechanism
- Remove the Seat Cover:
- Use upholstery tools to carefully detach the seat cover, starting from the back.
- Take photos as you go to help with reassembly.
- Visually Inspect the Components:
- Look for broken, worn, or misaligned parts.
- Check the gears for stripped teeth and the cables for fraying.
- Test the Mechanism:
- Manually try to move the adjuster to identify any points of resistance or failure.
- Use a Multimeter:
- If the seat has an electric adjuster, use a multimeter to test the motor and wiring for continuity and voltage.
By following these diagnostic steps, you can pinpoint the exact problem with your car seat back adjuster and determine the best course of action for repair. CARDIAGTECH.NET offers a range of diagnostic tools to assist you in this process, ensuring accurate and efficient troubleshooting.
4. Repairing Manual Seat Back Adjusters
Manual seat back adjusters are common in many vehicles and often simpler to repair than their electric counterparts. This section provides a detailed guide on how to fix common issues with manual adjusters.
4.1 Fixing Stripped Gears
Stripped gears are a frequent problem in manual seat adjusters. Here’s how to address this issue:
- Access the Gears:
- Remove the seat cover to expose the adjuster mechanism.
- Identify the gears that are responsible for the seat back adjustment.
- Inspect the Gears:
- Look for teeth that are worn, broken, or missing.
- If the damage is minor, you might be able to file down any rough edges to improve engagement.
- Replace the Gears:
- If the gears are severely damaged, replacement is necessary.
- Obtain a seat recliner repair kit from CARDIAGTECH.NET that includes the correct type of gears for your vehicle.
- Remove the old gears and install the new ones, ensuring they are properly aligned.
- Lubricate the Mechanism:
- Apply lithium grease to the gears to reduce friction and improve performance.
- Reassemble the Seat:
- Reattach the seat cover using hog ring pliers and hog rings.
- Ensure the cover is securely fastened to the frame.
4.2 Repairing Broken Levers
A broken lever can render the seat adjuster useless. Here’s how to fix it:
- Remove the Broken Lever:
- Depending on the design, the lever may be held in place by screws, bolts, or clips.
- Remove the fasteners and detach the broken lever.
- Obtain a Replacement Lever:
- Purchase a replacement lever from CARDIAGTECH.NET that is compatible with your car seat.
- Install the New Lever:
- Attach the new lever using the original fasteners.
- Ensure it is securely in place and functions smoothly.
- Test the Adjustment:
- Try adjusting the seat back to confirm that the new lever is working correctly.
- Reassemble the Seat:
- If you had to remove the seat cover to access the lever, reattach it securely.
4.3 Addressing Jammed Mechanisms
A jammed seat adjuster can be frustrating. Here’s how to free it up:
- Clean the Mechanism:
- Use a brush and vacuum to remove any dirt, debris, or corrosion from the adjuster mechanism.
- Apply Lubricant:
- Spray WD-40 or another penetrating lubricant onto the moving parts of the adjuster.
- Allow the lubricant to soak in for a few minutes.
- Gently Work the Mechanism:
- Try moving the lever or knob back and forth to loosen the jammed parts.
- Apply more lubricant as needed.
- Disassemble and Clean (if necessary):
- If the mechanism remains jammed, disassemble it to clean each part individually.
- Remove any stubborn debris with a wire brush or solvent.
- Reassemble and Lubricate:
- Reassemble the adjuster mechanism, applying lithium grease to all moving parts.
- Test the adjustment to ensure it is working smoothly.
By following these steps, you can effectively repair common issues with manual seat back adjusters. CARDIAGTECH.NET provides a wide range of tools and replacement parts to help you complete these repairs with confidence.
5. Troubleshooting Electric Seat Back Adjusters
Electric seat back adjusters offer convenience but can present unique challenges when they malfunction. This section provides a guide to troubleshooting and repairing electric seat adjusters.
5.1 Diagnosing Electrical Issues
- Check the Fuse:
- Locate the fuse for the power seats in your vehicle’s fuse box.
- Use a fuse tester or multimeter to check if the fuse is blown.
- Replace the fuse if necessary.
- Test the Switch:
- Use a multimeter to test the seat adjustment switch for continuity.
- Ensure that the switch is sending power to the motor when activated.
- Replace the switch if it is faulty.
- Inspect the Wiring:
- Check the wiring harness for any signs of damage, such as frayed wires or loose connections.
- Use a multimeter to test for continuity and voltage in the wiring.
- Repair or replace any damaged wires or connectors.
- Test the Motor:
- Disconnect the motor from the wiring harness.
- Apply direct power to the motor using jumper cables connected to a 12V battery.
- If the motor does not respond, it may be faulty and need replacement.
5.2 Replacing a Faulty Motor
- Access the Motor:
- Remove the seat cover to expose the adjuster mechanism and motor.
- Disconnect the Motor:
- Disconnect the wiring harness from the motor.
- Remove any screws or bolts that secure the motor to the adjuster mechanism.
- Remove the Old Motor:
- Carefully detach the old motor from the adjuster.
- Install the New Motor:
- Attach the new motor to the adjuster mechanism, ensuring it is properly aligned.
- Secure the motor with screws or bolts.
- Reconnect the Wiring:
- Reconnect the wiring harness to the motor.
- Test the Adjustment:
- Test the seat adjustment to ensure that the new motor is working correctly.
- Reassemble the Seat:
- Reattach the seat cover securely.
5.3 Repairing or Replacing Cables
- Inspect the Cables:
- Check the cables for fraying, kinks, or disconnections.
- Repair Damaged Cables:
- If the cable is frayed but not broken, you may be able to repair it with electrical tape or heat shrink tubing.
- Replace Broken Cables:
- If the cable is broken or severely damaged, replacement is necessary.
- Obtain a replacement cable from CARDIAGTECH.NET that is compatible with your seat adjuster.
- Disconnect the old cable from the motor and adjuster mechanism.
- Install the new cable, ensuring it is properly connected at both ends.
- Test the Adjustment:
- Test the seat adjustment to ensure that the new cable is working correctly.
Troubleshooting electric seat back adjusters requires a systematic approach to identify and address electrical and mechanical issues. CARDIAGTECH.NET offers a comprehensive selection of diagnostic tools and replacement parts to help you restore your electric seat adjuster to optimal performance.
6. Advanced Repair Techniques
For more complex issues with your car seat back adjuster, advanced repair techniques may be necessary. These techniques often require specialized tools and a deeper understanding of the mechanism.
6.1 Welding Broken Components
If a metal component of the seat adjuster is broken, welding can be a viable repair option.
- Prepare the Components:
- Clean the broken edges of the metal components to remove any rust, paint, or debris.
- Use a wire brush or grinder to ensure a clean surface for welding.
- Align the Components:
- Carefully align the broken pieces to ensure a proper fit.
- Use clamps or jigs to hold the components in place during welding.
- Weld the Components:
- Use a MIG (Metal Inert Gas) or TIG (Tungsten Inert Gas) welder to weld the components together.
- Apply small, controlled welds to prevent overheating and distortion of the metal.
- Grind and Finish:
- After welding, use a grinder to smooth the weld and remove any excess material.
- Apply a coat of paint or primer to protect the repaired area from rust.
6.2 Fabricating Custom Parts
In some cases, replacement parts for your seat adjuster may not be readily available. In these situations, fabricating custom parts may be necessary.
- Assess the Required Part:
- Carefully examine the broken or missing part to determine its dimensions, shape, and function.
- Create a Template:
- Use cardboard or sheet metal to create a template of the required part.
- Ensure the template is accurate and matches the dimensions of the original part.
- Fabricate the Part:
- Use metal cutting tools, such as a saw or plasma cutter, to cut the part from a suitable piece of metal.
- Use metal forming tools, such as a brake or hammer, to shape the part according to the template.
- Finish the Part:
- Grind and smooth any rough edges or surfaces.
- Drill any necessary holes for mounting or attachment.
- Install the Part:
- Install the fabricated part into the seat adjuster mechanism.
- Ensure it fits properly and functions as intended.
6.3 Reinforcing Weak Points
To prevent future failures, it may be beneficial to reinforce weak points in the seat adjuster mechanism.
- Identify Weak Points:
- Examine the adjuster mechanism for areas that are prone to stress or failure.
- Add Reinforcements:
- Weld additional metal supports or brackets to reinforce these weak points.
- Use gussets or braces to distribute stress and prevent bending or breaking.
- Apply Protective Coatings:
- Apply a protective coating, such as paint or powder coating, to prevent rust and corrosion.
Advanced repair techniques require skill and precision. CARDIAGTECH.NET offers a range of high-quality welding equipment, metalworking tools, and protective coatings to help you perform these repairs effectively and ensure the longevity of your car seat back adjuster.
7. Maintenance Tips for Longevity
Proper maintenance is crucial for extending the life of your car seat back adjuster and preventing future issues. Here are some essential maintenance tips:
7.1 Regular Cleaning
- Vacuum the Seats:
- Regularly vacuum the seats to remove dirt, dust, and debris that can accumulate in the adjuster mechanism.
- Wipe Down Surfaces:
- Use a damp cloth to wipe down the surfaces of the seat and adjuster components.
- Avoid using harsh chemicals that can damage the upholstery or metal parts.
- Clean the Adjuster Mechanism:
- Periodically clean the adjuster mechanism with a brush and vacuum to remove any accumulated dirt or debris.
7.2 Lubrication
- Apply Lubricant:
- Apply lithium grease or another suitable lubricant to the moving parts of the adjuster mechanism.
- This will reduce friction and prevent jamming.
- Inspect for Corrosion:
- Check the adjuster mechanism for signs of rust or corrosion.
- Apply a rust inhibitor or protective coating to prevent further damage.
7.3 Periodic Inspections
- Check for Loose Components:
- Periodically inspect the seat adjuster for loose screws, bolts, or other fasteners.
- Tighten any loose components to prevent excessive wear or damage.
- Monitor Functionality:
- Regularly test the seat adjuster to ensure it is working smoothly and properly.
- Address any issues promptly to prevent them from escalating into more significant problems.
7.4 Preventative Measures
- Avoid Overloading the Seats:
- Avoid placing excessive weight on the seats, as this can strain the adjuster mechanism.
- Use Seat Covers:
- Use seat covers to protect the upholstery and adjuster components from dirt, spills, and wear.
- Drive Carefully:
- Avoid sudden stops or impacts that can jolt the seats and damage the adjuster mechanism.
By following these maintenance tips, you can significantly extend the life of your car seat back adjuster and ensure it continues to function smoothly and reliably. CARDIAGTECH.NET offers a range of cleaning supplies, lubricants, and protective coatings to help you maintain your car seats in top condition.
8. Safety Precautions
When working on car seat back adjusters, it’s crucial to prioritize safety to prevent injuries and damage to your vehicle. Here are some essential safety precautions to keep in mind:
8.1 General Safety Tips
- Disconnect the Battery:
- Always disconnect the negative battery terminal before working on any electrical components of the car.
- This will prevent accidental deployment of airbags and reduce the risk of electrical shock.
- Wear Safety Gear:
- Wear safety glasses to protect your eyes from debris.
- Wear gloves to protect your hands from dirt, grease, and sharp edges.
- Use Proper Tools:
- Use the correct tools for the job to prevent damage to the components and reduce the risk of injury.
- Avoid using makeshift tools that may slip or break.
- Work in a Well-Ventilated Area:
- When using cleaning solvents, lubricants, or welding equipment, work in a well-ventilated area to avoid inhaling harmful fumes.
8.2 Specific Precautions
- Airbag Safety:
- Be extremely cautious when working near airbags.
- Refer to your vehicle’s service manual for specific instructions on disabling and handling airbags.
- Electrical Safety:
- When working on electric seat adjusters, be aware of the risk of electrical shock.
- Use a multimeter to test for voltage and continuity before touching any wires or connectors.
- Welding Safety:
- When welding, wear appropriate protective gear, including a welding helmet, gloves, and apron.
- Ensure that the welding area is clear of flammable materials.
- Sharp Edges:
- Be careful when handling metal components, as they may have sharp edges.
- Use gloves and handle the components with care.
8.3 Emergency Procedures
- First Aid Kit:
- Keep a well-stocked first aid kit nearby in case of injuries.
- Emergency Contacts:
- Have a list of emergency contact numbers readily available.
- Fire Extinguisher:
- Keep a fire extinguisher nearby in case of a fire.
By following these safety precautions, you can minimize the risk of accidents and injuries while working on your car seat back adjuster. CARDIAGTECH.NET emphasizes the importance of safety and provides high-quality safety gear to help you work confidently and securely.
9. Cost Considerations
Repairing a car seat back adjuster can involve various costs, depending on the nature of the problem and whether you choose to do it yourself or hire a professional. Understanding these costs can help you make an informed decision.
9.1 DIY Repairs
- Tools:
- Initial investment in basic hand tools: $50 – $200
- Specialty tools (e.g., upholstery tools, multimeter): $50 – $150
- Replacement Parts:
- Seat recliner repair kit: $20 – $50
- Replacement gears or levers: $10 – $30 each
- Replacement motor (for electric seats): $50 – $150
- Replacement cables: $10 – $20 each
- Materials:
- Lubricants, cleaning supplies, and protective coatings: $20 – $50
Total cost for DIY repairs: $150 – $500
9.2 Professional Repairs
- Labor Costs:
- Average hourly labor rate for auto mechanics: $80 – $150
- Estimated labor time for seat adjuster repair: 2 – 4 hours
- Replacement Parts:
- Marked-up prices for replacement parts: 20% – 50% higher than retail
- Total Cost:
- Total cost for professional repairs: $300 – $800+
9.3 Factors Affecting Costs
- Vehicle Type:
- Luxury vehicles or those with complex electric systems may have higher repair costs.
- Severity of Damage:
- More extensive damage will require more parts and labor, increasing the cost.
- Location:
- Labor rates and parts prices can vary depending on your geographic location.
9.4 Cost-Saving Tips
- DIY vs. Professional:
- Consider whether you have the skills and tools to perform the repair yourself.
- DIY repairs can save money on labor costs but require an investment in tools and parts.
- Obtain Multiple Quotes:
- If hiring a professional, obtain quotes from multiple mechanics to compare prices.
- Source Parts Wisely:
- Purchase replacement parts from reputable suppliers like CARDIAGTECH.NET to ensure quality and competitive pricing.
By considering these cost factors, you can make an informed decision about whether to repair your car seat back adjuster yourself or hire a professional. CARDIAGTECH.NET provides a wide range of affordable tools and replacement parts to help you save money on your car repair projects.
10. When to Seek Professional Help
While many car seat back adjuster repairs can be done at home, certain situations warrant seeking professional help. Knowing when to consult a mechanic can save you time, money, and potential frustration.
10.1 Complex Electrical Issues
If your electric seat adjuster has complex electrical problems, such as short circuits, wiring harness damage, or malfunctioning control modules, it’s best to consult a professional. Diagnosing and repairing these issues requires specialized tools and expertise.
10.2 Airbag Concerns
Working near airbags can be dangerous if you’re not familiar with the proper procedures. If the seat adjuster repair requires you to remove or work around airbags, it’s best to have a professional handle the job to avoid accidental deployment and potential injuries.
10.3 Extensive Mechanical Damage
If the seat adjuster has extensive mechanical damage, such as broken frames, severely stripped gears, or irreparable components, a professional mechanic may be better equipped to handle the repairs. They have access to specialized tools and equipment, such as welding machines and metal fabrication tools, to perform complex repairs.
10.4 Lack of Experience
If you’re not comfortable working on car repairs or lack the necessary experience, it’s best to seek professional help. Attempting a repair without the proper knowledge and skills can lead to further damage to your vehicle and potential injuries.
10.5 Time Constraints
If you’re short on time or need the repair done quickly, hiring a professional mechanic can save you valuable time and effort. They can efficiently diagnose and repair the issue, allowing you to get back on the road as soon as possible.
10.6 Warranty Considerations
If your vehicle is still under warranty, it’s important to have the repairs done by an authorized service center to avoid voiding the warranty. DIY repairs or repairs performed by unauthorized mechanics may not be covered by the warranty.
10.7 Peace of Mind
Even if you’re capable of performing the repair yourself, hiring a professional can provide peace of mind knowing that the job is done correctly and safely. Professional mechanics have the training, experience, and resources to ensure that the repair is done to the highest standards.
Knowing when to seek professional help can save you time, money, and potential headaches. CARDIAGTECH.NET recommends consulting a trusted mechanic if you encounter any of the above situations. However, for those who prefer to tackle the repairs themselves, CARDIAGTECH.NET offers a wide range of high-quality tools and replacement parts to help you get the job done right.
11. Finding Replacement Parts
Locating the correct replacement parts is essential for a successful car seat back adjuster repair. Here’s a guide to help you find the parts you need:
11.1 Identifying the Correct Part
- Vehicle Information:
- Have your vehicle’s make, model, and year ready.
- Knowing the trim level and specific seat type can also be helpful.
- Part Number:
- If possible, locate the part number on the broken component.
- This will ensure you get the exact replacement.
- Visual Inspection:
- Compare the broken part to diagrams or photos online to identify it.
- Note any unique features or dimensions.
11.2 Sources for Replacement Parts
- CARDIAGTECH.NET:
- Offers a wide range of high-quality auto repair tools and replacement parts.
- Provides detailed product descriptions and compatibility information to help you find the right parts.
- Contact Whatsapp: +1 (641) 206-8880 for immediate assistance and expert advice.
- Local Auto Parts Stores:
- Visit local auto parts stores to inquire about replacement parts.
- They may be able to order the parts for you if they don’t have them in stock.
- Online Retailers:
- Explore online retailers like Amazon, eBay, and specialized auto parts websites.
- Read customer reviews and check compatibility before making a purchase.
- Salvage Yards:
- Consider visiting salvage yards to find used parts at a lower cost.
- Inspect the parts carefully to ensure they are in good condition.
- Dealerships:
- Dealerships can provide genuine OEM (Original Equipment Manufacturer) parts.
- These parts are typically more expensive but offer the best fit and reliability.
11.3 Tips for Ordering Parts
- Check Compatibility:
- Always verify that the replacement part is compatible with your vehicle.
- Use the part number or vehicle information to confirm compatibility.
- Read Reviews:
- Read customer reviews to assess the quality and reliability of the part.
- Compare Prices:
- Compare prices from different suppliers to get the best deal.
- Review Return Policies:
- Check the return policy before making a purchase to ensure you can return the part if it doesn’t fit or function properly.
11.4 CARDIAGTECH.NET Advantages
- High-Quality Products:
- CARDIAGTECH.NET offers only high-quality tools and replacement parts.
- Ensures durability and reliability.
- Expert Support:
- Provides expert advice and support to help you find the right parts and tools.
- Contact Whatsapp: +1 (641) 206-8880 for personalized assistance.
- Wide Selection:
- Offers a wide range of tools and parts for various car makes and models.
- Simplifies the process of finding everything you need in one place.
Finding the right replacement parts is crucial for a successful car seat back adjuster repair. By using the resources and tips outlined above, you can locate the parts you need and restore your car seat to its optimal condition. Remember, CARDIAGTECH.NET is your trusted partner for high-quality tools and expert support. Visit CARDIAGTECH.NET or contact us via Whatsapp at +1 (641) 206-8880 for all your auto repair needs.
12. Reassembling the Car Seat
After repairing or replacing the necessary components, reassembling the car seat correctly is crucial to ensure safety and functionality. Follow these steps for a successful reassembly:
12.1 Preparing for Reassembly
- Clean Components:
- Clean all seat components, including the frame, adjuster mechanism, and upholstery, to remove dirt and debris.
- Use a vacuum cleaner and appropriate cleaning solutions.
- Inspect Components:
- Inspect all components for any signs of damage or wear.
- Replace any worn or damaged parts before reassembling the seat.
- Lubricate Moving Parts:
- Apply lithium grease or another suitable lubricant to all moving parts of the adjuster mechanism.
- This will ensure smooth operation and prevent future issues.
12.2 Step-by-Step Reassembly
- Reattach Adjuster Mechanism:
- Reattach the adjuster mechanism to the seat frame, ensuring it is properly aligned and securely fastened.
- Use the appropriate screws, bolts, or clips.
- Reconnect Electrical Components (if applicable):
- Reconnect any electrical connectors for power seats, heating, or other features.
- Ensure the connections are secure and properly insulated.
- Reinstall Seat Cushion:
- Place the seat cushion back onto the frame, ensuring it is properly positioned and aligned.
- Secure the cushion with any necessary clips or fasteners.
- Reattach Seat Cover:
- Reattach the seat cover, starting from the back and working your way forward.
- Use hog ring pliers and hog rings to securely fasten the cover to the frame.
- Ensure the cover is smooth and wrinkle-free.
- Reinstall Plastic Panels:
- Reinstall any plastic panels or trim pieces that were removed during disassembly.
- Use panel removal tools to avoid damaging the panels.
- Reinstall Headrest:
- Reinstall the headrest, ensuring it is properly aligned and securely fastened.
12.3 Final Checks
- Test Seat Adjustment:
- Test the seat adjustment to ensure it is working smoothly and properly.
- Check the full range of motion and confirm that the seat locks securely in each position.
- Check Electrical Functions (if applicable):
- Check all electrical functions, such as power adjustment, heating, and lumbar support, to ensure they are working correctly.
- Inspect for Loose Components:
- Inspect the seat for any loose screws, bolts, or clips.
- Tighten any loose components to prevent future issues.
- Clean the Seat:
- Clean the seat with a vacuum cleaner and appropriate cleaning solutions to remove any dirt or debris accumulated during reassembly.
12.4 Reinstalling the Seat in the Vehicle
- Position the Seat:
- Carefully position the seat in the vehicle, aligning it with the mounting points on the floor.
- Reconnect Electrical Connectors:
- Reconnect any electrical connectors for airbags, seat belts, or other safety features.
- Ensure the connections are secure and properly insulated.
- Secure the Seat:
- Secure the seat to the floor using the appropriate bolts or screws.
- Tighten the fasteners to the specified torque to ensure the seat is securely mounted.
- Reconnect the Battery:
- Reconnect the negative battery terminal.
- Test Safety Features:
- Test all safety features, such as seat belts and airbags, to ensure they are working correctly.
By following these steps, you can successfully reassemble the car seat and restore it to its original condition. Remember, CARDIAGTECH.NET is your trusted partner for high-quality tools and expert support. Visit CARDIAGTECH.NET or contact us via Whatsapp at +1 (641) 206-8880 for all your auto repair needs. Our address is 276 Reock St, City of Orange, NJ 07050, United States.
13. Case Studies
To further illustrate the repair process, let’s examine a couple of case studies involving different types of car seat back adjuster issues.
13.1 Case Study 1: Manual Seat with Stripped Gears
Vehicle: 2008 Honda Civic
Problem: The driver’s seat back adjuster was not locking properly, causing the seat to recline unexpectedly.
Diagnosis:
- Initial inspection revealed that the lever moved freely without engaging the seat back.
- Removing the seat cover exposed the adjuster mechanism, revealing stripped gears.
Solution:
- Parts Sourced: A seat recliner repair kit with replacement gears was purchased from CARDIAGTECH.NET.
- Repair Process:
- The old, stripped gears were removed.
- The new gears were installed, ensuring proper alignment.
- The mechanism was lubricated with lithium grease.
- The seat cover was reattached using hog ring pliers and hog rings.
- Outcome: The seat back adjuster now locks securely, and the seat functions as intended.
13.2 Case Study 2: Electric Seat with Faulty Motor
Vehicle: 2015 Ford Explorer
Problem: The passenger’s seat back adjuster was not working; the seat would not recline.
Diagnosis:
- Initial inspection revealed that the seat adjustment switch was functioning, but the motor was not responding.
- Using a multimeter, it was confirmed that the motor was not receiving power.
Solution:
- Parts Sourced: A replacement motor was purchased from CARDIAGTECH.NET.
- Repair Process:
- The seat was removed and placed on a workbench.
- The seat cover was partially removed to access the motor.
- The old motor was disconnected and removed.
- The new motor was installed and connected to the wiring harness.
- The seat cover was reattached, and the seat was reinstalled in the vehicle.
- Outcome: The seat back adjuster now works smoothly, and the passenger can adjust the seat as needed.
These case studies demonstrate the step-by-step process of diagnosing and repairing common car seat back adjuster issues. With the right tools and parts from CARDIAGTECH.NET, you can successfully tackle these repairs and restore your car seats to optimal condition.
14. Why Choose CARDIAGTECH.NET?
When it comes to repairing your car seat back adjuster, choosing the right supplier for tools and replacement parts is crucial. CARDIAGTECH.NET stands out as a