How To Fix Light Scratches On A Car Like A Pro
Is your car marred by unsightly scratches? Don’t fret. This comprehensive guide from CARDIAGTECH.NET will walk you through how to fix light scratches on a car, restoring your vehicle’s pristine look. We’ll explore DIY solutions and when it’s best to call in the pros, ensuring your car looks its best. We’ll cover everything from surface blemishes to deeper gouges, and we’ll discuss cost-effective methods to revive your car’s paint job and protect it from rust, employing expert car scratch removal techniques.
1. Identifying the Type of Scratch
Before diving into any repair methods, it’s essential to determine the type and depth of the scratch. Understanding the severity will dictate the best approach and the necessary tools.
- Clear Coat Scratches: These are the most superficial, affecting only the clear top layer of the paint. They often appear as light, hairline marks.
- Paint Scratches: These penetrate the clear coat and reach the actual paint layer. The color of the car may be visible within the scratch.
- Primer Scratches: These scratches go through the clear coat and paint, exposing the primer layer underneath. The scratch will typically appear white or gray.
- Deep Scratches: These are the most severe, reaching the metal body of the car. These require immediate attention to prevent rust and further damage.
Understanding the scratch type is the first step toward effective car paint scratch repair.
2. Essential Tools and Materials
Gathering the right tools and materials is crucial for successful DIY scratch repair. Here’s a comprehensive list:
- Car Wash Soap: For cleaning the affected area.
- Microfiber Cloths: Soft cloths that won’t scratch the paint.
- Polishing Compound: For removing light scratches and swirl marks.
- Rubbing Compound: More abrasive than polishing compound, used for deeper scratches.
- Touch-Up Paint: Matching the exact color code of your car.
- Clear Coat: To protect the repaired area.
- Fine-Grit Sandpaper: For leveling imperfections (2000-3000 grit).
- Masking Tape: To protect surrounding areas.
- Applicator Pads: For applying compounds and waxes.
- Wax: To protect and shine the repaired area.
- Water Spray Bottle: For wet sanding.
Having these tools at hand will ensure you can tackle most light scratches effectively and efficiently, paving the way for successful car scratch removal.
3. Preparing the Area for Repair
Proper preparation is key to achieving a seamless repair. Follow these steps to prep the scratched area:
-
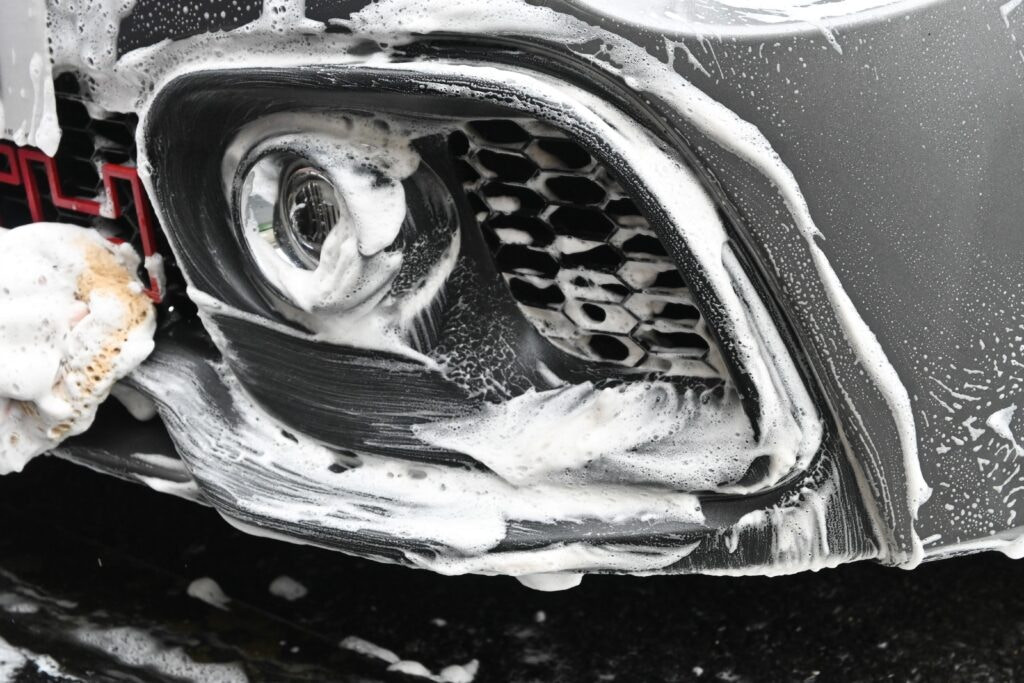
Wash the Car: Thoroughly wash the area around the scratch with car wash soap and water to remove dirt and grime.
a car being cleaned with soap and water -
Dry the Area: Use a clean microfiber cloth to dry the area completely.
-
Inspect the Scratch: Closely examine the scratch to determine its depth and length.
-
Mask the Surrounding Area: Use masking tape to protect the surrounding paint from accidental damage during the repair process.
-
Clay Bar Treatment (Optional): If there is any contamination on the paint surface, use a clay bar to remove it. This ensures a smooth surface for repair.
Proper preparation minimizes the risk of further damage and ensures the repair blends seamlessly with the existing paint, optimizing the car scratch repair process.
4. DIY Methods for Fixing Light Scratches
For minor scratches that only affect the clear coat, several DIY methods can be effective.
4.1. Using Polishing Compound
Polishing compound is designed to remove minor imperfections and restore shine to the paint.
Steps:
- Apply Compound: Apply a small amount of polishing compound to a clean applicator pad.
- Rub Gently: Gently rub the compound onto the scratch using a circular motion. Apply light pressure.
- Buff the Area: Use a clean microfiber cloth to buff the area, removing the compound and revealing the repaired surface.
- Inspect: Check if the scratch is gone or significantly reduced. Repeat if necessary.
Polishing compound is a great first step for minor scratches and is a staple in car paint scratch repair.
4.2. Utilizing Scratch Repair Kits
Scratch repair kits come with everything you need to fix minor scratches, including polishing compounds, applicators, and clear coat.
Steps:
- Follow Kit Instructions: Read and follow the instructions provided with the scratch repair kit.
- Apply Compound: Apply the provided compound to the scratch using the applicator.
- Buff: Buff the area with a microfiber cloth.
- Apply Clear Coat: If included, apply a thin layer of clear coat to protect the repaired area.
Scratch repair kits provide a convenient and comprehensive solution for DIY car scratch removal.
4.3. Toothpaste as a Mild Abrasive
Believe it or not, toothpaste can be used to remove very light scratches due to its mild abrasive properties.
Steps:
- Apply Toothpaste: Apply a small amount of non-gel toothpaste to a damp microfiber cloth.
- Rub Gently: Gently rub the toothpaste onto the scratch using a circular motion.
- Rinse: Rinse the area with water.
- Dry: Dry the area with a clean microfiber cloth.
Toothpaste is a surprisingly effective and readily available solution for very minor car paint scratch repair.
5. Addressing Deeper Scratches with Touch-Up Paint
For scratches that penetrate the clear coat and reach the paint layer, touch-up paint is necessary.
5.1. Selecting the Right Touch-Up Paint
Choosing the correct touch-up paint is critical for a seamless repair.
- Find the Paint Code: Locate your car’s paint code, usually found on a sticker in the door jamb, glove box, or under the hood.
- Purchase Matching Paint: Buy touch-up paint that matches your car’s paint code from an auto parts store or online.
- Test the Paint: Before applying, test the paint on an inconspicuous area to ensure it’s a perfect match.
Selecting the correct touch-up paint ensures the repair blends seamlessly with the surrounding paint, crucial for effective car scratch removal.
5.2. Applying Touch-Up Paint
Applying touch-up paint requires patience and precision.
Steps:
- Clean the Scratch: Ensure the scratch is clean and dry.
- Apply Primer (If Necessary): If the scratch is deep and exposes the metal, apply a thin layer of automotive primer.
- Apply Touch-Up Paint: Using the applicator brush provided with the touch-up paint, apply thin layers to the scratch. Allow each layer to dry completely before applying the next.
- Level the Paint: If the touch-up paint is higher than the surrounding paint, use fine-grit sandpaper (2000-3000 grit) to gently level it. Wet the sandpaper and the area before sanding.
- Apply Clear Coat: Apply a thin layer of clear coat over the touch-up paint to protect it and blend it with the surrounding paint.
- Buff: After the clear coat is dry, buff the area with a polishing compound to restore shine.
5.3. Wet Sanding for a Seamless Finish
Wet sanding is a technique used to smooth out imperfections after applying touch-up paint.
Steps:
- Prepare Sandpaper: Soak fine-grit sandpaper (2000-3000 grit) in water for several minutes.
- Sand Gently: Gently sand the area with the wet sandpaper, using light pressure and a back-and-forth motion.
- Rinse: Rinse the area frequently to remove debris.
- Dry: Dry the area with a clean microfiber cloth.
- Inspect: Check the surface to ensure it is smooth and even. Repeat if necessary.
- Polish: After wet sanding, use a polishing compound to restore shine and remove any sanding marks.
6. When to Seek Professional Help
While DIY methods can effectively address light scratches, some damage requires professional attention.
- Deep Scratches: Scratches that reach the metal body of the car should be repaired by a professional to prevent rust.
- Extensive Damage: Large areas of scratched or damaged paint may require professional repainting.
- Unsure of DIY Skills: If you are not confident in your DIY abilities, it’s best to consult a professional to avoid further damage.
6.1. Benefits of Professional Scratch Removal
Professional scratch removal offers several advantages:
- Expertise: Professionals have the knowledge and experience to properly assess and repair scratches.
- Equipment: They have access to specialized tools and equipment for seamless repairs.
- Quality: Professional repairs are typically of higher quality and longer-lasting than DIY repairs.
- Color Matching: Professionals can perfectly match the paint color for a seamless finish.
6.2. Cost Considerations for Professional Repairs
The cost of professional scratch removal varies depending on the severity of the damage and the location.
- Minor Scratches: Repairs to superficial scratches may cost between $50 and $150 per scratch.
- Deeper Scratches: Repairs to deeper scratches that require bodywork and repainting can range from $200 to $500 or more per scratch.
- Full Repainting: Repainting an entire panel or section of the car can cost several hundred to over a thousand dollars.
7. Maintaining Your Car’s Paint to Prevent Scratches
Prevention is always better than cure. Here are some tips to maintain your car’s paint and prevent scratches:
- Regular Washing: Wash your car regularly to remove dirt, grime, and contaminants that can scratch the paint.
- Waxing: Apply wax to your car’s paint every few months to protect it from scratches and UV damage.
- Avoid Automatic Car Washes: Automatic car washes can cause swirl marks and scratches due to abrasive brushes.
- Park Carefully: Park in areas where your car is less likely to be scratched by other vehicles or objects.
- Use Car Covers: If you park your car outside, use a car cover to protect it from the elements and potential scratches.
8. CARDIAGTECH.NET: Your Partner in Automotive Care
At CARDIAGTECH.NET, we understand the importance of maintaining your vehicle’s appearance and performance. That’s why we offer a wide range of high-quality automotive tools and equipment to help you keep your car in top condition.
8.1. High-Quality Automotive Tools
We offer a variety of tools perfect for auto enthusiasts and professional technicians:
- Polishing Machines: Achieve a flawless finish with our selection of professional-grade polishing machines.
- Paint Thickness Gauges: Ensure even paint application and detect hidden damage.
- Detailing Kits: Everything you need for a showroom-worthy shine.
8.2. Expert Advice and Support
Our team of experienced professionals is here to provide expert advice and support to help you choose the right tools and techniques for your specific needs.
- Consultations: We offer personalized consultations to assess your needs and recommend the best solutions.
- Technical Support: Our technical support team is available to answer your questions and provide assistance with any issues.
8.3. Contact Us Today
Ready to take your car care to the next level? Contact CARDIAGTECH.NET today!
- Address: 276 Reock St, City of Orange, NJ 07050, United States
- WhatsApp: +1 (641) 206-8880
- Website: CARDIAGTECH.NET
Let us help you achieve a showroom-worthy finish and maintain your car’s value.
9. Real-World Examples and Case Studies
To further illustrate the effectiveness of the methods discussed, let’s look at a couple of real-world examples:
9.1. Case Study 1: Clear Coat Scratch Repair
Scenario: John noticed a light scratch on the door of his black sedan after parking in a crowded lot. The scratch was superficial and only affected the clear coat.
Solution: John followed the DIY methods described above. He washed the area, applied polishing compound using a microfiber cloth, and buffed the surface. After a few applications, the scratch was no longer visible, and the paint’s shine was restored.
Result: John successfully repaired the scratch himself, saving money and time by avoiding a trip to a professional detailer.
9.2. Case Study 2: Touch-Up Paint Application
Scenario: Mary discovered a deeper scratch on her SUV’s fender after a minor fender-bender. The scratch penetrated the clear coat and reached the paint layer.
Solution: Mary purchased touch-up paint matching her car’s paint code. She cleaned the scratch, applied thin layers of touch-up paint, allowed each layer to dry, and wet sanded the area to level the paint. Finally, she applied a clear coat and buffed the surface.
Result: Mary successfully repaired the deeper scratch, blending the repair seamlessly with the surrounding paint. The fender looked as good as new, and she avoided the high cost of professional bodywork.
10. The Science Behind Scratch Removal
Understanding the science behind car scratch removal can help you appreciate why certain methods work and how to use them effectively.
10.1. How Polishing Compounds Work
Polishing compounds contain mild abrasives that gently remove a thin layer of the clear coat, leveling the surface and eliminating minor scratches. The abrasives in the compound smooth the edges of the scratch, making it less visible and restoring the paint’s shine.
10.2. The Role of Clear Coat
The clear coat is the outermost layer of a car’s paint, protecting the color coat from UV rays, environmental contaminants, and minor abrasions. When a scratch occurs, it’s often only the clear coat that’s affected. Repairing the clear coat restores the paint’s protective barrier and appearance.
10.3. Paint Adhesion and Layering
When applying touch-up paint, it’s crucial to apply thin layers to ensure proper adhesion and prevent the paint from clumping or running. Allowing each layer to dry completely before applying the next promotes a strong bond between the paint and the surface, resulting in a durable and seamless repair.
11. Addressing Common Concerns and Misconceptions
Let’s address some common concerns and misconceptions about car scratch repair.
11.1. “Can I use any type of sandpaper?”
No, you should only use fine-grit sandpaper (2000-3000 grit) specifically designed for automotive paint. Coarse sandpaper can cause severe damage and should be avoided.
11.2. “Will scratch repair pens work on all scratches?”
Scratch repair pens are best suited for very minor scratches and chips. They may not be effective for deeper scratches or extensive damage.
11.3. “Is it safe to use household cleaners on my car’s paint?”
No, household cleaners can contain harsh chemicals that can damage your car’s paint. Always use car wash soap specifically designed for automotive finishes.
11.4. “Can I repair scratches in direct sunlight?”
It’s best to repair scratches in a shaded area or indoors, as direct sunlight can cause the repair materials to dry too quickly and result in an uneven finish.
12. Advanced Techniques for Car Scratch Repair
For those looking to take their scratch repair skills to the next level, here are some advanced techniques:
12.1. Using a Dual Action Polisher
A dual action polisher is a power tool that can significantly improve the efficiency and effectiveness of polishing compounds. It provides consistent pressure and motion, resulting in a smoother and more even finish.
Steps:
- Apply Compound: Apply a small amount of polishing compound to a polishing pad.
- Polish the Area: Use the dual action polisher to polish the area, using overlapping strokes and light pressure.
- Buff: Buff the area with a clean microfiber cloth.
12.2. Color Sanding for a Flawless Finish
Color sanding is an advanced technique used to remove imperfections and achieve a perfectly smooth finish after applying touch-up paint. It involves using very fine-grit sandpaper (3000-5000 grit) to level the paint surface.
Steps:
- Prepare Sandpaper: Soak the sandpaper in water for several minutes.
- Sand Gently: Gently sand the area with the wet sandpaper, using light pressure and a back-and-forth motion.
- Rinse: Rinse the area frequently to remove debris.
- Dry: Dry the area with a clean microfiber cloth.
- Polish: After color sanding, use a polishing compound to restore shine and remove any sanding marks.
12.3. Blending Techniques for Seamless Repairs
Blending techniques are used to seamlessly integrate the repaired area with the surrounding paint. This involves carefully feathering the edges of the repaired area to create a smooth transition.
Steps:
- Apply Blending Solution: Apply a blending solution to the edges of the repaired area.
- Feather the Edges: Use a soft cloth to gently feather the edges of the repaired area, blending it with the surrounding paint.
- Polish: Polish the area to restore shine and create a seamless finish.
13. Economic Benefits of DIY Scratch Repair
Opting for DIY scratch repair can lead to significant cost savings compared to professional services.
| Expense | DIY Cost (Approximate) | Professional Cost (Approximate) | Savings |
|---|---|---|---|
| Polishing Compound | $10 – $20 | $50 – $150 | $40 – $130 |
| Touch-Up Paint | $20 – $30 | $100 – $300 | $80 – $270 |
| Sandpaper & Other Tools | $10 – $20 | Included in Professional Fees | $10 – $20 |
| Total | $40 – $70 | $150 – $450 | $110 – $380 |
As shown in the table, DIY scratch repair can save you anywhere from $110 to $380, making it a cost-effective option for minor damage.
14. Environmental Considerations
Choosing eco-friendly products and practices can minimize the environmental impact of car scratch repair.
14.1. Water-Based Products
Opt for water-based polishing compounds and touch-up paints, which contain fewer volatile organic compounds (VOCs) and are safer for the environment.
14.2. Biodegradable Cleaners
Use biodegradable car wash soaps and cleaners to reduce the impact on water systems and ecosystems.
14.3. Responsible Disposal
Properly dispose of used sandpaper, applicators, and containers according to local regulations to prevent environmental contamination.
15. Staying Updated with the Latest Techniques
The automotive industry is constantly evolving, with new products and techniques emerging regularly. Stay informed about the latest advancements in car scratch repair to ensure you’re using the most effective methods.
15.1. Online Forums and Communities
Join online forums and communities dedicated to car detailing and repair. These platforms offer valuable insights, tips, and recommendations from experienced enthusiasts and professionals.
15.2. Automotive Trade Shows
Attend automotive trade shows and exhibitions to learn about new products, technologies, and techniques from industry experts.
15.3. Professional Training Courses
Consider enrolling in professional training courses to enhance your skills and knowledge in car scratch repair. These courses provide hands-on experience and instruction from certified instructors.
16. Legal and Ethical Considerations
When repairing scratches on your car, it’s essential to consider legal and ethical aspects.
16.1. Disclosure When Selling
If you’re selling your car, be transparent about any scratch repairs you’ve performed. Disclose any damage or repairs to potential buyers to avoid legal issues or disputes.
16.2. Insurance Claims
If the scratches were caused by an accident, report the damage to your insurance company and follow their procedures for filing a claim. Be honest and accurate when describing the damage and the circumstances surrounding the incident.
16.3. Respect for Property
If the scratches were caused by someone else, respect their property rights and avoid taking matters into your own hands. Contact the authorities or your insurance company to resolve the issue legally and ethically.
17. The Future of Car Scratch Repair
The future of car scratch repair is likely to be shaped by technological advancements and innovative solutions.
17.1. Self-Healing Paints
Self-healing paints are being developed that can automatically repair minor scratches and imperfections when exposed to heat or sunlight. These paints contain special polymers that can reform and restore the paint’s surface, eliminating the need for manual repairs.
17.2. Nanotechnology Solutions
Nanotechnology is being used to create advanced coatings and sealants that provide superior protection against scratches and environmental damage. These coatings form a durable barrier on the paint’s surface, preventing scratches and maintaining the car’s appearance for longer.
17.3. Robotics and Automation
Robotics and automation are being integrated into car scratch repair processes to improve efficiency and precision. Automated systems can accurately assess the damage, apply repair materials, and blend the repaired area seamlessly with the surrounding paint.
18. Testimonials and Success Stories
Hearing from others who have successfully tackled car scratch repair can provide inspiration and confidence.
18.1. Sarah’s Story
Sarah, a busy professional, accidentally scratched her new car while parking in her garage. Initially, she was worried about the cost and inconvenience of professional repairs. However, after reading a guide on CARDIAGTECH.NET, she decided to try DIY scratch repair.
“I followed the steps outlined in the guide, and I was amazed at how easy it was to fix the scratch myself,” Sarah says. “The polishing compound worked like magic, and the scratch disappeared completely. I saved a lot of money and time, and I’m so proud of myself for tackling this project.”
18.2. David’s Experience
David, a car enthusiast, enjoys maintaining his vehicles and keeping them in top condition. When he noticed a few scratches on his classic car, he knew he wanted to repair them himself.
“I’ve always been passionate about cars, and I enjoy the process of restoring and maintaining them,” David says. “With the help of CARDIAGTECH.NET, I was able to find the right tools and materials to repair the scratches on my classic car. The touch-up paint matched perfectly, and the repair looks seamless. It’s incredibly satisfying to see my car looking its best.”
19. Actionable Steps to Take Now
Ready to get started with car scratch repair? Here are some actionable steps you can take now:
- Assess the Damage: Examine your car for scratches and determine their depth and severity.
- Gather Supplies: Collect the necessary tools and materials, including car wash soap, microfiber cloths, polishing compound, touch-up paint, and sandpaper. You can find these at CARDIAGTECH.NET.
- Follow a Guide: Choose a DIY method based on the type of scratch you’re dealing with, and follow a step-by-step guide to ensure a successful repair.
- Seek Professional Help: If you’re unsure about your DIY abilities or the damage is extensive, consult a professional for assistance.
- Maintain Your Paint: Take steps to protect your car’s paint and prevent future scratches, such as washing it regularly and applying wax.
20. Call to Action: Contact CARDIAGTECH.NET for Expert Advice
Don’t let unsightly scratches detract from your car’s appearance. Whether you’re a seasoned DIY enthusiast or a first-time car owner, CARDIAGTECH.NET is here to help you achieve a flawless finish and maintain your car’s value.
Are you facing challenges with car scratches and unsure which tools or techniques are best for your situation? Do you find the variety of automotive tools overwhelming and need guidance to make the right choice?
We understand the challenges you face:
- The work is physically demanding, and you’re constantly exposed to grease and chemicals.
- Keeping up with the latest automotive technology requires continuous learning.
- Time is of the essence, and you need to complete repairs quickly and efficiently.
- Finding high-quality tools that fit your budget can be difficult.
CARDIAGTECH.NET offers solutions that enhance your efficiency, accuracy, and safety, ultimately boosting your revenue and reputation.
Contact CARDIAGTECH.NET today for personalized advice on selecting the right tools and techniques for your specific needs!
- Address: 276 Reock St, City of Orange, NJ 07050, United States
- WhatsApp: +1 (641) 206-8880
- Website: CARDIAGTECH.NET
Our team of experts is ready to assist you with:
- Choosing the right polishing compounds and touch-up paints.
- Selecting the appropriate tools for your skill level and budget.
- Providing step-by-step guidance on DIY scratch repair methods.
- Connecting you with trusted professionals for extensive damage.
Don’t wait any longer to restore your car’s beauty and protect its value. Contact CARDIAGTECH.NET today and let us help you achieve a showroom-worthy finish!
FAQs
1. Can a car scratch fail my MOT?
Yes, deep or extensive car scratches that affect safety, such as impairing visibility, can lead to an MOT failure. Superficial scratches, however, are highly unlikely to cause a failure.
2. Can you spray paint car scratches?
Yes, you can use spray paint to repair scratches, but it’s essential to get an exact match of the paint color and follow the correct priming and finishing procedures for the best results.
3. Does WD-40 remove scratches from cars?
Yes, WD-40 can be used to remove scratches from cars, but it should not be the main scratch remover. It can help with scuff marks and light scratch marks.
4. Can toothpaste remove a car scratch?
Yes, toothpaste can remove clear coat scratches which are superficial scratches. It’s worth noting that whitening toothpaste works well but it may not be effective for deep scratches or extensive damage.
5. How do I know if a scratch is too deep to fix myself?
If the scratch penetrates the clear coat, paint, and primer layers, exposing the metal underneath, it’s too deep to fix yourself and should be repaired by a professional to prevent rust.
6. What is the best way to prevent car scratches?
Regular washing, waxing, avoiding automatic car washes, parking carefully, and using car covers can help prevent car scratches.
7. Can I use a household cleaner to wash my car?
No, household cleaners can damage your car’s paint. Use car wash soap specifically designed for automotive finishes.
8. How often should I wax my car?
You should wax your car every three to four months to protect the paint from scratches and UV damage.
9. What is the difference between polishing compound and rubbing compound?
Polishing compound is less abrasive and is used for removing minor imperfections and restoring shine. Rubbing compound is more abrasive and is used for deeper scratches.
10. Can I use a scratch repair pen on any color car?
Yes, scratch repair pens are available in various colors to match your car’s paint. However, it’s essential to choose a pen that matches your car’s paint code for a seamless repair.