**Mercedes Heated Steering Wheel Retrofit: A Complete Guide**
Mercedes heated steering wheel retrofit is a popular upgrade, especially for those living in colder climates. CARDIAGTECH.NET offers expert insights and solutions to make this enhancement seamless, improving your driving experience. Learn about the nuances of adding this comfort feature and discover the benefits of using high-quality components and professional techniques. Let’s delve into everything you need to know about the Mercedes heated steering wheel retrofit.
1. Understanding the Mercedes Heated Steering Wheel Retrofit
1.1 What is a Heated Steering Wheel Retrofit?
A heated steering wheel retrofit involves adding a heated steering wheel to a Mercedes vehicle that didn’t originally come with this feature. This upgrade enhances comfort, particularly in cold weather, by providing warmth to the driver’s hands. According to a study by AAA, drivers who are more comfortable behind the wheel are less likely to experience fatigue and distractions, leading to safer driving conditions.
1.2 Benefits of a Heated Steering Wheel
- Enhanced Comfort: Provides warmth and comfort during cold weather.
- Improved Safety: Keeps hands warm, improving grip and control.
- Increased Vehicle Value: Adds a desirable feature, potentially increasing resale value.
- Luxury Feel: Enhances the overall driving experience, adding a touch of luxury.
1.3 Common Reasons for Retrofitting
- Vehicle Didn’t Come with the Feature: Many older or base model Mercedes vehicles may not have included a heated steering wheel as standard.
- Personal Preference: Some drivers find the feature essential for comfort during winter.
- Upgrade from Standard Steering Wheel: Upgrading to a higher-end steering wheel that includes heating.
2. Essential Components for the Retrofit
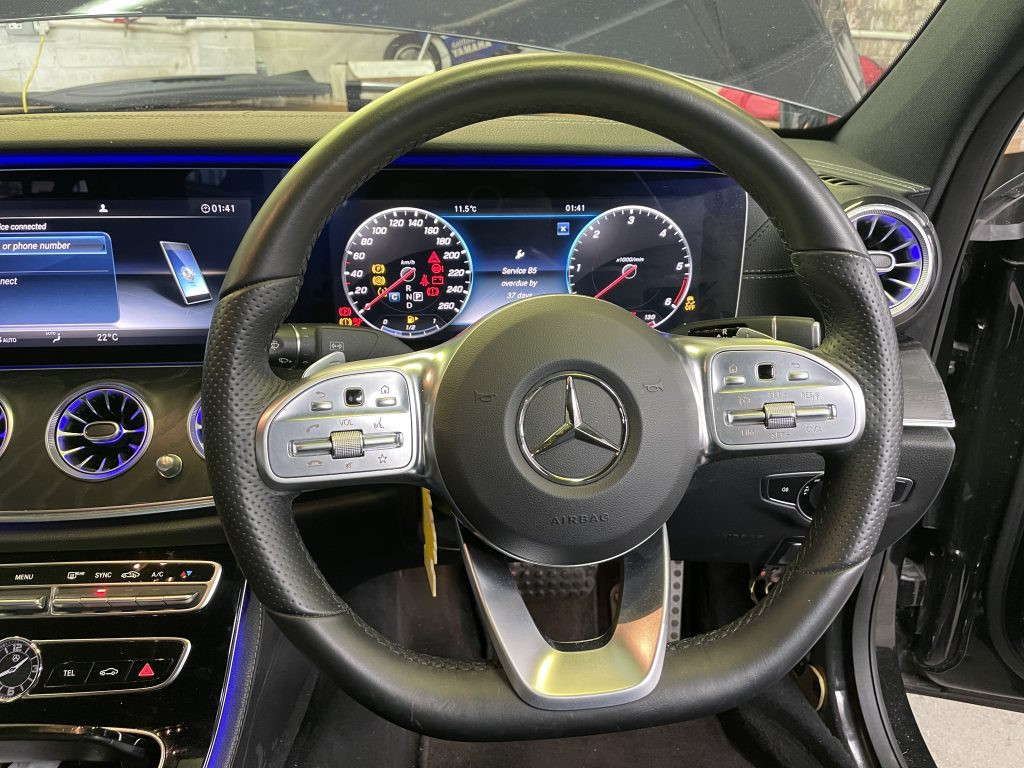
2.1 The Heated Steering Wheel
The core component of the retrofit is the heated steering wheel itself. It contains integrated heating elements that warm the surface of the wheel.
- OEM vs. Aftermarket: You can choose between an Original Equipment Manufacturer (OEM) wheel or an aftermarket option. OEM wheels ensure perfect fit and integration, while aftermarket wheels may offer more variety and potentially lower costs.
- Material and Design: Available in various materials such as leather, wood, and synthetic options, with different designs to match your vehicle’s interior.
2.2 Control Module
The control module regulates the heating function, ensuring the wheel warms up safely and efficiently.
- Compatibility: Ensure the control module is compatible with your specific Mercedes model and year.
- Functionality: Some advanced modules offer adjustable temperature settings and automatic shut-off features.
2.3 Wiring Harness
A dedicated wiring harness is necessary to connect the heated steering wheel to the vehicle’s electrical system.
- OEM vs. Custom: OEM harnesses are designed for a seamless fit, while custom harnesses may be required for certain aftermarket setups.
- Quality: Opt for a high-quality harness to ensure reliable performance and prevent electrical issues.
2.4 Switch or Button
A switch or button is needed to activate the heated steering wheel.
- Location: Typically installed on the steering wheel, dashboard, or center console.
- Integration: Some kits include replacement buttons that integrate seamlessly with the existing controls.
2.5 Slip Ring
The slip ring, also known as a clock spring, allows electrical connections to the steering wheel while it rotates.
- Compatibility: Ensure the slip ring supports the additional wiring for the heated steering wheel.
- Condition: Replace the slip ring if it’s worn or damaged to ensure proper functionality.
3. Step-by-Step Guide to Performing the Retrofit
3.1 Preparation
3.1.1 Gather Necessary Tools and Materials
Before starting, gather all the necessary tools and materials. This includes:
- New heated steering wheel
- Control module
- Wiring harness
- Switch or button
- Slip ring (if necessary)
- Basic hand tools (screwdrivers, wrenches, sockets)
- Torque wrench
- Multimeter
- Wiring connectors
- Electrical tape
- Diagnostic scanner
3.1.2 Disconnect the Battery
To prevent electrical shock and protect the vehicle’s electrical system, disconnect the negative terminal of the battery before beginning any work.
3.1.3 Review Safety Precautions
Review all safety precautions before starting the retrofit. This includes wearing appropriate safety gear and following the manufacturer’s instructions.
3.2 Removing the Existing Steering Wheel
3.2.1 Locate and Remove Airbag
- Identify Airbag Fasteners: Locate the fasteners (usually screws or clips) on the back of the steering wheel that secure the airbag.
- Disconnect Airbag Connectors: Carefully disconnect the airbag connectors, noting their positions for reassembly.
- Remove Airbag: Gently remove the airbag from the steering wheel.
3.2.2 Remove Steering Wheel Nut
- Loosen Steering Wheel Nut: Use a socket wrench to loosen the steering wheel nut in the center of the wheel.
- Mark Steering Wheel Position: Before fully removing the nut, mark the position of the steering wheel on the steering column to ensure proper alignment during reinstallation.
- Remove Steering Wheel Nut: Fully remove the nut.
3.2.3 Use Steering Wheel Puller (If Necessary)
- Attach Steering Wheel Puller: If the steering wheel is stuck, use a steering wheel puller to safely remove it.
- Apply Tension: Tighten the puller to apply even pressure and loosen the steering wheel from the steering column.
- Remove Steering Wheel: Once loosened, carefully remove the steering wheel.
3.3 Installing the New Heated Steering Wheel
3.3.1 Install New Slip Ring (If Necessary)
- Remove Old Slip Ring: If replacing the slip ring, remove the old one from the steering column.
- Install New Slip Ring: Install the new slip ring, ensuring it is properly aligned and secured.
3.3.2 Connect Wiring Harness
- Route Wiring Harness: Route the new wiring harness through the steering column and connect it to the appropriate connectors.
- Connect to Control Module: Connect the wiring harness to the control module, following the manufacturer’s instructions.
3.3.3 Mount the Heated Steering Wheel
- Align Steering Wheel: Align the new heated steering wheel with the mark on the steering column.
- Secure Steering Wheel Nut: Reinstall the steering wheel nut and torque it to the manufacturer’s specified value (typically around 45 ft-lbs or 62 Nm).
3.3.4 Reinstall Airbag
- Reconnect Airbag Connectors: Reconnect the airbag connectors to the airbag unit.
- Mount Airbag: Carefully reinstall the airbag into the steering wheel, securing it with the fasteners.
3.4 Connecting the Control Module and Switch
3.4.1 Mount Control Module
- Choose Location: Select a suitable location for the control module, such as under the dashboard or in the center console.
- Secure Control Module: Mount the control module securely to prevent it from moving around.
3.4.2 Install Switch or Button
- Choose Location: Choose a convenient location for the switch or button, such as on the steering wheel, dashboard, or center console.
- Connect Wiring: Connect the switch or button to the control module and the vehicle’s electrical system, following the wiring diagram.
3.5 Testing and Final Checks
3.5.1 Reconnect Battery
Reconnect the negative terminal of the battery.
3.5.2 Test Heated Steering Wheel
- Activate Switch: Turn on the heated steering wheel using the switch or button.
- Check for Heat: Wait a few minutes and check if the steering wheel is warming up.
- Verify Functionality: Ensure all buttons and features on the steering wheel are functioning correctly.
3.5.3 Use Diagnostic Scanner
Use a diagnostic scanner to check for any error codes related to the steering wheel or airbag system. Clear any codes that appear.
3.5.4 Final Inspection
Perform a final inspection to ensure all connections are secure, and all components are properly installed.
4. Common Issues and Troubleshooting
4.1 Steering Wheel Not Heating
- Check Connections: Ensure all wiring connections are secure and properly connected.
- Check Fuse: Verify that the fuse for the heated steering wheel is not blown.
- Test Control Module: Use a multimeter to test the control module for proper functionality.
- Inspect Heating Element: Check the heating element in the steering wheel for damage.
4.2 Airbag Warning Light
- Check Airbag Connectors: Ensure the airbag connectors are properly connected and secured.
- Use Diagnostic Scanner: Use a diagnostic scanner to read and clear any airbag-related error codes.
- Inspect Slip Ring: Check the slip ring for damage or misalignment.
4.3 Switch Not Working
- Check Switch Connections: Ensure the switch is properly connected to the control module and the vehicle’s electrical system.
- Test Switch: Use a multimeter to test the switch for continuity.
- Replace Switch: If the switch is faulty, replace it with a new one.
4.4 Error Codes
- Use Diagnostic Scanner: Use a diagnostic scanner to read the error codes and identify the problem.
- Research Codes: Research the error codes to understand the cause of the issue.
- Follow Troubleshooting Steps: Follow the troubleshooting steps outlined in the vehicle’s service manual or online resources.
5. Professional Installation vs. DIY
5.1 Advantages of Professional Installation
- Expertise: Professional installers have the knowledge and experience to perform the retrofit correctly.
- Warranty: Professional installations often come with a warranty, providing peace of mind.
- Proper Tools: Professionals have access to specialized tools and equipment.
- Time Savings: Professionals can complete the retrofit quickly and efficiently.
5.2 Considerations for DIY Installation
- Technical Skills: DIY installation requires a good understanding of automotive electrical systems.
- Time Commitment: DIY installation can be time-consuming, especially for those with limited experience.
- Risk of Damage: Incorrect installation can damage the vehicle’s electrical system or airbag system.
- Cost Savings: DIY installation can save money on labor costs, but may require purchasing specialized tools.
5.3 When to Choose Professional Installation
- Limited Experience: If you have limited experience with automotive electrical systems, it’s best to choose professional installation.
- Complex Retrofit: If the retrofit involves complex wiring or modifications, professional installation is recommended.
- Warranty Concerns: If you want the peace of mind that comes with a professional warranty, choose professional installation.
6. Cost Analysis
6.1 Component Costs
| Component | Estimated Cost |
|---|---|
| Heated Steering Wheel | $300 – $1000 |
| Control Module | $100 – $300 |
| Wiring Harness | $50 – $150 |
| Switch or Button | $20 – $50 |
| Slip Ring | $50 – $200 |
6.2 Labor Costs
Professional installation labor costs can range from $200 to $500, depending on the complexity of the retrofit and the hourly rate of the installer.
6.3 Total Cost
The total cost of a Mercedes heated steering wheel retrofit can range from $720 to $2200, depending on the components chosen and whether you opt for professional installation or DIY.
6.4 Potential Savings with DIY
DIY installation can save you $200 to $500 on labor costs. However, be sure to factor in the cost of any specialized tools you may need to purchase.
7. Choosing the Right Components
7.1 OEM vs. Aftermarket
- OEM (Original Equipment Manufacturer):
- Pros: Perfect fit, seamless integration, high quality.
- Cons: Higher cost, limited availability.
- Aftermarket:
- Pros: Lower cost, wider variety, more features.
- Cons: Potential fitment issues, variable quality.
7.2 Selecting a Compatible Steering Wheel
- Check Compatibility: Ensure the steering wheel is compatible with your Mercedes model and year.
- Consider Material: Choose a material that matches your vehicle’s interior and your personal preferences.
- Evaluate Design: Select a design that complements the overall look of your vehicle.
7.3 Choosing a Reliable Control Module
- Check Specifications: Ensure the control module meets the specifications for your vehicle’s electrical system.
- Read Reviews: Read reviews from other users to gauge the reliability and performance of the control module.
- Consider Features: Look for a control module with adjustable temperature settings and automatic shut-off features.
7.4 Selecting a High-Quality Wiring Harness
- Check Material: Ensure the wiring harness is made from high-quality materials that can withstand the harsh automotive environment.
- Inspect Connectors: Inspect the connectors to ensure they are properly crimped and insulated.
- Verify Compatibility: Verify that the wiring harness is compatible with your vehicle’s electrical system.
8. Maintaining Your Heated Steering Wheel
8.1 Regular Cleaning
Clean the steering wheel regularly with a mild soap and water solution to remove dirt and grime.
8.2 Avoiding Harsh Chemicals
Avoid using harsh chemicals or abrasive cleaners, as they can damage the steering wheel’s finish.
8.3 Protecting from Sunlight
Park your vehicle in the shade or use a sunshade to protect the steering wheel from prolonged exposure to sunlight, which can cause fading and cracking.
8.4 Checking for Wear and Tear
Regularly inspect the steering wheel for signs of wear and tear, such as cracks, tears, or loose stitching.
8.5 Addressing Issues Promptly
Address any issues with the heated steering wheel promptly to prevent further damage.
9. The Future of Heated Steering Wheels
9.1 Integration with Smart Technology
Future heated steering wheels may integrate with smart technology, allowing drivers to control the temperature and settings through their smartphone or vehicle’s infotainment system.
9.2 Advanced Materials and Designs
New materials and designs may offer improved heating performance, durability, and comfort.
9.3 Enhanced Safety Features
Future heated steering wheels may incorporate additional safety features, such as sensors that detect the driver’s grip and adjust the temperature accordingly.
9.4 Customization Options
More customization options may become available, allowing drivers to personalize their heated steering wheels with different materials, colors, and designs.
10. Why Choose CARDIAGTECH.NET for Your Automotive Needs?
At CARDIAGTECH.NET, we understand the unique needs of automotive technicians and shop owners. We offer a wide range of high-quality tools and equipment designed to enhance efficiency, accuracy, and safety in your work. Our commitment to providing top-notch products and expert support makes us the ideal partner for all your automotive repair needs.
10.1 High-Quality Tools and Equipment
CARDIAGTECH.NET provides a comprehensive selection of tools and equipment, including diagnostic scanners, specialized hand tools, and advanced electronic devices. Our products are sourced from trusted manufacturers and undergo rigorous testing to ensure they meet the highest standards of performance and durability.
10.2 Expert Support and Guidance
Our team of experienced professionals is dedicated to providing expert support and guidance to help you select the right tools and equipment for your specific needs. Whether you’re a seasoned technician or just starting out, we’re here to answer your questions and provide the assistance you need to succeed.
10.3 Enhancing Efficiency and Accuracy
CARDIAGTECH.NET’s tools and equipment are designed to enhance efficiency and accuracy in your work. Our diagnostic scanners provide detailed insights into vehicle systems, allowing you to quickly identify and resolve issues. Our specialized hand tools are designed for precision and ease of use, helping you complete repairs with confidence.
10.4 Improving Safety
Safety is a top priority at CARDIAGTECH.NET. We offer a range of safety equipment, including gloves, goggles, and protective gear, to help you stay safe while working on vehicles. Our tools are designed with safety features to minimize the risk of injury.
10.5 Call to Action
Ready to elevate your automotive repair capabilities? Contact CARDIAGTECH.NET today at 276 Reock St, City of Orange, NJ 07050, United States or call us on WhatsApp at +1 (641) 206-8880. Visit our website CARDIAGTECH.NET to explore our extensive catalog and discover how our tools and equipment can help you achieve excellence in your automotive repair work. Our dedicated team is ready to assist you with expert advice and support. Don’t wait—reach out now and take the first step towards a more efficient, accurate, and profitable automotive repair experience.
FAQ: Mercedes Heated Steering Wheel Retrofit
1. Is it possible to retrofit a heated steering wheel on any Mercedes model?
While possible on many models, compatibility depends on the vehicle’s electrical architecture and available features. Check with a professional for specific model compatibility.
2. How much does a Mercedes heated steering wheel retrofit cost?
The cost ranges from $720 to $2200, including parts and labor. DIY installation can save on labor costs.
3. Can I install a heated steering wheel myself, or should I seek professional help?
DIY installation is possible with automotive electrical knowledge. However, professional installation is recommended for complex retrofits or if you lack experience.
4. What components are needed for a heated steering wheel retrofit?
Essential components include a heated steering wheel, control module, wiring harness, switch or button, and possibly a new slip ring.
5. Are OEM or aftermarket parts better for a heated steering wheel retrofit?
OEM parts offer perfect fit and integration but are more expensive. Aftermarket parts are cheaper but may have fitment issues.
6. How do I maintain my heated steering wheel after the retrofit?
Regular cleaning with mild soap and water, avoiding harsh chemicals, and protecting from sunlight are essential maintenance steps.
7. What are the common issues with a heated steering wheel retrofit?
Common issues include the steering wheel not heating, airbag warning lights, switch malfunctions, and error codes.
8. Will retrofitting a heated steering wheel affect my vehicle’s warranty?
Retrofitting may affect your warranty, especially if not done by a certified professional. Check with your dealer for specific details.
9. What are the benefits of a heated steering wheel?
Benefits include enhanced comfort, improved safety, increased vehicle value, and a luxury feel.
10. How do I choose the right components for my Mercedes heated steering wheel retrofit?
Check compatibility with your vehicle model, consider material and design, and choose a reliable control module and high-quality wiring harness.