How To Fix A Vacuum Leak On A Car: A Pro Guide
Is your car sputtering, stalling, or guzzling gas? A vacuum leak could be the culprit. CARDIAGTECH.NET offers top-notch diagnostic tools to pinpoint and resolve these issues efficiently. Let’s dive into how to fix a vacuum leak on a car and restore your vehicle’s performance. Diagnostic Scanner BMW
1. Understanding Automotive Vacuum Leaks
A vacuum leak is an unwanted entry of air into your car’s engine or other systems. This happens when there’s a breach in the sealed environment maintained by vacuum pressure. In your vehicle, vacuum pressure operates several important systems. These include the brake booster, emission control systems, and even some accessories. When these systems lose vacuum, problems arise.
2. Why Vacuum Leaks Cause Car Problems
Vacuum leaks upset the air-fuel ratio in your engine. This imbalance can lead to a range of issues, from poor performance to increased emissions. Think of it like this: your engine needs a precise recipe of air and fuel to run smoothly. A vacuum leak throws off that recipe, causing chaos.
3. Recognizing the Common Signs of a Vacuum Leak
Early detection is key to preventing further damage. Here are the common signs of a vacuum leak:
3.1. Rough or Erratic Idle
If your engine struggles to maintain a steady idle, it might be a vacuum leak. The engine may vibrate or fluctuate in RPMs.
3.2. Stalling Engine
A significant vacuum leak can cause your engine to stall, especially at low speeds or when stopping.
3.3. Poor Acceleration
Notice your car feels sluggish? A vacuum leak can reduce your engine’s power output, making acceleration slower.
3.4. Increased Fuel Consumption
A lean-running engine due to a vacuum leak can drastically reduce your car’s fuel economy. You might find yourself filling up more often.
3.5. Hissing Sounds
Listen for unusual hissing or whistling sounds coming from the engine bay. This can indicate air being sucked in through the leak.
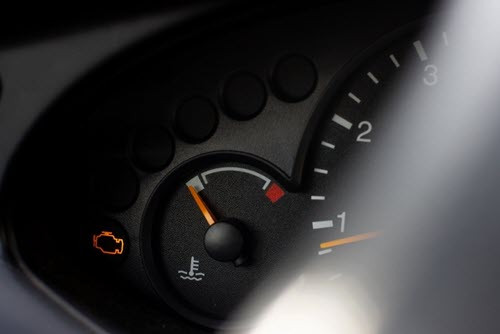
3.6. Check Engine Light (MIL)
A vacuum leak can trigger the Malfunction Indicator Lamp (MIL), also known as the check engine light. Use a scan tool like those available at CARDIAGTECH.NET to read the Diagnostic Trouble Codes (DTCs). This will provide clues about the problem.
Illuminated check engine light on a car dashboard indicating a potential vacuum leak
4. Pinpointing the Usual Suspects: Common Causes of Vacuum Leaks
Knowing where to look is half the battle. Here are the most common causes of vacuum leaks:
4.1. Cracked or Damaged Vacuum Hoses
Vacuum hoses can dry out, crack, and become brittle over time. Check all hoses for visible damage.
4.2. Loose Hose Connections
Hoses can become loose at their connections, creating a gap for air to enter.
4.3. Faulty Intake Manifold Gasket
The intake manifold gasket seals the intake manifold to the cylinder head. If this gasket fails, it can cause a significant vacuum leak.
4.4. Brake Booster Issues
A leak in the brake booster can affect braking performance and create a vacuum leak.
4.5. EGR Valve Problems
A faulty EGR valve can cause unmetered air to enter the engine.
4.6. PCV Valve Failure
A malfunctioning PCV valve can also contribute to vacuum leaks.
5. Essential Tools and Equipment for Vacuum Leak Detection
Before diving in, gather the necessary tools. Having the right equipment makes the job much easier. Consider acquiring these essential tools from CARDIAGTECH.NET:
5.1. Smoke Machine
A smoke machine is a valuable tool for detecting vacuum leaks. It introduces smoke into the system, making leaks easily visible.
5.2. Vacuum Gauge
A vacuum gauge helps measure the vacuum pressure in the engine. This provides insight into the severity of the leak.
5.3. Scan Tool/Code Reader
A scan tool retrieves Diagnostic Trouble Codes (DTCs) from the vehicle’s computer. This can pinpoint the source of the leak.
5.4. Carburetor Cleaner or Starting Fluid
These can be used to locate leaks by spraying them around suspected areas and listening for engine RPM changes.
5.5. Basic Hand Tools
You’ll need screwdrivers, pliers, wrenches, and sockets to remove and replace components.
5.6. Inspection Mirror and Flashlight
These help you see hard-to-reach areas.
5.7. Safety Gear
Wear gloves and eye protection to protect yourself from chemicals and debris.
6. How to Find a Vacuum Leak: Step-by-Step Diagnostic Guide
Finding a vacuum leak requires patience and a systematic approach. Follow these steps to locate the leak:
6.1. Visual Inspection
Start by visually inspecting all vacuum hoses and connections. Look for cracks, splits, or loose connections. Pay close attention to hoses near heat sources or moving parts.
6.2. Listening Test
With the engine running, listen for hissing or whistling sounds near vacuum lines. These sounds can lead you to the leak.
6.3. Using Carburetor Cleaner or Starting Fluid
Spray small amounts of carburetor cleaner or starting fluid around suspected leak areas. If the engine RPMs increase, you’ve found a leak. Be cautious when using these flammable substances.
6.4. Vacuum Gauge Test
Connect a vacuum gauge to a vacuum port on the engine. A low or unstable reading indicates a vacuum leak. Compare the reading to the manufacturer’s specifications.
6.5. Smoke Machine Test
The smoke machine is a highly effective way to find vacuum leaks. Connect the machine to the vacuum system and introduce smoke. Watch for smoke escaping from any cracks or openings. This method makes even small leaks visible.
6.6. Scan Tool Diagnostic Trouble Codes (DTCs)
Use a scan tool to retrieve any Diagnostic Trouble Codes (DTCs) stored in the vehicle’s computer. These codes can provide valuable clues about the location and nature of the vacuum leak. Common codes associated with vacuum leaks include:
- P0171: System Too Lean (Bank 1)
- P0174: System Too Lean (Bank 2)
- P0300: Random Misfire Detected
- P0401: Exhaust Gas Recirculation Flow Insufficient Detected
- P0505: Idle Air Control System Malfunction
Illuminated check engine light on a car dashboard indicating a potential vacuum leak
6.7. Checking the PCV Valve
The Positive Crankcase Ventilation (PCV) valve is an important component in your vehicle’s emission control system. A faulty or clogged PCV valve can create vacuum-related issues, so it’s worth checking during your diagnosis.
- Locate the PCV Valve: The PCV valve is usually located on the valve cover or intake manifold. Consult your vehicle’s repair manual for the exact location.
- Inspect the Valve: Remove the PCV valve and inspect it for any signs of damage, such as cracks or a buildup of deposits.
- Test the Valve: Shake the PCV valve. You should hear a rattling sound, indicating that the valve is moving freely. If it’s stuck or makes no noise, it’s likely faulty and needs replacement.
- Check the Hoses: Inspect the PCV valve’s hoses for any cracks or leaks. Replace them if necessary.
6.8. Testing the EGR Valve
The Exhaust Gas Recirculation (EGR) valve helps reduce emissions by recirculating exhaust gases back into the engine. A malfunctioning EGR valve can cause vacuum leaks and performance issues.
- Locate the EGR Valve: The EGR valve is typically found on the intake manifold. Refer to your vehicle’s repair manual for the exact location.
- Inspect the Valve: Check the EGR valve for any signs of damage or corrosion.
- Test the Valve: With the engine idling, disconnect the vacuum hose from the EGR valve. The engine idle should change. If there’s no change, the EGR valve may be stuck open or closed.
- Clean or Replace: Depending on the condition of the EGR valve, you may be able to clean it or you may need to replace it.
6.9. Examining the Intake Manifold Gasket
The intake manifold gasket seals the intake manifold to the cylinder head. If this gasket fails, it can cause a significant vacuum leak.
- Visually Inspect: Check the intake manifold gasket for any signs of damage or deterioration.
- Spray Test: With the engine running, spray carburetor cleaner or starting fluid around the intake manifold gasket. If the engine RPMs increase, you’ve likely found a leak in the gasket.
- Replace if Necessary: If you suspect a leak in the intake manifold gasket, replace it.
7. Step-by-Step Guide on How to Fix A Vacuum Leak On A Car
Once you’ve identified the source of the leak, it’s time to fix it. Here’s a step-by-step guide:
7.1. Replacing Vacuum Hoses
- Gather Supplies: Obtain the correct replacement vacuum hose. Ensure it’s the right diameter and length.
- Remove Old Hose: Disconnect the old hose from its fittings. Use pliers if necessary.
- Install New Hose: Connect the new hose to the fittings, ensuring a snug fit. Use hose clamps if required.
7.2. Tightening Loose Connections
- Locate Loose Connection: Find the loose connection that’s causing the leak.
- Tighten Connection: Use a screwdriver or wrench to tighten the connection. Be careful not to overtighten.
- Test: Start the engine and listen for leaks.
7.3. Replacing the Intake Manifold Gasket
- Gather Supplies: Obtain a new intake manifold gasket.
- Remove Intake Manifold: Disconnect all hoses, wires, and components attached to the intake manifold. Remove the manifold from the engine.
- Clean Surfaces: Clean the mating surfaces on the engine and intake manifold.
- Install New Gasket: Place the new gasket onto the engine.
- Reinstall Intake Manifold: Reinstall the intake manifold, tightening the bolts to the manufacturer’s specified torque.
- Reconnect Components: Reconnect all hoses, wires, and components.
7.4. Brake Booster Replacement
- Gather Supplies: Obtain a new brake booster.
- Disconnect Brake Lines: Disconnect the brake lines from the master cylinder.
- Remove Old Booster: Remove the old brake booster from the vehicle.
- Install New Booster: Install the new brake booster.
- Reconnect Brake Lines: Reconnect the brake lines to the master cylinder.
- Bleed Brakes: Bleed the brakes to remove any air from the system.
7.5. Replacing the EGR Valve
- Gather Supplies: Obtain a new EGR valve.
- Disconnect Vacuum Lines: Disconnect the vacuum lines from the EGR valve.
- Remove Old Valve: Remove the old EGR valve from the vehicle.
- Install New Valve: Install the new EGR valve.
- Reconnect Vacuum Lines: Reconnect the vacuum lines to the EGR valve.
8. Tips for Preventing Future Vacuum Leaks
Prevention is better than cure. Here are some tips to help prevent future vacuum leaks:
- Regularly inspect vacuum hoses for cracks and damage.
- Replace vacuum hoses as part of your routine maintenance.
- Ensure all hose connections are tight and secure.
- Avoid exposing vacuum hoses to extreme heat or chemicals.
- Use quality replacement parts.
9. Estimated Costs for Vacuum Leak Repairs
The cost of repairing a vacuum leak varies depending on the location and severity of the leak. Here are some estimated costs:
| Repair Type | Estimated Cost |
|---|---|
| Vacuum Hose Replacement | $50 – $150 |
| Intake Manifold Gasket | $150 – $400 |
| Brake Booster Replacement | $200 – $500 |
| EGR Valve Replacement | $100 – $300 |
| Smoke Machine Diagnostic Fee | $75 – $150 |
These costs include parts and labor. Prices may vary based on your location and the make and model of your vehicle.
10. Leveraging CARDIAGTECH.NET for Your Automotive Needs
CARDIAGTECH.NET is your go-to source for high-quality automotive diagnostic tools and equipment. Whether you’re a professional mechanic or a DIY enthusiast, we have the tools you need to tackle vacuum leaks and other automotive repairs.
10.1. Why Choose CARDIAGTECH.NET?
- Wide selection of diagnostic tools
- High-quality products from trusted brands
- Competitive prices
- Expert customer support
10.2. Featured Products for Vacuum Leak Repair
- Smoke Machines: Quickly locate vacuum leaks with our professional-grade smoke machines.
- Scan Tools: Retrieve DTCs and diagnose engine problems with our advanced scan tools.
- Vacuum Gauges: Measure vacuum pressure and assess engine performance with our accurate vacuum gauges.
11. Understanding Different Vehicle Brands and Vacuum Leak Tendencies
Different vehicle brands may have specific tendencies when it comes to vacuum leaks. Here’s a general overview:
11.1. Common Issues by Brand
| Brand | Common Vacuum Leak Areas | Potential Causes |
|---|---|---|
| Ford | PCV valve hoses, intake manifold gaskets | Aging hoses, gasket deterioration |
| Chevrolet | Vacuum lines near the throttle body, EGR valve | Heat exposure, wear and tear |
| Toyota | Vacuum hoses connecting to the EVAP system | Drying and cracking due to age |
| Honda | Intake manifold area, brake booster hose | Rubber degradation, loose connections |
| BMW | Vacuum lines in the engine bay, DISA valve | Heat and oil exposure, plastic brittleness |
| Mercedes | Vacuum lines related to the brake system, EGR valve | Component aging, environmental factors |
11.2. How to Account for Brand-Specific Issues in Diagnostics
When diagnosing vacuum leaks, consider these brand-specific areas:
- Ford: Focus on the PCV valve system and intake manifold.
- Chevrolet: Inspect around the throttle body and EGR valve connections.
- Toyota: Pay special attention to hoses linked to the EVAP system.
- Honda: Check the intake manifold and brake booster hose thoroughly.
- BMW: Look closely at vacuum lines in the engine bay and the DISA valve.
- Mercedes: Evaluate lines related to braking and the EGR valve.
12. Addressing Advanced Diagnostic Techniques
For tricky or intermittent vacuum leaks, more advanced techniques may be needed:
12.1. Using a Multimeter to Check Sensors
Sensors affected by vacuum leaks include the Mass Airflow (MAF) sensor and the Oxygen (O2) sensor. Use a multimeter to check their readings:
- MAF Sensor: Look for stable voltage readings at idle and varying voltage as the engine revs. Unusual fluctuations can point to a vacuum leak.
- O2 Sensor: Check that the sensor alternates between rich and lean readings. A consistently lean reading may signal a vacuum leak.
12.2. Performing a Compression Test
A compression test assesses the condition of your engine’s cylinders. Low compression in one or more cylinders can indicate a leak around the intake manifold gasket:
- Disable Ignition: Disconnect the ignition system to prevent the engine from starting.
- Remove Spark Plugs: Remove all spark plugs from the engine.
- Insert Compression Tester: Insert the compression tester into each spark plug hole.
- Crank Engine: Crank the engine for several seconds.
- Record Readings: Record the compression reading for each cylinder.
- Compare Readings: Compare the readings to the manufacturer’s specifications. Significant variations can indicate a leak.
13. Essential Maintenance to Prevent Vacuum Leaks
Proactive maintenance can minimize the chances of developing vacuum leaks.
13.1. Regular Hose Inspections
Inspect all vacuum hoses every 6 months. Check for cracks, brittleness, and loose connections. Replace any damaged hoses immediately.
13.2. Periodic Gasket Checks
When performing other engine maintenance tasks, inspect gaskets, such as the intake manifold gasket. Look for signs of deterioration or damage.
13.3. Professional Servicing
Schedule regular servicing with a qualified mechanic. They can perform thorough inspections and identify potential issues before they become major problems.
14. Navigating Legal and Safety Considerations
Safety should always be a priority when working on your vehicle. Here are some safety tips:
- Always wear safety glasses and gloves when working on your car.
- Work in a well-ventilated area.
- Disconnect the battery before starting any repairs.
- Be careful when working with flammable substances like carburetor cleaner.
15. The Future of Automotive Diagnostics
Automotive technology is constantly evolving. Future diagnostic tools will likely include:
- More advanced scan tools with enhanced diagnostic capabilities.
- AI-powered diagnostic systems that can analyze data from multiple sources to pinpoint problems.
- Remote diagnostic capabilities that allow technicians to diagnose and repair vehicles remotely.
16. Troubleshooting Common Post-Repair Issues
Even after fixing a vacuum leak, you might encounter some post-repair issues:
16.1. Engine Still Runs Rough
If the engine still runs rough after the repair, double-check your work. Ensure all connections are tight and that you’ve replaced all damaged components. Also, check for any additional vacuum leaks.
16.2. Check Engine Light Returns
If the check engine light returns after the repair, use a scan tool to retrieve the new DTCs. This will provide clues about the ongoing problem.
16.3. Poor Fuel Economy Persists
If you’re still experiencing poor fuel economy, check your engine’s overall condition. Other factors, such as a dirty air filter or worn spark plugs, can also affect fuel economy.
17. Real-World Examples
Let’s look at some real-world examples of vacuum leak repairs:
17.1. Scenario 1: Ford F-150 with a Rough Idle
A Ford F-150 owner noticed a rough idle and a hissing sound coming from the engine bay. After inspecting the vacuum hoses, they found a cracked hose near the PCV valve. Replacing the hose resolved the issue, and the engine ran smoothly again.
17.2. Scenario 2: Toyota Camry with Poor Acceleration
A Toyota Camry owner complained of poor acceleration and reduced fuel economy. A smoke test revealed a leak in the intake manifold gasket. Replacing the gasket restored the car’s performance and fuel efficiency.
17.3. Scenario 3: BMW 3 Series with Check Engine Light
A BMW 3 Series owner had a check engine light and a lean code. After checking the vacuum lines, they discovered a faulty DISA valve. Replacing the DISA valve cleared the code and improved the engine’s performance.
18. Contact CARDIAGTECH.NET for Professional Assistance
Need expert advice or high-quality diagnostic tools? Contact CARDIAGTECH.NET today! Our team is here to help you diagnose and repair vacuum leaks and other automotive issues.
- Address: 276 Reock St, City of Orange, NJ 07050, United States
- WhatsApp: +1 (641) 206-8880
- Website: CARDIAGTECH.NET
Don’t let a vacuum leak ruin your car’s performance. Contact us now and get the tools and expertise you need to get back on the road!
19. FAQs About Vacuum Leaks
Here are some frequently asked questions about vacuum leaks:
19.1. How Long Does It Take to Fix a Vacuum Leak?
The time it takes to fix a vacuum leak varies depending on the location and severity of the leak. Simple repairs, such as replacing a vacuum hose, can take as little as 30 minutes. More complex repairs, such as replacing an intake manifold gasket, can take several hours.
19.2. Can I Drive with a Vacuum Leak?
While it’s possible to drive with a vacuum leak, it’s not recommended. A vacuum leak can cause poor engine performance, reduced fuel economy, and potential damage to other components. It’s best to repair the leak as soon as possible.
19.3. Will a Vacuum Leak Cause My Car to Fail an Emissions Test?
Yes, a vacuum leak can cause your car to fail an emissions test. A vacuum leak can cause the engine to run lean, which increases emissions.
19.4. How Can I Tell if a Vacuum Hose Is Bad?
A bad vacuum hose will typically be cracked, brittle, or loose. You may also be able to hear a hissing sound coming from the hose.
19.5. Can a Vacuum Leak Cause My Car to Overheat?
While it’s not common, a vacuum leak can contribute to overheating. A vacuum leak can cause the engine to run lean, which can increase the engine’s temperature.
19.6. How Often Should I Check My Vacuum Hoses?
You should check your vacuum hoses at least every 6 months.
19.7. What Is a Smoke Machine, and How Does It Help Find Vacuum Leaks?
A smoke machine introduces smoke into the vacuum system. The smoke escapes from any leaks, making them easy to find.
19.8. Can a Vacuum Leak Cause a Misfire?
Yes, a vacuum leak can cause a misfire. A vacuum leak can cause the air-fuel mixture to become too lean, which can cause the engine to misfire.
19.9. Is It Safe to Use Carburetor Cleaner to Find Vacuum Leaks?
While carburetor cleaner can be effective at finding vacuum leaks, it’s important to use it carefully. Carburetor cleaner is flammable, so avoid spraying it near hot engine components.
19.10. What Are Some Common Symptoms of a Vacuum Leak?
Common symptoms of a vacuum leak include rough idle, stalling, poor acceleration, increased fuel consumption, and a check engine light.
20. Final Thoughts: Proactive Maintenance and Reliable Repairs
Fixing a vacuum leak is a manageable task with the right knowledge and tools. From visual inspections to smoke testing, the methods discussed here can help you diagnose and repair vacuum leaks effectively. Remember, regular maintenance and prompt repairs are key to keeping your vehicle running smoothly.
For top-quality diagnostic tools and equipment, trust CARDIAGTECH.NET. Our wide selection and expert support will ensure you have everything you need to tackle any automotive repair.
Ready to get started? Contact CARDIAGTECH.NET today!
Address: 276 Reock St, City of Orange, NJ 07050, United States
WhatsApp: +1 (641) 206-8880
Website: CARDIAGTECH.NET
Take Action Now: If you’re experiencing any of the symptoms of a vacuum leak, don’t wait! Contact CARDIAGTECH.NET for expert advice and the tools you need to get your car running smoothly again. Our team is ready to assist you with all your automotive diagnostic needs. Let us help you keep your vehicle in top condition!
