How to Fix Leather Seat Tear in a Car Professionally

Fixing a leather seat tear in a car can restore its luxurious look and prevent further damage. CARDIAGTECH.NET provides expert solutions and premium tools to make this repair efficient and long-lasting. This guide covers techniques like leather conditioning and vinyl repair to ensure your car seats look as good as new.
1. Understanding Leather Seat Damage
Leather car seats, while luxurious, are prone to wear and tear. Recognizing the type of damage is crucial for effective repair. Common issues include:
- Tears: Resulting from sharp objects or excessive stress.
- Cracks: Caused by dryness and lack of maintenance.
- Fading: Due to sun exposure and aging.
- Stains: From spills and everyday use.
Addressing these problems promptly can prevent them from escalating, preserving the value and comfort of your vehicle.
1.1. Types of Leather Used in Car Seats
Understanding the different types of leather used in car seats is essential for selecting the appropriate repair methods and products. Here’s a breakdown of the common types:
-
Aniline Leather: This is the most natural-looking leather, as it retains the hide’s original surface and markings. It’s dyed with transparent dyes, showcasing the leather’s unique character.
- Pros: Soft, supple, and highly breathable.
- Cons: More susceptible to stains and damage due to its lack of protective coating.
-
Semi-Aniline Leather: A step up in durability from aniline leather, semi-aniline leather is also dyed but has a light surface coating. This coating provides some protection against wear and stains while still preserving the leather’s natural appearance.
- Pros: Better stain resistance and durability than aniline leather.
- Cons: Not as soft or natural-feeling as pure aniline leather.
-
Protected (or Pigmented) Leather: This type of leather has a polymer surface coating containing pigments, which makes it more uniform in appearance and highly resistant to wear, fading, and staining.
- Pros: Very durable and easy to clean, ideal for high-traffic areas.
- Cons: Lacks the natural feel and breathability of aniline or semi-aniline leather.
-
Nappa Leather: This term refers to particularly soft and full-grain leather, often made from unsplit sheep, calf, or goat hides. It can be aniline or semi-aniline, prized for its luxurious feel.
- Pros: Exceptionally soft, smooth, and luxurious.
- Cons: Requires careful maintenance to prevent damage.
-
Bonded Leather: Made from shredded leather fibers bonded together with polyurethane or latex, bonded leather is an economical alternative. However, it does not possess the same qualities as real leather.
- Pros: Cost-effective and can look similar to real leather.
- Cons: Not as durable or breathable as genuine leather.
-
Suede and Nubuck: These are types of leather with a napped finish. Suede is made from the inner split of the hide, while nubuck is made from the outer layer, giving it a finer grain.
- Pros: Soft and velvety texture.
- Cons: Easily stained and requires specialized cleaning products.
-
Vinyl (Leatherette): While not a type of leather, vinyl is often used as a leather substitute in car seats. It is a synthetic material made from PVC and other compounds, designed to mimic the look and feel of leather.
- Pros: Affordable, water-resistant, and easy to clean.
- Cons: Not as breathable or durable as genuine leather.
By understanding these different types of leather, you can better assess the damage to your car seats and choose the right repair and maintenance products to keep them in excellent condition. Always consult the manufacturer’s specifications for your car’s interior to ensure you use the correct products.
1.2. Common Causes of Leather Tears
Leather car seats can tear due to various factors. Identifying these causes can help prevent future damage. Here are the most common reasons:
- Sharp Objects: Keys, pens, and other sharp items carried in pockets can easily puncture or scratch leather seats.
- Friction: Repeated rubbing against the seat, especially when getting in and out of the car, can wear down the leather over time.
- Dryness: Lack of regular conditioning can cause the leather to dry out and become brittle, making it more prone to tearing.
- Sun Exposure: Prolonged exposure to sunlight can fade and weaken the leather, reducing its elasticity and increasing the risk of tears.
- Extreme Temperatures: Both extreme heat and cold can damage leather. Heat can dry it out, while cold can make it stiff and prone to cracking.
- Spills and Stains: Untreated spills can seep into the leather, causing it to deteriorate and weaken.
- Pets: Animal claws and teeth can easily scratch or tear leather seats.
- Age: Over time, leather naturally degrades, losing its strength and flexibility.
- Lack of Maintenance: Neglecting regular cleaning and conditioning can accelerate the deterioration process.
- Accidents: Sudden impacts or sharp forces during accidents can cause significant tears in the leather.
Understanding these causes can guide car owners to take preventive measures. Using seat covers, regularly conditioning the leather, and being careful with sharp objects can significantly extend the lifespan of leather car seats.
2. Essential Tools and Materials for Leather Repair
Having the right tools and materials is crucial for a successful leather repair. CARDIAGTECH.NET offers a wide range of high-quality products designed for this purpose. Here’s a comprehensive list:
2.1. List of Necessary Equipment
| Tool | Description | Benefits |
|---|---|---|
| Leather Repair Kit | Contains essential items like leather glue, filler, colorant, and sealant. | Provides a complete solution for minor repairs, ensuring color matching and durability. |
| Leather Cleaner | A specialized cleaner designed to remove dirt, oil, and grime without damaging the leather. | Prepares the surface for repair by removing contaminants, ensuring better adhesion of repair materials. |
| Leather Conditioner | Keeps leather soft and supple, preventing cracks and tears. | Maintains the leather’s flexibility, preventing future damage and extending its lifespan. |
| Sub-Patch Material | A piece of strong fabric or leather used to reinforce the underside of the tear. | Adds structural integrity to the repair, preventing the tear from spreading and providing a stable base for the filler. |
| Leather Glue | A strong adhesive specifically formulated for leather. | Bonds the sub-patch to the leather, creating a secure and durable repair. |
| Leather Filler | A flexible compound used to fill the tear, creating a smooth surface. | Fills the gap evenly, providing a seamless look and preventing the repaired area from sinking over time. |
| Colorant | A dye or pigment used to match the color of the repaired area with the surrounding leather. | Ensures the repair blends seamlessly with the original leather, maintaining the seat’s aesthetic appeal. |
| Sealant | A protective coating applied after the colorant to seal and protect the repaired area. | Protects the colorant from wear and fading, ensuring a long-lasting repair. |
| Heat Gun | Used to accelerate the drying and curing process of the filler and sealant. | Speeds up the repair process, allowing for quicker completion and reducing the risk of damage during drying. |
| Sanding Block | Used with sandpaper to smooth the filled area. | Creates a smooth, even surface that blends seamlessly with the surrounding leather. |
| Sandpaper Set | An assortment of fine-grit sandpapers (e.g., 400, 600, 800 grit) for smoothing the filler. | Allows for precise smoothing and blending of the filler, ensuring a professional finish. |
| Scissors/Scalpel | Used to trim frayed edges and prepare the tear for repair. | Provides clean, precise cuts, ensuring a neat and professional repair. |
| Tweezers | Used to position the sub-patch and manipulate small pieces of material. | Allows for precise placement of the sub-patch, ensuring optimal adhesion and support. |
| Sponge/Applicator | Used to apply cleaner, conditioner, colorant, and sealant. | Ensures even application of products, preventing streaks and blotches. |
| Mixing Palette | Used to mix and blend colorants to achieve the perfect match. | Allows for precise color matching, ensuring a seamless repair. |
| Airbrush Kit | For applying colorant and sealant in thin, even layers. | Provides a professional finish by ensuring uniform coverage and preventing buildup of product. |
| Protective Gloves | To protect hands from chemicals and dyes. | Keeps hands clean and prevents skin irritation from repair products. |
| Safety Glasses | To protect eyes from splashes and debris. | Protects eyes from accidental splashes of chemicals and debris during the repair process. |
| Ventilation | Adequate ventilation to avoid inhaling harmful fumes. | Ensures a safe working environment by preventing the buildup of harmful fumes. |
2.2. Where to Buy Quality Leather Repair Tools
For premium leather repair tools, visit CARDIAGTECH.NET. We offer a comprehensive selection of kits and individual items to suit all your repair needs. Our products are designed for durability and performance, ensuring professional-quality results.
3. Step-by-Step Guide to Repairing a Leather Car Seat Tear
Follow these detailed steps to effectively repair a tear in your leather car seat.
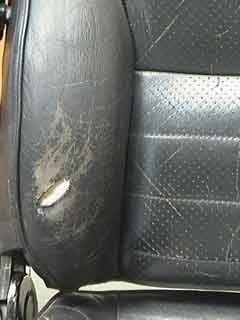
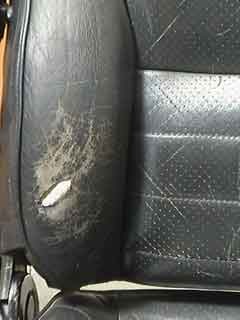
3.1. Preparing the Area
- Clean the Leather:
- Use a leather cleaner to remove dirt, oil, and grime from the area around the tear.
- Apply the cleaner to a soft cloth and gently wipe the surface.
- Let it dry completely before proceeding.
- Trim Frayed Edges:
- Use scissors or a scalpel to carefully trim any frayed or loose edges around the tear.
- This will create a clean surface for the repair.
Preparing the leather car seat for repair using Leather Prep and an abrasive pad to remove grease and oils.
3.2. Applying a Sub-Patch
- Cut the Sub-Patch:
- Cut a piece of sub-patch material slightly larger than the tear.
- Ensure it extends about 1 cm beyond the edges of the tear.
- Insert the Sub-Patch:
- Use tweezers to carefully insert the sub-patch under the leather around the tear.
- Ensure the patch lies flat and covers the entire tear with an even overlap.
 Applying the leather repair sub-patch to provide a firm backing for the repair.
3.3. Gluing the Patch in Place
- Apply Leather Glue:
- Apply a small amount of leather glue to the underside of the leather edges around the tear.
- Use a spatula or small brush to spread the glue evenly.
- Adhere the Patch:
- Press the leather edges onto the sub-patch, ensuring a secure bond.
- Hold in place for a few minutes to allow the glue to set.
- Let it dry completely before moving on to the next step.
3.4. Filling the Tear
- Apply Leather Filler:
- Use a palette knife to apply a thin layer of leather filler into the tear, covering the sub-patch.
- Make sure the layer is very thin, just covering the sub-patch.
- Dry the Filler:
- Allow the filler to dry for about 20 minutes.
- Use a heat gun on a low setting to speed up the drying process if needed.
- Apply Multiple Layers:
- Apply additional thin layers of filler, allowing each layer to dry before applying the next.
- Typically, 5-6 thin layers are needed to build up the filler to just below the top of the hole.
- Smooth the Surface:
- With each layer, smooth the area with the edge of the palette knife to remove excess filler.
 Filling the hole in the leather car seat with thin layers of Heavy Filler.
3.5. Sanding the Filled Area
- Initial Sanding:
- Once the final layer of filler is dry, use a sanding block with 400-grit sandpaper to smooth the surface.
- Gently sand the area to level the filler with the surrounding leather.
- Fine Sanding:
- Switch to 600-grit sandpaper for finer smoothing.
- Continue sanding until the filled area is flush with the surrounding leather.
- Final Sanding:
- Use 800-grit sandpaper for the final smoothing.
- Ensure there are no ridges or uneven spots.
- Clean the Area:
- Wipe the area with a clean cloth and alcohol cleaner to remove any dust from sanding.
3.6. Matching the Color
- Choose the Right Colorant:
- Select a colorant that matches the color of your leather car seat.
- Leather repair kits from CARDIAGTECH.NET come with a range of color options.
- Apply Initial Coat:
- Apply a small amount of colorant to a sponge or applicator.
- Rub the colorant thoroughly into the repaired area.
- This allows the colorant to penetrate into the creases of the leather.
 Applying an initial coat of colorant to the repaired area.
3.7. Applying Colorant
- Prepare Airbrush:
- If using an airbrush, thin the colorant according to the manufacturer’s instructions.
- Pour the colorant into the airbrush container.
- Spray Thin Coats:
- Spray thin coats of colorant over the repaired area, blending it with the surrounding leather.
- Ensure each coat is very thin and allow sufficient time to dry before applying the next.
- Apply 10-15 thin coats for the best results, depending on the damage and color used.
3.8. Applying Sealant
- Apply Sealant:
- Once the colorant is completely dry and blended, apply a thin coat of sealant using the airbrush or a sponge.
- Allow each coat to dry before applying the next.
- Dry the Sealant:
- Let the sealant dry completely for at least 24 hours before using the seat.
- This ensures the filler, colorant, and sealant have cured sufficiently.
3.9. Final Touches
- Inspect the Repair:
- Carefully inspect the repaired area to ensure it blends seamlessly with the surrounding leather.
- Check for any uneven spots or color discrepancies.
- Apply Leather Conditioner:
- Apply a leather conditioner to the entire seat to keep the leather soft and supple.
- This will help prevent future cracks and tears.
4. Advanced Techniques for Complex Tears
For more complex tears, consider these advanced techniques to enhance your repair:
4.1. Using Grain Paper for Texture
- Select Grain Paper:
- Choose a grain paper that matches the texture of your leather car seat.
- Apply Texture:
- Place the grain paper over the filled area while the filler is still wet.
- Press gently to transfer the texture onto the filler.
- Remove Grain Paper:
- Carefully remove the grain paper and allow the filler to dry completely.
4.2. Working with Heavily Damaged Areas
- Reinforce with Extra Patch:
- For heavily damaged areas, use an additional sub-patch for extra reinforcement.
- Layer Filler Carefully:
- Apply the filler in very thin layers, allowing each layer to dry completely before applying the next.
- Take Your Time:
- Complex repairs require patience and attention to detail.
- Rushing the process can result in a less-than-perfect finish.
5. Maintenance Tips to Prevent Future Tears
Preventing tears is better than repairing them. Follow these maintenance tips to keep your leather car seats in top condition:
5.1. Regular Cleaning and Conditioning
- Clean Regularly:
- Clean your leather seats every 1-3 months to remove dirt and grime.
- Use a specialized leather cleaner to avoid damaging the leather.
- Condition Frequently:
- Apply leather conditioner every 3-6 months to keep the leather soft and supple.
- Conditioner prevents the leather from drying out and cracking.
5.2. Protecting from Sun and Heat
- Park in the Shade:
- Whenever possible, park your car in the shade to protect the leather from direct sunlight.
- Use a Sunshade:
- Use a sunshade on the windshield to reduce heat buildup inside the car.
- Tint Windows:
- Consider tinting your car windows to block UV rays and reduce heat.
5.3. Avoiding Sharp Objects
- Check Pockets:
- Before sitting down, check your pockets for sharp objects that could damage the leather.
- Use Seat Covers:
- Consider using seat covers to protect your leather seats from everyday wear and tear.
- Be Careful with Pets:
- If you travel with pets, use a pet seat cover to protect the leather from scratches and tears.
6. Cost-Effective Solutions
6.1. DIY vs. Professional Repair
Deciding between DIY and professional repair depends on the extent of the damage and your comfort level. DIY repairs are cost-effective for minor tears, while professional services are better for significant damage.
6.2. When to Seek Professional Help
- Extensive Damage:
- If the tear is large or the leather is severely damaged, seek professional help.
- Multiple Tears:
- Multiple tears may require more extensive repairs that are best handled by a professional.
- Lack of Confidence:
- If you are not confident in your ability to perform the repair, it is best to seek professional assistance.
7. Choosing the Right Leather Repair Kit
Selecting the appropriate leather repair kit is essential for achieving optimal results. CARDIAGTECH.NET offers a variety of kits tailored to different types of damage and leather.
7.1. Key Features to Look For
- Comprehensive Kit:
- Ensure the kit includes all necessary items, such as cleaner, conditioner, filler, colorant, and sealant.
- Color Matching:
- Look for kits that offer a range of color options or custom color matching.
- Quality Materials:
- Choose kits with high-quality materials that are designed for durability and long-lasting results.
- Ease of Use:
- Select a kit with clear instructions and easy-to-use products.
7.2. Top Recommended Kits from CARDIAGTECH.NET
| Kit Name | Description | Best For | Price |
|---|---|---|---|
| Basic Leather Repair Kit | Includes leather cleaner, conditioner, filler, colorant, and sealant. | Small tears and scratches. | $49.99 |
| Deluxe Leather Repair Kit | Includes everything in the basic kit plus additional tools like an airbrush and grain paper. | Medium-sized tears and more complex repairs. | $99.99 |
| Professional Leather Repair Kit | Includes a comprehensive range of tools and materials for professional-quality repairs, including custom color matching. | Large tears, extensive damage, and professional use. | $199.99 |
| Leather Care Kit | Includes leather cleaner and conditioner to maintain and protect leather seats. | Regular maintenance and prevention of tears and cracks. | $39.99 |
| Vinyl Repair Kit | Designed specifically for vinyl car seats, includes vinyl filler, colorant, and sealant. | Tears and damage on vinyl seats. | $44.99 |
8. Understanding Vinyl Car Seat Repair
For car owners with vinyl seats, understanding the differences between vinyl and leather is essential for proper repair. Vinyl is a synthetic material, and repairing tears in vinyl seats requires different tools and techniques than leather repair.
8.1. Differences Between Leather and Vinyl Repair
| Feature | Leather | Vinyl |
|---|---|---|
| Material | Natural animal hide | Synthetic material (PVC) |
| Repair Products | Leather-specific cleaners, conditioners, fillers, and colorants | Vinyl-specific cleaners, fillers, and colorants |
| Flexibility | More flexible and breathable | Less flexible and less breathable |
| Durability | Can last longer with proper care | Less durable than high-quality leather |
| Repair Technique | Requires careful layering, sanding, and color matching for a seamless look | Requires precise filling and texture matching for a natural appearance |
8.2. Step-by-Step Guide to Vinyl Car Seat Repair
- Clean the Area:
- Use a vinyl cleaner to remove dirt and grime from the area around the tear.
- Prepare the Tear:
- Trim any frayed edges with scissors or a scalpel.
- Apply a Vinyl Patch (if needed):
- For larger tears, use a vinyl patch to provide support.
- Cut the patch slightly larger than the tear and insert it underneath the vinyl.
- Apply Vinyl Filler:
- Use a palette knife to apply vinyl filler into the tear, covering the patch.
- Apply in thin layers, allowing each layer to dry before applying the next.
- Texture Matching:
- Use a grain paper or texture pad to match the texture of the surrounding vinyl.
- Press the texture onto the wet filler and allow it to dry.
- Sanding:
- Gently sand the filled area with fine-grit sandpaper to smooth the surface.
- Color Matching:
- Select a vinyl colorant that matches the color of your vinyl seat.
- Apply the colorant in thin coats, allowing each coat to dry.
- Sealant:
- Apply a vinyl sealant to protect the repaired area and blend it with the surrounding vinyl.
9. Addressing Common Mistakes
Even with careful preparation, mistakes can happen. Here’s how to address common issues:
9.1. Uneven Filling
- Identify Uneven Spots:
- Run your hand over the filled area to identify any uneven spots or ridges.
- Sand Down High Spots:
- Use fine-grit sandpaper to gently sand down any high spots until the surface is level.
- Apply Additional Filler:
- If there are low spots, apply additional filler in thin layers to build up the surface.
- Re-Sand:
- Once the additional filler is dry, re-sand the area to ensure a smooth, even surface.
9.2. Color Mismatch
- Assess the Mismatch:
- Compare the color of the repaired area with the surrounding leather to determine the extent of the mismatch.
- Adjust Colorant:
- If the color is too light, add a small amount of darker pigment.
- If the color is too dark, add a small amount of lighter pigment.
- Test the Color:
- Test the adjusted colorant on a hidden area of the leather before applying it to the repaired area.
- Reapply Colorant:
- Apply the adjusted colorant in thin coats, allowing each coat to dry before applying the next.
- Blend the Edges:
- Use a soft cloth to gently blend the edges of the repaired area with the surrounding leather.
9.3. Peeling or Cracking
- Identify the Cause:
- Peeling or cracking can be caused by improper preparation, using too much filler, or applying the filler in thick layers.
- Remove Loose Material:
- Use a scalpel or fine-grit sandpaper to remove any loose or peeling material.
- Reapply Filler:
- Apply a thin layer of leather glue to the affected area.
- Apply the filler in very thin layers, allowing each layer to dry completely before applying the next.
- Sealant:
- Once the filler is dry, seal the area with a thin coat of sealant to prevent further peeling or cracking.
10. Customer Success Stories
Here are a few testimonials from satisfied customers who have successfully used CARDIAGTECH.NET products to repair their leather car seats:
- John D., Los Angeles, CA: “I had a tear in my leather seat that I thought was beyond repair. The Deluxe Leather Repair Kit from CARDIAGTECH.NET saved the day! The color match was perfect, and the instructions were easy to follow. My seat looks as good as new!”
- Sarah M., Houston, TX: “The Leather Care Kit is amazing! It keeps my leather seats looking and feeling soft and supple. I highly recommend it for anyone who wants to protect their investment.”
- Mike L., Miami, FL: “I was hesitant to try repairing my vinyl seat myself, but the Vinyl Repair Kit made it easy. The texture matching tool was a lifesaver, and the repair is virtually invisible.”
11. Call to Action
Ready to restore your car’s interior? Contact CARDIAGTECH.NET today for expert advice and premium leather repair tools. Address your challenges of physical work, continuous learning, and time constraints with our solutions. Let us help you enhance your work efficiency, accuracy, and customer satisfaction.
Contact Information:
- Address: 276 Reock St, City of Orange, NJ 07050, United States
- WhatsApp: +1 (641) 206-8880
- Website: CARDIAGTECH.NET
FAQ
1. What causes leather car seats to tear?
Leather car seats can tear due to sharp objects, friction, dryness, sun exposure, extreme temperatures, spills, pets, age, and lack of maintenance.
2. Can I repair a leather car seat tear myself?
Yes, you can repair minor tears yourself using a leather repair kit. For extensive damage, professional help is recommended.
3. What tools do I need to repair a leather car seat tear?
Essential tools include a leather repair kit, leather cleaner, conditioner, sub-patch material, leather glue, filler, colorant, sealant, heat gun, sandpaper, scissors, and tweezers.
4. How do I prepare the area for leather repair?
Clean the area with a leather cleaner and trim any frayed edges with scissors or a scalpel.
5. How do I apply a sub-patch?
Cut a piece of sub-patch material slightly larger than the tear and use tweezers to insert it under the leather around the tear.
6. How do I fill the tear?
Apply leather filler in thin layers, allowing each layer to dry before applying the next. Smooth the surface with a palette knife and sandpaper.
7. How do I match the color of the repaired area?
Select a colorant that matches the color of your leather car seat and apply it in thin coats, blending it with the surrounding leather.
8. How do I protect the repaired area?
Apply a sealant to protect the repaired area from wear and fading.
9. How can I prevent future tears in my leather car seats?
Regularly clean and condition your leather seats, protect them from sun and heat, and avoid sharp objects.
10. What should I do if I make a mistake during the repair process?
Address common mistakes like uneven filling and color mismatch by sanding, reapplying filler, and adjusting the colorant as needed.