How to Check for Leaks in the Cooling System? A Complete Guide
Is your car losing coolant? CARDIAGTECH.NET provides you with a comprehensive guide on how to check for coolant leaks in your vehicle’s cooling system and offers top-notch tools to address the problem effectively. Master the art of coolant leak detection and resolution to maintain your engine’s health with our expert advice and CARDIAGTECH.NET solutions.
1. Understanding the Importance of Coolant and Leak Detection
What is the crucial role of coolant in your vehicle and why is detecting leaks so important? Coolant, often known as antifreeze, plays a vital role in regulating engine temperature, preventing overheating in the summer and freezing in the winter. According to a study by the University of Michigan Transportation Research Institute, approximately 40% of engine failures are cooling system related. Early detection of coolant leaks can prevent severe engine damage, saving you significant repair costs. Ignoring coolant leaks can lead to overheating, which can cause cracked cylinder heads, warped engine blocks, and even complete engine failure.
2. Identifying Potential Coolant Leak Symptoms
What are the key indicators that your vehicle may have a coolant leak? Detecting coolant leaks early can prevent catastrophic engine damage. Here are several signs to watch for:
- Visible Puddles: Look for green, pink, orange, or blue puddles under your car, especially after it has been parked for a while. These colors are due to the dyes added to coolants.
- Sweet Smell: A sweet, maple syrup-like smell, especially when the engine is hot, can indicate a coolant leak. This is because the main component of antifreeze, ethylene glycol, has a sweet scent.
- Overheating Engine: Frequent overheating, even on short trips, is a classic sign of a coolant leak. The engine temperature gauge may climb into the red zone.
- Low Coolant Level: Regularly check your coolant reservoir. A consistently low level despite refills indicates a leak.
Puddles of coolant under a car indicating a coolant leak
Visible Puddles: Look for green, pink, orange, or blue puddles under your car, especially after it has been parked for a while.
- Steam from the Engine: Visible steam coming from under the hood is a clear sign of overheating, often due to a coolant leak.
- White Smoke: White smoke from the exhaust pipe can indicate a coolant leak into the engine cylinders, particularly if accompanied by a sweet smell.
- Dashboard Warning Lights: The coolant temperature warning light or low coolant level indicator on your dashboard may illuminate.
- Bubbles in the Coolant Reservoir: Bubbles in the coolant reservoir while the engine is running can signal a leak of combustion gases into the cooling system, often due to a head gasket issue.
- Wet or Oily Residue: Check around hoses, connections, and the water pump for wetness or oily residue, which can indicate a slow coolant leak.
3. Common Areas Where Coolant Leaks Occur
Where are the most frequent spots for coolant to escape in a vehicle’s cooling system? Coolant leaks can occur in various parts of the cooling system. Identifying these common areas can help you narrow down your search:
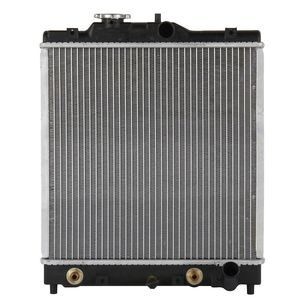
- Radiator: The radiator is a prime location for leaks, especially at the seams, core, and connections.
- Hoses: Hoses can crack, become brittle, or loosen at connections, leading to leaks.
- Hose Clamps: Loose or corroded hose clamps can fail to provide a tight seal, causing coolant to seep out.
- Water Pump: The water pump’s seals can wear out over time, resulting in coolant leaks from the weep hole.
- Heater Core: Leaks in the heater core can cause coolant to enter the passenger compartment, often detected by a sweet smell inside the car.
- Head Gasket: A blown head gasket can cause coolant to leak into the engine cylinders or oil, leading to significant engine problems. According to a study by the National Institute for Automotive Service Excellence (ASE), head gasket failures account for approximately 20% of coolant leaks that lead to major engine repairs.
- Freeze Plugs: Also known as core plugs, these can corrode and leak coolant from the engine block.
- Thermostat Housing: The thermostat housing can crack or corrode, causing coolant to leak around the thermostat.
- Coolant Reservoir: Cracks or damage to the coolant reservoir can result in coolant loss.
4. Step-by-Step Guide to Checking for Coolant Leaks
How can you systematically inspect your vehicle for coolant leaks? Follow these steps to perform a thorough inspection:
4.1. Preparation
- Safety First: Ensure the engine is completely cool before starting the inspection to avoid burns from hot coolant or steam.
- Gather Tools: Assemble the necessary tools, including a flashlight, gloves, safety glasses, and a coolant pressure tester (optional but highly recommended).
- Prepare the Vehicle: Park the vehicle on a level surface and engage the parking brake.
4.2. Visual Inspection
- Check Under the Vehicle: Look for puddles of coolant under the engine area. Note the color and location of the puddle.
- Inspect the Radiator: Examine the radiator for signs of leaks, corrosion, or damage, especially around the seams and connections.
- Check Hoses: Inspect all hoses connected to the radiator, engine, and heater core. Look for cracks, bulges, and wet spots. Squeeze the hoses to check for softness or brittleness.
- Inspect Hose Clamps: Ensure all hose clamps are tight and free from corrosion. Use a screwdriver to tighten any loose clamps.
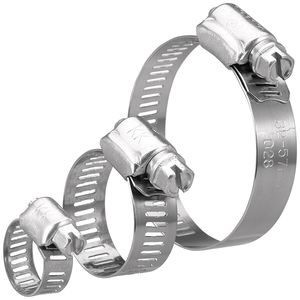 Checking hose clamps for corrosion and tightness
Inspect Hose Clamps: Ensure all hose clamps are tight and free from corrosion.
- Check the Water Pump: Look for coolant leaks around the water pump, particularly from the weep hole. A leaking water pump often indicates a failing seal.
- Inspect the Heater Core: Check for a sweet smell inside the car, damp carpets, or fogging of the windshield, which can indicate a leaking heater core.
- Check the Coolant Reservoir: Inspect the coolant reservoir for cracks or leaks. Ensure the coolant level is at the appropriate mark.
- Check the Engine Block: Look for coolant leaks around the head gasket and freeze plugs.
4.3. Coolant Pressure Test
- Attach the Pressure Tester: Remove the radiator cap and attach the coolant pressure tester to the radiator neck or coolant reservoir, ensuring a tight seal.
- Pressurize the System: Pump the pressure tester to the pressure recommended by your vehicle’s manufacturer, typically between 15 to 20 psi.
- Monitor for Pressure Drop: Watch the gauge for a drop in pressure, which indicates a leak.
- Inspect for Leaks: With the system pressurized, carefully inspect all hoses, connections, the radiator, water pump, and engine components for visible leaks.
4.4. Engine Running Test
- Start the Engine: With the pressure tester still attached, start the engine and let it run for a few minutes.
- Observe for Leaks: Continue to observe for any coolant leaks, particularly around the head gasket and water pump.
- Check Exhaust Smoke: Watch for white smoke from the exhaust, which could indicate a head gasket leak.
5. Tools and Equipment for Leak Detection
What are the essential tools needed to effectively find coolant leaks? Having the right tools can make the process of detecting coolant leaks more efficient and accurate. Here are some essential tools and equipment:
- Flashlight: For inspecting hard-to-reach areas.
- Gloves and Safety Glasses: To protect your hands and eyes from coolant and debris.
- Coolant Pressure Tester: A hand-held tool to pressurize the cooling system and detect leaks. CARDIAGTECH.NET offers high-quality coolant pressure testers for accurate diagnostics.
- Screwdrivers and Wrenches: For tightening hose clamps and removing components.
- Catch Pan: To collect any spilled coolant.
- UV Dye and UV Light (Optional): For detecting hard-to-find leaks, add UV dye to the coolant and use a UV light to locate the source of the leak.
- Radiator Pressure Test Kit: Our Radiator Pressure Test Kit from CARDIAGTECH.NET is a game-changer, allowing you to quickly and accurately pinpoint leaks with ease.
- Hose Clamp Pliers: With our Hose Clamp Pliers from CARDIAGTECH.NET, you’ll be able to tighten or loosen hose clamps with ease, ensuring a leak-free seal every time.
Investing in quality tools from CARDIAGTECH.NET ensures accurate and efficient diagnostics, saving you time and money.
6. Detailed Inspection of Cooling System Components
How do you thoroughly examine each component of the cooling system to identify leaks? A detailed inspection of each component can help pinpoint the exact source of the leak.
6.1. Radiator Inspection
- Visual Check: Look for wet spots, corrosion, or damage on the radiator’s surface, seams, and connections.
- Pressure Test: Use a coolant pressure tester to pressurize the system and check for leaks around the radiator core and end tanks.
- Fin Condition: Inspect the radiator fins for damage or blockage, which can reduce cooling efficiency and increase pressure.
6.2. Hose Inspection
- Visual Check: Examine all hoses for cracks, bulges, and signs of wear. Pay close attention to areas near connections and bends.
- Squeeze Test: Squeeze the hoses to check for softness or brittleness. Replace any hoses that feel excessively soft or hard.
- Connection Check: Ensure all hose connections are secure and free from leaks. Tighten any loose clamps.
6.3. Water Pump Inspection
- Visual Check: Look for coolant leaks around the water pump housing and weep hole.
- Bearing Check: Check for play in the water pump bearing by attempting to move the pump pulley. Excessive play indicates a failing bearing.
- Noise Check: Listen for unusual noises, such as whining or grinding, from the water pump while the engine is running.
6.4. Heater Core Inspection
- Interior Check: Look for a sweet smell inside the car, damp carpets, or fogging of the windshield.
- Hose Connection Check: Inspect the heater hoses and connections for leaks.
- Pressure Test (If Accessible): If the heater core is accessible, use a coolant pressure tester to check for leaks.
6.5. Head Gasket Inspection
- Exhaust Smoke Check: Watch for white smoke from the exhaust, which can indicate a head gasket leak.
- Coolant Condition Check: Inspect the coolant for signs of oil contamination, which can indicate a head gasket leak.
- Compression Test: Perform a compression test on each cylinder to check for compression loss, which can indicate a head gasket issue.
- Block Tester: Use a block tester to check for the presence of combustion gases in the coolant, which can confirm a head gasket leak.
7. Understanding Coolant Types and Their Colors
What are the different types of coolant available and what do their colors signify? Coolant comes in various types and colors, each designed for specific vehicle makes and models. Understanding these differences is crucial for proper maintenance and preventing damage to your cooling system.
- Green Coolant (IAT – Inorganic Additive Technology): Traditionally used in older vehicles, green coolant has a shorter lifespan and needs to be replaced every 2 years or 24,000 miles.
- Orange Coolant (OAT – Organic Acid Technology): Commonly used in GM vehicles, orange coolant has a longer lifespan, typically lasting up to 5 years or 150,000 miles.
- Yellow Coolant (OAT): Some manufacturers use yellow coolant, which is also an OAT type and has similar properties to orange coolant.
- Pink or Red Coolant (OAT): Typically used in Toyota and other Asian vehicles, pink or red coolant has a long lifespan similar to orange coolant.
- Blue Coolant (HOAT – Hybrid Organic Acid Technology): Used in some European vehicles, blue coolant combines the benefits of both IAT and OAT coolants, providing longer life and better corrosion protection.
- Purple Coolant (G40): Specifically designed for newer Volkswagen/Audi vehicles.
- Universal Coolant: These coolants are designed to be compatible with all types of vehicles.
Using the wrong type of coolant can lead to corrosion, reduced cooling efficiency, and damage to cooling system components. Always check your vehicle’s owner’s manual to determine the correct type of coolant to use.
8. Temporary vs. Permanent Coolant Leak Fixes
What are the differences between temporary and permanent solutions for fixing coolant leaks? When dealing with a coolant leak, it’s essential to distinguish between temporary and permanent fixes. Temporary fixes can provide a short-term solution, while permanent fixes address the underlying problem.
8.1. Temporary Fixes
- Radiator Sealants: These additives can be poured into the radiator to seal small leaks. While effective for minor leaks, they are not a long-term solution and can potentially clog the cooling system.
- Hose Repair Tape: Wrapping damaged hoses with repair tape can provide a temporary seal. However, the tape can deteriorate over time, leading to further leaks.
- Hose Clamps: Tightening loose hose clamps can temporarily stop leaks, but if the hose is damaged, the leak will likely return.
8.2. Permanent Fixes
- Hose Replacement: Replacing cracked or damaged hoses with new ones is a permanent solution that ensures a leak-free seal. CARDIAGTECH.NET offers a wide range of high-quality replacement hoses.
- Radiator Repair or Replacement: Repairing or replacing a damaged radiator addresses the source of the leak and restores proper cooling system function.
- Water Pump Replacement: Replacing a leaking water pump ensures proper coolant circulation and prevents further leaks.
- Head Gasket Replacement: Replacing a blown head gasket is a labor-intensive but necessary repair to prevent coolant from leaking into the engine cylinders or oil.
- Heater Core Replacement: Replacing a leaking heater core eliminates coolant leaks inside the vehicle and restores proper heating function.
Choosing a permanent fix ensures long-term reliability and prevents further damage to your vehicle’s engine.
9. Preventative Maintenance Tips to Avoid Coolant Leaks
How can you maintain your cooling system to prevent coolant leaks from occurring? Proper maintenance can significantly reduce the likelihood of coolant leaks and extend the life of your cooling system.
- Regular Coolant Level Checks: Check the coolant level in the reservoir regularly and top off as needed.
- Inspect Hoses and Clamps: Inspect hoses and clamps for cracks, bulges, and leaks during routine maintenance.
- Flush the Cooling System: Flush the cooling system every 2 to 5 years or as recommended in your vehicle’s owner’s manual to remove contaminants and prevent corrosion.
- Use the Correct Coolant: Always use the type of coolant recommended by your vehicle’s manufacturer.
- Check the Radiator Cap: Ensure the radiator cap is in good condition and maintains the correct pressure.
- Inspect the Water Pump: Check the water pump for leaks and unusual noises during routine maintenance.
- Clean the Radiator Fins: Keep the radiator fins clean to ensure proper airflow and cooling efficiency.
By following these preventative maintenance tips, you can keep your cooling system in top condition and avoid costly coolant leaks.
10. Why Choose CARDIAGTECH.NET for Your Cooling System Needs
Why should you choose CARDIAGTECH.NET for all your cooling system tools and equipment needs? CARDIAGTECH.NET is your trusted partner for high-quality automotive tools and equipment, including everything you need to diagnose and fix coolant leaks.
- Wide Selection: We offer a wide range of tools, including coolant pressure testers, hose clamp pliers, and UV leak detection kits.
- High-Quality Products: Our products are made from durable materials and designed for accurate and reliable performance.
- Expert Advice: Our team of experienced technicians can provide expert advice and support to help you diagnose and fix coolant leaks.
- Competitive Prices: We offer competitive prices on all our products, ensuring you get the best value for your money.
- Customer Satisfaction: We are committed to providing excellent customer service and ensuring your satisfaction.
- Convenience: Shop online at CARDIAGTECH.NET from the comfort of your home or visit our store at 276 Reock St, City of Orange, NJ 07050, United States. Contact us via WhatsApp at +1 (641) 206-8880 for immediate assistance.
Choosing CARDIAGTECH.NET ensures you have the right tools and expertise to keep your cooling system in top condition.
CARDIAGTECH.NET understands the challenges faced by automotive technicians. The job demands physical strength, constant exposure to grease and chemicals, and the need to stay updated with the latest automotive technology. Technicians face time constraints, competition, and the difficulty of finding the right tools.
We are here to help you:
- Increase efficiency and reduce repair time with our high-quality tools.
- Enhance accuracy and safety in your work.
- Save on repair and maintenance costs for your customers.
- Increase revenue and profitability for your garage.
Call to Action
Don’t let coolant leaks damage your engine! Contact CARDIAGTECH.NET today for expert advice and the best tools to diagnose and fix coolant leaks. Our team is ready to assist you with all your cooling system needs.
Address: 276 Reock St, City of Orange, NJ 07050, United States
WhatsApp: +1 (641) 206-8880
Website: CARDIAGTECH.NET
Act now and ensure your vehicle’s cooling system is in top condition!
FAQ: Coolant Leaks
1. How can I tell if my vehicle has a coolant leak?
You can tell if your vehicle has a coolant leak by noticing symptoms such as puddles of colored fluid (green, pink, orange) under your car, a sweet smell when the engine is hot, frequent overheating, and a consistently low coolant level in the reservoir. Additionally, white smoke from the exhaust or bubbles in the coolant reservoir can indicate a leak.
2. Is it safe to drive my car if it’s leaking coolant?
It is generally not safe to drive your car if it’s leaking coolant. Coolant is essential for regulating engine temperature, and a leak can lead to overheating and severe engine damage. If you suspect a coolant leak, it’s best to address the issue immediately rather than risk further damage.
3. How do I find a hidden coolant leak?
To find a hidden coolant leak, start by performing a visual inspection of the cooling system components, including the radiator, hoses, water pump, and heater core. Use a flashlight to inspect hard-to-reach areas. If you can’t find the leak visually, use a coolant pressure tester to pressurize the system and check for leaks. Adding UV dye to the coolant and using a UV light can also help locate hard-to-find leaks.
4. Can I temporarily fix a coolant leak?
Yes, you can temporarily fix a coolant leak using radiator sealants or hose repair tape. Radiator sealants can seal small leaks in the radiator or engine block, while hose repair tape can temporarily seal damaged hoses. However, these are only short-term solutions, and it’s essential to address the underlying issue with a permanent fix as soon as possible.
5. What are the common causes of coolant leaks?
Common causes of coolant leaks include cracked or damaged hoses, loose hose clamps, a leaking radiator, a failing water pump, a blown head gasket, and a leaking heater core. Over time, these components can deteriorate or become damaged, leading to coolant leaks.
6. What is the average cost of fixing a coolant leak?
The average cost of fixing a coolant leak can vary widely depending on the location and severity of the leak. Minor leaks, such as a leaking hose, may cost between $100 and $300 to repair. More significant leaks, such as a blown head gasket or a leaking radiator, can cost between $500 and $2,000 or more.
7. How often should I flush my coolant?
You should typically flush your coolant every 2 to 5 years or every 30,000 to 60,000 miles, depending on your vehicle’s manufacturer recommendations and the type of coolant used. Check your vehicle’s owner’s manual for specific guidelines.
8. What type of coolant should I use in my vehicle?
You should always use the type of coolant recommended by your vehicle’s manufacturer. Using the wrong type of coolant can lead to corrosion and damage to cooling system components. Check your vehicle’s owner’s manual for specific coolant recommendations.
9. Can a coolant leak cause my car to overheat?
Yes, a coolant leak can definitely cause your car to overheat. Coolant is essential for regulating engine temperature, and a leak can lead to insufficient coolant levels, causing the engine to overheat. Overheating can cause severe engine damage, so it’s important to address coolant leaks promptly.
10. What are the symptoms of a blown head gasket that is causing a coolant leak?
Symptoms of a blown head gasket that is causing a coolant leak include white smoke from the exhaust, coolant in the oil (resulting in a milky or frothy appearance), overheating, loss of coolant with no visible leaks, and bubbles in the coolant reservoir. A blown head gasket can also cause a loss of compression in one or more cylinders.