How To Fix Chipped Paint on A White Car: Your Ultimate Guide
Fixing chipped paint on your white car can restore its appearance and prevent further damage. At CARDIAGTECH.NET, we understand the frustration of dealing with unsightly paint chips and offer comprehensive solutions, including expert guidance and top-quality auto repair tools, to help you achieve a flawless finish. Discover how to fix paint chips and maintain your car’s pristine look with our detailed guide, and explore our selection of auto repair tools to make the job easier.
1. Identifying the Intent Behind Fixing Chipped Paint
Why are car owners searching for ways to fix chipped paint? Here are five key intentions:
- Restoration: Bring back the original look of their car.
- Prevention: Stop rust and further damage from spreading.
- Aesthetics: Enhance the overall appearance and value of their vehicle.
- DIY Savings: Complete the repair themselves to save money.
- Maintenance: Keep their car in top condition.
2. Understanding the Problem of Chipped Paint on White Cars
Chipped paint can be a common issue, especially on white cars. Several factors contribute to this problem, and understanding them is the first step in finding an effective solution.
2.1. Common Causes of Paint Chips
Paint chips can result from various external factors:
- Road Debris: Gravel, rocks, and other debris kicked up by tires.
- Weather: Extreme temperatures, sunlight, and moisture.
- Accidents: Minor collisions and scratches.
- Poor Application: Inadequate paint adhesion during manufacturing or previous repairs.
2.2. Why White Cars Seem More Susceptible
While all car colors are susceptible to paint chips, white cars may show them more prominently due to contrast and potential issues with paint formulation. According to a study by PPG, white is the most common car color, accounting for about 30% of all vehicles produced globally. This prevalence means there are simply more white cars on the road, increasing the likelihood of observing paint issues.
Whitepaint 9087
Additionally, some manufacturers have faced issues with white paint formulations. For example, Toyota offered to repaint over 1.7 million white cars due to peeling paint, as noted in a Customer Support Program documented on NHTSA. The program states that certain Blizzard Pearl and Super White paint colors may experience peeling due to sunlight degrading the adhesion between the primer and the metal electrodeposition layer.
2.3. The Risks of Ignoring Chipped Paint
Ignoring paint chips can lead to more significant problems:
- Rust Formation: Exposed metal can rust, weakening the car’s structure.
- Further Peeling: Surrounding paint can peel away, expanding the damaged area.
- Reduced Value: The car’s resale value decreases due to cosmetic damage.
3. Essential Tools and Materials for Fixing Chipped Paint
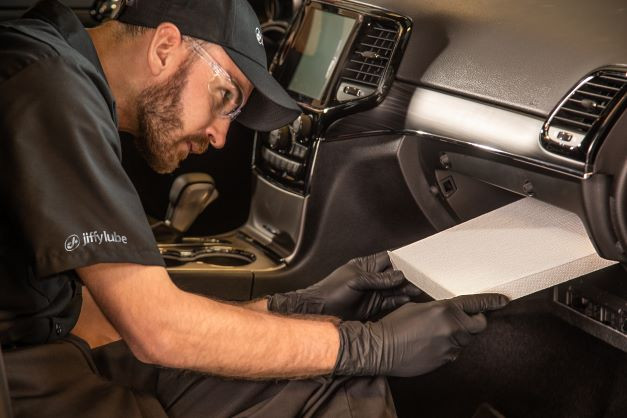
Before starting the repair process, gather the necessary tools and materials. Using high-quality tools from CARDIAGTECH.NET ensures a professional finish and lasting results.
3.1. List of Required Tools
- Cleaning Supplies:
- Car Wash Soap: To clean the area around the chip.
- Grease and Wax Remover: To remove any contaminants.
- Microfiber Towels: For gentle cleaning and drying.
- Preparation Tools:
- Sandpaper (Various Grits): 320, 600, 1000, and 2000 grit for smoothing the edges of the chip.
- Sanding Block: For even sanding.
- Detail Brush: For precise application of touch-up paint.
- Masking Tape: To protect surrounding areas.
- Application Tools:
- Touch-Up Paint: Matching the car’s exact color code.
- Clear Coat: To protect the paint and provide a glossy finish.
- Primer (Optional): For chips that expose bare metal.
- Rubbing Compound: To blend the repair with the surrounding paint.
- Polishing Compound: To restore shine.
- Buffing Pad: For use with polishing compound.
3.2. Choosing the Right Touch-Up Paint
Selecting the correct touch-up paint is crucial for a seamless repair.
- Find the Paint Code: Locate the car’s paint code, usually found on a sticker in the door jamb, glove box, or engine compartment.
- Purchase Matching Paint: Buy touch-up paint that matches this code from an auto parts store or CARDIAGTECH.NET.
- Consider a Paint Pen: Paint pens are excellent for small chips and scratches, providing precise application.
3.3. Safety Precautions
- Work in a Well-Ventilated Area: To avoid inhaling fumes.
- Wear Gloves: To protect your hands from chemicals.
- Wear a Mask: To avoid inhaling dust and paint particles.
- Eye Protection: Safety glasses are essential to protect your eyes.
4. Step-by-Step Guide to Fixing Chipped Paint on a White Car
Follow these steps to repair chipped paint and restore your car’s appearance.
4.1. Preparing the Area
- Wash the Car: Thoroughly wash the area around the paint chip with car wash soap and water.
- Remove Contaminants: Use a grease and wax remover to eliminate any remaining dirt, wax, or oil.
- Dry the Area: Dry the area with a clean microfiber towel.
4.2. Sanding the Edges
- Initial Sanding: Use 320-grit sandpaper to gently sand the edges of the paint chip to remove any loose paint and smooth the transition between the chip and the surrounding paint.
- Finer Sanding: Switch to 600-grit sandpaper to further smooth the edges.
- Even Out Imperfections: Use 1000-grit sandpaper to feather the edges, ensuring a seamless transition.
- Final Smoothing: Finish with 2000-grit sandpaper to create a smooth surface for the touch-up paint.
Sanding helps prevent the new paint from creating a noticeable edge and ensures it adheres properly.
4.3. Applying Primer (If Necessary)
- Apply a Thin Layer: If the chip exposes bare metal, apply a thin layer of automotive primer using a detail brush.
- Allow Drying Time: Let the primer dry completely, following the manufacturer’s instructions (usually about 30 minutes).
- Light Sanding: Lightly sand the primed area with 2000-grit sandpaper to smooth any imperfections.
- Clean the Area: Wipe the area with a tack cloth to remove any sanding residue.
4.4. Applying Touch-Up Paint
- Shake the Paint: Shake the touch-up paint thoroughly for several minutes to ensure proper mixing.
- Apply Thin Coats: Use a detail brush to apply the touch-up paint in thin, even coats. Avoid applying too much paint at once, as this can cause runs and drips.
- Allow Drying Time: Let each coat dry completely before applying the next. Multiple thin coats are better than one thick coat.
- Build Up the Paint: Continue applying thin coats until the paint is level with the surrounding surface.
4.5. Applying Clear Coat
- Allow Paint to Cure: After the final coat of touch-up paint has dried, allow it to cure for at least 24 hours.
- Apply Clear Coat: Apply a thin, even layer of clear coat using a detail brush.
- Allow Drying Time: Let the clear coat dry completely (usually 24-48 hours).
4.6. Blending and Polishing
- Wet Sanding (Optional): If necessary, lightly wet sand the repaired area with 2000-grit sandpaper to remove any imperfections in the clear coat.
- Apply Rubbing Compound: Apply a small amount of rubbing compound to a buffing pad.
- Buff the Area: Use a buffer to gently buff the repaired area, blending the new paint with the surrounding paint.
- Apply Polishing Compound: Apply a small amount of polishing compound to a clean buffing pad.
- Polish the Area: Use a buffer to polish the area, restoring the shine and removing any swirl marks left by the rubbing compound.
4.7. Waxing the Area
- Apply Wax: Apply a coat of car wax to the repaired area to protect the paint and enhance the shine.
- Buff the Wax: Buff the wax with a clean microfiber towel to a high gloss.
5. Advanced Techniques for a Professional Finish
For those seeking a truly professional finish, consider these advanced techniques.
5.1. Wet Sanding for a Flawless Surface
Wet sanding involves using sandpaper with water as a lubricant to create an ultra-smooth surface. This technique is particularly useful for removing imperfections in the clear coat.
- Soak Sandpaper: Soak 2000-grit sandpaper in water for several minutes.
- Sand Gently: Gently sand the repaired area with the wet sandpaper, using light pressure.
- Rinse Frequently: Rinse the area and the sandpaper frequently to remove any debris.
- Dry Thoroughly: Dry the area with a clean microfiber towel before proceeding with polishing.
5.2. Using a Heat Gun to Speed Up Drying
A heat gun can be used to accelerate the drying and curing process, but it must be used with caution to avoid damaging the paint.
- Set to Low Heat: Set the heat gun to its lowest setting.
- Apply Heat Evenly: Hold the heat gun several inches away from the surface and move it in a sweeping motion.
- Avoid Overheating: Do not overheat the paint, as this can cause it to bubble or crack.
5.3. Applying Multiple Thin Coats
Applying multiple thin coats of touch-up paint is always better than applying one thick coat. Thin coats dry more evenly, reduce the risk of runs and drips, and allow for better adhesion between layers.
6. Common Mistakes to Avoid
Avoid these common mistakes to ensure a successful repair.
6.1. Using the Wrong Type of Paint
Using the wrong type of paint can result in a mismatched color and a poor finish. Always use touch-up paint that is specifically designed for automotive use and matches your car’s paint code.
6.2. Applying Too Much Paint at Once
Applying too much paint at once can cause runs, drips, and an uneven finish. Always apply thin, even coats and allow each coat to dry completely before applying the next.
6.3. Neglecting Surface Preparation
Proper surface preparation is essential for ensuring that the touch-up paint adheres properly. Always clean, sand, and prime the area before applying paint.
6.4. Skipping the Clear Coat
Clear coat protects the touch-up paint and provides a glossy finish. Skipping the clear coat can result in a dull, unprotected repair.
7. Maintaining Your Car’s Paint Job
Proper maintenance can help prevent future paint chips and keep your car looking its best.
7.1. Regular Washing and Waxing
Regular washing removes dirt and debris that can damage the paint, while waxing protects the paint from the elements and enhances the shine. Aim to wash your car every two weeks and wax it every three months.
7.2. Using a Car Cover
A car cover protects the paint from sunlight, rain, and other environmental factors. Use a car cover whenever possible, especially when parking outdoors for extended periods.
7.3. Avoiding Harsh Chemicals
Avoid using harsh chemicals or abrasive cleaners on your car’s paint, as these can damage the finish. Use only car wash soap and other products specifically designed for automotive use.
7.4. Promptly Repairing Chips and Scratches
Promptly repairing any chips or scratches can prevent rust and further damage. Keep a touch-up paint kit on hand for quick repairs.
8. The Science Behind Paint Adhesion
Understanding the science behind paint adhesion can help you appreciate the importance of proper preparation and application techniques.
8.1. The Role of Primer
Primer creates a smooth, uniform surface for the paint to adhere to. It also helps to prevent rust by sealing the metal surface and providing a barrier against moisture.
8.2. The Importance of Cleanliness
Cleanliness is essential for ensuring proper paint adhesion. Any dirt, oil, or wax on the surface can interfere with the paint’s ability to bond to the metal.
8.3. The Effects of Temperature and Humidity
Temperature and humidity can also affect paint adhesion. High humidity can prevent the paint from drying properly, while extreme temperatures can cause the paint to crack or peel.
9. Real-World Examples of Paint Chip Repair
Here are a few real-world examples of how to repair paint chips on a white car.
9.1. Case Study 1: Repairing a Small Chip on the Hood
- Car: 2018 Honda Civic
- Problem: Small paint chip on the hood caused by a rock.
- Solution:
- Cleaned the area with car wash soap and grease remover.
- Sanded the edges with 600-grit and 2000-grit sandpaper.
- Applied a thin coat of primer.
- Applied multiple thin coats of touch-up paint.
- Applied clear coat.
- Wet sanded with 2000-grit sandpaper.
- Polished with rubbing compound and polishing compound.
- Waxed the area.
- Result: The paint chip was completely repaired, and the hood looked as good as new.
9.2. Case Study 2: Repairing Multiple Chips on the Bumper
- Car: 2020 Toyota Corolla
- Problem: Multiple small paint chips on the front bumper caused by road debris.
- Solution:
- Cleaned the bumper with car wash soap and grease remover.
- Masked off the surrounding area with masking tape.
- Sanded the edges of each chip with 600-grit and 2000-grit sandpaper.
- Applied multiple thin coats of touch-up paint to each chip.
- Applied clear coat to the entire bumper.
- Wet sanded the clear coat with 2000-grit sandpaper.
- Polished the bumper with rubbing compound and polishing compound.
- Waxed the bumper.
- Result: The bumper looked flawless, and the multiple paint chips were no longer visible.
10. Professional Services vs. DIY Repair
Deciding whether to hire a professional or tackle the repair yourself depends on the severity of the damage and your comfort level.
10.1. When to Hire a Professional
Consider hiring a professional if:
- The paint chip is large or deep.
- You are not comfortable with sanding or painting.
- You want a guaranteed professional finish.
10.2. The Cost of Professional Services
Professional paint chip repair can range from $100 to $500 or more, depending on the size and location of the chip.
10.3. Benefits of DIY Repair
DIY repair can save you money and provide a sense of accomplishment. It also allows you to control the quality of the repair and use the best possible materials.
11. Maximizing Your Car’s Resale Value
Maintaining your car’s paint job is essential for maximizing its resale value. Potential buyers often assess the car’s exterior condition, and well-maintained paint can significantly increase its appeal and perceived value.
11.1. The Impact of Paint Condition on Resale Value
According to Kelley Blue Book, a car with excellent paint condition can command a higher resale price compared to a car with visible paint damage. Addressing paint chips and scratches promptly shows that the car has been well-cared for and can instill confidence in potential buyers.
11.2. Documenting Repairs
Keeping records of all repairs, including paint chip fixes, can further enhance your car’s resale value. Documented maintenance demonstrates transparency and attention to detail, which can be appealing to buyers.
12. Addressing Peeling Paint Issues
In some cases, white cars may experience more extensive paint peeling, as highlighted by issues with certain Honda and Toyota models. Addressing peeling paint requires a more comprehensive approach than simple chip repair.
12.1. Identifying the Cause of Peeling
Peeling paint can be caused by several factors, including:
- Manufacturing Defects: Issues with the original paint application.
- Environmental Factors: Prolonged exposure to sunlight and extreme weather.
- Underlying Corrosion: Rust or corrosion beneath the paint.
12.2. Steps to Repair Peeling Paint
- Assess the Damage: Determine the extent of the peeling and identify any underlying issues.
- Remove Loose Paint: Carefully remove any loose or peeling paint using a scraper or sandpaper.
- Prepare the Surface: Clean, sand, and prime the area to ensure proper adhesion.
- Apply Paint: Apply multiple thin coats of automotive paint that matches your car’s color code.
- Apply Clear Coat: Protect the paint with a clear coat for added durability and shine.
12.3. When to Seek Professional Help
If the peeling paint is extensive or caused by underlying corrosion, it’s best to seek professional help. A professional auto body shop can address the root cause of the problem and provide a lasting solution.
13. Frequently Asked Questions (FAQs)
13.1. What causes paint to chip on a car?
Paint chips are typically caused by road debris, weather, minor accidents, or poor paint application.
13.2. Why do white cars seem to have more paint chip problems?
White cars may show chips more prominently due to contrast, and some white paint formulations have been known to have issues with adhesion.
13.3. Can I use any touch-up paint on my car?
No, you should use touch-up paint that matches your car’s exact color code for the best results.
13.4. Is it necessary to use primer before applying touch-up paint?
Primer is recommended if the chip exposes bare metal, as it helps to prevent rust and provides a better surface for the paint to adhere to.
13.5. How many coats of touch-up paint should I apply?
Apply multiple thin coats of touch-up paint until the paint is level with the surrounding surface.
13.6. Do I need to apply clear coat after touch-up paint?
Yes, clear coat protects the touch-up paint and provides a glossy finish.
13.7. How long should I wait before washing my car after repairing a paint chip?
Wait at least 48 hours before washing your car to allow the paint to fully cure.
13.8. Can I use a heat gun to speed up the drying process?
Yes, but use a heat gun with caution on a low setting to avoid damaging the paint.
13.9. What is wet sanding, and when should I use it?
Wet sanding involves using sandpaper with water as a lubricant to create an ultra-smooth surface. It is useful for removing imperfections in the clear coat.
13.10. How can I prevent future paint chips?
Regular washing and waxing, using a car cover, avoiding harsh chemicals, and promptly repairing chips and scratches can help prevent future paint chips.
14. CARDIAGTECH.NET: Your Partner in Auto Repair
At CARDIAGTECH.NET, we are committed to providing you with the highest quality tools and resources for all your auto repair needs. Our extensive selection of auto repair tools, combined with our expert guidance, ensures that you can achieve professional results from the comfort of your own garage.
14.1. Explore Our Range of Auto Repair Tools
From precision detail brushes to high-performance buffers, CARDIAGTECH.NET offers a wide range of tools to help you tackle any auto repair project. Our products are sourced from trusted manufacturers and are designed to deliver exceptional performance and durability.
14.2. Get Expert Advice and Support
Our team of experienced technicians is always available to provide expert advice and support. Whether you need help choosing the right tools or guidance on a specific repair technique, we are here to assist you every step of the way.
14.3. Contact Us Today
Don’t let chipped paint detract from your car’s appearance. Contact CARDIAGTECH.NET today to learn more about our auto repair tools and how we can help you achieve a flawless finish.
Address: 276 Reock St, City of Orange, NJ 07050, United States
WhatsApp: +1 (641) 206-8880
Website: CARDIAGTECH.NET
15. Conclusion: Restore Your Car’s Beauty Today
Fixing chipped paint on your white car is a manageable task with the right tools and techniques. By following this comprehensive guide and utilizing high-quality products from CARDIAGTECH.NET, you can restore your car’s appearance and protect it from further damage.
Remember, consistent maintenance and prompt repairs are key to keeping your car looking its best and maintaining its value. Don’t wait until the damage worsens—take action today and enjoy a flawless finish that will turn heads.
Are you ready to restore your car’s beauty and protect it from future damage? Contact CARDIAGTECH.NET now for expert advice on the best tools and techniques for fixing chipped paint. Our team is ready to assist you in achieving a professional finish and maintaining your car’s pristine condition. Reach out to us via WhatsApp at +1 (641) 206-8880 or visit our website at CARDIAGTECH.NET for more information. Let us help you make your car look as good as new!