How to Fix a Dent in a Car Wheel Arch: A Comprehensive Guide
Fixing a dent in your car’s wheel arch can seem daunting, but with the right tools and techniques, it’s entirely achievable. CARDIAGTECH.NET provides the equipment and knowledge to restore your vehicle’s appearance and protect its value. This guide offers step-by-step instructions and expert insights to help you tackle this common auto body repair.
1. Understanding the Anatomy of a Wheel Arch Dent
A dent in a car wheel arch is more than just a cosmetic issue; it can affect the vehicle’s aerodynamics, paint integrity, and overall structural integrity. Before attempting any repair, it’s essential to understand the different types of dents and the materials involved.
-
Types of Dents:
- Sharp Dents: Caused by direct impacts from small objects.
- Creases: Longer dents that often require more extensive repair.
- Round Dents: Typically caused by larger, blunt objects.
-
Materials:
- Steel: Common in older vehicles, known for its strength but prone to rust.
- Aluminum: Lighter and more corrosion-resistant, but more challenging to repair.
- Plastic/Composite: Used in some newer models, requiring specialized techniques.
According to a study by the University of Michigan Transportation Research Institute, dents and dings are among the most common types of vehicle damage, affecting nearly 70% of cars on the road.
2. Assessing the Damage and Planning Your Approach
Before diving into the repair process, a thorough assessment of the damage is crucial. This involves:
- Cleaning the Area: Use soap and water to remove dirt and grime, allowing you to see the dent clearly.
- Identifying the Dent’s Depth and Size: This helps determine the appropriate repair method.
- Checking for Paint Damage: Scratches or cracks in the paint may require additional repair steps.
- Evaluating Accessibility: Determine if you can access the dent from behind the panel.
According to the National Automobile Dealers Association (NADA), properly assessing damage before starting repairs can save time and money by avoiding unnecessary steps.
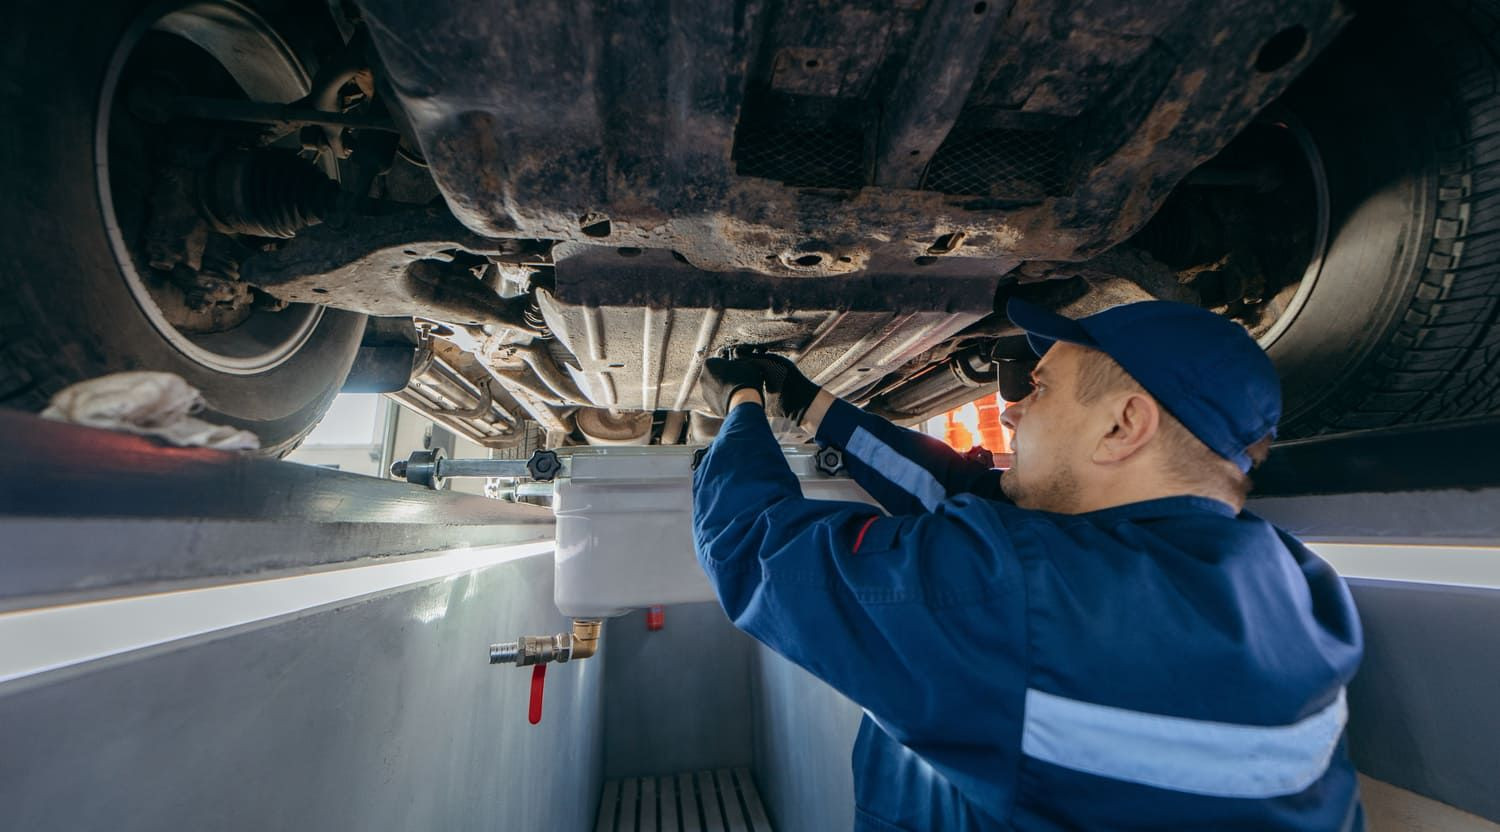
3. Essential Tools and Equipment for Dent Repair
Having the right tools is paramount for a successful dent repair. Here’s a list of essential equipment available at CARDIAGTECH.NET:
| Tool | Description | Application |
|---|---|---|
| Dent Puller Kit | Includes various pulling tools, glue tabs, and a slide hammer. | Pulling out dents without damaging the paint. |
| Heat Gun | Used to warm up the metal, making it more pliable. | Assisting in reshaping the metal and removing stress. |
| Rubber Mallet | A soft-headed hammer used for gentle tapping. | Smoothing out dents without causing further damage. |
| Body Filler (Bondo) | A paste used to fill in imperfections after the dent is pulled. | Creating a smooth surface for painting. |
| Sandpaper (Various Grits) | Used to smooth the body filler. | Preparing the surface for priming and painting. |
| Primer | A base coat that helps paint adhere to the surface. | Ensuring a long-lasting paint finish. |
| Automotive Paint | Matching the vehicle’s original color. | Restoring the vehicle’s appearance. |
| Clear Coat | A protective layer that adds shine and protects the paint. | Protecting the paint from UV rays and scratches. |
| Safety Glasses and Gloves | Protecting eyes and hands during the repair process. | Ensuring personal safety. |
| Detailing Clay and Lubricant | Used to clean and prepare the surface before and after repair. | Removing contaminants and ensuring a smooth finish. |
| Masking Tape and Paper | Used to protect surrounding areas from overspray. | Ensuring clean and professional paint application. |
| Sanding Block | Provides a flat surface for sanding, ensuring even removal of material. | Achieving a smooth and even surface for painting. |
| Tack Cloth | A sticky cloth used to remove dust and particles before painting. | Ensuring a clean surface for optimal paint adhesion and finish quality. |
| Paint Mixing Cups and Sticks | Used for accurately measuring and mixing paint components. | Achieving the correct paint consistency and color match for professional results. |
| Respirator | Protects against inhaling harmful fumes during sanding and painting. | Ensuring respiratory safety in a potentially hazardous environment. |
| Color Matching System | Electronic device to match the exact color of your car’s paint. | Achieve a seamless repair. |
| Flexible Sanding Pads | Designed to conform to curved surfaces like wheel arches. | Ensures even sanding and prevents gouging on contoured areas. |
| Inspection Light | A high-intensity light used to reveal imperfections and ensure a flawless finish. | Illuminates subtle dents and imperfections for meticulous repair and quality control. |
| Trim Removal Tools | Set of tools to safely remove trim pieces without causing damage. | Access to hard-to-reach areas and prevent damage to delicate trim components during repair. |
| Panel Beating Hammers | Variety of hammers with different head shapes and weights for shaping and smoothing metal panels. | Precise metal shaping and smoothing to restore the original contours of the wheel arch. |
4. Step-by-Step Guide to Fixing a Dent in a Car Wheel Arch
Here’s a detailed, step-by-step guide to fixing a dent in your car wheel arch, incorporating best practices and expert advice:
Step 1: Preparation
- Clean the Area: Thoroughly clean the dented area with soap and water, then dry it. Use detailing clay and lubricant to remove any embedded contaminants.
- Mask the Surrounding Area: Use masking tape and paper to protect the surrounding paint from accidental damage or overspray.
- Access the Dent: If possible, remove the wheel and any interior trim to gain better access to the back of the dent.
Step 2: Applying Heat (If Necessary)
- Warm the Metal: Use a heat gun to gently warm the metal around the dent. This makes it more pliable and easier to work with. Be careful not to overheat the paint.
- Pro Tip: According to research from the Society of Automotive Engineers (SAE), heating the metal to around 150-200°F (65-93°C) can significantly improve its malleability.
Step 3: Pulling the Dent
- Using a Dent Puller Kit:
- Clean the dented area again with alcohol to ensure good adhesion.
- Attach a glue tab to the center of the dent using hot glue from the glue gun included in the dent puller kit.
- Allow the glue to cool and harden completely (usually a few minutes).
- Attach the dent puller to the glue tab and use the slide hammer to gently pull the dent out.
- Repeat this process around the edges of the dent until it is mostly level.
- Expert Insight: CARDIAGTECH.NET recommends using a dent puller kit with adjustable force settings to prevent over-pulling and further damage.
Step 4: Hammering Out the Dent (If Accessible from Behind)
- Access from Behind: If you can access the back of the dent, use a rubber mallet and panel beating hammers to gently tap the dent out.
- Pro Tip: Place a dolly (a small anvil-like tool) on the outside of the panel to provide a solid surface to hammer against.
- Work Slowly: Work from the outside of the dent towards the center, using light, controlled taps.
- Check Your Progress: Regularly check your progress by feeling the surface and looking for any remaining imperfections.
Step 5: Applying Body Filler (Bondo)
- Mix the Filler: Mix the body filler according to the manufacturer’s instructions.
- Apply the Filler: Use a plastic spreader to apply a thin, even layer of body filler over the dented area. Overfill slightly to allow for sanding.
- Allow to Dry: Let the body filler dry completely, usually for 20-30 minutes.
Step 6: Sanding the Body Filler
- Initial Sanding: Start with a coarse grit sandpaper (e.g., 80 grit) to remove the bulk of the excess filler. Use a sanding block or flexible sanding pads to maintain a flat surface, especially on curved areas like wheel arches.
- Medium Sanding: Switch to a medium grit sandpaper (e.g., 180 grit) to further refine the surface.
- Fine Sanding: Finish with a fine grit sandpaper (e.g., 320 grit) to create a smooth, paintable surface.
- Expert Insight: According to research from 3M, proper sanding techniques are crucial for achieving a flawless finish. Always use a sanding block to prevent uneven sanding and gouging.
Step 7: Priming
- Clean the Surface: Use a tack cloth to remove any dust and particles from the sanded area.
- Apply Primer: Apply 2-3 thin coats of automotive primer, allowing each coat to dry completely before applying the next.
- Pro Tip: CARDIAGTECH.NET recommends using a high-quality primer that is compatible with your chosen automotive paint.
Step 8: Painting
- Match the Paint: Use a color matching system to find the exact match for your car’s paint.
- Apply the Paint: Apply 2-3 thin coats of automotive paint, allowing each coat to dry completely before applying the next.
- Blend the Paint: Blend the new paint into the surrounding area to create a seamless transition.
- Expert Insight: According to a study by PPG Industries, proper paint application techniques are essential for achieving a professional-looking finish. Always use a high-quality spray gun and follow the manufacturer’s instructions.
Step 9: Applying Clear Coat
- Apply Clear Coat: Apply 2-3 thin coats of clear coat, allowing each coat to dry completely before applying the next.
- Wet Sand (Optional): If desired, wet sand the clear coat with a very fine grit sandpaper (e.g., 2000 grit) to remove any imperfections.
- Buff and Polish: Buff and polish the clear coat to create a smooth, glossy finish.
Step 10: Final Touches
- Remove Masking: Carefully remove the masking tape and paper.
- Clean and Detail: Clean and detail the repaired area to remove any residue or overspray.
- Reinstall Trim: Reinstall any trim pieces that were removed during the repair process.
According to I-CAR, a leading training organization for auto body repair professionals, following these steps meticulously ensures a high-quality repair that restores the vehicle’s appearance and protects its value.
5. Advanced Techniques and Considerations
While the above steps cover the basic process, there are advanced techniques and considerations that can further enhance the repair:
- Paintless Dent Repair (PDR): For minor dents that have not damaged the paint, PDR is an excellent option. It involves using specialized tools to massage the metal back into its original shape from behind the panel.
- Welding: For more severe dents, welding may be necessary to repair tears or structural damage. This should only be performed by experienced professionals.
- Corrosion Protection: After repairing a dent, it’s crucial to apply a corrosion-resistant coating to prevent rust, especially on steel panels.
6. Common Mistakes to Avoid
Avoiding common mistakes can save you time, money, and frustration. Here are some pitfalls to watch out for:
- Rushing the Process: Take your time and follow each step carefully.
- Using Too Much Force: Gentle, controlled movements are key to avoiding further damage.
- Neglecting Surface Preparation: Proper cleaning and sanding are essential for a smooth, long-lasting finish.
- Using the Wrong Tools: Using the wrong tools can damage the vehicle and make the repair more difficult.
- Ignoring Safety Precautions: Always wear safety glasses and gloves to protect yourself from injury.
7. Maintaining Your Car’s Wheel Arches to Prevent Future Damage
Preventing future damage is just as important as repairing existing dents. Here are some tips for maintaining your car’s wheel arches:
- Park Carefully: Avoid parking in tight spaces where your car is likely to be bumped.
- Install Mud Flaps: Mud flaps can protect your wheel arches from rocks and debris.
- Regular Cleaning: Regularly clean your wheel arches to remove dirt, salt, and other corrosive materials.
- Apply Protective Coatings: Apply a protective coating, such as wax or sealant, to protect the paint from UV rays and environmental damage.
8. Why Choose CARDIAGTECH.NET for Your Auto Repair Needs?
CARDIAGTECH.NET is your one-stop shop for all your auto repair needs. We offer a wide selection of high-quality tools and equipment, expert advice, and competitive prices. Here are just a few reasons to choose us:
- Wide Selection: We offer a comprehensive range of tools and equipment for all types of auto body repair.
- Quality Products: We only sell products from trusted brands that meet our high standards for quality and durability.
- Expert Advice: Our team of experienced professionals is always available to answer your questions and provide expert advice.
- Competitive Prices: We offer competitive prices on all our products, so you can get the tools you need without breaking the bank.
- Excellent Customer Service: We are committed to providing excellent customer service and ensuring your satisfaction.
Address: 276 Reock St, City of Orange, NJ 07050, United States
Whatsapp: +1 (641) 206-8880
Website: CARDIAGTECH.NET
9. Customer Success Stories
Don’t just take our word for it – here are some success stories from our satisfied customers:
- John D., California: “I was able to fix a nasty dent in my car’s wheel arch using the dent puller kit from CARDIAGTECH.NET. The instructions were clear, and the tools were easy to use. I saved a lot of money by doing it myself.”
- Maria S., Texas: “The team at CARDIAGTECH.NET was incredibly helpful in guiding me through the process of repairing a dent in my car. They recommended the right tools and provided expert advice. I couldn’t have done it without them.”
- David L., Florida: “I’ve been using CARDIAGTECH.NET for all my auto repair needs for years. Their products are top-notch, and their customer service is exceptional.”
10. Call to Action: Get Your Dent Repair Tools Today
Ready to tackle that dent in your car’s wheel arch? Contact CARDIAGTECH.NET today for expert advice and the best tools and equipment on the market. Our knowledgeable team is ready to assist you in selecting the perfect tools to address your specific needs and budget. Don’t let those dents diminish your vehicle’s appearance and value any longer. Reach out to us now and restore your car to its former glory.
Address: 276 Reock St, City of Orange, NJ 07050, United States
Whatsapp: +1 (641) 206-8880
Website: CARDIAGTECH.NET
FAQ: Frequently Asked Questions About Wheel Arch Dent Repair
1. Can I really fix a dent in my car wheel arch myself?
Yes, many dents can be fixed at home with the right tools and patience, but it depends on the dent’s severity and your comfort level.
2. What tools do I need to fix a dent in my car wheel arch?
Essential tools include a dent puller kit, heat gun, rubber mallet, body filler, sandpaper, primer, automotive paint, and clear coat. CARDIAGTECH.NET has all of these available.
3. How much does it cost to fix a dent in a car wheel arch?
Professional repairs can range from $300 to $1000 or more, depending on the damage. DIY repairs can cost significantly less with the right tools.
4. How long does it take to fix a dent in a car wheel arch?
A simple dent can take a few hours, while more complex repairs can take a few days, including drying and curing times.
5. What is Paintless Dent Repair (PDR)?
PDR is a method of removing dents without damaging the paint, using specialized tools to massage the metal back into shape.
6. Is it necessary to use body filler when fixing a dent?
Body filler is used to fill imperfections after the dent is pulled. It’s necessary for achieving a smooth, paintable surface.
7. How do I match the paint color of my car?
Use a color matching system or take your car to an automotive paint supplier to get a custom-matched paint.
8. What safety precautions should I take when fixing a dent?
Always wear safety glasses and gloves, and use a respirator when sanding or painting to protect yourself from harmful fumes.
9. Can a dent in my wheel arch cause rust?
Yes, dents can damage the paint and expose the metal to moisture, leading to rust. It’s important to repair dents promptly to prevent corrosion.
10. Where can I buy high-quality dent repair tools?
CARDIAGTECH.NET offers a wide selection of high-quality dent repair tools at competitive prices. Check out our website or contact us today.