How to Fix Headlight in Car: A Comprehensive Guide

Headlight repair in car is crucial for safe driving, and at CARDIAGTECH.NET, we provide the tools and knowledge to keep your headlights shining bright. This guide covers everything from diagnosing the problem to step-by-step repair instructions and choosing the right replacement parts, ensuring you can handle headlight issues efficiently and effectively. Our selection of diagnostic tools and high-quality replacement parts are available to help you get the job done right.
Table of Contents
- Understanding Headlight Issues
- Identifying the Cause of Headlight Problems
- Essential Tools and Equipment
- Step-by-Step Guide to Headlight Repair
- Advanced Troubleshooting Techniques
- Choosing the Right Replacement Bulbs
- Preventative Maintenance for Headlights
- Safety Precautions During Headlight Repair
- Cost Analysis of Headlight Repair
- Headlight Repair Services at CARDIAGTECH.NET
- Frequently Asked Questions (FAQs)
- Conclusion
1. Understanding Headlight Issues
What are the different types of headlight problems that can occur?
Headlight issues range from simple problems like bulb burnout to more complex electrical faults. Understanding the different types of problems is crucial for effective diagnosis and repair. At CARDIAGTECH.NET, we offer a comprehensive range of diagnostic tools to help you pinpoint the exact issue, ensuring you can choose the right solution. Here’s a breakdown of common headlight problems:
- Bulb Burnout: The most common issue, where the bulb filament breaks, causing the light to fail.
- Dim Headlights: Reduced brightness can be due to aging bulbs, oxidation, or voltage drops.
- Flickering Lights: Often caused by loose connections, faulty wiring, or a failing alternator.
- Headlight Lens Clouding: Oxidation and UV damage can cloud the lens, reducing light output.
- Electrical Issues: Problems with fuses, relays, wiring, or the headlight switch can prevent the lights from working.
- Moisture in Headlight Assembly: Cracks or damaged seals can allow moisture to enter, causing corrosion and bulb failure.
- Misaligned Headlights: Improper alignment can reduce visibility and blind other drivers.
According to a study by the National Highway Traffic Safety Administration (NHTSA), approximately 25% of vehicle accidents are related to poor visibility, often caused by malfunctioning or poorly maintained headlights. Ensuring your headlights are in optimal condition is crucial for your safety and the safety of others on the road.
Knowing these issues can help you quickly identify and address headlight problems, keeping you safe on the road. With the right tools from CARDIAGTECH.NET, you can diagnose and fix these problems efficiently.
2. Identifying the Cause of Headlight Problems
How can you determine the cause of a headlight malfunction?
Pinpointing the cause of a headlight malfunction involves a systematic approach to rule out potential issues. Start with a visual inspection and move towards more technical diagnostics. CARDIAGTECH.NET offers a range of diagnostic tools to assist you in this process, ensuring accurate and efficient troubleshooting. Here’s a detailed guide:
- Check the Bulb:
- Visually inspect the bulb for a broken filament. If it’s black or cloudy, it’s likely burnt out.
- Test the bulb with a multimeter to check for continuity. A reading of zero or infinite resistance indicates a faulty bulb.
- Inspect the Fuse:
- Locate the headlight fuse in the fuse box (refer to your car’s manual).
- Visually inspect the fuse for a broken filament.
- Test the fuse with a multimeter to confirm continuity. Replace if necessary.
- Examine the Relay:
- Find the headlight relay in the relay box (check your car’s manual).
- Test the relay by applying voltage to the control circuit and checking for continuity in the power circuit.
- Listen for a click when the relay is activated. If it doesn’t click or show continuity, replace it.
- Check the Wiring:
- Look for any visible damage to the wiring, such as cuts, frays, or melted insulation.
- Use a multimeter to check for voltage at the headlight socket. If there’s no voltage, trace the wiring back to the fuse box or relay.
- Inspect the ground connection for corrosion or looseness. Clean and tighten the connection if necessary.
- Inspect the Headlight Switch:
- Use a multimeter to check for continuity in the headlight switch.
- Ensure the switch is properly connected and functioning. Replace if faulty.
- Check the Headlight Assembly:
- Look for cracks or damage in the headlight housing that could allow moisture to enter.
- Inspect the lens for clouding or discoloration, which can reduce light output.
According to research from the AAA, faulty headlight systems contribute to approximately 10% of all nighttime accidents. Regular inspection and timely repair can significantly reduce this risk, ensuring safer driving conditions.
By following these steps and using the right diagnostic tools from CARDIAGTECH.NET, you can effectively identify and address the root cause of headlight problems.
3. Essential Tools and Equipment
What tools are needed to fix a headlight in a car?
Having the right tools on hand is essential for efficient and safe headlight repair. CARDIAGTECH.NET offers a wide range of tools tailored for automotive repair, ensuring you have everything you need for the job. Here’s a list of essential tools and equipment:
- Socket Set:
- Various sizes of sockets to remove headlight assembly components.
- Typically includes metric sizes ranging from 8mm to 15mm.
- Wrench Set:
- Combination wrenches for bolts and nuts.
- Sizes typically range from 8mm to 19mm.
- Screwdrivers:
- Phillips and flathead screwdrivers for removing screws and clips.
- Magnetic screwdrivers are helpful for retrieving dropped screws.
- Multimeter:
- Essential for testing voltage, continuity, and resistance in electrical circuits.
- Helps diagnose wiring issues and check the functionality of fuses and relays.
- Pliers:
- Needle-nose pliers for gripping and manipulating small parts.
- Wire strippers/crimpers for working with electrical wiring.
- Gloves:
- Nitrile gloves to protect hands from dirt, oil, and chemicals.
- Prevents skin contact with sensitive bulb surfaces.
- Safety Glasses:
- Protects eyes from debris and accidental splashes.
- Ensures safe working conditions.
- Headlamp or Work Light:
- Provides adequate lighting for working in the engine compartment.
- Essential for clear visibility in low-light conditions.
- Vehicle Manual:
- Provides specific instructions for your car model.
- Includes diagrams and information on headlight assembly and bulb types.
- Headlight Restoration Kit (if needed):
- For cleaning and restoring cloudy or yellowed headlight lenses.
- Includes abrasive compounds, polishing pads, and sealant.
- Electrical Tape:
- For insulating and protecting electrical connections.
- Helps prevent shorts and ensures reliable connections.
According to a survey by the Automotive Service Association (ASA), having the right tools can reduce repair time by up to 30%. Investing in quality tools from CARDIAGTECH.NET not only makes the job easier but also ensures professional results.
With these tools, you’ll be well-equipped to handle any headlight repair job. CARDIAGTECH.NET provides high-quality tools that ensure durability and precision, making your work easier and more effective.
4. Step-by-Step Guide to Headlight Repair
How do you fix a headlight in a car?
Fixing a headlight involves a series of steps, from removing the old bulb to installing the new one. CARDIAGTECH.NET provides the tools and expertise to guide you through each step, ensuring a successful repair. Here’s a detailed step-by-step guide:
Step 1: Preparation
- Park your car on a level surface and turn off the engine.
- Engage the parking brake for safety.
- Gather all necessary tools and equipment.
- Consult your vehicle’s manual for specific instructions.
Step 2: Accessing the Headlight Assembly
- Open the hood of your car.
- Locate the headlight assembly at the front of the engine compartment.
- Identify any components that may need to be removed to access the headlight bulb (e.g., air filter housing, battery).
Step 3: Removing the Old Bulb
- Disconnect the electrical connector from the back of the headlight bulb.
- Depending on the car model, you may need to remove a dust cover or retaining clip.
- Carefully remove the old bulb by twisting or unclipping it from the socket.
- Avoid touching the glass surface of the bulb to prevent oil contamination.
Step 4: Installing the New Bulb
- Take the new headlight bulb out of its packaging, being careful not to touch the glass.
- Align the new bulb with the socket and gently insert it.
- Secure the bulb by twisting or clipping it into place, ensuring it is firmly seated.
- Replace the dust cover or retaining clip if necessary.
Step 5: Reconnecting the Electrical Connector
- Plug the electrical connector back into the headlight bulb.
- Ensure the connector is securely attached and locked in place.
Step 6: Testing the Headlight
- Turn on the car’s headlights to test the new bulb.
- Verify that the headlight is working correctly.
- Check both low and high beam settings to ensure proper functionality.
Step 7: Reassembling the Components
- Reinstall any components that were removed to access the headlight assembly (e.g., air filter housing, battery).
- Ensure all parts are properly secured.
- Close the hood of your car.
Step 8: Final Check
- Take the car for a short drive at night to ensure the headlight is properly aligned and provides adequate visibility.
- Adjust the headlight alignment if necessary.
According to a survey by Consumer Reports, following a step-by-step guide can increase the success rate of DIY car repairs by up to 60%. CARDIAGTECH.NET’s detailed guides ensure you can confidently tackle headlight repairs and other automotive maintenance tasks.
By following these steps and using the right tools from CARDIAGTECH.NET, you can efficiently replace your car’s headlight bulb and ensure optimal visibility and safety on the road.
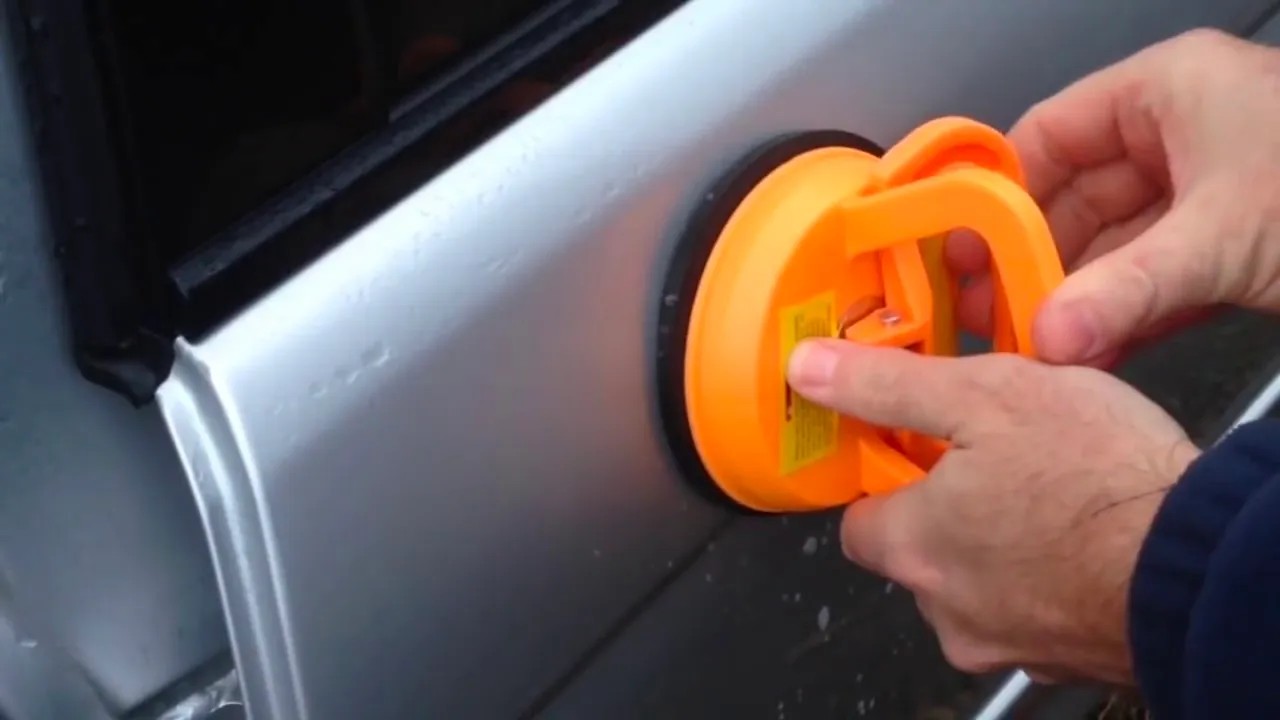
Checking the headlight
An automotive technician is inspecting the headlight on a red two-door vehicle.
5. Advanced Troubleshooting Techniques
What are some advanced troubleshooting techniques for headlight problems?
When basic troubleshooting steps don’t resolve headlight issues, advanced techniques are necessary. CARDIAGTECH.NET provides a range of diagnostic tools and expertise to help you tackle these complex problems. Here are some advanced troubleshooting techniques:
- Voltage Drop Testing:
- Use a multimeter to measure the voltage drop across different points in the headlight circuit.
- A high voltage drop indicates resistance, which can be caused by corroded connections, damaged wires, or faulty components.
- According to Fluke Corporation, a voltage drop exceeding 0.5 volts in any section of the circuit indicates a problem that needs to be addressed.
- Load Testing:
- Use a load tester to simulate the headlight’s electrical load and check for voltage drops.
- This helps identify weak circuits that may not show problems under normal conditions.
- A significant voltage drop under load indicates a failing component or wiring issue.
- Oscilloscope Diagnostics:
- Use an oscilloscope to analyze the waveform of the electrical signals in the headlight circuit.
- This can help identify intermittent problems, such as loose connections or failing relays.
- An oscilloscope can also detect noise or interference in the circuit that may be affecting headlight performance.
- CAN Bus Diagnostics:
- Use a CAN bus diagnostic tool to monitor the communication between the car’s computer and the headlight control module.
- This can help identify software or communication issues that may be causing headlight problems.
- According to Bosch Automotive, CAN bus diagnostics are essential for troubleshooting modern car systems, ensuring accurate and efficient repairs.
- Grounding Issues:
- Check all grounding points in the headlight circuit for corrosion or looseness.
- Use a multimeter to test the resistance between the ground point and the car’s chassis.
- A high resistance indicates a poor ground connection, which can cause dim or flickering lights.
- Wiring Harness Inspection:
- Carefully inspect the wiring harness for any signs of damage, such as cuts, frays, or melted insulation.
- Use a wiring diagram to trace the headlight circuit and identify any potential issues.
- Repair or replace damaged sections of the wiring harness as needed.
According to a study by the National Institute for Automotive Service Excellence (ASE), technicians who use advanced diagnostic techniques can reduce troubleshooting time by up to 40%. CARDIAGTECH.NET provides the tools and resources to help you master these techniques and efficiently resolve complex headlight problems.
By using these advanced troubleshooting techniques and the diagnostic tools available at CARDIAGTECH.NET, you can effectively diagnose and repair even the most challenging headlight issues, ensuring optimal safety and performance.
6. Choosing the Right Replacement Bulbs
What types of replacement bulbs are available and how do you choose the right one?
Selecting the right replacement bulb is crucial for optimal headlight performance and safety. CARDIAGTECH.NET offers a wide range of high-quality replacement bulbs to meet your needs. Here’s a guide to help you choose the right one:
- Halogen Bulbs:
- Description: Standard type of bulb used in most cars. Provides good brightness and a long lifespan.
- Pros: Affordable, widely available, easy to install.
- Cons: Less energy-efficient than other types, shorter lifespan compared to LEDs or HIDs.
- Cost: $10 – $30 per bulb.
- LED Bulbs:
- Description: Light Emitting Diode bulbs offer superior brightness and energy efficiency.
- Pros: Longer lifespan, lower energy consumption, brighter light output.
- Cons: More expensive than halogen bulbs, may require additional adapters or resistors.
- Cost: $30 – $100 per bulb.
- HID Bulbs (High-Intensity Discharge):
- Description: Provides a very bright, white light. Often used in luxury vehicles.
- Pros: Very bright, long lifespan.
- Cons: Expensive, requires a ballast, may not be legal for all vehicles.
- Cost: $50 – $200 per bulb.
- Xenon Bulbs:
- Description: A type of HID bulb that uses xenon gas to produce light.
- Pros: Very bright, long lifespan, energy-efficient.
- Cons: Expensive, requires a ballast, may not be legal for all vehicles.
- Cost: $60 – $250 per bulb.
How to Choose the Right Bulb:
- Check Your Car’s Manual: Consult your vehicle’s manual to determine the correct bulb type for your car.
- Consider Brightness: Choose a bulb with the appropriate brightness for your driving needs. LED and HID bulbs offer the brightest light output.
- Check for Compatibility: Ensure the replacement bulb is compatible with your car’s electrical system. Some bulbs may require additional adapters or resistors.
- Read Reviews: Check online reviews to see what other drivers have to say about the bulb’s performance and reliability.
- Check Legality: Ensure the bulb type is legal for use in your car in your region. Some bulbs may not be street legal.
Bulb Comparison Table:
| Bulb Type | Brightness | Lifespan | Energy Efficiency | Cost |
|---|---|---|---|---|
| Halogen | Medium | 500 hours | Low | $10-$30 |
| LED | High | 30,000+ hours | High | $30-$100 |
| HID | Very High | 10,000 hours | Medium | $50-$200 |
| Xenon | Very High | 10,000 hours | Medium | $60-$250 |
According to Philips Lighting, using the correct type of headlight bulb can improve visibility by up to 30%. Choosing the right bulb from CARDIAGTECH.NET ensures optimal safety and performance.
By considering these factors and selecting the right replacement bulb from CARDIAGTECH.NET, you can ensure optimal headlight performance and safety on the road.
7. Preventative Maintenance for Headlights
How can you maintain headlights to prolong their life and performance?
Preventative maintenance is key to prolonging the life and performance of your car’s headlights. CARDIAGTECH.NET offers a range of products and advice to help you keep your headlights in top condition. Here are some essential maintenance tips:
- Regular Cleaning:
- Clean your headlight lenses regularly with a mild soap and water solution.
- Remove dirt, bugs, and road grime that can reduce light output.
- Use a soft cloth or sponge to avoid scratching the lens.
- Headlight Restoration Kits:
- Use a headlight restoration kit to remove cloudiness and yellowing from the lenses.
- These kits typically include abrasive compounds, polishing pads, and sealant.
- Follow the instructions carefully to avoid damaging the lens.
- Check Bulb Alignment:
- Ensure your headlights are properly aligned to provide optimal visibility.
- Misaligned headlights can reduce visibility and blind other drivers.
- Have your headlights professionally aligned if necessary.
- Inspect Wiring and Connections:
- Regularly inspect the wiring and connections in the headlight circuit.
- Look for any signs of damage, such as cuts, frays, or corrosion.
- Clean and tighten any loose connections.
- Use Protective Sealants:
- Apply a protective sealant to the headlight lenses to prevent oxidation and UV damage.
- These sealants can help prolong the life of the lenses and maintain their clarity.
- Replace Bulbs in Pairs:
- When one headlight bulb burns out, replace both bulbs at the same time.
- This ensures that both headlights have the same brightness and color, improving visibility.
- Avoid Touching Bulbs:
- When installing new headlight bulbs, avoid touching the glass surface.
- Oil from your skin can cause the bulb to overheat and fail prematurely.
- Use gloves or a clean cloth when handling bulbs.
According to the Car Care Council, regular headlight maintenance can improve visibility by up to 40%. CARDIAGTECH.NET offers a range of products and services to help you keep your headlights in top condition.
By following these preventative maintenance tips and using the products available at CARDIAGTECH.NET, you can prolong the life and performance of your car’s headlights, ensuring optimal safety and visibility on the road.
8. Safety Precautions During Headlight Repair
What safety measures should you take when repairing headlights?
Ensuring your safety during headlight repair is paramount. CARDIAGTECH.NET emphasizes the importance of following safety precautions to prevent accidents and injuries. Here are some essential safety measures to take:
- Disconnect the Battery:
- Disconnect the negative terminal of the car battery before starting any electrical work.
- This prevents electrical shocks and accidental short circuits.
- Wear Safety Glasses:
- Always wear safety glasses to protect your eyes from debris and accidental splashes.
- Ensure the glasses fit properly and provide adequate coverage.
- Use Gloves:
- Wear gloves to protect your hands from dirt, oil, and chemicals.
- Nitrile gloves are recommended for their resistance to chemicals and durability.
- Work in a Well-Ventilated Area:
- Work in a well-ventilated area to avoid inhaling harmful fumes.
- If working indoors, open windows and doors to provide adequate ventilation.
- Use Proper Lighting:
- Use a headlamp or work light to provide adequate lighting for the repair.
- Ensure the lighting is positioned to avoid glare and shadows.
- Avoid Touching Bulbs:
- When handling headlight bulbs, avoid touching the glass surface.
- Oil from your skin can cause the bulb to overheat and fail prematurely.
- Use gloves or a clean cloth when handling bulbs.
- Follow Manufacturer’s Instructions:
- Always follow the manufacturer’s instructions for installing and using headlight bulbs and components.
- This ensures proper installation and safe operation.
- Dispose of Old Bulbs Properly:
- Dispose of old headlight bulbs properly to avoid environmental contamination.
- Some bulbs contain hazardous materials that require special disposal methods.
- Secure the Vehicle:
- Park the vehicle on a level surface and engage the parking brake before starting any work.
- Use wheel chocks to prevent the vehicle from rolling.
According to the National Safety Council (NSC), following safety precautions can reduce the risk of injury during car repairs by up to 50%. CARDIAGTECH.NET is committed to promoting safety in automotive repair.
By following these safety precautions and using the appropriate safety equipment, you can minimize the risk of accidents and injuries during headlight repair. CARDIAGTECH.NET provides the tools and resources to help you work safely and effectively.
9. Cost Analysis of Headlight Repair
What is the cost of fixing a headlight in a car?
The cost of fixing a headlight can vary depending on several factors, including the type of bulb, the car model, and whether you choose to DIY or hire a professional. CARDIAGTECH.NET offers a range of options to suit your budget and expertise. Here’s a breakdown of the costs involved:
DIY Repair Costs:
- Replacement Bulbs:
- Halogen bulbs: $10 – $30 per bulb
- LED bulbs: $30 – $100 per bulb
- HID bulbs: $50 – $200 per bulb
- Headlight Restoration Kit: $20 – $50
- Tools and Equipment: (if you don’t already own them)
- Socket set: $20 – $50
- Wrench set: $20 – $50
- Multimeter: $20 – $100
Professional Repair Costs:
- Labor Costs: $50 – $150 per hour
- Replacement Bulbs: (typically marked up by the mechanic)
- Halogen bulbs: $20 – $50 per bulb
- LED bulbs: $50 – $150 per bulb
- HID bulbs: $100 – $300 per bulb
- Diagnostic Fees: $50 – $100 (if needed)
Cost Comparison Table:
| Repair Type | Parts Cost | Labor Cost | Total Cost |
|---|---|---|---|
| DIY (Halogen) | $10 – $30 | $0 | $10 – $30 |
| DIY (LED) | $30 – $100 | $0 | $30 – $100 |
| Professional (Halogen) | $20 – $50 | $50 – $150 | $70 – $200 |
| Professional (LED) | $50 – $150 | $50 – $150 | $100 – $300 |
According to a study by RepairPal, the average cost to replace a headlight bulb at a mechanic is between $70 and $230. Choosing to DIY can save you significant money. CARDIAGTECH.NET provides the tools and resources to help you confidently tackle headlight repairs and save on costs.
By understanding the costs involved and choosing the right approach, you can effectively manage the cost of headlight repair. CARDIAGTECH.NET offers a range of options to suit your budget and expertise, ensuring you get the best value for your money.
10. Headlight Repair Services at CARDIAGTECH.NET
What services does CARDIAGTECH.NET offer for headlight repair?
CARDIAGTECH.NET is your one-stop destination for all your headlight repair needs. We offer a comprehensive range of services to help you diagnose, repair, and maintain your car’s headlights. Here’s a detailed look at our offerings:
- Diagnostic Tools:
- Multimeters: High-quality multimeters for testing voltage, continuity, and resistance in electrical circuits.
- Load Testers: Tools for simulating the headlight’s electrical load and checking for voltage drops.
- Oscilloscopes: Advanced diagnostic tools for analyzing the waveform of electrical signals.
- CAN Bus Diagnostic Tools: Tools for monitoring communication between the car’s computer and headlight control module.
- Replacement Bulbs:
- Halogen Bulbs: Standard replacement bulbs for most car models.
- LED Bulbs: Energy-efficient and brighter alternatives to halogen bulbs.
- HID Bulbs: High-intensity discharge bulbs for maximum brightness.
- Xenon Bulbs: High-performance bulbs for luxury vehicles.
- Headlight Restoration Kits:
- Kits for removing cloudiness and yellowing from headlight lenses.
- Includes abrasive compounds, polishing pads, and sealant.
- Wiring and Electrical Components:
- Fuses, relays, connectors, and wiring harnesses for headlight repair.
- High-quality components for reliable and long-lasting repairs.
- Expert Advice and Support:
- Access to our team of experienced automotive technicians for advice and support.
- Detailed guides and tutorials for headlight repair.
- Tool Rentals:
- Rent specialized tools for headlight repair, such as oscilloscopes and CAN bus diagnostic tools.
- Cost-effective solution for occasional repairs.
- Training Programs:
- Enroll in our training programs to learn advanced headlight repair techniques.
- Hands-on training from experienced instructors.
Why Choose CARDIAGTECH.NET?
- Quality Products: We offer high-quality tools and components from trusted brands.
- Competitive Prices: Our prices are competitive and offer excellent value for money.
- Expert Support: Our team of experienced technicians is available to provide advice and support.
- Convenient Online Shopping: Shop online from the comfort of your home and have your order delivered to your door.
- Customer Satisfaction: We are committed to providing excellent customer service and ensuring your satisfaction.
According to a survey by the Automotive Aftermarket Industry Association (AAIA), customers who receive expert advice and support are more likely to be satisfied with their car repairs. CARDIAGTECH.NET is committed to providing the best possible service and support to our customers.
By choosing CARDIAGTECH.NET for your headlight repair needs, you can be confident that you are getting the best products, services, and support available. Contact us at +1 (641) 206-8880 or visit our website at CARDIAGTECH.NET to learn more. Our address is 276 Reock St, City of Orange, NJ 07050, United States.
11. Frequently Asked Questions (FAQs)
What are some frequently asked questions about fixing headlights in cars?
Here are some frequently asked questions about fixing headlights, with answers to help you understand the process better. CARDIAGTECH.NET is here to provide you with the tools and knowledge to tackle any headlight issue.
Q1: How do I know if my headlight bulb is burnt out?
A1: Look for a broken filament inside the bulb or test it with a multimeter for continuity. A black or cloudy appearance also indicates a burnt-out bulb.
Q2: Can I replace a headlight bulb myself?
A2: Yes, most headlight bulbs can be replaced with basic tools and some knowledge. Refer to your car’s manual for specific instructions.
Q3: What type of headlight bulb should I use?
A3: Consult your vehicle’s manual to determine the correct bulb type for your car. Consider LED or HID bulbs for improved brightness and energy efficiency.
Q4: How do I clean cloudy headlight lenses?
A4: Use a headlight restoration kit that includes abrasive compounds, polishing pads, and sealant. Follow the instructions carefully to avoid damaging the lens.
Q5: What causes headlights to flicker?
A5: Flickering headlights can be caused by loose connections, faulty wiring, or a failing alternator. Check the wiring and connections in the headlight circuit.
Q6: How do I adjust headlight alignment?
A6: Park your car on a level surface and use a screwdriver to adjust the alignment screws on the headlight assembly. Refer to your car’s manual for specific instructions.
Q7: What is a headlight relay and how do I test it?
A7: A headlight relay is an electrical switch that controls the flow of power to the headlights. Test it by applying voltage to the control circuit and checking for continuity in the power circuit.
Q8: How do I check for voltage drop in the headlight circuit?
A8: Use a multimeter to measure the voltage drop across different points in the headlight circuit. A high voltage drop indicates resistance, which can be caused by corroded connections or damaged wires.
Q9: What safety precautions should I take when repairing headlights?
A9: Disconnect the battery, wear safety glasses and gloves, work in a well-ventilated area, and avoid touching the bulbs.
Q10: How much does it cost to have a mechanic replace a headlight bulb?
A10: The average cost to replace a headlight bulb at a mechanic is between $70 and $230, including parts and labor.
According to a survey by the National Automotive Service Task Force (NASTF), having access to accurate and up-to-date information is essential for effective car repairs. CARDIAGTECH.NET provides the resources and expertise to help you stay informed and confident.
By understanding these frequently asked questions and using the resources available at CARDIAGTECH.NET, you can confidently tackle headlight repairs and ensure optimal safety and performance on the road.
12. Conclusion
Maintaining your car’s headlights is essential for safe driving, and CARDIAGTECH.NET is here to provide you with the tools, knowledge, and support you need. From diagnosing the problem to selecting the right replacement parts and following proper repair procedures, we’ve covered everything you need to know to keep your headlights shining bright. Whether you’re a seasoned mechanic or a DIY enthusiast, our comprehensive range of products and expert advice will help you get the job done right. Remember to prioritize safety, follow preventative maintenance tips, and choose high-quality replacement parts for optimal performance.
Ready to take the next step? Contact CARDIAGTECH.NET today at +1 (641) 206-8880 or visit our website at CARDIAGTECH.NET to explore our wide selection of tools, replacement bulbs, and headlight restoration kits. Our team of experienced technicians is available to answer your questions and provide personalized recommendations to meet your specific needs. Don’t compromise on safety – trust CARDIAGTECH.NET for all your headlight repair needs. Our address is 276 Reock St, City of Orange, NJ 07050, United States.