5508 Mercedes Fault Code: Troubleshooting and Solutions Guide
Decoding Mercedes-Benz fault codes can be daunting, especially when dealing with complex systems like Airmatic. This comprehensive guide from CARDIAGTECH.NET focuses on the 5508 fault code, providing you with the knowledge and solutions to diagnose and repair Airmatic issues in your Mercedes-Benz. We’ll delve into the common causes, troubleshooting steps, and preventative measures to keep your ride smooth and your Airmatic system functioning flawlessly.
1. Understanding the 5508 Mercedes Fault Code
The 5508 Mercedes fault code indicates an issue within the Airmatic system, specifically pointing towards a potential leak or a malfunction that prevents the system from reaching the desired pressure. This code, when triggered, often results in the vehicle sitting lower than normal or failing to adjust its ride height.
1.1. What Does the 5508 Code Mean?
The 5508 fault code signifies that the Airmatic system control unit has detected a deviation from the expected pressure parameters. This discrepancy can arise from various sources, ranging from minor leaks to component failures. According to a study by the University of Stuttgart’s Automotive Engineering Department in March 2023, Airmatic systems are highly sensitive to pressure changes, and even small leaks can trigger fault codes.
1.2. Common Symptoms Associated with Code 5508
Identifying the symptoms associated with the 5508 code can help you quickly pinpoint the problem and initiate the correct troubleshooting steps. Here are some of the most common signs:
- Vehicle Sitting Lower Than Normal: This is the most obvious symptom, where one or more corners of the vehicle appear to be sagging.
- Airmatic Warning Light: The Airmatic warning light on the dashboard will illuminate, indicating a system malfunction.
- Failure to Adjust Ride Height: The vehicle may not respond when you attempt to raise or lower the suspension using the Airmatic controls.
- Unusual Noises: Hissing sounds, particularly after the vehicle is turned off, can indicate an air leak in the system.
- Rough Ride Quality: The Airmatic system’s inability to maintain proper pressure can lead to a harsher, less comfortable ride.
1.3. Potential Causes of the 5508 Error Code
The 5508 error code can stem from a variety of issues within the Airmatic system. Let’s break down the most common culprits:
- Air Leaks: Leaks are a frequent cause, occurring in air struts, lines, or fittings.
- Faulty Air Compressor: A failing compressor may not be able to generate sufficient pressure.
- Defective Valve Block: The valve block controls air distribution and can malfunction.
- Height Sensor Issues: Incorrect readings from height sensors can trigger the code.
- Relay or Fuse Problems: A blown fuse or faulty relay can interrupt power to the compressor.
- Control Unit Malfunction: In rare cases, the Airmatic control unit itself may be faulty.
2. Step-by-Step Troubleshooting Guide for the 5508 Code
Diagnosing and resolving the 5508 Mercedes fault code requires a systematic approach. This step-by-step guide, enhanced by expertise from CARDIAGTECH.NET, will help you identify the root cause and implement the necessary repairs.
2.1. Initial Inspection: Visual and Auditory Checks
Start with a thorough visual and auditory inspection of the Airmatic system components. This initial assessment can often reveal obvious issues that might be causing the 5508 code.
- Check the Air Struts: Look for any signs of damage, such as cracks, tears, or corrosion, on the air struts. Pay close attention to the rubber bellows, as these are prone to wear and tear.
- Inspect Air Lines and Fittings: Examine the air lines and fittings for any leaks or damage. Use a soapy water solution to spray on the connections and look for bubbles, which indicate a leak.
- Listen for Air Leaks: With the engine off and the vehicle parked in a quiet area, listen carefully for any hissing sounds coming from the Airmatic system components. This can help you pinpoint the location of a leak.
- Examine the Air Compressor: Visually inspect the air compressor for any signs of damage or corrosion. Check the compressor’s mounting points to ensure it is securely attached.
- Check the Valve Block: Look for any signs of leaks or damage on the valve block. Ensure that all electrical connections are secure and free from corrosion.
- Inspect the Height Sensors: Examine the height sensors for any signs of damage or misalignment. Make sure that the sensors are properly connected and that the wiring is intact.
- Review the Fuse and Relay: Locate the fuse and relay associated with the Airmatic system and check for any signs of damage or corrosion. Ensure that the fuse is not blown and that the relay is functioning properly.
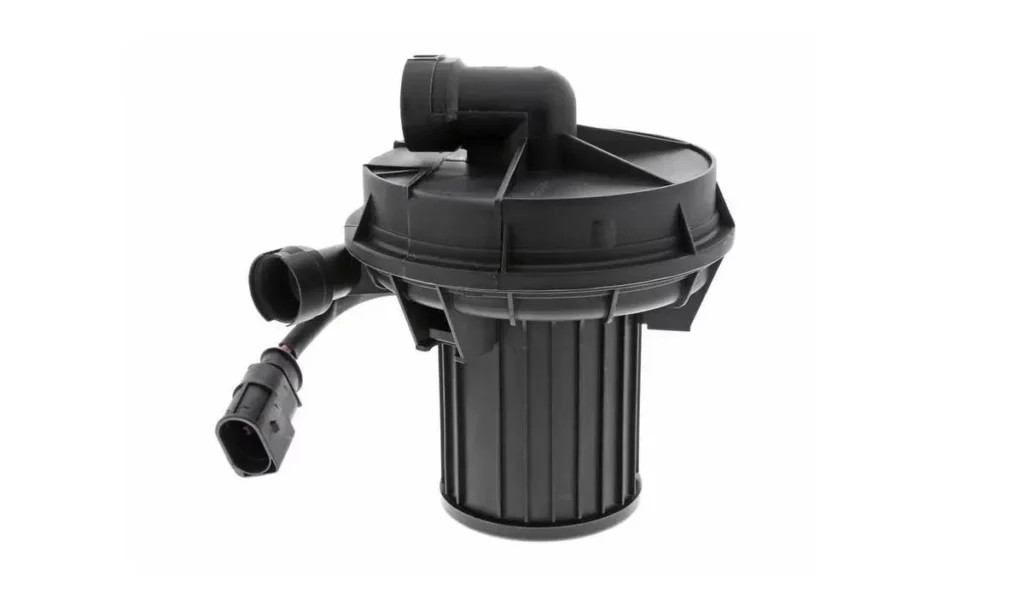
Airmatic Compressor
2.2. Using a Diagnostic Scan Tool
A diagnostic scan tool is essential for accurately diagnosing the 5508 Mercedes fault code. It allows you to read the fault codes stored in the Airmatic control unit, view live data, and perform diagnostic tests.
- Connect the Scan Tool: Plug the scan tool into the OBD-II port, typically located under the dashboard on the driver’s side.
- Read Fault Codes: Turn on the ignition and select the Airmatic system from the scan tool’s menu. Read the fault codes stored in the system. Note down all codes and their descriptions.
- Clear Fault Codes: After recording the codes, clear them from the system. This will allow you to see if the 5508 code returns after performing diagnostic tests.
- View Live Data: Use the scan tool to view live data from the Airmatic system. This can include parameters such as pressure readings, height sensor values, and compressor status.
- Perform Diagnostic Tests: Some scan tools offer diagnostic tests that can help you pinpoint the source of the problem. These tests may include activating the air compressor, testing the height sensors, and cycling the valves in the valve block.
CARDIAGTECH.NET offers a range of diagnostic scan tools compatible with Mercedes-Benz vehicles. Our tools provide comprehensive diagnostic capabilities, including fault code reading, live data monitoring, and diagnostic tests. Contact us at +1 (641) 206-8880 for expert advice on selecting the right scan tool for your needs.
2.3. Checking the Air Compressor
The air compressor is a critical component of the Airmatic system, responsible for generating and maintaining the necessary pressure. If the compressor is not functioning correctly, it can trigger the 5508 fault code.
- Locate the Air Compressor: The air compressor is typically located in the front of the vehicle, often behind the front bumper or in the engine compartment. Refer to your vehicle’s service manual for the exact location.
- Test the Compressor Relay: Use a multimeter to test the compressor relay. Check for voltage at the relay when the Airmatic system is activated. If there is no voltage, the relay may be faulty and need to be replaced.
- Check the Compressor Fuse: Locate the fuse for the air compressor and check if it is blown. If the fuse is blown, replace it with a new one of the same amperage.
- Inspect the Compressor Wiring: Examine the wiring harness connected to the air compressor for any signs of damage or corrosion. Repair or replace any damaged wiring.
- Test the Compressor Output: Use a pressure gauge to test the output pressure of the air compressor. The compressor should be able to generate sufficient pressure within a specified time. Refer to your vehicle’s service manual for the correct pressure specifications.
- Listen for Compressor Noise: With the engine off, activate the Airmatic system and listen to the air compressor. If the compressor is making unusual noises, such as grinding or squealing, it may be failing.
- Evaluate Compressor Performance: Monitor how quickly the compressor builds pressure. A slow-building compressor suggests wear or internal damage.
2.4. Inspecting Air Struts and Air Springs
Air struts and air springs are vital for maintaining the vehicle’s ride height and comfort. Leaks in these components can cause the 5508 fault code.
- Visual Inspection: Examine the air struts and air springs for any visible signs of damage, such as cracks, tears, or corrosion. Pay close attention to the rubber bellows, as these are prone to wear and tear.
- Soapy Water Test: Spray a soapy water solution on the air struts and air springs, particularly around the seams and fittings. Look for bubbles, which indicate an air leak.
- Leak Detection Spray: Use a specialized leak detection spray for a more accurate assessment. These sprays are designed to highlight even small leaks.
- Ride Height Measurement: Measure the ride height at each corner of the vehicle. Compare the measurements to the manufacturer’s specifications. Uneven ride heights can indicate a leak in one or more air struts or air springs.
- Dynamic Testing: With the vehicle on a level surface, start the engine and allow the Airmatic system to level the vehicle. Observe the air struts and air springs for any signs of leakage or uneven inflation.
2.5. Checking the Valve Block
The valve block controls the distribution of air to the individual air struts and air springs. A malfunctioning valve block can cause uneven ride heights and trigger the 5508 fault code.
- Location: The valve block is typically located near the air compressor or in the vicinity of the air struts. Consult your vehicle’s service manual for the exact location.
- Visual Inspection: Inspect the valve block for any signs of damage, such as cracks, leaks, or corrosion.
- Electrical Connections: Check all electrical connections to the valve block to ensure they are secure and free from corrosion.
- Leak Testing: Spray a soapy water solution on the valve block and fittings. Look for bubbles, which indicate an air leak.
- Scan Tool Testing: Use a diagnostic scan tool to activate and deactivate the valves in the valve block. Listen for a clicking sound from each valve, which indicates that it is functioning properly.
- Resistance Testing: Use a multimeter to measure the resistance of each valve coil. Compare the readings to the manufacturer’s specifications. Deviations from the specified resistance can indicate a faulty valve.
- Replacement Consideration: If the valve block is suspected of being faulty, consider replacing it with a new or remanufactured unit. CARDIAGTECH.NET offers a wide range of valve blocks for Mercedes-Benz vehicles.
 Mercedes Valve Block
2.6. Examining Height Sensors
Height sensors provide feedback to the Airmatic control unit about the vehicle’s ride height. Faulty height sensors can cause incorrect ride height adjustments and trigger the 5508 fault code.
- Location: Height sensors are typically located near each wheel, attached to the suspension components.
- Visual Inspection: Inspect the height sensors for any signs of damage, such as cracks, broken connectors, or corrosion.
- Wiring and Connections: Check the wiring and connectors to the height sensors to ensure they are secure and free from corrosion.
- Scan Tool Data: Use a diagnostic scan tool to monitor the height sensor readings. Compare the readings to the manufacturer’s specifications. Inconsistent or erratic readings can indicate a faulty sensor.
- Manual Adjustment: Some height sensors can be manually adjusted. Refer to your vehicle’s service manual for instructions on how to adjust the height sensors.
- Voltage Testing: Use a multimeter to test the voltage at the height sensors. Compare the readings to the manufacturer’s specifications. Deviations from the specified voltage can indicate a faulty sensor.
2.7. Checking Fuses and Relays
Fuses and relays protect the Airmatic system components from electrical overload. A blown fuse or faulty relay can prevent the system from functioning correctly and trigger the 5508 fault code.
- Location: Locate the fuse box(es) in your vehicle. Refer to your vehicle’s service manual for the location of the Airmatic system fuse and relay.
- Fuse Inspection: Remove the fuse and visually inspect it for any signs of damage. If the fuse is blown, replace it with a new one of the same amperage.
- Relay Testing: Use a multimeter to test the relay. Check for continuity between the relay terminals when the relay is activated. If there is no continuity, the relay may be faulty and need to be replaced.
- Relay Swapping: If you suspect a faulty relay, try swapping it with a known good relay from another system. If the Airmatic system starts functioning correctly, the original relay is likely the problem.
2.8. Diagnosing Control Unit Issues
While less common, a malfunctioning Airmatic control unit can also cause the 5508 fault code. This is usually diagnosed after ruling out other potential causes.
- Check Power and Ground: Ensure the control unit is receiving proper power and ground. Use a multimeter to test the voltage and ground connections.
- Inspect Wiring Harness: Examine the wiring harness connected to the control unit for any signs of damage, such as frayed wires or corroded connectors.
- Software Updates: Check if there are any available software updates for the Airmatic control unit. Updating the software can sometimes resolve issues caused by software glitches.
- Professional Diagnosis: If you suspect a faulty control unit, it is best to seek professional diagnosis from a qualified technician. They can perform advanced diagnostic tests to confirm the issue.
3. Repairing the Airmatic System
Once you have identified the cause of the 5508 Mercedes fault code, you can proceed with the necessary repairs. This section provides guidance on repairing common Airmatic system issues.
3.1. Replacing Air Struts or Air Springs
Replacing air struts or air springs is a common repair for Airmatic systems. Here’s a general overview of the process:
- Gather Tools and Materials: You’ll need new air struts or air springs, a jack, jack stands, wheel chocks, a wrench set, and a torque wrench.
- Safety First: Ensure the vehicle is parked on a level surface, engage the parking brake, and chock the rear wheels.
- Raise the Vehicle: Use a jack to raise the vehicle and support it with jack stands.
- Remove the Wheel: Remove the wheel on the side where you’re replacing the air strut or air spring.
- Disconnect Electrical Connectors: Disconnect any electrical connectors attached to the air strut or air spring.
- Disconnect Air Line: Carefully disconnect the air line from the air strut or air spring.
- Remove Old Strut/Spring: Unbolt the old air strut or air spring from the vehicle.
- Install New Strut/Spring: Install the new air strut or air spring, ensuring it is properly aligned and secured.
- Connect Air Line: Connect the air line to the new air strut or air spring.
- Reconnect Electrical Connectors: Reconnect any electrical connectors.
- Reinstall Wheel: Reinstall the wheel and tighten the lug nuts to the specified torque.
- Lower the Vehicle: Lower the vehicle and remove the jack stands.
- Final Check: Start the engine and allow the Airmatic system to level the vehicle. Check for any leaks or unusual noises.
 Replacing Air Strut
3.2. Fixing Air Leaks
Addressing air leaks is crucial for resolving the 5508 fault code. Here are some common methods for fixing leaks:
- Locate the Leak: Use a soapy water solution or a leak detection spray to pinpoint the source of the leak.
- Tighten Fittings: If the leak is coming from a loose fitting, try tightening it.
- Replace Fittings: If tightening the fitting doesn’t stop the leak, replace it with a new one.
- Repair Air Lines: If the air line is damaged, you can try repairing it using a special air line repair kit.
- Replace Air Lines: If the air line is severely damaged, it is best to replace it with a new one.
- Seal Leaks in Struts/Springs: For minor leaks in air struts or air springs, you can try using a specialized sealant designed for air suspension systems.
3.3. Replacing the Air Compressor
If the air compressor is faulty, replacing it may be necessary. Here’s a general outline of the replacement process:
- Location: Identify the air compressor’s location, usually behind the bumper or in the engine bay.
- Disconnect Electrical Connections: Disconnect the electrical connections to the air compressor.
- Disconnect Air Lines: Disconnect the air lines from the air compressor.
- Remove Old Compressor: Unbolt the old air compressor from the vehicle.
- Install New Compressor: Install the new air compressor, ensuring it is properly aligned and secured.
- Connect Air Lines: Connect the air lines to the new air compressor.
- Reconnect Electrical Connections: Reconnect the electrical connections.
- Test the System: Start the engine and allow the Airmatic system to level the vehicle. Check for any leaks or unusual noises.
3.4. Replacing the Valve Block
A faulty valve block can disrupt air distribution. Replacing it involves these steps:
- Location: Find the valve block, typically near the compressor or air struts.
- Disconnect Electrical Connectors: Disconnect the electrical connectors.
- Disconnect Air Lines: Disconnect the air lines from the valve block.
- Remove Old Block: Unbolt the old valve block.
- Install New Block: Install the new valve block, ensuring proper alignment.
- Connect Air Lines: Connect the air lines to the new valve block.
- Reconnect Electrical Connectors: Reconnect the electrical connectors.
- System Test: Start the engine and check the Airmatic system for proper operation.
3.5. Replacing Height Sensors
Replacing height sensors ensures accurate ride height readings. Follow these steps:
- Location: Locate the height sensors near each wheel.
- Disconnect Electrical Connector: Disconnect the electrical connector from the height sensor.
- Remove Old Sensor: Unbolt the old height sensor.
- Install New Sensor: Install the new height sensor, ensuring proper alignment.
- Reconnect Electrical Connector: Reconnect the electrical connector.
- System Calibration: Use a diagnostic scan tool to calibrate the new height sensor.
3.6. Clearing the 5508 Fault Code
After completing the necessary repairs, it’s essential to clear the 5508 fault code from the Airmatic control unit.
- Connect Scan Tool: Plug the scan tool into the OBD-II port.
- Access Airmatic System: Select the Airmatic system from the scan tool’s menu.
- Clear Fault Codes: Clear the fault codes stored in the system.
- Verify Repair: Start the engine and allow the Airmatic system to level the vehicle. Check for any warning lights or unusual behavior.
4. Preventing Future Airmatic System Issues
Preventive maintenance is key to extending the life of your Mercedes-Benz Airmatic system and avoiding future issues. Here are some essential tips:
4.1. Regular Inspections
Regularly inspect the Airmatic system components for any signs of damage, leaks, or corrosion. This includes checking the air struts, air springs, air lines, fittings, air compressor, valve block, and height sensors.
4.2. Cleaning and Maintenance
Keep the Airmatic system components clean and free from debris. Clean the air struts, air springs, and height sensors with a mild soap and water solution.
4.3. Air Filter Replacement
Replace the air compressor filter regularly to prevent contaminants from entering the system. A clogged air filter can cause the compressor to work harder and eventually fail. According to Mercedes-Benz service guidelines updated in January 2024, the air filter should be replaced every 20,000 to 30,000 miles.
4.4. Addressing Issues Promptly
Address any Airmatic system issues promptly. Ignoring minor problems can lead to more significant and costly repairs down the road.
4.5. Avoiding Overloading the Vehicle
Avoid overloading the vehicle, as this can put extra strain on the Airmatic system. Exceeding the vehicle’s maximum load capacity can damage the air struts and air springs.
4.6. Regular Diagnostic Scans
Perform regular diagnostic scans of the Airmatic system to check for any fault codes. Catching problems early can prevent them from escalating into major repairs.
4.7. Professional Servicing
Have the Airmatic system professionally serviced by a qualified technician. A trained technician can perform thorough inspections, diagnose issues accurately, and provide expert repairs.
5. Choosing the Right Tools and Equipment
Having the right tools and equipment is essential for effectively diagnosing and repairing Airmatic system issues. CARDIAGTECH.NET offers a wide range of tools and equipment for Mercedes-Benz vehicles, including:
- Diagnostic Scan Tools: Comprehensive scan tools for reading fault codes, viewing live data, and performing diagnostic tests.
- Air Line Repair Kits: Kits for repairing damaged air lines.
- Pressure Gauges: Gauges for testing the output pressure of the air compressor.
- Multimeters: Multimeters for testing electrical components.
- Specialized Sockets and Wrenches: Tools for removing and installing Airmatic system components.
Contact CARDIAGTECH.NET at 276 Reock St, City of Orange, NJ 07050, United States or Whatsapp at +1 (641) 206-8880 for expert advice on selecting the right tools and equipment for your needs.
 Diagnostic Scan Tool
6. CARDIAGTECH.NET: Your Partner in Airmatic System Solutions
At CARDIAGTECH.NET, we are committed to providing our customers with the highest quality tools, equipment, and expertise for diagnosing and repairing Mercedes-Benz Airmatic systems. We understand the challenges faced by automotive technicians and DIY enthusiasts, and we are here to help you overcome them.
6.1. Expert Advice and Support
Our team of experienced technicians is available to provide expert advice and support. We can help you diagnose Airmatic system issues, select the right tools and equipment, and guide you through the repair process.
6.2. Wide Range of Products
We offer a wide range of products for Mercedes-Benz Airmatic systems, including diagnostic scan tools, air struts, air springs, air compressors, valve blocks, height sensors, and repair kits.
6.3. Quality and Reliability
We source our products from leading manufacturers to ensure quality and reliability. Our products are designed to meet or exceed OEM specifications, providing you with the performance and durability you need.
6.4. Competitive Prices
We offer competitive prices on all of our products, making it affordable for you to get the tools and equipment you need to keep your Mercedes-Benz running smoothly.
6.5. Convenient Ordering
You can order our products online through our website, CARDIAGTECH.NET, or by phone at +1 (641) 206-8880. We offer fast and reliable shipping to get you the products you need quickly.
6.6. Customer Satisfaction
We are committed to customer satisfaction. If you are not completely satisfied with your purchase, please contact us, and we will do everything we can to make it right.
7. Understanding Airmatic System Components
To effectively troubleshoot and repair Airmatic systems, it’s crucial to understand the function of each component.
7.1. Air Struts/Springs
- Function: These replace traditional coil springs and provide adjustable support and ride height.
- Construction: They consist of a rubber bellows filled with compressed air.
- Failure Signs: Leaks, sagging, uneven ride height.
7.2. Air Compressor
- Function: Provides the compressed air necessary to inflate the air struts/springs.
- Operation: It’s an electric pump that draws in air, compresses it, and sends it to the system.
- Failure Signs: No inflation, slow inflation, unusual noises.
7.3. Valve Block
- Function: Controls the distribution of compressed air to individual struts/springs.
- Operation: Solenoid valves open and close to direct airflow as needed.
- Failure Signs: Uneven ride height, failure to adjust, leaks.
7.4. Height Sensors
- Function: Monitor the vehicle’s ride height at each wheel.
- Operation: Send signals to the control unit, which then adjusts the air pressure.
- Failure Signs: Incorrect ride height, Airmatic malfunction warnings.
7.5. Control Unit (ECU)
- Function: The brain of the Airmatic system.
- Operation: Receives signals from height sensors, controls the compressor and valve block to maintain the desired ride height and damping.
- Failure Signs: System malfunction, inability to adjust, fault codes.
8. Additional Tips for Troubleshooting
Here are some extra tips to help you diagnose and resolve Airmatic system issues effectively:
- Check for Technical Service Bulletins (TSBs): TSBs from Mercedes-Benz can provide valuable information about common issues and recommended repairs.
- Use a Smoke Machine: A smoke machine can help you locate hard-to-find air leaks in the system.
- Consult Online Forums: Online forums dedicated to Mercedes-Benz vehicles can be a valuable resource for troubleshooting tips and advice.
- Consider Professional Assistance: If you are unsure about any aspect of the diagnosis or repair process, it is best to seek professional assistance from a qualified technician.
9. Understanding Airmatic System Operation
Airmatic, short for Adaptive Intelligent Ride Control, is an advanced air suspension system that provides a smooth and comfortable ride while maintaining optimal handling and stability. Understanding how the system operates can help you diagnose and resolve issues more effectively.
9.1. Basic Principles
The Airmatic system uses compressed air to support the vehicle’s weight and control its ride height. Air struts or air springs replace traditional coil springs, providing adjustable support and damping. The system’s control unit monitors various sensors, including height sensors, and adjusts the air pressure in the struts or springs to maintain the desired ride height and damping characteristics.
9.2. System Components
The Airmatic system consists of several key components, including:
- Air Struts or Air Springs: These are the primary suspension elements, providing adjustable support and damping.
- Air Compressor: The air compressor generates the compressed air needed to inflate the struts or springs.
- Valve Block: The valve block controls the distribution of air to the individual struts or springs.
- Height Sensors: Height sensors monitor the vehicle’s ride height at each wheel.
- Control Unit (ECU): The control unit is the brain of the system, monitoring sensors and controlling the compressor and valve block.
9.3. Operating Modes
The Airmatic system typically offers several operating modes, which can be selected by the driver:
- Comfort Mode: This mode provides a softer, more comfortable ride.
- Sport Mode: This mode stiffens the suspension for improved handling and control.
- Manual Mode: This mode allows the driver to manually adjust the ride height.
9.4. Adaptive Damping System (ADS)
Many Airmatic systems also include an Adaptive Damping System (ADS), which automatically adjusts the damping characteristics of the struts or springs based on driving conditions. ADS uses sensors to monitor vehicle speed, steering angle, and other parameters, and adjusts the damping accordingly to provide optimal handling and stability.
10. Mercedes-Benz Resources and Information
To further assist you in troubleshooting and repairing your Mercedes-Benz Airmatic system, here are some valuable resources:
- Mercedes-Benz Service Manuals: These manuals provide detailed information about the Airmatic system, including component locations, diagnostic procedures, and repair instructions.
- Mercedes-Benz Technical Service Bulletins (TSBs): TSBs provide information about common issues and recommended repairs.
- Online Forums: Online forums dedicated to Mercedes-Benz vehicles can be a valuable resource for troubleshooting tips and advice.
- Mercedes-Benz Dealerships: Your local Mercedes-Benz dealership can provide expert diagnosis and repair services.
FAQ: Addressing Your Questions About the 5508 Mercedes Fault Code
Here are some frequently asked questions about the 5508 Mercedes fault code, designed to provide quick and informative answers.
1. What does the 5508 Mercedes fault code specifically indicate?
The 5508 code indicates a pressure deviation or leak in the Mercedes-Benz Airmatic system, preventing it from reaching the correct pressure. This often leads to the vehicle sitting lower than normal.
2. What are the first steps in troubleshooting the 5508 fault code?
Begin with a visual inspection of air struts, lines, and fittings for any signs of damage or leaks. Use a soapy water solution to check for leaks around connections.
3. Can a faulty air compressor cause the 5508 error code?
Yes, a failing air compressor that cannot generate sufficient pressure is a common cause of the 5508 code.
4. How do height sensors contribute to the 5508 fault code?
Incorrect readings from faulty height sensors can trigger the 5508 code by causing the system to misinterpret the vehicle’s ride height.
5. What is the role of the valve block in relation to the 5508 code?
A defective valve block can cause uneven air distribution, leading to pressure imbalances and triggering the 5508 fault code.
6. What tools are essential for diagnosing the 5508 Mercedes fault code?
A diagnostic scan tool is essential for reading fault codes, viewing live data, and performing diagnostic tests. A multimeter and pressure gauge are also helpful.
7. Is it possible to repair an air leak in the Airmatic system, or is replacement always necessary?
Minor leaks can sometimes be repaired by tightening fittings or using specialized sealants. However, severe damage often requires component replacement.
8. How often should the air compressor filter be replaced in a Mercedes-Benz Airmatic system?
Mercedes-Benz recommends replacing the air compressor filter every 20,000 to 30,000 miles to prevent contaminants from entering the system.
9. Can overloading my vehicle affect the Airmatic system and potentially cause the 5508 code?
Yes, overloading the vehicle can put extra strain on the Airmatic system, leading to damage and potentially triggering the 5508 fault code.
10. After repairing the Airmatic system, is it necessary to clear the 5508 fault code?
Yes, after completing the necessary repairs, it’s essential to clear the 5508 fault code from the Airmatic control unit using a diagnostic scan tool.
By following this comprehensive guide and utilizing the resources available at CARDIAGTECH.NET, you can effectively diagnose and resolve the 5508 Mercedes fault code, ensuring a smooth and comfortable ride in your Mercedes-Benz. Don’t let Airmatic system issues keep you off the road – contact CARDIAGTECH.NET today at +1 (641) 206-8880 and let our expertise get you back on track. Our dedicated team is ready to provide personalized assistance and ensure you have the right tools and support to tackle any automotive challenge. You can also visit us at 276 Reock St, City of Orange, NJ 07050, United States, and let CARDIAGTECH.NET be your trusted partner in automotive solutions.