**What Are the Steps to Check the Thermostat? A Comprehensive Guide**
Are you experiencing inconsistent heating or cooling in your home? The thermostat, that little device on your wall, could be the culprit. At CARDIAGTECH.NET, we understand the frustration of a malfunctioning thermostat and its impact on your comfort and energy bills. This comprehensive guide will walk you through the steps to check your thermostat, diagnose potential problems, and ensure your HVAC system operates efficiently. By following these steps, you’ll be able to determine if you need a thermostat replacement or other HVAC repairs, saving you time and money. Plus, if you discover you need new tools for the job, CARDIAGTECH.NET has you covered with a wide selection of high-quality diagnostic tools and equipment.
1. Understanding the Role of a Thermostat
Before diving into the steps, it’s crucial to understand the thermostat’s function. A thermostat acts as the control center for your HVAC system. It senses the ambient temperature and signals the heating or cooling system to turn on or off to maintain your desired setting.
1.1 Types of Thermostats
There are several types of thermostats, each with its own set of features and functionalities:
-
Mechanical Thermostats: These are the simplest types, using a bimetallic strip to sense temperature changes.
-
Digital Thermostats: These offer more precise temperature control and often include programmable features.
-
Smart Thermostats: These advanced thermostats connect to your home’s Wi-Fi network, allowing remote control and learning capabilities.
2. Identifying Potential Thermostat Problems
Several signs can indicate that your thermostat is not working correctly. Recognizing these symptoms early can prevent further damage to your HVAC system.
2.1 Common Symptoms of a Faulty Thermostat
- Inconsistent Temperatures: Uneven heating or cooling throughout your home.
- HVAC System Not Responding: The system doesn’t turn on or off when you adjust the thermostat.
- Constant Cycling: The HVAC system turns on and off frequently.
- High Energy Bills: Unexpected increases in your energy consumption.
- Blank Display: The thermostat screen is blank or unresponsive.
According to a study by the U.S. Department of Energy, faulty thermostats can increase energy consumption by up to 10%. Regular maintenance and timely repairs are essential to ensure efficient operation.
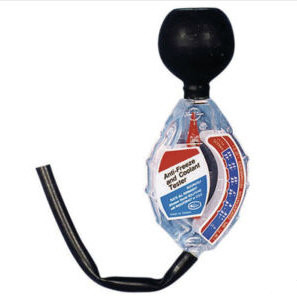
3. Essential Tools for Thermostat Check
Before you begin, gather the necessary tools to safely and effectively check your thermostat. Having the right equipment not only simplifies the process but also ensures accurate results.
3.1 Required Tools
- Screwdrivers: Both Phillips head and flathead screwdrivers.
- Multimeter: For testing electrical continuity.
- Voltage Tester: To ensure power is off before working with wires.
- Level: To ensure the thermostat is mounted straight.
- Cleaning Supplies: Soft brush or cloth for cleaning.
- Camera or Smartphone: To take photos of wiring configurations.
Investing in quality tools from CARDIAGTECH.NET can make a significant difference in the accuracy and efficiency of your diagnostic work.
4. Step-by-Step Guide to Check Your Thermostat
Follow these detailed steps to check your thermostat and identify any potential issues. Safety should always be your top priority, so ensure you follow each step carefully.
4.1 Safety First: Turn Off the Power
Before you begin any work on your thermostat, it’s crucial to turn off the power to your HVAC system at the circuit breaker. This prevents electrical shock and ensures your safety throughout the process.
4.2 Remove the Thermostat Cover
Carefully remove the thermostat cover. Some thermostats have screws, while others simply snap off. Refer to your thermostat’s manual for specific instructions.
4.3 Inspect the Thermostat for Physical Damage
Visually inspect the thermostat for any signs of physical damage, such as cracks, broken wires, or corrosion. These issues can affect the thermostat’s performance.
4.4 Check the Wiring
Examine the wiring connections. Ensure that the wires are securely connected to the terminals and that there are no loose or frayed wires. Use your camera or smartphone to take a photo of the wiring configuration before disconnecting anything. This will be a valuable reference when reconnecting the wires later.
4.4.1 Identifying Thermostat Wires
- R (Red): Power wire.
- W (White): Heating wire.
- Y (Yellow): Cooling wire.
- G (Green): Fan wire.
- C (Common): Common wire (not always present).
4.5 Clean the Thermostat
Dust and debris can accumulate inside the thermostat, affecting its accuracy. Use a soft brush or cloth to gently clean the internal components.
4.6 Check the Thermostat’s Level
Ensure that the thermostat is mounted straight. An unlevel thermostat can lead to inaccurate temperature readings. Use a level to check and adjust if necessary.
4.7 Testing with a Multimeter
A multimeter is an essential tool for testing the electrical continuity of your thermostat. Follow these steps to perform the test:
- Set the Multimeter: Set the multimeter to the ohms (Ω) setting to measure resistance.
- Disconnect Wires: Disconnect the wires from the thermostat terminals.
- Touch Probes: Touch the multimeter probes to the wire terminals you want to test. For example, to test the heating circuit, touch the probes to the R (Red) and W (White) terminals.
- Read the Results: A working circuit will show continuity, usually displayed as a low resistance value on the multimeter. If the multimeter displays “OL” or a very high resistance value, it indicates an open circuit, meaning there is a break in the circuit.
According to a study by the National Institute of Standards and Technology (NIST), using calibrated tools like multimeters ensures accurate measurements and reliable diagnostics.
4.8 Bypassing the Thermostat (Jumper Test)
Bypassing the thermostat can help you determine if the thermostat itself is the problem. This involves directly connecting the wires to activate the HVAC system.
- Disconnect Wires: Disconnect the R (Red) wire and the wire for the system you want to test (W for heating, Y for cooling).
- Connect Wires: Twist the bare ends of the R (Red) wire and the system wire together.
- Turn on Power: Turn the power back on at the circuit breaker.
- Observe Results: If the HVAC system turns on, the thermostat is likely the problem. If it doesn’t turn on, the issue may be with the HVAC system itself.
Note: This test should be performed cautiously and only for a short period to avoid damaging the HVAC system.
5. Troubleshooting Common Thermostat Issues
After performing the initial checks, you may encounter specific issues. Here are some common problems and how to address them.
5.1 Thermostat Not Responding
If the thermostat is not responding, start by checking the power source.
- Battery Replacement: Replace the batteries if your thermostat is battery-powered.
- Check Wiring: Ensure the wiring is securely connected.
- Circuit Breaker: Verify that the circuit breaker is not tripped.
5.2 Inaccurate Temperature Readings
Inaccurate temperature readings can be caused by several factors.
- Location: Ensure the thermostat is not located near heat sources, direct sunlight, or drafts.
- Calibration: Some thermostats require calibration. Refer to the manual for instructions.
- Dust and Debris: Clean the thermostat to remove any accumulated dust.
5.3 HVAC System Constantly Cycling
Frequent cycling can be due to a faulty thermostat or other HVAC issues.
- Thermostat Placement: Ensure the thermostat is in a central location away from extreme temperatures.
- Dirty Air Filter: A clogged air filter can cause the HVAC system to overheat and cycle frequently.
- Refrigerant Levels: Low refrigerant levels in the AC can also cause cycling.
5.4 Smart Thermostat Connectivity Issues
If you have a smart thermostat, connectivity issues can prevent remote control and programming.
- Wi-Fi Connection: Ensure the thermostat is connected to your Wi-Fi network.
- App Updates: Update the thermostat app to the latest version.
- Reset Thermostat: Try resetting the thermostat and reconnecting to Wi-Fi.
6. When to Replace Your Thermostat
In some cases, the thermostat may be beyond repair. Here are signs that it’s time to replace your thermostat:
- Old Age: Thermostats typically last 10-15 years. If yours is older, it may be time for a replacement.
- Frequent Malfunctions: If you’re experiencing frequent issues despite troubleshooting, a replacement is likely necessary.
- Outdated Technology: Upgrading to a smart thermostat can improve energy efficiency and convenience.
6.1 Benefits of Upgrading to a Smart Thermostat
- Remote Control: Adjust temperature settings from anywhere using your smartphone.
- Energy Savings: Programmable features and learning algorithms can optimize energy consumption.
- Integration: Connects with other smart home devices for seamless automation.
- Insights: Provides detailed reports on energy usage.
According to a study by Nest, smart thermostats can save homeowners an average of 10-12% on heating bills and 15% on cooling bills.
7. How to Install a New Thermostat
Installing a new thermostat is a straightforward process, but it’s essential to follow the instructions carefully.
7.1 Step-by-Step Installation Guide
- Turn Off Power: Turn off the power to the HVAC system at the circuit breaker.
- Remove Old Thermostat: Remove the old thermostat cover and disconnect the wires. Take a photo of the wiring configuration for reference.
- Install Base Plate: Mount the new thermostat’s base plate to the wall using screws.
- Connect Wires: Connect the wires to the corresponding terminals on the new thermostat. Refer to the photo you took earlier.
- Attach Thermostat Body: Attach the thermostat body to the base plate.
- Turn On Power: Turn the power back on at the circuit breaker.
- Configure Settings: Follow the manufacturer’s instructions to configure the thermostat settings.
7.2 Common Mistakes to Avoid
- Incorrect Wiring: Double-check the wiring connections to ensure they match the old thermostat’s configuration.
- Over tightening Screws: Avoid over tightening the screws, which can damage the terminals.
- Ignoring Manual: Always refer to the manufacturer’s manual for specific instructions.
8. Thermostat Maintenance Tips
Regular maintenance can extend the life of your thermostat and ensure accurate performance.
8.1 Routine Maintenance Tasks
- Clean Regularly: Clean the thermostat every few months to remove dust and debris.
- Check Batteries: Replace batteries annually or as needed.
- Inspect Wiring: Periodically inspect the wiring connections for any signs of damage.
- Calibrate as Needed: Calibrate the thermostat if you notice inaccurate temperature readings.
8.2 Professional HVAC Maintenance
Consider scheduling professional HVAC maintenance annually. A qualified technician can inspect and tune up your entire system, including the thermostat, to ensure optimal performance.
According to the Air Conditioning Contractors of America (ACCA), regular HVAC maintenance can improve energy efficiency by up to 30% and extend the life of your equipment.
9. Diagnosing HVAC Problems Beyond the Thermostat
If you’ve checked your thermostat and are still experiencing issues, the problem may lie elsewhere in your HVAC system.
9.1 Common HVAC Problems
- Dirty Air Filter: A clogged air filter can restrict airflow and cause the system to overheat.
- Refrigerant Leaks: Low refrigerant levels in the AC can reduce cooling efficiency.
- Dirty Coils: Dirty evaporator or condenser coils can reduce heat transfer.
- Ductwork Leaks: Leaks in the ductwork can cause air loss and uneven temperatures.
- Faulty Blower Motor: A malfunctioning blower motor can reduce airflow.
9.2 When to Call a Professional
If you’re not comfortable working with electrical components or HVAC systems, it’s best to call a professional. A qualified HVAC technician can accurately diagnose and repair complex issues.
According to the Bureau of Labor Statistics, the demand for HVAC technicians is expected to grow 13% from 2018 to 2028, indicating the importance of professional HVAC services.
10. Utilizing CARDIAGTECH.NET for Your HVAC Needs
At CARDIAGTECH.NET, we provide a comprehensive range of diagnostic tools and equipment to help you maintain and repair your HVAC system.
10.1 Our Product Offerings
- Multimeters: High-quality multimeters for accurate electrical testing.
- Voltage Testers: Ensure safety when working with electrical components.
- HVAC Diagnostic Kits: Complete kits for diagnosing HVAC problems.
- Smart Thermostats: Upgrade to the latest smart thermostat technology.
10.2 Why Choose CARDIAGTECH.NET?
- Quality Products: We offer only the highest quality tools and equipment.
- Expert Support: Our team of experts is available to assist you with any questions.
- Competitive Prices: We offer competitive prices on all our products.
- Fast Shipping: Get your tools quickly with our fast shipping options.
11. Conclusion: Ensuring Optimal Thermostat Performance
Checking your thermostat is a crucial step in maintaining a comfortable and energy-efficient home. By following the steps outlined in this guide, you can identify potential problems, troubleshoot common issues, and ensure your HVAC system operates at its best. Remember to prioritize safety and utilize quality tools from CARDIAGTECH.NET to achieve accurate results. If you encounter complex issues, don’t hesitate to call a professional HVAC technician.
Interested in upgrading your diagnostic tools or need expert advice? Contact us today!
Address: 276 Reock St, City of Orange, NJ 07050, United States
WhatsApp: +1 (641) 206-8880
Website: CARDIAGTECH.NET
Take control of your home’s comfort and energy efficiency. Invest in the right tools and knowledge to keep your thermostat and HVAC system running smoothly. Visit CARDIAGTECH.NET for all your diagnostic and equipment needs.
12. Frequently Asked Questions (FAQs) About Thermostats
12.1 How do I know if my thermostat is bad?
If your thermostat is unresponsive, displays incorrect temperatures, or causes your HVAC system to cycle on and off frequently, it may be faulty. Testing with a multimeter can confirm electrical continuity issues.
12.2 Can a bad thermostat cause high energy bills?
Yes, a malfunctioning thermostat can lead to inconsistent heating or cooling, causing your HVAC system to work harder and consume more energy. Replacing a faulty thermostat can help lower energy bills.
12.3 How long do thermostats typically last?
Thermostats typically last 10-15 years. If your thermostat is older than this, it may be time for a replacement.
12.4 What is the difference between a digital and a smart thermostat?
Digital thermostats offer precise temperature control and programmable features, while smart thermostats connect to your home’s Wi-Fi network, allowing remote control, learning capabilities, and integration with other smart home devices.
12.5 How do I reset my thermostat?
The reset process varies depending on the thermostat model. Refer to the manufacturer’s manual for specific instructions. Generally, you can reset the thermostat by turning it off, removing the batteries (if applicable), waiting a few minutes, and then reinserting the batteries and turning it back on.
12.6 What does the “C” wire do on a thermostat?
The “C” wire, or common wire, provides a constant power supply to the thermostat. It is required for many modern thermostats, especially smart thermostats, to operate correctly.
12.7 Can I install a thermostat myself?
Yes, installing a thermostat is a straightforward process, but it’s essential to follow the instructions carefully. Ensure you turn off the power to the HVAC system before beginning the installation.
12.8 How do I calibrate my thermostat?
Some thermostats require calibration to ensure accurate temperature readings. Refer to the manufacturer’s manual for specific instructions on how to calibrate your thermostat.
12.9 What should I do if my thermostat is not connecting to Wi-Fi?
Ensure your thermostat is within range of your Wi-Fi router and that you have entered the correct password. Try resetting the thermostat and reconnecting to Wi-Fi. Update the thermostat app to the latest version.
12.10 Where is the best location to place a thermostat?
The best location for a thermostat is in a central area of your home, away from heat sources, direct sunlight, and drafts. Avoid placing it in a hallway, kitchen, or near windows or doors.
Address: 276 Reock St, City of Orange, NJ 07050, United States
WhatsApp: +1 (641) 206-8880
Website: CARDIAGTECH.NET
By understanding these common issues and solutions, you can keep your thermostat functioning efficiently and maintain a comfortable home environment. And remember, CARDIAGTECH.NET is here to support all your HVAC diagnostic and equipment needs.
13. Maximizing HVAC Efficiency Through Thermostat Optimization
Beyond basic functionality, optimizing your thermostat settings can significantly improve your HVAC system’s efficiency and reduce energy consumption. Let’s explore some advanced strategies for thermostat optimization.
13.1 Programming Your Thermostat
Programming your thermostat to adjust temperatures automatically based on your schedule is one of the most effective ways to save energy.
- Weekday Settings: Set lower temperatures during the day when you’re away and higher temperatures in the evening when you’re home.
- Weekend Settings: Adjust temperatures based on your weekend routines, such as lower temperatures in the morning if you sleep in.
According to the Environmental Protection Agency (EPA), properly programmed thermostats can save up to $180 per year in energy costs.
13.2 Utilizing Smart Thermostat Features
Smart thermostats offer advanced features that can further optimize energy savings.
- Learning Algorithms: These thermostats learn your preferences and automatically adjust temperatures based on your habits.
- Geofencing: This feature uses your smartphone’s location to adjust temperatures when you’re away from home.
- Energy Reports: Smart thermostats provide detailed reports on energy usage, allowing you to identify areas for improvement.
13.3 Seasonal Adjustments
Adjust your thermostat settings based on the season to maximize comfort and efficiency.
- Winter: Set the thermostat to a comfortable temperature, such as 68°F (20°C), and use blankets or sweaters to stay warm.
- Summer: Set the thermostat to a slightly higher temperature, such as 78°F (26°C), and use fans to circulate air.
13.4 Avoiding Extreme Temperature Swings
Avoid setting extreme temperature swings, as this can cause your HVAC system to work harder and consume more energy. A moderate temperature difference between indoor and outdoor temperatures is ideal.
13.5 Integrating with Smart Home Systems
Integrating your smart thermostat with other smart home systems can further optimize energy efficiency.
- Smart Sensors: Use smart sensors to monitor temperature and occupancy in different rooms and adjust temperatures accordingly.
- Smart Blinds: Integrate with smart blinds to automatically adjust window coverings based on sunlight and temperature.
14. The Economic Impact of Thermostat Efficiency
The benefits of an efficient thermostat extend beyond individual comfort and energy savings. They also have a significant impact on the economy.
14.1 Reduced Energy Consumption
Efficient thermostats help reduce overall energy consumption, lowering demand on power grids and reducing greenhouse gas emissions.
14.2 Lower Utility Bills
By optimizing thermostat settings, homeowners can significantly lower their utility bills, freeing up income for other expenses.
14.3 Job Creation
The installation and maintenance of smart thermostats and HVAC systems create jobs in the energy efficiency sector.
14.4 Economic Growth
Increased energy efficiency can stimulate economic growth by reducing energy costs for businesses and improving overall productivity.
15. The Future of Thermostat Technology
Thermostat technology is constantly evolving, with new innovations emerging to improve energy efficiency and convenience.
15.1 AI-Powered Thermostats
AI-powered thermostats use artificial intelligence to learn your preferences and optimize energy settings automatically.
15.2 Voice Control Integration
Voice control integration allows you to adjust thermostat settings using voice commands.
15.3 Predictive Maintenance
Predictive maintenance features can detect potential issues before they become major problems, preventing costly repairs.
15.4 Integration with Renewable Energy Systems
Integration with renewable energy systems allows thermostats to optimize energy usage based on solar or wind power availability.
16. Maintaining a Healthy Home Environment
In addition to energy efficiency, thermostats also play a crucial role in maintaining a healthy home environment.
16.1 Air Quality Monitoring
Some thermostats include air quality monitoring features, alerting you to pollutants and allergens in your home.
16.2 Humidity Control
Humidity control features help maintain optimal humidity levels, preventing mold growth and improving comfort.
16.3 Ventilation Control
Ventilation control features ensure proper airflow, removing stale air and bringing in fresh air.
17. The Role of Thermostats in Smart Homes
Thermostats are a key component of smart homes, seamlessly integrating with other smart devices to create a connected and automated living environment.
17.1 Integration with Smart Lighting
Integrating thermostats with smart lighting systems allows you to adjust lighting based on temperature and occupancy.
17.2 Integration with Smart Security Systems
Integrating thermostats with smart security systems can automatically adjust temperatures when you arm or disarm the system.
17.3 Creating Automated Scenes
Use smart thermostats to create automated scenes that adjust temperature, lighting, and other settings with a single command.
18. Best Practices for Thermostat Placement
Proper thermostat placement is crucial for accurate temperature readings and optimal performance.
18.1 Avoiding Drafts and Sunlight
Avoid placing thermostats in areas with drafts or direct sunlight, as this can cause inaccurate readings.
18.2 Central Location
Place thermostats in a central location in your home, away from exterior walls and doorways.
18.3 Avoiding Heat Sources
Avoid placing thermostats near heat sources, such as lamps, stoves, or computers.
19. Conclusion: The Future of Home Comfort and Energy Efficiency
Thermostats are essential components of modern HVAC systems, playing a critical role in maintaining home comfort and energy efficiency. By understanding the different types of thermostats, troubleshooting common issues, and optimizing thermostat settings, you can ensure your HVAC system operates at its best. And remember, CARDIAGTECH.NET is here to support all your HVAC diagnostic and equipment needs.
Interested in upgrading your diagnostic tools or need expert advice? Contact us today!
Address: 276 Reock St, City of Orange, NJ 07050, United States
WhatsApp: +1 (641) 206-8880
Website: CARDIAGTECH.NET
Take control of your home’s comfort and energy efficiency. Invest in the right tools and knowledge to keep your thermostat and HVAC system running smoothly. Visit CARDIAGTECH.NET for all your diagnostic and equipment needs.
20. Advanced Troubleshooting Techniques for Thermostat Problems
When basic checks and troubleshooting steps don’t resolve your thermostat issues, it’s time to delve into more advanced techniques. These methods often require a deeper understanding of HVAC systems and electrical components.
20.1 Checking the Thermocouple
In gas furnaces, the thermocouple is a safety device that shuts off the gas supply if the pilot light goes out. A faulty thermocouple can prevent the furnace from igniting, even if the thermostat is working correctly.
- Location: The thermocouple is typically located near the pilot light.
- Testing: Use a multimeter to test the thermocouple’s voltage output. A reading below the specified value indicates a faulty thermocouple that needs replacement.
20.2 Inspecting the Flame Sensor
Similar to the thermocouple, the flame sensor ensures that the burner is lit and operating safely. A dirty or faulty flame sensor can cause the furnace to shut down prematurely.
- Cleaning: Clean the flame sensor with fine steel wool or sandpaper to remove any buildup.
- Testing: Use a multimeter to test the flame sensor’s current flow. A reading below the specified value indicates a faulty flame sensor that needs replacement.
20.3 Checking the Limit Switch
The limit switch is a safety device that prevents the furnace from overheating. If the furnace gets too hot, the limit switch will shut off the burner. A faulty limit switch can cause the furnace to cycle on and off frequently.
- Location: The limit switch is typically located near the blower motor or heat exchanger.
- Testing: Use a multimeter to test the limit switch’s continuity. An open circuit indicates a faulty limit switch that needs replacement.
20.4 Inspecting the Capacitor
The capacitor is an electrical component that helps start the blower motor and compressor. A faulty capacitor can prevent these components from starting, causing the HVAC system to malfunction.
- Testing: Use a multimeter to test the capacitor’s capacitance. A reading below the specified value indicates a faulty capacitor that needs replacement.
20.5 Checking the Contactor
The contactor is an electrical switch that controls the power to the compressor. A faulty contactor can prevent the compressor from starting, causing the AC to malfunction.
- Testing: Use a multimeter to test the contactor’s voltage. A reading below the specified value indicates a faulty contactor that needs replacement.
21. Understanding HVAC Zoning Systems
HVAC zoning systems allow you to control the temperature in different areas of your home independently. Understanding how these systems work can help you troubleshoot thermostat issues more effectively.
21.1 Zone Dampers
Zone dampers are motorized valves that control the airflow to different zones. A faulty zone damper can prevent airflow to a specific zone, causing temperature imbalances.
21.2 Zone Thermostats
Each zone has its own thermostat, allowing you to set different temperatures for each area. A faulty zone thermostat can cause temperature control issues in that specific zone.
21.3 Zone Control Panel
The zone control panel manages the operation of the zone dampers and thermostats. A faulty zone control panel can cause widespread temperature control issues throughout the system.
22. Navigating Complex Wiring Diagrams
Working with thermostats often involves deciphering complex wiring diagrams. Understanding these diagrams is essential for proper installation and troubleshooting.
22.1 Color Coding
HVAC wiring typically uses color coding to identify different wires. Common colors include red for power, white for heating, yellow for cooling, and green for the fan.
22.2 Terminal Labels
Thermostat terminals are labeled with letters that correspond to different functions. Common labels include R for power, W for heating, Y for cooling, G for the fan, and C for the common wire.
22.3 Wiring Schematics
Wiring schematics provide a visual representation of the wiring connections between different components. Understanding these schematics is essential for troubleshooting complex wiring issues.
23. Leveraging Technology for HVAC Diagnostics
Modern technology offers a variety of tools and resources for diagnosing HVAC problems.
23.1 Mobile Apps
Mobile apps provide access to wiring diagrams, troubleshooting guides, and diagnostic tools.
23.2 Online Forums
Online forums connect you with other HVAC professionals and homeowners, allowing you to share information and get expert advice.
23.3 Video Tutorials
Video tutorials provide step-by-step instructions on how to diagnose and repair common HVAC problems.
24. Conclusion: Empowering You to Master Thermostat Troubleshooting
Thermostat troubleshooting can seem daunting, but with the right knowledge, tools, and techniques, you can confidently diagnose and resolve most issues. By following the advanced troubleshooting steps outlined in this guide and leveraging the resources available at CARDIAGTECH.NET, you’ll be well-equipped to maintain a comfortable and energy-efficient home.
Interested in upgrading your diagnostic tools or need expert advice? Contact us today!
Address: 276 Reock St, City of Orange, NJ 07050, United States
WhatsApp: +1 (641) 206-8880
Website: CARDIAGTECH.NET
Take control of your home’s comfort and energy efficiency. Invest in the right tools and knowledge to keep your thermostat and HVAC system running smoothly. Visit CARDIAGTECH.NET for all your diagnostic and equipment needs.
25. Integrating Energy Efficiency with Smart Home Technology
As technology continues to advance, integrating energy efficiency practices with smart home technology becomes increasingly crucial. Let’s delve deeper into how these integrations can maximize comfort and minimize energy consumption.
25.1 Smart Sensors for Occupancy Detection
Smart sensors that detect occupancy can play a vital role in adjusting thermostat settings automatically. When a room is unoccupied, the thermostat can be set to a more energy-efficient temperature, and when someone enters the room, the temperature can be adjusted to a comfortable level.
- Motion Sensors: These sensors detect movement in a room and trigger temperature adjustments accordingly.
- Door/Window Sensors: These sensors can detect when a door or window is opened, signaling the thermostat to temporarily disable heating or cooling in that zone.
25.2 Predictive Algorithms for Weather Forecasting
Smart thermostats can utilize predictive algorithms based on weather forecasts to optimize heating and cooling schedules. For instance, on a sunny day, the thermostat can anticipate the increase in indoor temperature and adjust the cooling system to maintain a comfortable environment while minimizing energy consumption.
25.3 Integration with Smart Blinds and Shades
Integrating smart thermostats with smart blinds and shades can significantly reduce energy consumption by automatically adjusting window coverings based on sunlight and temperature. During the summer, blinds can be closed during peak sunlight hours to prevent overheating, and during the winter, blinds can be opened to allow sunlight to warm the room.
25.4 Smart Thermostats with Learning Capabilities
Smart thermostats equipped with learning capabilities can analyze your daily routines and preferences to create personalized heating and cooling schedules. These thermostats learn when you typically wake up, go to bed, and leave the house, and they adjust temperature settings accordingly to maximize comfort and energy savings.
26. Common Pitfalls to Avoid When Troubleshooting Thermostats
While troubleshooting thermostats, it’s essential to be aware of common pitfalls that can lead to incorrect diagnoses and potentially damage your HVAC system.
26.1 Neglecting Safety Precautions
Failing to turn off the power to the HVAC system before working on the thermostat is a dangerous oversight that can result in electrical shock. Always prioritize safety by turning off the power at the circuit breaker before performing any diagnostic or repair work.
26.2 Overlooking Simple Solutions
Sometimes, the simplest solutions are the most effective. Before diving into complex troubleshooting steps, double-check basic settings, such as the thermostat mode (heat, cool, auto), temperature settings, and battery levels.
26.3 Disregarding Wiring Diagrams
Attempting to install or troubleshoot a thermostat without consulting the wiring diagram can lead to incorrect wiring connections, which can damage the thermostat or HVAC system. Always refer to the wiring diagram and double-check your connections before powering on the system.
26.4 Misinterpreting Multimeter Readings
Incorrectly interpreting multimeter readings can lead to misdiagnoses and unnecessary repairs. Ensure you understand how to use a multimeter properly and interpret the readings accurately before making any conclusions about the condition of electrical components.
27. Tips for Prolonging the Lifespan of Your Thermostat
Proper maintenance and care can extend the lifespan of your thermostat, saving you money on replacement costs.
27.1 Regular Cleaning
Dust and debris can accumulate inside the thermostat, affecting its accuracy and performance. Clean the thermostat regularly using a soft brush or cloth to remove any buildup.
27.2 Battery Replacement
If your thermostat is battery-powered, replace the batteries annually or as needed to ensure continuous operation.
27.3 Avoiding Extreme Temperatures
Avoid exposing the thermostat to extreme temperatures or direct sunlight, as this can damage its internal components.
27.4 Professional Maintenance
Consider scheduling professional HVAC maintenance annually to have a qualified technician inspect and tune up your entire system, including the thermostat.
28. The Impact of Government Regulations on Thermostat Technology
Government regulations and energy efficiency standards play a significant role in shaping thermostat technology and promoting energy conservation.
28.1 Energy Star Certification
Energy Star certification is a voluntary program that recognizes energy-efficient products, including thermostats. Energy Star-certified thermostats meet specific energy efficiency criteria and can help homeowners save money on their utility bills.
28.2 Building Codes
Building codes often include requirements for thermostat technology, such as programmable thermostats or smart thermostats, to improve energy efficiency in new construction and renovations.
28.3 Rebate Programs
Government agencies and utility companies offer rebate programs to incentivize homeowners to purchase energy-efficient thermostats. These rebates can help offset the upfront cost of upgrading to a smart thermostat.
29. Conclusion: Mastering the Art of Thermostat Management
Effectively managing your thermostat is crucial for achieving optimal comfort, energy efficiency, and cost savings. By understanding the intricacies of thermostat technology, implementing best practices, and leveraging the resources available at CARDIAGTECH.NET, you can take control of your home’s climate and create a more sustainable living environment.
Interested in upgrading your diagnostic tools or need expert advice? Contact us today!
Address: 276 Reock St, City of Orange, NJ 07050, United States
WhatsApp: +1 (641) 206-8880
Website: CARDIAGTECH.NET
Take control of your home’s comfort and energy efficiency. Invest in the right tools and knowledge to keep your thermostat and HVAC system running smoothly. Visit CARDIAGTECH.NET for all your diagnostic and equipment needs.