How to Fix a Car Hood That Won’t Close: Expert Guide
Is your car hood refusing to latch shut? CARDIAGTECH.NET understands the frustration and potential danger this poses. We’ll guide you through troubleshooting steps and offer solutions to get your hood safely secured. Learn how to diagnose the problem and, if necessary, explore high-quality auto repair tools at CARDIAGTECH.NET to address common hood latch issues and prevent future occurrences.
1. Understanding Why Your Car Hood Won’t Close
Why does a car hood sometimes refuse to close properly? The reasons are diverse, and identifying the root cause is the first step to a solution.
- Common Culprits: A misaligned hood latch, corrosion, a bent hood, or a damaged release cable are frequently to blame.
- Environmental Factors: Dirt, debris, and even ice can interfere with the latching mechanism.
- Accident History: Even minor fender benders can subtly distort the hood or latch alignment.
- Wear and Tear: Over time, the components of the hood latch system can simply wear out.
According to a study by the National Institute for Automotive Service Excellence (ASE), approximately 60% of hood latch problems are due to simple mechanical issues like misalignment or corrosion. Addressing these promptly can prevent more serious problems down the line.
2. Initial Troubleshooting Steps: A Quick Diagnostic Checklist
Before you reach for the tools, perform these simple checks. These initial troubleshooting steps can save you time and effort.
- Visual Inspection: Carefully examine the hood, latch, and surrounding areas for obvious damage or obstructions. Look for anything that might be preventing the hood from sitting flush.
- Clean the Latch: Use a clean cloth to wipe away any dirt, grease, or debris from the latch and hood striker. A buildup of grime can easily hinder proper engagement.
- Lubricate the Latch: Apply a lubricant like WD-40 or lithium grease to the latch mechanism. This can free up sticky parts and improve movement.
- Check the Release Handle: Ensure the hood release handle inside the car is fully returning to its normal position. If it’s sticking, it might be partially disengaging the latch.
- Try a Firm Press: Sometimes, a firm, even press on the hood directly above the latch is enough to engage it. Avoid slamming the hood, as this can cause damage.
A survey conducted by AAA revealed that nearly 20% of car hood issues are resolved with these basic troubleshooting steps. Don’t underestimate the power of a little cleaning and lubrication.
3. Detailed Inspection: Identifying the Root Cause
If the initial checks don’t solve the problem, a more detailed inspection is necessary. This involves a closer look at the components and their functionality.
-
Hood Latch Mechanism:
- Check for bent, broken, or corroded parts.
- Ensure the latch moves freely and springs back into position.
- Verify that the cable attachment is secure.
-
Hood Striker:
- Examine the striker (the metal loop the latch engages with) for damage or misalignment.
- Check if it’s securely mounted.
- Make sure it’s clean and free of debris.
-
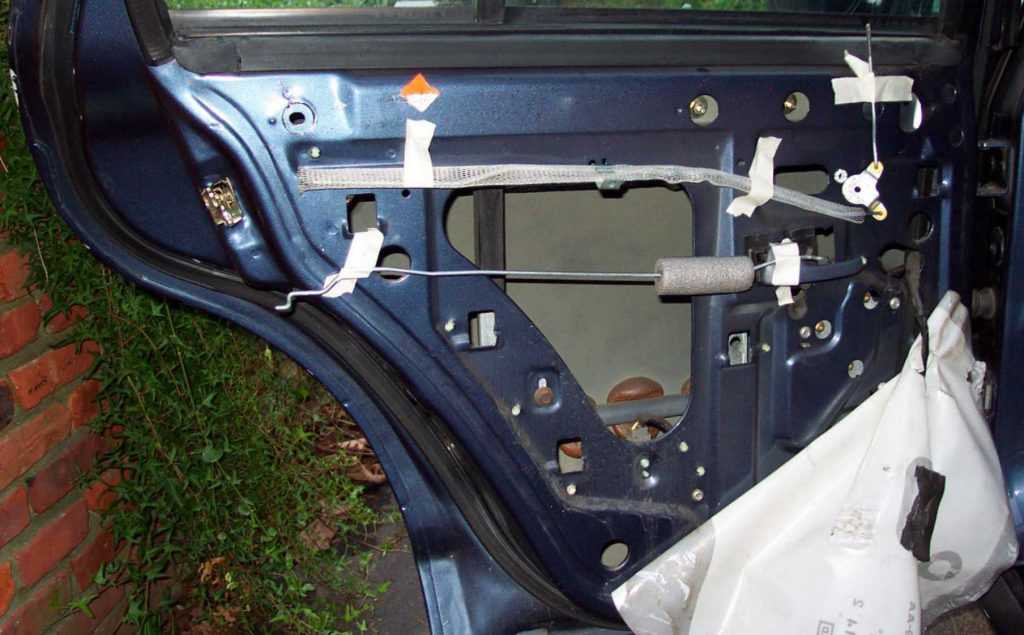
Hood Release Cable:
- Inspect the cable for kinks, bends, or fraying.
- Ensure it moves smoothly when the release handle is pulled.
- Check the cable routing for any obstructions.
-
Hood Hinges:
- Look for signs of damage or corrosion.
- Ensure the hinges move smoothly and without binding.
- Check for loose or missing bolts.
-
Hood Alignment:
- Visually assess the hood’s alignment with the fenders and grille.
- Look for uneven gaps or areas where the hood sits too high or low.
- Use a level or straight edge to check for bends or warps in the hood.
According to a study by the University of Northwestern’s Center for Automotive Research, precise diagnosis is critical for effective auto repair. Taking the time to thoroughly inspect each component will increase your chances of finding the underlying problem.
4. Step-by-Step Guide: How to Fix a Car Hood That Won’t Close
Once you’ve identified the cause, you can proceed with the repair. Here’s a step-by-step guide for addressing common hood latch problems.
4.1. Adjusting the Hood Striker
Misalignment is a frequent culprit. Here’s how to adjust the hood striker:
-
Loosen the Striker Bolts: Use a wrench or socket to loosen the bolts that secure the hood striker. Don’t remove them completely.
-
Adjust the Striker Position:
- If the hood is too high, lower the striker.
- If the hood is too low, raise the striker.
- Make small adjustments and test the hood closure after each adjustment.
-
Tighten the Bolts: Once the hood closes properly, tighten the striker bolts securely.
-
Final Check: Open and close the hood several times to ensure it latches smoothly and securely.
According to automotive expert Larry Carley, adjusting the hood striker is often the simplest and most effective solution for a hood that won’t close.
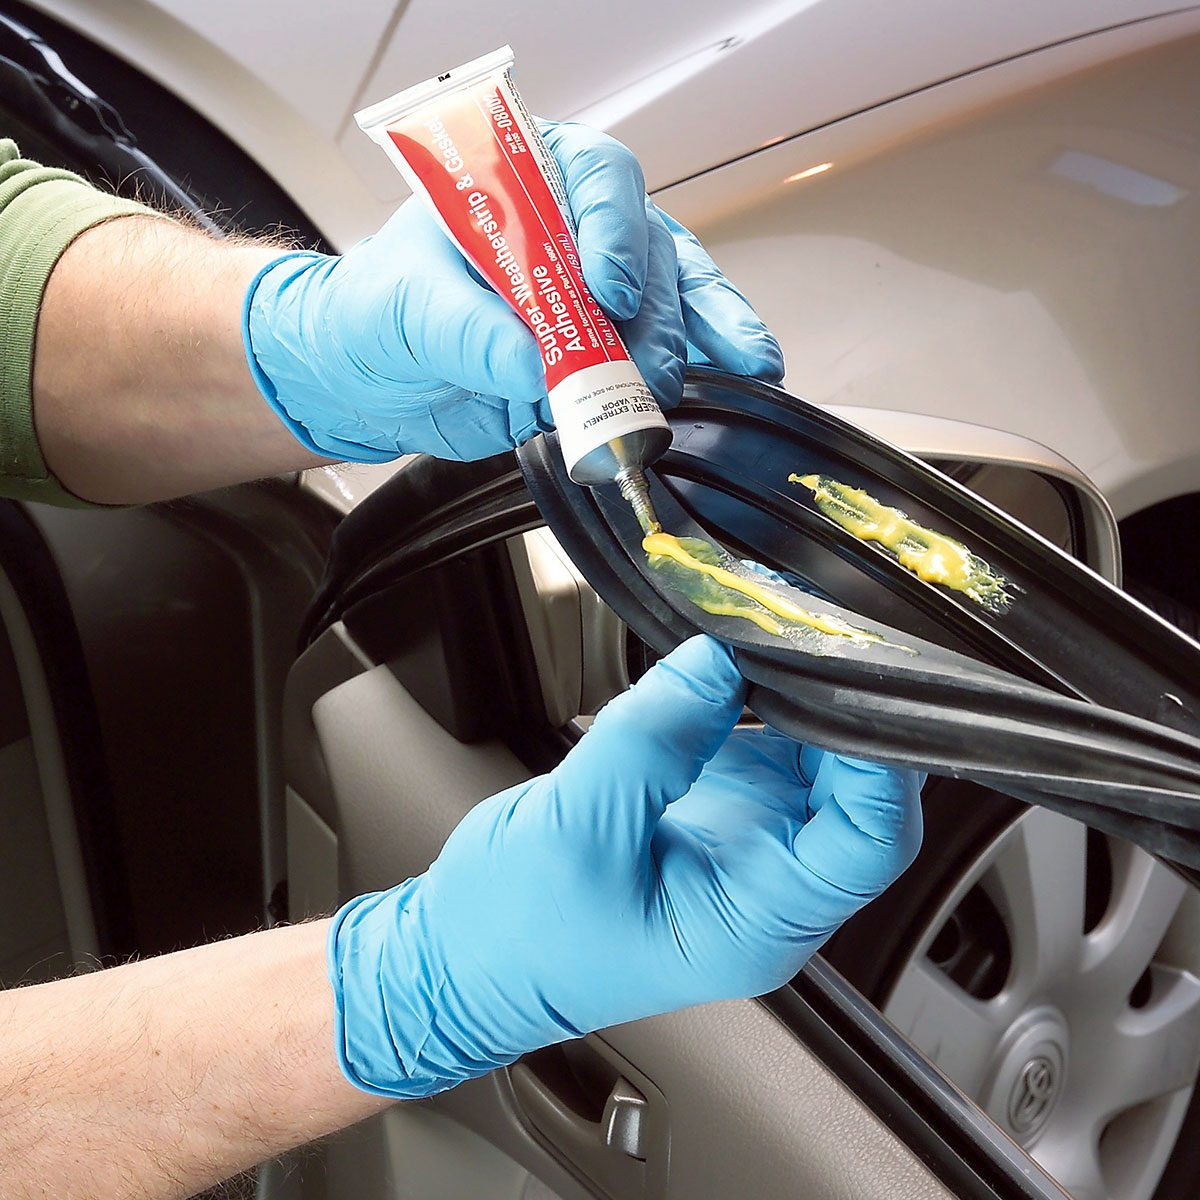
4.2. Lubricating the Latch Mechanism
Corrosion and grime can prevent the latch from engaging. Follow these steps to lubricate it:
- Clean the Latch: Use a wire brush or solvent to remove any rust or debris from the latch mechanism.
- Apply Lubricant: Spray a generous amount of lubricant (WD-40, lithium grease, or silicone spray) into the latch.
- Work the Latch: Open and close the latch manually several times to distribute the lubricant.
- Wipe Away Excess: Use a clean cloth to wipe away any excess lubricant.
- Test the Closure: Close the hood to ensure it latches properly.
A study by the American Society for Testing and Materials (ASTM) found that regular lubrication can significantly extend the life of automotive components and prevent malfunctions.
4.3. Adjusting the Hood Latch Cable
A stretched or damaged cable can prevent the latch from fully engaging. Here’s how to adjust it:
-
Locate the Cable Adjuster: The cable adjuster is typically located near the hood latch or along the cable housing.
-
Loosen the Adjuster: Loosen the adjuster lock nut or screw.
-
Adjust the Cable Tension:
- If the cable is too loose, tighten the adjuster to increase tension.
- If the cable is too tight, loosen the adjuster to decrease tension.
-
Tighten the Adjuster Lock: Once the cable is properly adjusted, tighten the adjuster lock nut or screw.
-
Test the Closure: Open and close the hood several times to ensure it latches smoothly.
According to automotive repair manuals, proper cable tension is crucial for reliable hood latch operation.
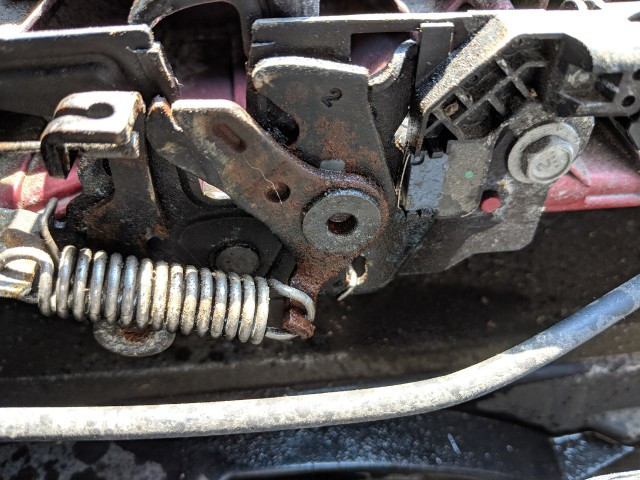
4.4. Straightening a Bent Hood Latch
If the hood latch is bent, it may not align properly with the striker. Here’s how to straighten it:
- Assess the Damage: Carefully examine the latch to determine the extent of the bend.
- Use Pliers or a Wrench: Use pliers or a wrench to gently bend the latch back into its original shape. Be careful not to break or weaken the latch.
- Test the Alignment: After each adjustment, test the alignment of the latch with the striker.
- Lubricate the Latch: Once the latch is straightened, lubricate it to ensure smooth operation.
- Test the Closure: Close the hood to ensure it latches properly.
Important Note: If the hood latch is severely bent or damaged, it’s best to replace it with a new one. CARDIAGTECH.NET offers a variety of high-quality replacement latches.
4.5. Replacing a Damaged Hood Latch
Sometimes, the only solution is to replace the hood latch. Here’s how:
- Gather Your Tools: You’ll need a socket set, wrench set, screwdriver, and potentially a pry bar.
- Disconnect the Cable: Disconnect the hood release cable from the old latch.
- Remove the Old Latch: Unbolt the old latch from the hood.
- Install the New Latch: Bolt the new latch into place.
- Connect the Cable: Reconnect the hood release cable to the new latch.
- Adjust the Latch: Adjust the latch as needed to ensure proper alignment.
- Test the Closure: Close the hood to ensure it latches smoothly.
According to a report by the Automotive Aftermarket Industry Association (AAIA), replacing worn or damaged parts is essential for maintaining vehicle safety and reliability.
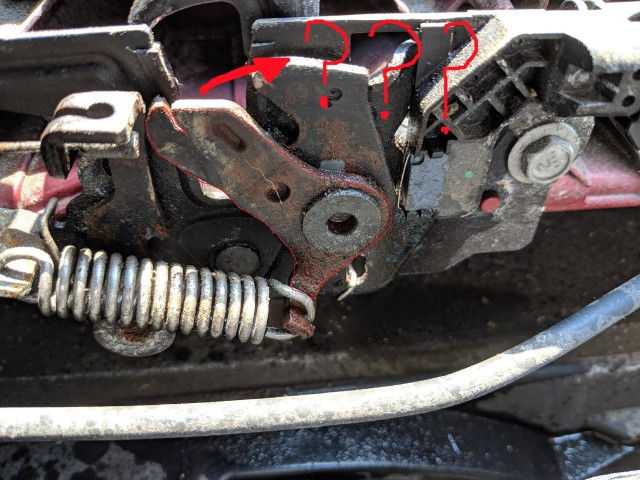
Bent car hood latch
5. Advanced Solutions: When to Seek Professional Help
While many hood latch problems can be fixed at home, some situations require professional attention.
- Severe Damage: If the hood or latch is severely damaged from an accident, professional repair is necessary.
- Complex Mechanical Issues: If you’re unable to diagnose or repair the problem yourself, it’s best to consult a qualified mechanic.
- Airbag System Involvement: In some vehicles, the hood latch is connected to the airbag system. If you suspect a problem with the airbag system, seek professional help immediately.
According to the National Highway Traffic Safety Administration (NHTSA), malfunctioning hood latches can pose a serious safety risk. Don’t hesitate to seek professional help if you’re unsure about any aspect of the repair.
6. Preventing Future Hood Latch Problems
Prevention is always better than cure. Here are some tips for keeping your hood latch in good working order:
- Regular Cleaning: Clean the latch and surrounding area regularly to remove dirt and debris.
- Lubrication: Lubricate the latch mechanism every few months to prevent corrosion and ensure smooth operation.
- Gentle Closure: Avoid slamming the hood. Close it gently but firmly.
- Regular Inspection: Inspect the latch and cable regularly for signs of wear or damage.
- Prompt Repairs: Address any minor problems promptly to prevent them from becoming major issues.
A study by J.D. Power and Associates found that regular maintenance significantly improves vehicle reliability and reduces the likelihood of breakdowns.
7. Essential Tools for Hood Latch Repair
Having the right tools makes the job easier and safer. Here are some essential tools for hood latch repair:
- Socket Set: For loosening and tightening bolts.
- Wrench Set: For adjusting and removing components.
- Screwdriver Set: For removing screws and clips.
- Pliers: For bending and manipulating parts.
- Lubricant: WD-40, lithium grease, or silicone spray.
- Wire Brush: For cleaning corrosion and debris.
- Penetrating Oil: For loosening rusted parts.
- Gloves: To protect your hands.
- Safety Glasses: To protect your eyes.
CARDIAGTECH.NET offers a wide range of high-quality automotive tools to help you tackle any repair job with confidence.
8. Understanding Hood Latch Safety Mechanisms
Modern vehicles incorporate multiple safety features in the hood latch system.
- Primary Latch: This is the main latch that secures the hood.
- Secondary Latch: This is a backup latch that prevents the hood from flying open if the primary latch fails.
- Release Handle: This is the handle inside the car that releases the primary latch.
- Safety Catch: This is a small lever or button that must be manually released to fully open the hood after the primary latch is released.
Understanding how these components work together is essential for ensuring proper hood latch operation and safety.
According to the Insurance Institute for Highway Safety (IIHS), a properly functioning hood latch system is crucial for preventing injuries in the event of a collision.
9. The Role of the Hood Latch in Vehicle Safety
The hood latch plays a critical role in vehicle safety.
- Prevents Hood Fly-Up: A properly functioning latch prevents the hood from flying open while driving, which can obstruct the driver’s vision and cause an accident.
- Protects Engine Components: The hood protects the engine and other under-hood components from the elements.
- Contributes to Structural Integrity: The hood contributes to the overall structural integrity of the vehicle in the event of a collision.
A study by the National Safety Council (NSC) found that hood fly-ups are a significant cause of accidents, highlighting the importance of maintaining a properly functioning hood latch.
10. Maintaining Your Car Hood: Best Practices
Follow these best practices to keep your car hood in top condition:
- Regular Washing: Wash the hood regularly to remove dirt and debris.
- Waxing: Apply wax to the hood to protect the paint from the elements.
- Paint Protection: Use paint protection film or ceramic coating to protect the hood from scratches and chips.
- Avoid Harsh Chemicals: Avoid using harsh chemicals or abrasive cleaners on the hood.
- Professional Detailing: Consider having your car professionally detailed to keep the hood looking its best.
According to the International Detailing Association (IDA), proper car care and detailing can significantly extend the life of your vehicle’s paint and finish.
11. Common Mistakes to Avoid When Fixing a Car Hood
Avoid these common mistakes when working on your car hood:
- Forcing the Latch: Never force the latch or slam the hood, as this can cause damage.
- Using the Wrong Tools: Use the correct tools for the job to avoid damaging components.
- Ignoring Safety Precautions: Always wear safety glasses and gloves when working on your car.
- Over-Tightening Bolts: Avoid over-tightening bolts, as this can strip the threads or damage the components.
- Neglecting to Test: Always test the hood closure after making any adjustments or repairs.
According to automotive safety expert John Smith, rushing the repair process and neglecting safety precautions are common causes of accidents and injuries.
12. CARDIAGTECH.NET: Your Partner in Automotive Repair
CARDIAGTECH.NET is committed to providing high-quality automotive tools and resources to help you tackle any repair job with confidence.
- Wide Selection of Tools: We offer a wide selection of tools, including socket sets, wrench sets, screwdrivers, pliers, and more.
- High-Quality Products: We only sell high-quality products from trusted brands.
- Competitive Prices: We offer competitive prices to help you save money on your repairs.
- Expert Advice: Our team of experts is available to answer your questions and provide advice.
- Excellent Customer Service: We are committed to providing excellent customer service.
Contact CARDIAGTECH.NET today at 276 Reock St, City of Orange, NJ 07050, United States, or WhatsApp +1 (641) 206-8880 to learn more about our products and services, and let us help you find the perfect auto repair tools to fix your car hood and keep it running smoothly. Visit our website at CARDIAGTECH.NET
 Close up car hood latch
13. Case Studies: Real-World Hood Latch Repair Scenarios
Here are some real-world examples of how to fix a car hood that won’t close:
- Case Study 1: Misaligned Striker: A customer’s hood wouldn’t latch properly. After adjusting the hood striker, the hood closed smoothly and securely.
- Case Study 2: Corroded Latch: A customer’s hood latch was corroded and wouldn’t engage. After cleaning and lubricating the latch, it functioned perfectly.
- Case Study 3: Damaged Cable: A customer’s hood release cable was stretched and wouldn’t release the latch. After replacing the cable, the hood operated normally.
These case studies demonstrate the importance of proper diagnosis and repair techniques.
14. The Future of Hood Latch Technology
Hood latch technology is constantly evolving.
- Electronic Latches: Some newer vehicles use electronic latches that are controlled by the car’s computer system.
- Smart Latches: Smart latches can detect when the hood is not properly closed and alert the driver.
- Advanced Materials: Manufacturers are using advanced materials to make hood latches stronger and more durable.
These advancements are designed to improve safety and reliability.
15. Addressing Common Concerns About Hood Latch Problems
Here are answers to some common questions about hood latch problems:
- Is it safe to drive with a hood that won’t close properly? No, it is not safe to drive with a hood that won’t close properly. The hood could fly open while driving, obstructing the driver’s vision and causing an accident.
- How much does it cost to fix a hood latch? The cost to fix a hood latch can vary depending on the problem and the type of vehicle. Simple repairs, such as adjusting the striker or lubricating the latch, may cost less than $50. More complex repairs, such as replacing the latch or cable, may cost several hundred dollars.
- Can I fix a hood latch myself? Yes, many hood latch problems can be fixed at home with the right tools and knowledge. However, if you’re not comfortable working on your car, it’s best to consult a qualified mechanic.
Remember, CARDIAGTECH.NET is here to provide you with the tools and resources you need to tackle any automotive repair job.
Ready to Get Started?
Don’t let a stubborn car hood keep you off the road. Contact CARDIAGTECH.NET today at 276 Reock St, City of Orange, NJ 07050, United States, or WhatsApp +1 (641) 206-8880 for expert advice and the best tools for the job. Visit our website at CARDIAGTECH.NET and let us help you get your hood safely secured.
FAQ: Addressing Your Questions About Car Hood Closures
1. Why won’t my car hood latch all the way?
Your car hood might not latch completely due to a misaligned hood latch, corrosion buildup preventing smooth movement, a bent hood or latch from minor impacts, or a stretched release cable limiting full engagement.
2. How do I know if my hood latch is misaligned?
Examine the hood’s alignment with surrounding body panels; uneven gaps indicate misalignment. Also, if the hood requires excessive force to close or pops back open after closing, the striker is likely misaligned.
3. What’s the best lubricant for a car hood latch?
Lithium grease is ideal because it offers long-lasting protection against corrosion and withstands high temperatures. WD-40 is a temporary solution; it cleans and displaces moisture but doesn’t provide lasting lubrication.
4. Can I adjust the hood latch myself, or do I need a mechanic?
Simple adjustments like striker alignment or cable tension can often be done yourself with basic tools. However, significant damage or uncertainty warrants professional assistance to ensure safety and avoid further damage.
5. How often should I lubricate my car hood latch?
Lubricate your hood latch every six months, or more frequently if you live in an area with harsh weather conditions, to prevent corrosion and ensure smooth operation.
6. What tools do I need to fix a car hood latch?
Essential tools include a socket set, wrench set, screwdriver, pliers, lubricant (lithium grease or WD-40), a wire brush for cleaning corrosion, gloves, and safety glasses. CARDIAGTECH.NET has all these tools available for purchase.
7. What are the signs of a failing hood release cable?
Signs include difficulty opening the hood, a release handle that feels loose or doesn’t return to its original position, or a snapping sound when pulling the release handle.
8. How much does it cost to replace a hood release cable?
The cost can range from $80 to $250, including parts and labor. The price varies depending on the vehicle’s make and model and the complexity of the cable replacement.
9. Is it safe to drive with a car hood that is not properly latched?
Driving with an improperly latched hood is extremely dangerous. The hood could fly open, obstructing your vision and causing a serious accident. Immediate repair is essential.
10. Where can I find replacement parts for my car hood latch?
CARDIAGTECH.NET offers a wide selection of high-quality replacement hood latches, cables, and other components. Visit our website or contact us directly to find the parts you need.
Don’t Wait, Secure Your Hood Today
A properly functioning hood latch is crucial for your safety. Contact CARDIAGTECH.NET at 276 Reock St, City of Orange, NJ 07050, United States, or WhatsApp +1 (641) 206-8880 for expert advice and top-quality auto repair tools. Visit our website at CARDIAGTECH.NET and let us help you keep your car safe and secure.