How to Fix a Car Bumper Falling Off: Expert Guide
Fixing a car bumper that’s falling off involves identifying the root cause, such as damaged brackets or retainers, and implementing the appropriate repair or replacement. CARDIAGTECH.NET provides solutions. This article will help you understand how to address a loose bumper, including checking for damage and exploring options for repair or replacement, offering guidance for ensuring your vehicle’s bumper remains securely attached and aesthetically pleasing, alongside vital information on bumper repair costs, materials and tools.
1. Identifying the Reasons Why Your Car Bumper is Falling Off
Why is my car bumper falling off? Several factors can cause a car bumper to detach or hang loose. According to a study by the Highway Loss Data Institute (HLDI), minor impacts account for a significant percentage of bumper damage. Identifying the specific cause is the first step in addressing the problem effectively. The most common reasons include:
- Minor Collisions: Even a slight fender bender can weaken the bumper’s attachments, leading to it gradually detaching over time.
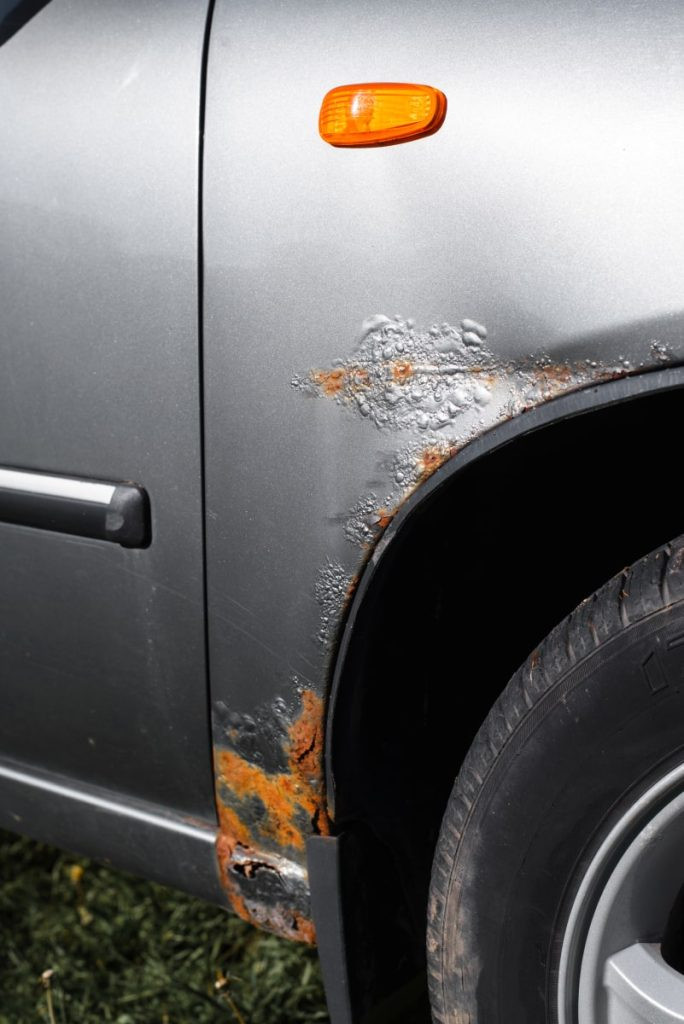
- Corrosion: Rust and corrosion can compromise the integrity of the bumper brackets and fasteners, particularly in regions with harsh weather conditions.
- Worn or Broken Retainers: The plastic clips and retainers that hold the bumper in place can become brittle and break due to age and environmental factors.
- Damage to Bumper Brackets: The brackets that secure the bumper to the vehicle’s frame can crack or bend upon impact, causing the bumper to sag or detach.
- Improper Installation: If the bumper was previously removed and not reinstalled correctly, it may not be securely fastened, leading to it falling off.
- Environmental Factors: Exposure to extreme temperatures and UV radiation can degrade the bumper material and its attachments, accelerating wear and tear.
Understanding these common causes will help you diagnose the issue accurately and determine the appropriate course of action. Regular inspections and prompt repairs can prevent minor issues from escalating into more significant problems.
2. Performing a Preliminary Inspection of Your Loose Car Bumper
How do I perform a preliminary inspection of my loose car bumper? Before attempting any repairs, conduct a thorough inspection to assess the extent of the damage. This will help you determine whether a simple fix is possible or if professional assistance is required.
- Visual Examination: Start by visually inspecting the entire bumper, looking for any obvious signs of damage such as cracks, dents, or missing pieces.
- Check the Attachment Points: Examine the areas where the bumper attaches to the vehicle’s body. Look for broken clips, damaged brackets, or loose screws.
- Assess the Alignment: Check if the bumper is properly aligned with the rest of the vehicle’s body. Gaps or unevenness can indicate underlying issues.
- Inspect the Retainers: Pay close attention to the plastic retainers that hold the bumper in place. Ensure they are not broken or worn out.
- Look for Corrosion: Check for any signs of rust or corrosion on the bumper brackets and fasteners. Use a flashlight to inspect hard-to-reach areas.
- Feel for Looseness: Gently try to wiggle the bumper to check for any excessive movement or play. This can indicate loose or damaged attachments.
By performing a detailed preliminary inspection, you can accurately identify the problem areas and plan your repair strategy accordingly. Remember, early detection and timely intervention can prevent further damage and save you money in the long run. CARDIAGTECH.NET has all the tools you need to assess your car bumper and start the repair process!
3. Gathering the Necessary Tools and Materials for Your Bumper Repair
What tools and materials do I need for my bumper repair? Having the right tools and materials on hand is essential for a successful bumper repair. Depending on the extent of the damage, you may need a variety of items to complete the job effectively.
| Tool/Material | Description | Purpose |
|---|---|---|
| Socket Set | A set of sockets and wrenches in various sizes. | To remove and tighten bolts and nuts. |
| Screwdrivers | Both Phillips head and flat head screwdrivers. | To remove and tighten screws. |
| Pliers | Standard and needle-nose pliers. | To grip and manipulate small parts. |
| Trim Removal Tool Set | Plastic tools designed to remove trim pieces without causing damage. | To remove bumper covers and other plastic components. |
| Ratchet and Extension | A ratchet handle with various extensions. | To reach bolts and nuts in tight spaces. |
| New Bumper Brackets/Clips | Replacement brackets and clips that match your vehicle’s make and model. | To replace damaged or broken attachment hardware. |
| Body Filler/Bondo | A paste used to fill in dents and imperfections on the bumper surface. | To repair minor damage and restore the bumper’s original shape. |
| Sandpaper | Various grits of sandpaper (e.g., 120, 220, 400). | To smooth out body filler and prepare the surface for painting. |
| Primer | A base coat that helps paint adhere to the bumper surface. | To ensure proper paint adhesion and a smooth finish. |
| Automotive Paint | Paint that matches your vehicle’s color code. | To restore the bumper’s original color and appearance. |
| Clear Coat | A protective layer that adds gloss and durability to the paint. | To protect the paint from scratches and UV damage. |
| Masking Tape and Paper | Tape and paper used to protect surrounding areas from overspray. | To ensure clean and precise painting. |
| Safety Glasses | Protective eyewear to shield your eyes from debris and chemicals. | To protect your eyes during the repair process. |
| Gloves | Chemical-resistant gloves to protect your hands. | To protect your hands from chemicals and sharp objects. |
| Heat Gun | A tool that emits hot air to help reshape plastic bumpers. | To repair dents and deformities in plastic bumpers. |
| Cleaning Supplies | Automotive cleaner and degreaser. | To clean the bumper surface before and after repairs. |
| Drill with Drill Bits | A drill with various drill bits. | To create holes for new fasteners or to remove damaged ones. |
| Jack and Jack Stands | To safely lift and support the vehicle. | To access the underside of the bumper for repairs. |
| Torque Wrench | A wrench that measures the amount of torque applied to a fastener. | To ensure fasteners are tightened to the manufacturer’s specifications. |
| Multimeter | An electronic measuring instrument used to test voltage, current, and resistance. | To diagnose electrical issues related to bumper sensors or lights. |
| Welding Equipment | A welder and associated safety gear. | To repair metal bumper brackets or other metal components. |
| Touch-Up Paint | Small bottle of paint matching your car’s color. | For covering minor scratches and chips after the main repair. |
| Plastic Welding Kit | A specialized kit for welding plastic components. | To repair cracks and breaks in plastic bumpers. |
| Rivet Gun | A tool used to install rivets. | For securing bumper components that use rivets. |
| Panel Beating Hammer | A hammer designed for shaping metal panels. | For gently reshaping metal bumpers or brackets. |
| Pry Bar | A tool used for prying and levering. | For removing stubborn clips and fasteners. |
| Headlamp | A light source that can be worn on the head, providing hands-free illumination. | For better visibility when working in dark or confined spaces. |
| Magnetic Parts Tray | A tray with a magnetic base to hold small metal parts. | Prevents screws, nuts, and bolts from getting lost during the repair process. |
| Wheel Chocks | Wedges placed in front of or behind the wheels to prevent the vehicle from rolling. | Enhances safety by ensuring the vehicle remains stationary while you work on it. |
| First Aid Kit | A collection of supplies for treating minor injuries. | Ensures immediate care for cuts, scrapes, or other minor injuries that may occur during the repair. |
By assembling these tools and materials beforehand, you can streamline the repair process and ensure a professional-quality result. CARDIAGTECH.NET is your one-stop shop for all your auto repair needs.
4. Step-by-Step Guide to Fixing a Loose Car Bumper
How do I fix a loose car bumper? Fixing a loose car bumper can be a straightforward process if you follow these step-by-step instructions. Always prioritize safety and take your time to ensure each step is completed correctly.
Step 1: Preparing the Vehicle
- Park your car on a level surface and engage the parking brake.
- Use wheel chocks to secure the wheels and prevent any movement.
- If necessary, use a jack and jack stands to lift the vehicle, providing better access to the underside of the bumper.
Step 2: Removing the Bumper (If Necessary)
- Locate and remove all screws, bolts, and clips that secure the bumper to the vehicle’s body.
- Use a trim removal tool to gently pry off any plastic retainers or clips.
- Carefully detach the bumper from the vehicle, noting the location of any wiring harnesses or sensors.
Step 3: Inspecting the Bumper Brackets and Retainers
- Examine the bumper brackets for any signs of damage, such as cracks, bends, or corrosion.
- Check the plastic retainers for wear, breakage, or missing pieces.
- Replace any damaged or worn components with new ones.
Step 4: Repairing Minor Damage
- If the bumper has minor dents or scratches, use body filler (Bondo) to fill in the imperfections.
- Sand the filler smooth using progressively finer grits of sandpaper.
- Apply primer to the repaired area and let it dry completely.
Step 5: Reattaching the Bumper
- Align the bumper with the vehicle’s body and carefully reattach any wiring harnesses or sensors.
- Reinstall all screws, bolts, and clips, ensuring they are tightened to the manufacturer’s specifications.
- Use a torque wrench to avoid overtightening, which can damage the plastic components.
Step 6: Painting and Finishing (If Necessary)
- Mask off any areas that you don’t want to paint using masking tape and paper.
- Apply several thin coats of automotive paint, allowing each coat to dry completely before applying the next.
- Apply a clear coat to protect the paint and add a glossy finish.
- Remove the masking tape and paper and allow the paint to cure completely.
Step 7: Final Inspection
- Inspect the repaired bumper to ensure it is securely attached and properly aligned.
- Check for any gaps or unevenness and make any necessary adjustments.
- Test any sensors or lights to ensure they are functioning correctly.
By following these steps carefully, you can successfully fix a loose car bumper and restore your vehicle’s appearance and safety. If you encounter any difficulties or are unsure about any of the steps, consult a professional mechanic for assistance. With the right tools from CARDIAGTECH.NET, you’ll have your car looking great in no time!
5. Dealing with Damaged Bumper Brackets and Retainers on Your Car
How do I deal with damaged bumper brackets and retainers? Damaged bumper brackets and retainers are a common cause of loose or falling bumpers. Addressing these issues promptly is crucial for maintaining the structural integrity and appearance of your vehicle.
- Assessing the Damage: Carefully inspect the brackets and retainers for any signs of cracks, bends, or corrosion. Use a flashlight to examine hard-to-reach areas.
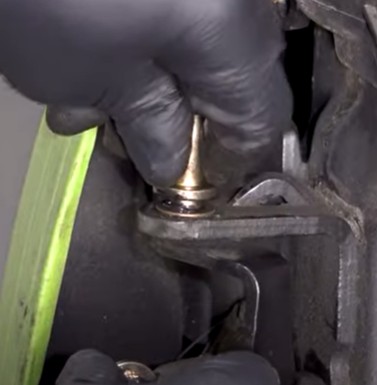
- Removing Damaged Components: Use a socket set or screwdriver to remove any screws or bolts that secure the damaged brackets or retainers. Use a trim removal tool to gently pry off any plastic retainers or clips.
- Replacing Damaged Brackets: Purchase new bumper brackets that match your vehicle’s make and model. Install the new brackets, ensuring they are properly aligned and securely fastened.
- Replacing Damaged Retainers: Replace any broken or worn plastic retainers with new ones. Ensure the retainers are the correct type and size for your vehicle.
- Reinforcing Weakened Areas: If the brackets or retainers are only slightly damaged, you may be able to reinforce them using epoxy or other adhesive materials. However, this is only a temporary solution and replacement is recommended.
- Using Aftermarket Solutions: Consider using aftermarket bumper reinforcement kits, which provide additional support and stability for the bumper. These kits are particularly useful for vehicles that are prone to bumper damage.
| Component | Action | Tools/Materials Required |
|---|---|---|
| Bumper Brackets | Remove damaged brackets, replace with new ones. | Socket set, screwdriver, new bumper brackets. |
| Plastic Retainers | Remove broken retainers, replace with new ones. | Trim removal tool, new plastic retainers. |
| Fasteners | Replace corroded or stripped screws/bolts. | Screwdriver, socket set, new screws/bolts. |
| Reinforcement Kits | Install aftermarket reinforcement kits for added support. | Socket set, drill, reinforcement kit. |
| Epoxy/Adhesives | Use epoxy to reinforce minor cracks (temporary solution). | Epoxy, mixing tools, sandpaper. |
| Corrosion Treatment | Apply rust inhibitor to prevent further corrosion. | Wire brush, rust inhibitor spray. |
| Protective Coating | Apply protective coating to new brackets and retainers. | Protective coating spray. |
| Torque Wrench | Ensure fasteners are tightened to specifications. | Torque wrench. |
| Safety Glasses | Wear safety glasses to protect eyes from debris. | Safety glasses. |
| Gloves | Wear gloves to protect hands. | Gloves. |
| Cleaning Supplies | Clean area before and after repair. | Automotive cleaner, degreaser. |
| Heat Gun | Use heat gun to help reshape plastic components if necessary. | Heat gun. |
By addressing damaged bumper brackets and retainers promptly, you can prevent further damage and ensure your bumper remains securely attached. Regular inspections and timely replacements will help maintain your vehicle’s safety and appearance.
6. Techniques for Repairing Cracks and Dents in Your Car Bumper
What are the techniques for repairing cracks and dents in my car bumper? Cracks and dents are common types of bumper damage that can detract from your vehicle’s appearance. Fortunately, there are several techniques you can use to repair these imperfections and restore your bumper to its original condition.
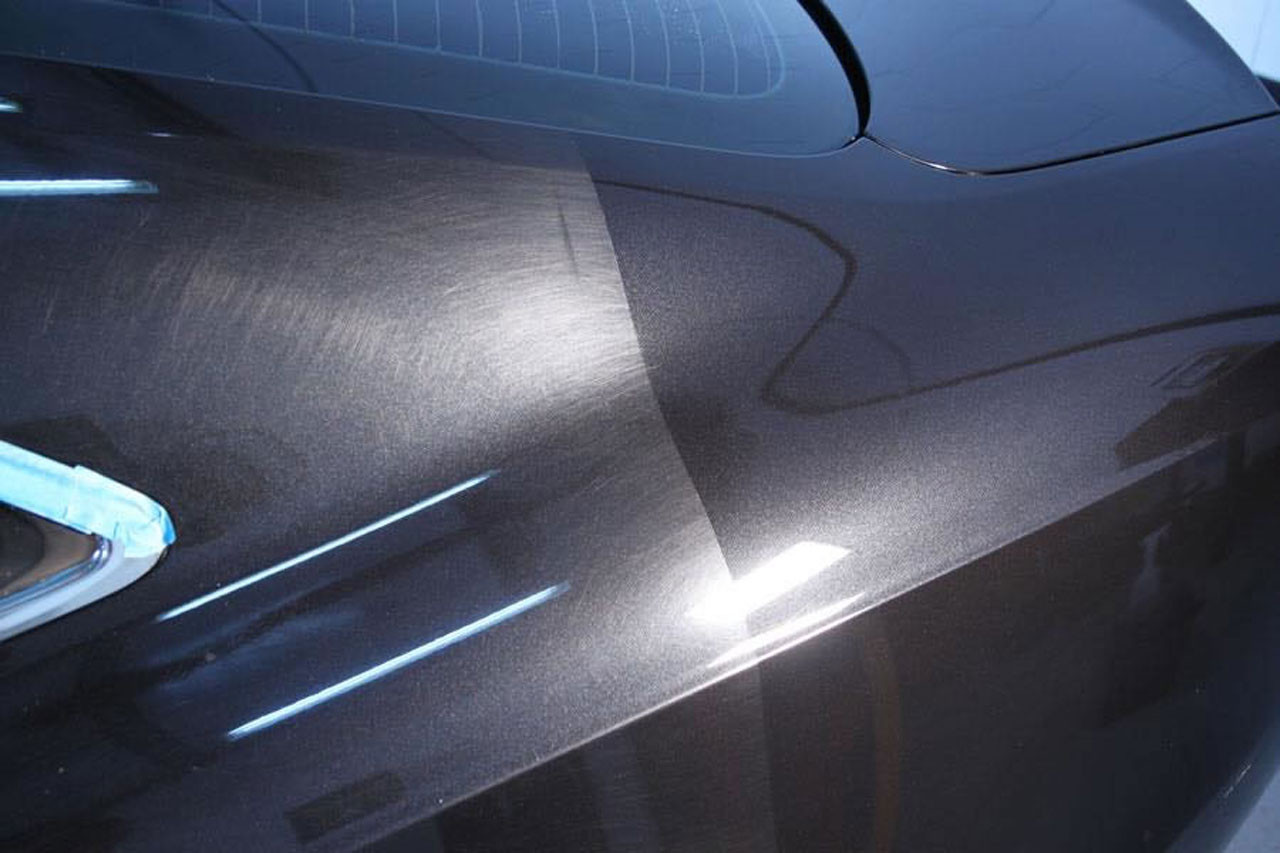
- Using Body Filler (Bondo): For minor dents and cracks, body filler is an effective solution. Clean the damaged area, apply the filler in thin layers, sand it smooth, and then prime and paint.
- Heat Gun Method: For plastic bumpers, a heat gun can be used to reshape the plastic. Heat the dented area evenly and gently push it back into its original shape. Be careful not to overheat the plastic, as this can cause it to melt or warp.
- Plastic Welding: For larger cracks or splits in plastic bumpers, plastic welding is a more durable repair method. Use a plastic welding kit to melt and fuse the plastic together, creating a strong bond.
- Bumper Pullers: For larger dents, a bumper puller can be used to pull the dent out from the outside. Attach the puller to the bumper and gradually pull the dent out, being careful not to damage the surrounding area.
- Filling with Two-Part Epoxy: For small cracks, two-part epoxy can be used to fill the gap. Clean the area, apply the epoxy, and let it cure completely before sanding and painting.
| Repair Technique | Damage Type | Materials/Tools Required | Procedure |
|---|---|---|---|
| Body Filler | Minor dents, cracks | Body filler (Bondo), sandpaper (various grits), primer, automotive paint, masking tape. | Clean the area, apply filler in thin layers, sand smooth, prime, and paint. |
| Heat Gun | Plastic dents | Heat gun, gloves, soft cloth. | Heat the area evenly, gently push the dent out from the inside, and cool with a damp cloth. |
| Plastic Welding | Larger cracks, splits | Plastic welding kit, safety glasses, gloves. | Clean the area, melt and fuse the plastic together, allow to cool, and sand smooth. |
| Bumper Puller | Larger dents | Bumper puller, gloves. | Attach the puller to the bumper, gradually pull the dent out, and check alignment. |
| Two-Part Epoxy | Small cracks | Two-part epoxy, mixing tools, sandpaper. | Clean the area, mix the epoxy, apply to the crack, let cure completely, and sand smooth. |
| Sanding | Imperfections | Sandpaper (various grits), sanding block. | Sand the repaired area to smooth imperfections, starting with coarser grit and finishing with finer grit. |
| Priming | Preparation for paint | Automotive primer, masking tape. | Apply primer to the repaired area to prepare for painting. Allow to dry completely. |
| Painting | Finish and color | Automotive paint (matching color code), clear coat, masking tape. | Apply several thin coats of automotive paint, allowing each coat to dry before applying the next. Finish with a clear coat for protection and shine. |
| Cleaning | Preparation and after | Automotive cleaner, degreaser. | Clean the bumper surface before and after the repair to remove dirt, grease, and residue. |
| Masking | Protecting areas | Masking tape, masking paper. | Mask off surrounding areas to protect them from overspray during painting. |
| Safety Gear | Protection | Safety glasses, gloves. | Wear safety glasses and gloves to protect yourself during the repair process. |
| Lighting | Visibility | Work light. | Use a work light to improve visibility while working on the bumper. |
By using these techniques and taking your time, you can effectively repair cracks and dents in your car bumper and restore its appearance. If you’re not comfortable performing these repairs yourself, consider seeking professional assistance. CARDIAGTECH.NET is here to give you all the expert advise you need. Just reach out to us!
7. Preventing Future Bumper Damage to Your Car
How do I prevent future bumper damage to my car? Preventing future bumper damage involves taking proactive measures to protect your vehicle from potential hazards. By implementing these strategies, you can minimize the risk of costly repairs and maintain your car’s appearance.
- Practice Safe Driving Habits: Avoid tailgating, maintain a safe following distance, and be aware of your surroundings to reduce the risk of collisions.
- Use Parking Sensors and Cameras: If your vehicle is equipped with parking sensors and cameras, use them to help you navigate tight spaces and avoid bumping into obstacles.
- Install a Bumper Protector: Consider installing a bumper protector, which is a strip of rubber or plastic that attaches to the bumper and provides a layer of protection against minor impacts.
- Park Carefully: When parking, choose spaces that offer ample room to maneuver and avoid parking too close to other vehicles or objects.
- Be Mindful of Road Hazards: Watch out for potholes, debris, and other road hazards that can damage your bumper.
- Regular Inspections: Conduct regular inspections of your bumper to identify any signs of damage or wear. Address any issues promptly to prevent them from escalating.
| Strategy | Description | Benefits |
|---|---|---|
| Safe Driving Habits | Avoid tailgating, maintain safe following distance, be aware of surroundings. | Reduces the risk of collisions and bumper damage. |
| Parking Sensors/Cameras | Use sensors and cameras to navigate tight spaces and avoid obstacles. | Helps prevent minor impacts and scratches while parking. |
| Bumper Protector | Install a rubber or plastic strip on the bumper for added protection. | Provides a layer of defense against minor impacts, reducing the likelihood of dents and scratches. |
| Careful Parking | Choose parking spaces with ample room, avoid parking too close to other vehicles. | Minimizes the risk of bumping into other cars or objects while parking. |
| Road Hazard Awareness | Watch out for potholes, debris, and other road hazards. | Helps avoid damage from road debris and uneven surfaces. |
| Regular Inspections | Conduct regular inspections of the bumper for signs of damage or wear. | Allows for early detection of issues, preventing them from escalating into more significant problems. |
| Avoid Extreme Temperatures | Park in shaded areas or garages to protect the bumper from extreme temperatures. | Prevents the bumper material from becoming brittle or warped due to heat or cold. |
| Use Car Covers | Cover your car when parked for extended periods to protect it from the elements. | Shields the bumper from UV rays, rain, and other environmental factors that can cause damage. |
| Install Parking Assist Systems | Add aftermarket parking assist systems with sensors and cameras if your car doesn’t have them. | Enhances parking accuracy and reduces the risk of collisions. |
| Be Careful in Car Washes | Use touchless car washes or be cautious in traditional car washes to avoid scratches and damage. | Prevents damage from harsh brushes and equipment in car washes. |
| Consider Paint Protection Film | Apply paint protection film (PPF) to the bumper for an extra layer of defense against scratches and chips. | Provides a transparent, self-healing layer that protects the bumper’s paint from damage. |
| Educate Other Drivers | If you share the car, educate other drivers about safe driving and parking practices. | Ensures that everyone who uses the car is aware of the importance of preventing bumper damage. |
| Avoid Narrow Driveways | Be cautious when entering and exiting narrow driveways to avoid scraping the bumper. | Prevents scratches and damage from contact with curbs and walls. |
| Secure Loose Items | Ensure that items in your trunk or cargo area are properly secured to prevent them from shifting and causing damage. | Prevents items from hitting the bumper from the inside during sudden stops or turns. |
| Monitor Weather Conditions | Be extra cautious during adverse weather conditions like snow, ice, and heavy rain. | Reduces the risk of accidents and damage caused by slippery roads and reduced visibility. |
| Repair Chips and Scratches | Address small chips and scratches promptly to prevent them from spreading and causing further damage. | Maintains the bumper’s appearance and prevents corrosion. |
By implementing these preventive measures, you can significantly reduce the risk of bumper damage and keep your car looking its best. Regular maintenance and proactive care will help protect your investment and ensure your vehicle remains in excellent condition.
8. Understanding Bumper Repair Costs and Insurance Claims for Your Car
What are the typical bumper repair costs and what about insurance claims? Understanding bumper repair costs and insurance claims can help you make informed decisions when dealing with bumper damage. The cost of repairing a bumper can vary widely depending on the extent of the damage, the type of vehicle, and the repair method used.
- Minor Repairs: Minor scratches, dents, or cracks can often be repaired for a few hundred dollars. These repairs typically involve filling, sanding, and painting the affected area.
- Bumper Replacement: If the bumper is severely damaged, it may need to be replaced. The cost of a new bumper can range from several hundred to several thousand dollars, depending on the vehicle’s make and model.
- Labor Costs: Labor costs can also vary depending on the repair shop and the complexity of the job. Expect to pay anywhere from $50 to $150 per hour for labor.
- Insurance Claims: If the bumper damage was caused by an accident, you may be able to file an insurance claim to cover the repair costs. However, keep in mind that filing a claim may increase your insurance premiums.
| Repair Type | Average Cost Range | Factors Influencing Cost |
|---|---|---|
| Minor Scratch Repair | $100 – $400 | Size and depth of scratch, type of paint, labor costs. |
| Small Dent Repair | $200 – $600 | Size and location of dent, type of bumper (plastic or metal), labor costs. |
| Crack Repair | $300 – $800 | Size and severity of crack, repair method (plastic welding or filler), labor costs. |
| Bumper Replacement | $500 – $2000+ | Type of vehicle, material of bumper, complexity of installation, labor costs. |
| Painting | $200 – $700 | Size of area being painted, type of paint, number of coats, labor costs. |
| Sensor Calibration | $100 – $300 | Type of sensors, complexity of calibration, labor costs. |
| Insurance Deductible | Varies | Your policy’s deductible amount. |
| Rental Car | $30 – $100 per day | Rental car rates, duration of repair. |
| Diminished Value Claim | Varies | The difference in the car’s value before and after the accident, state laws, insurance policy. |
When considering whether to file an insurance claim, weigh the cost of the repair against your deductible and the potential impact on your insurance premiums. It may be more cost-effective to pay for minor repairs out of pocket, while filing a claim for more extensive damage.
9. Knowing When to Seek Professional Help for Your Car Bumper
When should I seek professional help for my car bumper? While many bumper repairs can be done at home, there are situations where seeking professional help is the best course of action. Knowing when to consult a professional can save you time, money, and potential frustration.
- Extensive Damage: If the bumper has significant cracks, dents, or structural damage, it’s best to seek professional assistance. Attempting to repair extensive damage yourself may compromise the bumper’s integrity and safety.
- Sensor and Technology Issues: Modern bumpers often contain sensors and other technology, such as parking sensors and cameras. If these components are damaged, it’s essential to have them repaired by a qualified technician who understands the vehicle’s systems.
- Lack of Experience: If you’re not comfortable working on cars or lack the necessary tools and equipment, it’s best to leave the repair to a professional. Improper repairs can lead to further damage and safety issues.
- Insurance Requirements: If you’re filing an insurance claim for the bumper damage, your insurance company may require you to have the repairs done by a certified repair shop.
- Warranty Concerns: If your vehicle is still under warranty, having the bumper repaired by an unauthorized repair shop may void your warranty.
| Situation | Recommendation |
|---|---|
| Extensive Structural Damage | Seek professional help; attempting to repair extensive damage yourself may compromise safety. |
| Sensor or Technology Issues | Consult a qualified technician to ensure proper repair and calibration of sensors and technology. |
| Lack of Experience or Tools | Hire a professional; improper repairs can lead to further damage and safety issues. |
| Insurance Claim Requirements | Use a certified repair shop to comply with insurance requirements. |
| Warranty Concerns | Ensure repairs are done by an authorized shop to avoid voiding the warranty. |
| Complex Repairs | Consult a professional for complex repairs, such as frame straightening or advanced painting techniques. |
| Safety Concerns | Seek professional help if you have any safety concerns or are unsure about the repair process. |
| High-Value or Luxury Vehicles | Hire a specialized repair shop experienced with high-value or luxury vehicles. |
| Advanced Materials | Consult a professional for bumpers made of advanced materials, such as carbon fiber or specialized plastics. |
| Difficulty Matching Paint Colors | Seek professional assistance for accurate paint color matching, especially with metallic or complex finishes. |
| Desire for Flawless Finish | Hire a professional for a flawless finish and seamless repair. |
| Time Constraints | Use a professional repair service for quick and efficient repairs. |
| Desire for Guarantee or Warranty on Repairs | Seek professional services that offer a guarantee or warranty on their repairs. |
| Specialized Equipment Needed | Hire a professional if the repair requires specialized equipment, such as plastic welders or advanced diagnostic tools. |
| Concerns About Vehicle Value | Consult a professional to ensure the repairs are done correctly to maintain the vehicle’s value. |
| Legal or Liability Concerns | Seek professional assistance if the damage involves legal or liability concerns, such as accidents with other vehicles. |
By carefully assessing the situation and considering your own skills and resources, you can determine whether to tackle the bumper repair yourself or seek professional help. When in doubt, it’s always best to err on the side of caution and consult a qualified technician.
10. Bumper Materials and Their Impact on Repair Methods
How do bumper materials impact the repair methods? The material composition of your car’s bumper significantly influences the appropriate repair methods. Modern bumpers are typically made from various types of plastic, fiberglass, or metal, each requiring specific techniques for effective repair.
- Plastic Bumpers: Plastic bumpers are common due to their flexibility and impact resistance. Repairs often involve plastic welding, heat reshaping, or the use of body fillers designed for plastic.
- Fiberglass Bumpers: Fiberglass bumpers are lightweight but can crack or shatter upon impact. Repairs typically involve fiberglass repair kits, which include resin and fiberglass cloth.
- Metal Bumpers: Metal bumpers, often found on older vehicles, are durable but can rust and dent. Repairs may involve metalworking techniques such as hammering, welding, and the application of metal fillers.
| Material | Common Repair Methods | Considerations |
|---|---|---|
| Plastic | Plastic welding, heat reshaping, body fillers for plastic, sanding, priming, and painting. | Requires specialized plastic welding equipment and fillers designed for plastic; avoid overheating during heat reshaping; proper surface preparation is essential for paint adhesion. |
| Fiberglass | Fiberglass repair kits (resin and fiberglass cloth), sanding, priming, and painting. | Requires mixing resin and hardener in correct proportions; proper layering of fiberglass cloth is crucial for strength; avoid breathing fiberglass dust; use appropriate safety gear. |
| Metal | Metalworking techniques (hammering, welding), metal fillers, sanding, priming, and painting. | Requires metalworking tools and skills; welding may be necessary for structural repairs; rust removal and prevention are important; use appropriate safety gear. |
| Carbon Fiber | Specialized carbon fiber repair kits, epoxy resins, vacuum bagging techniques, sanding, and clear coating. | Requires specialized knowledge and equipment; precise layering and curing of carbon fiber are essential for strength; avoid breathing carbon fiber dust; use appropriate safety gear. |
| Thermoplastic Olefin (TPO) | Heat gun for minor dents, specialized TPO repair kits, plastic welding, and flexible fillers. | Requires careful heating to avoid melting the material; use flexible fillers to accommodate the bumper’s flexibility; proper surface preparation is essential for paint adhesion. |
| Polypropylene (PP) | Plastic welding, specialized PP repair kits, and flexible fillers. | Requires specific plastic welding techniques for polypropylene; use flexible fillers to accommodate the bumper’s flexibility; proper surface preparation is essential for paint adhesion. |
| Aluminum | Aluminum welding, specialized aluminum fillers, and metalworking techniques. | Requires specialized aluminum welding equipment and skills; avoid contaminating the aluminum with other metals; use appropriate safety gear. |
Choosing the appropriate repair method based on the bumper material is essential for achieving a durable and aesthetically pleasing result. If you’re unsure about the material of your bumper or the best repair method, consult a professional for guidance.
Contact CARDIAGTECH.NET at Address: 276 Reock St, City of Orange, NJ 07050, United States. Whatsapp: +1 (641) 206-8880. Website: CARDIAGTECH.NET to consult about specialized tools that will help you fix your car bumper now!
FAQ: Addressing Common Concerns About Car Bumpers
1. How much does it cost to fix a car bumper that’s falling off?
The cost to fix a car bumper falling off varies widely, from $100 for minor repairs to over $2,000 for full replacements, depending on the damage and vehicle type.
2. Can I fix a loose car bumper myself?
Yes, you can often fix a loose car bumper yourself with the right tools and materials, especially if the damage is minor. CARDIAGTECH.NET can provide the right tools.
3. What tools do I need to fix a car bumper?
Essential tools include a socket set, screwdrivers, trim removal tools, and possibly a heat gun or plastic welding kit, available at CARDIAGTECH.NET.
4. How do I know if my car bumper needs to be replaced?
If the bumper has extensive cracks, structural damage, or affects sensor functionality, replacement is typically necessary.
5. What are the common causes of car bumpers falling off?
Common causes include minor collisions, corrosion, worn retainers, damaged brackets, and improper installation.
6. How can I prevent future bumper damage?
Practice safe driving, use parking sensors, install bumper protectors, and be mindful of road hazards to prevent future damage.
7. Will my insurance cover bumper repairs?
Insurance coverage depends on your policy and the cause of the damage; filing a claim may affect your premiums.
8. Is it safe to drive with a loose car bumper?
Driving with a loose bumper is not recommended as it poses safety risks and may cause further damage to the vehicle.
9. How long does it take to fix a car bumper?
Repair time varies from a few hours for minor fixes to a few days for extensive repairs or replacements.
10. Where can I find quality replacement parts for my car bumper?
Quality replacement parts can be found at reputable auto parts stores or online retailers, like CARDIAGTECH.NET.
By addressing these common concerns, car owners can make informed decisions about their bumper repairs and maintenance.
Don’t let a loose bumper ruin your ride! Contact CARDIAGTECH.NET today at Address: 276 Reock St, City of Orange, NJ 07050, United States. Whatsapp: +1 (641) 206-8880. Website: CARDIAGTECH.NET and let our experts guide you towards the perfect tools and equipment to get your bumper back in shape. Our team is ready to help you find the best solutions for all your auto repair needs. Act now and experience the CARDIAGTECH.NET difference!
{width=411 height=403}{width=409 height=217}