**How Do You Fix A Gas Leak In A Car Safely?**
Fixing a gas leak in a car involves identifying the leak, cleaning the area, and applying a suitable sealant; CARDIAGTECH.NET provides the tools you need for a safe and effective repair. By utilizing proper safety measures and high-quality equipment, you can address gas leaks efficiently and prevent further fuel loss and potential hazards, thus ensuring vehicle safety and minimizing environmental impact. High-quality equipment and leak detection solutions are crucial for the integrity of your vehicle’s fuel system.
1. Understanding the Dangers and Urgency of Gas Leaks
Gas leaks in a car pose significant risks. According to the National Fire Protection Association (NFPA), fuel leaks are a leading cause of vehicle fires, which can result in severe injuries or fatalities. A study by the University of Michigan Transportation Research Institute found that even small fuel leaks can lead to substantial fuel loss, impacting both the environment and your wallet. The dangers of gas leaks include:
- Fire Hazard: Gasoline is highly flammable. A leak near a heat source or electrical component can ignite, causing a fire.
- Explosion Risk: In enclosed spaces, accumulated gas vapors can create an explosive atmosphere.
- Health Hazards: Inhaling gasoline fumes can cause dizziness, headaches, nausea, and long-term health issues, as reported by the Occupational Safety and Health Administration (OSHA).
- Environmental Damage: Leaking fuel contaminates soil and groundwater, posing a threat to ecosystems. The Environmental Protection Agency (EPA) has strict regulations regarding fuel leaks to prevent environmental harm.
- Fuel Efficiency: A leaking gas tank results in wasted fuel, decreasing your vehicle’s fuel economy and increasing your expenses.
Given these risks, addressing a gas leak promptly is crucial for your safety, the environment, and your vehicle’s performance.
2. Identifying Potential Gas Leak Symptoms
Recognizing the signs of a gas leak early can prevent serious consequences. Common symptoms include:
- Smell of Gasoline: One of the most obvious indicators is a strong gasoline odor, especially near the fuel tank or engine.
- Visible Leakage: Look for fuel puddles under your car, particularly after it has been parked for a while.
- Reduced Fuel Efficiency: Noticeable drops in your miles per gallon (MPG) can suggest a leak.
- Engine Performance Issues: Gas leaks can cause the engine to run poorly, leading to stalling, rough idling, or difficulty starting. A study by the Society of Automotive Engineers (SAE) found that fuel leaks often disrupt the air-fuel mixture, affecting engine performance.
- Check Engine Light: A gas leak might trigger the check engine light, indicating a problem with the fuel system.
- Hissing Sound: You may hear a hissing sound near the gas tank or fuel lines, indicating escaping fuel.
- Failed Emission Test: Leaks can cause your vehicle to fail an emissions test, as highlighted by the California Air Resources Board (CARB).
If you observe any of these symptoms, inspect your vehicle immediately to determine the source and extent of the leak.
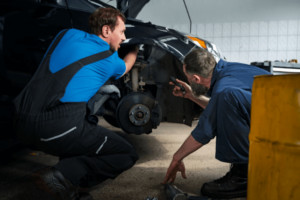
3. Locating the Source of the Gas Leak
Finding the exact location of the gas leak is the first step in fixing it. Follow these steps to identify the source:
- Safety First: Ensure the engine is off and cool. Work in a well-ventilated area and wear safety glasses and gloves. Keep a fire extinguisher nearby. According to the National Safety Council, taking these precautions significantly reduces the risk of accidents during auto repairs.
- Visual Inspection: Start by visually inspecting the gas tank, fuel lines, fuel pump, and fuel injectors. Look for wet spots, cracks, or damage. A study by the American Society for Testing and Materials (ASTM) recommends using a bright flashlight to enhance visibility.
- Smell Test: Carefully sniff around the fuel system components. The strongest gasoline odor will likely be closest to the leak.
- Soapy Water Test: Mix water with a small amount of dish soap. Apply the solution to the fuel lines and connections using a spray bottle or brush. Bubbles will form where there is a leak. A report by Consumer Reports indicates that this method is effective for detecting small leaks.
- Fuel Pressure Test: Use a fuel pressure gauge to check the fuel system pressure. A drop in pressure indicates a leak. The Equipment and Tool Institute (ETI) provides guidelines on performing fuel pressure tests safely and accurately.
- Check the Fuel Tank: Examine the gas tank for rust, corrosion, or physical damage. Pay special attention to seams and welds. The National Highway Traffic Safety Administration (NHTSA) reports that corrosion is a common cause of gas tank leaks.
- Inspect Fuel Lines: Trace the fuel lines from the tank to the engine, checking for cracks, punctures, or loose connections. The Car Care Council recommends replacing any damaged fuel lines immediately.
By following these steps, you can accurately locate the source of the gas leak and proceed with the appropriate repair method.
4. Essential Tools and Materials for Gas Leak Repair
Having the right tools and materials is crucial for a successful and safe gas leak repair. Here’s a list of essential items you’ll need, available at CARDIAGTECH.NET:
| Tool/Material | Description | Use |
|---|---|---|
| Safety Glasses | Protects your eyes from debris and chemical splashes. | Essential for safety during inspection and repair. |
| Gloves | Chemical-resistant gloves protect your hands from gasoline and other contaminants. | Prevents skin irritation and absorption of harmful substances. |
| Fire Extinguisher | A Class B fire extinguisher is essential in case of fire. | Provides immediate fire suppression. |
| Car Jack and Jack Stands | Used to safely lift and support the vehicle. | Allows access to the underside of the car where the fuel tank and lines are located. |
| Socket Set and Wrenches | For loosening and tightening bolts and fittings on fuel lines and components. | Necessary for removing and installing fuel system parts. |
| Screwdrivers | Various sizes of screwdrivers for removing and installing screws. | Useful for accessing fuel system components. |
| Fuel Line Disconnect Tool Set | Specialized tools for safely disconnecting fuel lines without damaging them. | Prevents fuel spillage and damage to fuel lines during removal. |
| Fuel Pressure Gauge | Measures the fuel pressure in the system to diagnose leaks. | Helps identify pressure drops indicating leaks. |
| Sandpaper or Wire Brush | For cleaning and preparing the surface before applying sealants or patches. | Ensures proper adhesion of repair materials. |
| Degreaser or Brake Cleaner | Cleans the area around the leak to ensure a good bond for sealants. | Removes dirt, grease, and contaminants. |
| Gas Tank Repair Kit | Contains epoxy putty or sealant specifically designed for fuel tank repairs. | Provides a temporary or permanent seal for small leaks. |
| Fuel-Resistant Sealant | A sealant that can withstand exposure to gasoline without dissolving. | Provides a durable seal for fuel lines and connections. |
| Replacement Fuel Lines and Clamps | Used to replace damaged or corroded fuel lines. | Ensures a reliable and leak-free fuel system. |
| Flashlight or Work Light | Provides adequate lighting for working in dark areas under the vehicle. | Improves visibility and safety. |
| Drain Pan | Catches any fuel that may spill during the repair process. | Prevents fuel from contaminating the work area and the environment. |
| OBD-II Scanner | Reads diagnostic trouble codes (DTCs) to identify fuel system issues. | Helps diagnose fuel system problems and verify repairs. |
| Multimeter | Used to check electrical connections and sensors in the fuel system. | Ensures proper functioning of electrical components. |
| Torque Wrench | Ensures bolts and fittings are tightened to the correct specification. | Prevents over-tightening or under-tightening, which can cause leaks or damage. |
| Protective Clothing (Apron, etc.) | Protects your clothing from fuel and chemicals. | Keeps you clean and safe. |
Having these tools and materials readily available will streamline the repair process and ensure a professional and safe outcome.
5. Step-by-Step Guide to Fixing a Gas Leak
Here’s a detailed guide to fixing a gas leak in your car. Always prioritize safety and follow these steps carefully:
5.1. Preparing the Vehicle and Work Area
- Park Safely: Park your car on a level surface in a well-ventilated area. Engage the parking brake and use wheel chocks for added safety.
- Gather Supplies: Collect all the necessary tools and materials from the list above.
- Disconnect the Battery: Disconnect the negative terminal of the battery to prevent electrical sparks. According to the Electrical Safety Foundation International (ESFI), this step is crucial to avoid electrical hazards.
- Raise the Vehicle: Use a car jack to lift the vehicle. Place jack stands securely under the frame to support the car. Never work under a vehicle supported only by a jack.
- Ventilate the Area: Ensure the work area is well-ventilated to prevent the buildup of gasoline vapors. Use a fan if necessary.
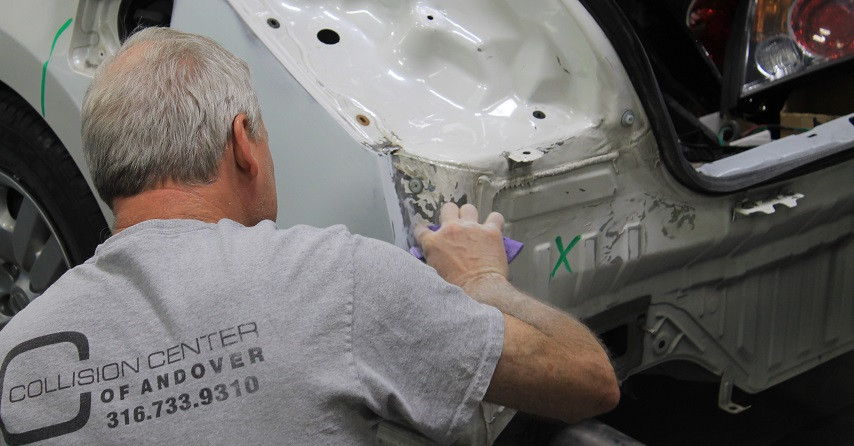
5.2. Repairing a Leaking Fuel Tank
- Drain the Fuel Tank: If the leak is significant, drain the fuel tank to reduce the risk of fuel spillage. Use a siphon or a fuel transfer pump to remove the fuel into a safe container. The U.S. Department of Transportation (DOT) provides guidelines on the safe handling and storage of gasoline.
- Clean the Area: Use sandpaper or a wire brush to clean the area around the leak. Remove any rust, dirt, or paint. Clean the area thoroughly with a degreaser or brake cleaner.
- Apply Epoxy Putty: Follow the manufacturer’s instructions to mix the epoxy putty. Apply the putty to the leak, pressing it firmly into the hole or crack. Make sure the putty covers the entire damaged area and extends slightly beyond the edges.
- Allow to Cure: Let the epoxy putty cure completely according to the manufacturer’s instructions. This may take several hours.
- Test the Repair: After the epoxy has cured, refill the fuel tank with a small amount of gasoline and check for leaks. If the leak persists, you may need to repeat the repair or consider a more permanent solution, such as welding or replacing the tank.
5.3. Repairing Leaking Fuel Lines
- Identify the Leaking Section: Locate the exact section of the fuel line that is leaking.
- Disconnect the Fuel Line: Use a fuel line disconnect tool to safely disconnect the fuel line at both ends. Be prepared for some fuel spillage and have a drain pan ready.
- Replace the Fuel Line: Install a new fuel line of the correct size and type. Ensure the fuel line is compatible with gasoline. Secure the fuel line with new clamps.
- Tighten Connections: Tighten all connections to the manufacturer’s specifications using a torque wrench.
- Test for Leaks: Start the engine and check for leaks at the connections. If necessary, tighten the connections further.
5.4. Addressing Leaking Fuel Injectors
- Access the Fuel Injectors: Remove any components that are blocking access to the fuel injectors, such as the intake manifold.
- Disconnect the Injector: Disconnect the electrical connector and fuel line from the injector.
- Remove the Injector: Carefully remove the fuel injector from the fuel rail.
- Inspect the Injector: Check the injector for cracks, damage, or debris. Clean the injector if necessary.
- Replace the Injector: If the injector is damaged or leaking, replace it with a new one.
- Reinstall the Injector: Reinstall the fuel injector, fuel line, and electrical connector.
- Test for Leaks: Start the engine and check for leaks around the injector.
5.5. Final Inspection and Safety Checks
- Inspect All Repairs: Carefully inspect all repaired areas for leaks.
- Check Fuel Pressure: Use a fuel pressure gauge to verify that the fuel system is operating at the correct pressure.
- Secure Components: Make sure all components are properly secured and tightened.
- Lower the Vehicle: Carefully lower the vehicle and remove the jack stands.
- Reconnect the Battery: Reconnect the negative terminal of the battery.
- Test Drive: Take the car for a short test drive and monitor for any signs of leaks or performance issues.
By following these detailed steps, you can effectively fix a gas leak in your car, ensuring your safety and the vehicle’s reliability.
6. Choosing the Right Sealant and Repair Kit
Selecting the appropriate sealant or repair kit is critical for ensuring a durable and effective repair. CARDIAGTECH.NET offers a range of high-quality products designed for gas leak repairs:
6.1. Types of Sealants
- Epoxy Putty: Ideal for small holes and cracks in the fuel tank. It provides a strong, waterproof seal. Products like Permatex Gas Tank Repair Kit are highly recommended.
- Fuel-Resistant Sealant: Used for sealing fuel lines and connections. It is resistant to gasoline and other chemicals. Loctite 567 Thread Sealant is a popular choice.
- Liquid Fuel Tank Sealers: Applied to the inside of the fuel tank to seal larger leaks and corrosion. Products like POR-15 Fuel Tank Sealer are effective for restoring old tanks.
6.2. Factors to Consider When Choosing a Sealant
- Compatibility: Ensure the sealant is compatible with gasoline and the materials of your fuel tank and lines.
- Durability: Choose a sealant that is durable and can withstand the operating conditions of your vehicle.
- Ease of Use: Select a sealant that is easy to apply and cures quickly.
- Temperature Resistance: The sealant should be able to withstand the temperature range of your fuel system.
6.3. Popular Repair Kits at CARDIAGTECH.NET
| Repair Kit | Description | Best Use | Price (USD) |
|---|---|---|---|
| Permatex Gas Tank Repair Kit | Includes epoxy putty and surface prep materials for small tank repairs. | Sealing small holes and cracks in fuel tanks. | 15-25 |
| Loctite Fuel Tank Repair Kit | Provides a fuel-resistant sealant for quick repairs. | Temporary repairs on fuel tanks and lines. | 20-30 |
| POR-15 Fuel Tank Repair Kit | A comprehensive kit for sealing and restoring fuel tanks. | Repairing larger leaks and corrosion in fuel tanks. | 80-120 |
| 3M Fuel Line Repair Kit | Contains fuel-resistant tape and sealant for repairing fuel lines. | Repairing small leaks and damage to fuel lines. | 25-35 |
| JB Weld Fuel Tank Repair | Epoxy-based repair suitable for steel, aluminum, and other metals. | Versatile for different repair needs. | 10-20 |
6.4. Tips for Using Sealants and Repair Kits
- Read Instructions: Always read and follow the manufacturer’s instructions carefully.
- Prepare the Surface: Clean the surface thoroughly before applying the sealant.
- Apply Evenly: Apply the sealant evenly and smoothly.
- Allow Proper Curing Time: Allow the sealant to cure completely before putting the vehicle back into service.
Choosing the right sealant and repair kit from CARDIAGTECH.NET will help you achieve a reliable and long-lasting repair.
7. Safety Precautions and Best Practices
Working with gasoline and fuel systems requires strict adherence to safety precautions to prevent accidents and injuries. The National Institute for Occupational Safety and Health (NIOSH) provides comprehensive guidelines for working safely with hazardous materials.
7.1. Essential Safety Measures
- Ventilation: Always work in a well-ventilated area to prevent the buildup of gasoline vapors.
- Personal Protective Equipment (PPE): Wear safety glasses, gloves, and protective clothing to protect yourself from chemical exposure.
- Fire Safety: Keep a Class B fire extinguisher nearby and ensure there are no open flames or sources of ignition in the work area.
- No Smoking: Never smoke or use open flames near gasoline.
- Battery Disconnection: Disconnect the negative terminal of the battery to prevent electrical sparks.
- Fuel Handling: Handle gasoline carefully and avoid spilling it. Use a funnel when transferring fuel.
- Proper Disposal: Dispose of used gasoline and contaminated materials properly according to local regulations. The EPA provides guidelines on the proper disposal of hazardous waste.
7.2. Best Practices for Gas Leak Repair
- Follow Instructions: Always follow the manufacturer’s instructions for using sealants, repair kits, and tools.
- Inspect Regularly: Regularly inspect your fuel system for signs of leaks or damage.
- Maintain Your Vehicle: Keep your vehicle well-maintained to prevent fuel system problems.
- Seek Professional Help: If you are not comfortable performing the repair yourself, seek help from a qualified mechanic.
7.3. Emergency Procedures
- In Case of Fire: If a fire breaks out, use the fire extinguisher to put it out. If the fire is too large to control, evacuate the area and call emergency services.
- Fuel Spill: If you spill gasoline, clean it up immediately with absorbent materials. Dispose of the materials properly.
- Chemical Exposure: If you are exposed to gasoline, wash the affected area with soap and water. Seek medical attention if you experience any symptoms.
By following these safety precautions and best practices, you can minimize the risk of accidents and injuries when repairing gas leaks.
8. Cost-Effective Solutions for Gas Leak Repair
Fixing a gas leak yourself can save you a significant amount of money compared to taking your car to a repair shop. Here’s a cost breakdown:
8.1. DIY Repair Costs
| Item | Estimated Cost (USD) |
|---|---|
| Gas Tank Repair Kit | 15-30 |
| Fuel Line Repair Kit | 20-40 |
| Fuel-Resistant Sealant | 10-20 |
| Replacement Fuel Lines and Clamps | 20-50 |
| Degreaser and Cleaning Supplies | 10-20 |
| Safety Glasses and Gloves | 10-20 |
| Total DIY Cost | 85-180 |
8.2. Professional Repair Costs
| Service | Estimated Cost (USD) |
|---|---|
| Gas Tank Repair or Replacement | 300-800 |
| Fuel Line Replacement | 150-400 |
| Fuel Injector Replacement | 100-300 per injector |
| Labor Costs | 75-150 per hour |
| Total Professional Cost | 525-1650+ |
8.3. Factors Affecting Repair Costs
- Extent of the Damage: More extensive damage will require more expensive repairs.
- Vehicle Type: The make and model of your vehicle can affect the cost of parts and labor.
- Location: Labor rates vary depending on your location.
- DIY vs. Professional: DIY repairs are generally much cheaper than professional repairs.
8.4. Tips for Saving Money on Gas Leak Repair
- DIY Repair: Perform the repair yourself if you are comfortable and have the necessary skills.
- Shop Around: Compare prices for parts and services from different suppliers and repair shops.
- Use Quality Parts: Invest in high-quality parts to ensure a long-lasting repair.
- Regular Maintenance: Keep your vehicle well-maintained to prevent fuel system problems.
By choosing cost-effective solutions and performing the repair yourself, you can save a significant amount of money on gas leak repairs.
9. Upgrading Your Tools and Equipment
Investing in high-quality tools and equipment from CARDIAGTECH.NET can make gas leak repairs easier, safer, and more efficient.
9.1. Essential Tool Upgrades
- Professional Fuel Line Disconnect Tool Set: A comprehensive set of fuel line disconnect tools will allow you to safely and easily disconnect fuel lines without damaging them.
- Advanced Fuel Pressure Gauge: An advanced fuel pressure gauge with digital display and data logging capabilities can provide more accurate and detailed information about your fuel system.
- High-Quality Torque Wrench: A high-quality torque wrench will ensure that bolts and fittings are tightened to the correct specification, preventing leaks and damage.
- OBD-II Scanner with Fuel System Diagnostics: An OBD-II scanner with advanced fuel system diagnostics can help you quickly identify fuel system problems and verify repairs.
- Portable Work Light: A portable work light with adjustable brightness and long battery life will provide adequate lighting for working in dark areas under the vehicle.
9.2. Benefits of Upgrading Your Tools
- Improved Safety: High-quality tools are designed to be safer and more reliable.
- Increased Efficiency: Upgraded tools can make repairs faster and easier.
- Better Accuracy: Advanced tools provide more accurate and detailed information.
- Longer Lifespan: High-quality tools are built to last longer and withstand more use.
9.3. Top Tool Recommendations from CARDIAGTECH.NET
| Tool | Description | Key Features | Price (USD) |
|---|---|---|---|
| OTC Fuel Line Disconnect Tool Set | A comprehensive set for disconnecting fuel lines on various vehicles. | Durable construction, easy to use, wide range of applications. | 40-60 |
| Actron Fuel Pressure Tester | An accurate and reliable gauge for measuring fuel pressure. | Digital display, wide pressure range, easy to read. | 50-70 |
| Craftsman Torque Wrench | A high-quality torque wrench for tightening bolts and fittings. | Accurate, durable, easy to adjust. | 80-120 |
| Autel MaxiSYS MS906BT OBD-II Scanner | An advanced scanner with fuel system diagnostics. | Wireless connectivity, comprehensive diagnostics, easy to use. | 800-1200 |
| Dewalt Cordless Work Light | A portable work light with adjustable brightness. | Cordless, adjustable brightness, long battery life. | 60-80 |
9.4. Financing Options
CARDIAGTECH.NET offers financing options to help you afford the tools and equipment you need. Contact our customer service team for more information.
Upgrading your tools and equipment will improve the quality and efficiency of your gas leak repairs, ensuring a safer and more reliable outcome.
10. When to Seek Professional Help
While many gas leak repairs can be performed DIY, certain situations require the expertise of a professional mechanic.
10.1. Situations Requiring Professional Assistance
- Extensive Damage: If the fuel tank or fuel lines are severely damaged or corroded, professional repair or replacement is necessary.
- Complex Repairs: If the gas leak is located in a hard-to-reach area or requires specialized tools, it is best to seek professional help.
- Uncertainty: If you are not comfortable performing the repair yourself or are unsure about the cause of the leak, consult a mechanic.
- Safety Concerns: If you have any safety concerns, such as a large fuel spill or fire hazard, call emergency services and seek professional help.
- Persistent Leaks: If you have attempted to repair the leak yourself but it persists, a professional mechanic can diagnose and fix the problem.
10.2. Benefits of Professional Repair
- Expertise: Professional mechanics have the knowledge and experience to diagnose and repair gas leaks accurately and safely.
- Specialized Tools: Mechanics have access to specialized tools and equipment that are not available to the general public.
- Warranty: Professional repairs often come with a warranty, providing peace of mind.
- Safety: Mechanics are trained to handle gasoline and fuel systems safely, reducing the risk of accidents and injuries.
10.3. Finding a Qualified Mechanic
- Ask for Recommendations: Ask friends, family, or colleagues for recommendations.
- Check Online Reviews: Read online reviews to get an idea of the mechanic’s reputation and quality of service.
- Verify Certifications: Ensure the mechanic is certified by a recognized organization, such as the National Institute for Automotive Service Excellence (ASE).
- Get an Estimate: Get an estimate for the repair before authorizing any work.
- Ask Questions: Ask the mechanic questions about the repair process, the parts they will be using, and the warranty they offer.
10.4. Questions to Ask a Mechanic
- What is the cause of the gas leak?
- What is the recommended repair?
- What parts will be replaced?
- How much will the repair cost?
- How long will the repair take?
- Do you offer a warranty on the repair?
Knowing when to seek professional help can prevent further damage and ensure the safety and reliability of your vehicle.
FAQ: Addressing Your Concerns About Gas Leaks
-
How can I tell if my car has a gas leak?
- The most common signs include a strong smell of gasoline, visible fuel puddles under the car, reduced fuel efficiency, and potential engine performance issues. If you notice any of these symptoms, it’s crucial to inspect your vehicle immediately.
-
What are the immediate dangers of a gas leak?
- Gas leaks pose serious fire and explosion risks due to the highly flammable nature of gasoline. Additionally, inhaling gasoline fumes can lead to health issues, and fuel leaks can cause significant environmental damage.
-
Can I temporarily fix a gas leak myself?
- Yes, small leaks can be temporarily fixed using epoxy putty or fuel-resistant sealant. However, these are short-term solutions, and a professional inspection is recommended to ensure a permanent fix.
-
What tools do I need to fix a gas leak?
- Essential tools include safety glasses, gloves, a fire extinguisher, a car jack and stands, socket set, screwdrivers, fuel line disconnect tool, pressure gauge, sandpaper, degreaser, a gas tank repair kit, and fuel-resistant sealant.
-
How much does it cost to fix a gas leak myself versus hiring a professional?
- DIY repairs typically range from $85 to $180, covering the cost of repair kits and tools. Professional repairs can range from $525 to over $1650, depending on the extent of the damage and labor costs.
-
Is it safe to drive with a small gas leak?
- Driving with any gas leak is unsafe due to the risk of fire and health hazards. It’s best to avoid driving the vehicle and address the leak as soon as possible.
-
How do fuel-resistant sealants work?
- Fuel-resistant sealants create a durable barrier that withstands exposure to gasoline, preventing it from leaking through cracks or holes. These sealants bond tightly to the surface, ensuring a long-lasting seal.
-
What should I do if I spill gasoline while repairing a leak?
- Clean up the spill immediately using absorbent materials like rags or spill pads. Dispose of the contaminated materials properly according to local environmental regulations to prevent pollution.
-
How can I prevent gas leaks in my car?
- Regular vehicle maintenance, including inspecting fuel lines and the gas tank for signs of wear or damage, can help prevent gas leaks. Addressing minor issues promptly can prevent them from escalating into larger problems.
-
When should I seek professional help for a gas leak?
- Seek professional help if the damage is extensive, the repair is complex, you are uncomfortable performing the repair yourself, or you have safety concerns. Professionals have the expertise and tools to handle these situations safely and effectively.
Addressing gas leaks promptly and safely is essential for your well-being and the longevity of your vehicle. CARDIAGTECH.NET provides the tools and resources you need to tackle these repairs effectively.
Ready to Get Started?
Don’t let a gas leak compromise your safety and your vehicle’s performance. Contact CARDIAGTECH.NET today at 276 Reock St, City of Orange, NJ 07050, United States, or reach out via WhatsApp at +1 (641) 206-8880. Visit our website CARDIAGTECH.NET for a wide range of high-quality tools and equipment to address all your auto repair needs. Our expert team is ready to assist you with any questions and ensure you have the right tools for a safe and effective repair. Act now and ensure a safe and reliable ride with CARDIAGTECH.NET’s top-notch auto repair solutions!