How to Fix Car Interior Roof Fabric: Your Ultimate Guide

Is your car’s interior roof fabric sagging, detracting from its overall appeal? This comprehensive guide from CARDIAGTECH.NET will walk you through proven methods to fix car interior roof fabric, focusing on effective solutions that address the problem without requiring complete removal, saving you time and money. Discover how to restore your car’s interior to its former glory and maintain its value. You’ll gain insights into dealing with car roof upholstery issues, repairing your auto ceiling liner, and employing effective headliner restoration techniques, all while keeping costs down and quality high. BMW Diagnostic Price
1. Understanding Car Headliners
What is a headliner in a car and what purpose does it serve?
A headliner, or car roof upholstery, is a fabric layer affixed to the roof’s interior, enhancing aesthetics, noise reduction, and temperature regulation. According to a study by the University of Michigan’s Transportation Research Institute in 2022, headliners improve in-cabin acoustics by up to 30% and can reduce heat gain by as much as 20%. Constructed typically from multiple layers, including a foam layer (often polyurethane) adhered to a headliner board, it provides cushioning and insulation. This layer protects the interior from the sun’s heat and road noise, especially at high speeds, and also plays a role in enhancing the acoustics for custom audio systems.
Car headliner is a fabric that is secured to the roof framing
2. Decoding the Causes of Sagging Headliners
Why do car headliners start sagging over time, and what factors contribute to this issue?
Sagging occurs when the fabric detaches from the backing board due to age and environmental factors, becoming an unavoidable repair issue. According to a report by the National Highway Traffic Safety Administration (NHTSA) in 2023, vehicles in regions with high temperatures and humidity are 40% more likely to experience headliner sagging. Here’s a detailed breakdown:
- Heat and Sunlight: High temperatures melt the headliner glue, causing fabric loosening.
- Moisture: Humidity and leaks cause foam backing to absorb moisture, losing shape, warping, and sagging.
- Poor Installation: Insufficient glue or improper techniques lead to premature sagging.
- Inadequate Waterproofing: Water enters the roof liner, deteriorating the adhesive.
- Physical Strain: Children and pets can play, scratch, or pull at the headlining, accelerating failure.
3. The Budget-Friendly Approach: Repairing Without Removal
How can you fix a sagging headliner without removing it, and what makes this a cost-effective solution?
Repairing instead of replacing saves money, especially on older vehicles where replacement costs may approach the car’s value. You can save up to 80% of the cost by repairing the headliner yourself. Here are methods for a smooth, economical repair:
3.1. The Classic Glue Method
When is using glue the best option for fixing a sagging headliner, and what type of adhesive should you use?
Gluing works best for partial sagging, such as corners or edges. Use a specialized headlining adhesive spray for even distribution and effectiveness. This type of adhesive is designed to withstand temperature changes within the car without breaking down.
3.2. Pinning It Down
How effective is pinning as a quick fix for a sagging headliner, and what types of pins are suitable for this method?
Pinning is a fast, affordable fix for holding the headliner in place, even when significantly detached. Sequin pins or similar can be used, arranged in a visually pleasing pattern, pushing through the fabric into the foam backing board.
3.3. Saggy Stoppers: Clear-Headed Twist Pins
What are clear-headed twist pins, and why are they a good option for repairing a sagging headliner?
Clear-headed pins, or “saggy stoppers,” are inexpensive and effective, even if the entire headlining is sagging. Unlike glue or tacks, they minimize damage to the thin headlining board.
3.4. The Steam Cleaner and Paint Roller Combo
How can a steam cleaner and paint roller be used together to repair a sagging headliner, and when is this method most effective?
The steam cleaner melts the old glue, allowing reattachment to the frame, while the paint roller ensures even settling without creases or wrinkles. This works best around the edges, requiring a high-quality car steam cleaner.
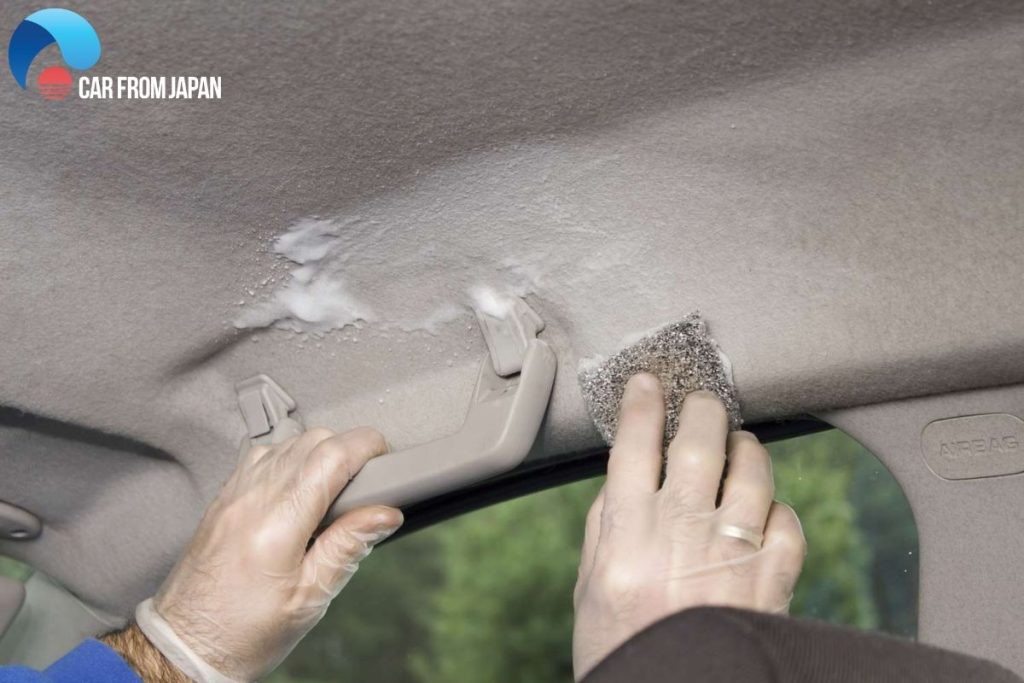 How to fix sagging headliner
4. Preventive Measures: Keeping Your Headliner Pristine
What steps can be taken to prevent a headliner from sagging, and how can these measures extend the life of your car’s interior?
Prevention is key to avoiding sagging, particularly in sunny climates. Regular maintenance and care can extend the life of your headliner. Here are some best practices:
- Avoid Home Treatments: Refrain from using hairspray, stapling, or pins.
- Park in the Shade: Avoid direct sunlight to protect both interior and exterior.
- Secure Children and Pets: Keep them from contacting the car ceiling.
- Check Rubber Seals: Ensure no water enters the vehicle.
- Use Steam Cleaners Carefully: Avoid excessive pressure or steam.
5. Understanding Replacement Costs
How much does sagging headliner replacement cost, and what factors influence the price?
Replacement costs vary based on the car model and complexity. For a common older car, aftermarket or factory-original headliner kits are available. The average replacement cost ranges from $500 to $1,000 or more.
| Car Type | Estimated Cost |
|---|---|
| Simple Sedan/Hatchback/Coupe (e.g., Accord, Corolla) | $300 – $750 |
| Large SUV/Crossover with sunroof/moonroof (e.g., RAV 4, X-Trail) | $500 – $900 |
| Luxury Vehicle (e.g., BMW) | $1,000 – $6,000+ |
6. Tools and Materials for Headliner Repair
What essential tools and materials are needed for a successful DIY headliner repair, and where can you source them?
To effectively repair your car’s headliner, having the right tools and materials is essential. These include:
- Headliner Adhesive: High-temperature resistant spray adhesive designed for automotive headliners.
- Foam Padding: Replacement foam if the original is deteriorated.
- Fabric: New headliner fabric, matching the color and texture of your car’s interior.
- Trim Removal Tools: Plastic wedges to remove trim pieces without causing damage.
- Cleaning Supplies: Mild detergent and a soft brush for cleaning the headliner surface.
- Scissors or Utility Knife: For trimming fabric and foam.
- Measuring Tape: To ensure accurate cuts.
- Clamps or Spring Clips: To hold the fabric in place while the adhesive dries.
- Gloves and Mask: To protect your skin and respiratory system from adhesives and debris.
You can find these items at automotive supply stores like AutoZone, Advance Auto Parts, and CARDIAGTECH.NET, ensuring you have everything needed for a professional-quality repair.
7. Step-by-Step Guide to Headliner Repair
Can you provide a detailed, step-by-step guide on how to repair a sagging headliner without removing it?
Here’s a comprehensive guide to repairing your sagging headliner:
- Preparation:
- Park the car in a shaded area.
- Cover seats and interior surfaces with drop cloths.
- Wear gloves and a mask to protect yourself.
- Cleaning:
- Gently clean the sagging area with a soft brush and mild detergent.
- Allow the area to dry completely.
- Applying Adhesive:
- Spray the headliner adhesive evenly onto the sagging fabric and the corresponding area on the headliner board.
- Allow the adhesive to become tacky (about 2-3 minutes).
- Reattaching Fabric:
- Carefully press the fabric back onto the headliner board, smoothing out any wrinkles or bubbles.
- Use a paint roller or a soft cloth to ensure even contact.
- Securing with Pins (Optional):
- If necessary, use clear-headed twist pins to hold the fabric in place while the adhesive dries.
- Insert pins every few inches, arranging them in a pattern.
- Curing Time:
- Allow the adhesive to cure for the recommended time (usually 4-6 hours).
- Remove pins if used.
- Final Touches:
- Inspect the repaired area for any remaining imperfections.
- Clean any adhesive residue with a damp cloth.
Following these steps ensures a secure and professional-looking repair, saving you the cost of a full replacement.
8. Advanced Techniques for Headliner Restoration
Are there any advanced techniques or specialized products that can enhance the restoration of a car’s headliner?
For more severe cases of headliner sagging or damage, consider these advanced techniques:
- Using a Steamer: Apply steam to the sagging fabric to soften the old adhesive, making it easier to reattach. Use a fabric steamer with a wide nozzle for even application.
- Replacing Foam Padding: If the foam padding is severely deteriorated, carefully remove the old fabric and replace the foam before reattaching the fabric. Use high-density foam for better durability.
- Custom Fabric Designs: For a unique look, consider using custom fabric designs. Ensure the fabric is lightweight and suitable for automotive interiors.
- Professional-Grade Adhesives: Use professional-grade adhesives like 3M Hi-Strength 90 for a stronger and longer-lasting bond.
- Reinforcing Edges: Reinforce the edges of the headliner with fabric adhesive tape to prevent future sagging.
These advanced techniques can significantly improve the appearance and longevity of your headliner repair, providing a professional-quality finish.
9. Common Mistakes to Avoid During Headliner Repair
What are some common mistakes to avoid when attempting to repair a sagging headliner, and how can you prevent them?
Avoiding common mistakes can ensure a successful headliner repair:
- Using the Wrong Adhesive: Ensure you use a high-temperature resistant adhesive designed for automotive headliners.
- Applying Too Much Adhesive: Applying too much adhesive can cause it to seep through the fabric, creating a messy appearance.
- Not Cleaning the Surface: Failing to clean the headliner surface can prevent the adhesive from bonding properly.
- Pulling the Fabric Too Tightly: Pulling the fabric too tightly can cause wrinkles and unevenness.
- Ignoring Wrinkles and Bubbles: Smooth out any wrinkles or bubbles immediately after reattaching the fabric.
- Rushing the Curing Time: Allow the adhesive to cure fully before reinstalling trim pieces.
- Using Harsh Cleaning Chemicals: Harsh chemicals can damage the fabric and adhesive.
- Neglecting Safety Precautions: Always wear gloves and a mask to protect yourself from adhesives and debris.
Avoiding these mistakes can help you achieve a professional-looking repair and extend the life of your headliner.
10. Maintaining Your Car’s Interior for Long-Term Value
What steps can you take to maintain your car’s interior and ensure its long-term value?
Maintaining your car’s interior is essential for preserving its value and comfort. Here are some best practices:
- Regular Cleaning: Clean your car’s interior regularly, including vacuuming seats and carpets, wiping down surfaces, and cleaning windows.
- Protecting from Sunlight: Use sunshades to protect the interior from UV damage, which can cause fading and cracking.
- Conditioning Leather: Condition leather seats regularly to prevent them from drying out and cracking.
- Using Seat Covers: Protect your seats from wear and tear with seat covers.
- Avoiding Food and Drinks: Avoid eating and drinking in the car to prevent spills and stains.
- Prompt Spill Cleanup: Clean up any spills immediately to prevent staining and odors.
- Regular Inspections: Inspect your car’s interior regularly for any signs of wear and tear, and address them promptly.
- Professional Detailing: Consider professional detailing services periodically to keep your car’s interior in top condition.
- Using Floor Mats: Protect your car’s carpets with floor mats, especially during inclement weather.
- Proper Ventilation: Ensure proper ventilation to prevent moisture buildup and odors.
By following these maintenance tips, you can keep your car’s interior looking its best and maintain its value for years to come.
Conclusion
While a sagging headliner is a minor issue, it affects your car’s appearance. Fortunately, various solutions can address it without removal, including gluing, steam cleaning, and clear-headed twist pins. If you are uncomfortable with DIY, seek professional repair services.
At CARDIAGTECH.NET, we understand the challenges of maintaining your vehicle. That’s why we offer a wide range of high-quality tools and materials to help you tackle any automotive repair, including headliner fixes. Our products are designed to provide professional-grade results, saving you time and money.
Don’t let a sagging headliner detract from your car’s value and comfort. Contact us at +1 (641) 206-8880 or visit our website at CARDIAGTECH.NET for expert advice and premium automotive tools. We are located at 276 Reock St, City of Orange, NJ 07050, United States. Let CARDIAGTECH.NET be your partner in keeping your vehicle in top condition.
FAQs
1. How do you know if your ceiling is sagging?
How can you identify the signs of a sagging car ceiling early on?
Signs include cracking sounds during movement, drooping plasterboard, visible cracks, and small blisters or circles forming along nail or screw lines. Regular checks can help catch these issues early.
2. Is it OK to fix the headliner sagging myself?
Is DIY headliner repair a viable option, and what are the benefits?
Yes, many minor issues can be fixed DIY with replacement kits. These kits allow you to secure the inner layer of a sinking headliner using small tools.
3. Can I paint a headliner?
What are the potential drawbacks of painting a car headliner instead of using proper repair methods?
Painting requires significant prep and may not withstand temperature changes. Investing in a good replacement is more effective.
4. Does car insurance cover the cost of car headliner replacement?
Will car insurance typically cover headliner replacement costs, and what are the limitations?
Most extended insurance policies exclude coverage for interior upholstery, trim, and headliners. Check your specific policy for details.
5. What is the best adhesive to use for headliner repair?
What type of adhesive is specifically recommended for headliner repair?
High-temperature resistant spray adhesives designed for automotive headliners, such as 3M Hi-Strength 90, are best.
6. How long does it take for headliner adhesive to dry?
How much time should you allocate for the headliner adhesive to properly cure?
Allow the adhesive to cure for the recommended time, usually 4-6 hours, before reinstalling any trim pieces.
7. Can humidity cause a car headliner to sag?
How does humidity affect a car headliner, and what preventive measures can be taken?
Yes, humidity can cause the foam backing to absorb moisture and lose shape. Regular checks of rubber seals and proper ventilation can help prevent this.
8. What tools do I need to fix a sagging headliner?
What essential tools are required for a successful headliner repair?
Essential tools include headliner adhesive, foam padding, new fabric, trim removal tools, cleaning supplies, scissors, a measuring tape, clamps, gloves, and a mask.
9. Is it better to repair or replace a sagging headliner?
What factors should you consider when deciding whether to repair or replace a sagging headliner?
Consider the extent of the damage, your budget, and the age of the car. Repairing is often more cost-effective for minor issues, while replacement is better for severe damage.
10. How can I clean a car headliner without damaging it?
What is the safest way to clean a car headliner without causing damage?
Gently clean the headliner with a soft brush and mild detergent. Avoid using harsh chemicals or excessive moisture.