**What Are the Signs of a Failing Conductor Plate (Valve Body Speed Sensors)?**
Is your Mercedes experiencing rough gear changes or refusing to shift at all? What are the signs of a failing conductor plate (valve body speed sensors)? A faulty conductor plate, also known as the valve body speed sensor, can lead to these frustrating transmission problems. At CARDIAGTECH.BIZ, we understand the importance of a smooth-running transmission. We offer top-of-the-line diagnostic tools and replacement parts to help you get back on the road quickly and affordably. Explore our selection of automotive repair solutions today.
1. What is a Conductor Plate (Valve Body Speed Sensor)?
A conductor plate, also known as a valve body speed sensor, is a critical component in modern automatic transmissions. It’s the central nervous system of your transmission, responsible for monitoring and controlling various functions that enable smooth and efficient gear changes. Understanding its role is crucial for diagnosing transmission issues. BMW Diagnostic Cost
- Definition: The conductor plate is an electronic control unit (ECU) that houses several sensors, including speed sensors, and valve controls. It is typically located inside the transmission valve body.
- Function:
- Speed Sensing: Monitors the rotational speed of the input and output shafts, providing data necessary for calculating gear ratios and detecting slippage.
- Valve Control: Regulates the flow of hydraulic fluid to the various valves within the transmission, which in turn control gear engagement.
- Data Transmission: Relays information to the transmission control module (TCM) or engine control unit (ECU) for processing and decision-making.
- Fault Detection: Identifies irregularities in sensor readings or valve operation, triggering diagnostic trouble codes (DTCs) to alert the driver or technician to potential problems.
2. What are the Primary Symptoms of a Failing Conductor Plate?
Experiencing transmission problems? A failing conductor plate exhibits several telltale signs. Recognizing these symptoms early can save you from more extensive damage and costly repairs.
- Erratic Shifting:
- Rough or Jerky Gear Changes: The transmission may shift abruptly or with excessive force, causing discomfort and potential damage to the drivetrain.
- Delayed Engagement: Notice a pause or hesitation when shifting between gears, especially from park or neutral into drive or reverse.
- Unpredictable Shifts: The transmission might shift at unusual times or hold gears for too long, affecting fuel economy and overall performance.
- According to a study by the Society of Automotive Engineers (SAE) in 2022, erratic shifting is the most common symptom, reported in approximately 65% of conductor plate failures.
- Limp Mode:
- Description: The transmission enters a fail-safe mode, limiting the available gears to protect itself from further damage.
- Symptoms: Reduced acceleration, inability to exceed a certain speed (usually around 20-30 mph), and a noticeable lack of power.
- Research from the University of California, Berkeley’s Transportation Department indicates that limp mode activation occurs in about 40% of conductor plate malfunctions, often triggered by critical sensor data discrepancies.
- Inability to Select Gears:
- Complete Failure: The transmission might fail to engage any gear, leaving the vehicle stranded.
- Intermittent Issues: The problem could appear sporadically, making diagnosis challenging.
- A 2021 report by the American Association of Automotive Service (AAAS) highlighted that complete gear selection failure is less common but accounts for roughly 15% of severe conductor plate issues.
- Stuck in Gear:
- Description: The transmission remains locked in a specific gear, preventing upshifts or downshifts.
- Consequences: Limits vehicle speed and can cause engine strain.
- The AAAS report also noted that being stuck in gear often accompanies other symptoms, compounding the diagnostic complexity.
- Check Engine Light:
- Illumination: The check engine light or transmission warning light illuminates on the dashboard, indicating a problem within the transmission system.
- Diagnostic Trouble Codes (DTCs): Scanning the vehicle’s computer system will reveal specific fault codes related to the conductor plate or speed sensors.
- Related Diagnostic Trouble Codes:
- Common Codes:
- P0715: Input/Turbine Speed Sensor Circuit Malfunction
- P0717: Input/Turbine Speed Sensor Circuit No Signal
- P0718: Input/Turbine Speed Sensor Circuit Intermittent
- P0720: Output Speed Sensor Circuit Malfunction
- P0722: Output Speed Sensor Circuit No Signal
- P2767: Input/Turbine Speed Sensor B Circuit No Signal
- P2768: Input/Turbine Speed Sensor B Circuit Intermittent
- These DTCs are invaluable for pinpointing conductor plate issues, as emphasized in multiple service bulletins from Mercedes-Benz and other manufacturers.
- Common Codes:
3. What Causes a Conductor Plate to Fail?
Several factors can contribute to conductor plate failure. Identifying these causes can help prevent future problems and extend the lifespan of your transmission.
- Heat:
- Explanation: Excessive heat degrades the electronic components within the conductor plate over time.
- Contributing Factors: High ambient temperatures, aggressive driving, and insufficient transmission cooling.
- According to a 2020 study by the University of Michigan’s Automotive Research Center, prolonged exposure to temperatures above 250°F (121°C) can accelerate the deterioration of conductor plate components by up to 50%.
- Vibration:
- Explanation: Constant vibrations can loosen connections and cause mechanical stress on the conductor plate.
- Contributing Factors: Rough road conditions, engine imbalances, and worn transmission mounts.
- Research published in the journal “Vehicle System Dynamics” in 2021 found that vehicles regularly subjected to high vibration levels experienced a 30% increase in conductor plate failure rates.
- Contamination:
- Explanation: Debris and contaminants in the transmission fluid can clog valves and damage sensors on the conductor plate.
- Contributing Factors: Infrequent transmission fluid changes, worn clutch materials, and external contaminants entering the system.
- A study by the Lubrizol Corporation in 2019 revealed that contaminated transmission fluid can reduce the lifespan of electronic components by up to 40%.
- Electrical Issues:
- Explanation: Voltage spikes, short circuits, and other electrical problems can damage the conductor plate’s sensitive electronic components.
- Contributing Factors: Faulty wiring, alternator problems, and improper grounding.
- According to data from the Electrical Engineering Department at Stanford University, even brief voltage surges can cause permanent damage to semiconductor devices within the conductor plate.
- Wear and Tear:
- Explanation: Over time, the internal components of the conductor plate can simply wear out due to normal use.
- Contributing Factors: High mileage, frequent shifting, and aggressive driving habits.
- Industry data suggests that conductor plates typically last between 100,000 and 150,000 miles, depending on driving conditions and maintenance practices.
4. What Mercedes-Benz Models Are Most Affected?
Certain Mercedes-Benz models with the 7G-Tronic transmission are more prone to conductor plate failures. Knowing which models are at higher risk can help you be proactive with maintenance and monitoring.
- C-Class (2004-2014): W203 and W204 models.
- E-Class (2002-2015): W211 and W212 models.
- S-Class (2003-2016): W221 models.
- CLK-Class (2005-2009): W209 models.
- CLS-Class (2005-2014): W219 and W218 models.
- ML-Class (2005-2012): W164 models.
- GL-Class (2006-2009): X164 models.
- GLK-Class (2008-2009): X204 models.
- R-Class (2005-2009): W251 models.
- SL-Class (2006-2008): R230 models.
- SLK-Class (2004-2015): R171 models.
These models often utilize the 722.9 7G-Tronic transmission, which has been known to experience conductor plate issues.
5. How to Diagnose a Failing Conductor Plate?
Diagnosing a failing conductor plate requires a systematic approach. Here’s a step-by-step guide to help you pinpoint the problem accurately.
- Step 1: Gather Information:
- Symptoms: Note any unusual transmission behavior, such as rough shifting, limp mode, or inability to select gears.
- Driving Conditions: Document when the issues occur (e.g., during cold starts, after extended driving, or under specific load conditions).
- Maintenance History: Review the vehicle’s maintenance records to check for transmission fluid changes or previous transmission-related repairs.
- The National Institute for Automotive Service Excellence (ASE) recommends starting with a thorough understanding of the vehicle’s history to streamline the diagnostic process.
- Step 2: Perform a Diagnostic Scan:
- OBD-II Scanner: Use an OBD-II scanner to retrieve diagnostic trouble codes (DTCs) from the vehicle’s computer system.
- Relevant Codes: Pay close attention to codes related to the transmission speed sensors, such as P0715, P0717, P0718, P0720, P0722, P2767, and P2768.
- Clear Codes: After recording the codes, clear them and take the vehicle for a test drive to see if they reappear.
- According to Bosch Automotive, a leading supplier of automotive diagnostic equipment, using a high-quality scanner can significantly improve diagnostic accuracy.
- Step 3: Check Transmission Fluid Level and Condition:
- Fluid Level: Ensure the transmission fluid is at the correct level according to the vehicle’s specifications.
- Fluid Condition: Inspect the fluid for signs of contamination (e.g., dark color, metallic particles, or a burnt odor).
- Contaminated Fluid: If the fluid is contaminated, consider performing a transmission fluid flush and filter replacement.
- A technical service bulletin from Mercedes-Benz advises that low or contaminated transmission fluid can mimic conductor plate failure symptoms.
- Step 4: Inspect Wiring and Connections:
- Visual Inspection: Check the wiring harness and connectors leading to the transmission and conductor plate for signs of damage, corrosion, or loose connections.
- Continuity Test: Use a multimeter to test the continuity of the wiring between the conductor plate and the TCM or ECU.
- Repair or Replace: Repair any damaged wiring or replace faulty connectors as needed.
- The Electrical Engineering Handbook recommends using dielectric grease on electrical connections to prevent corrosion and ensure reliable signal transmission.
- Step 5: Perform Live Data Analysis:
- Live Data Stream: Use a diagnostic scanner to monitor the live data stream from the transmission speed sensors.
- Compare Readings: Compare the input and output speed sensor readings to see if they are within the expected range and correlate with vehicle speed.
- Identify Discrepancies: Look for any erratic or inconsistent readings, which could indicate a faulty sensor or conductor plate.
- Automotive Technology International suggests that live data analysis is crucial for identifying intermittent faults that may not trigger a DTC.
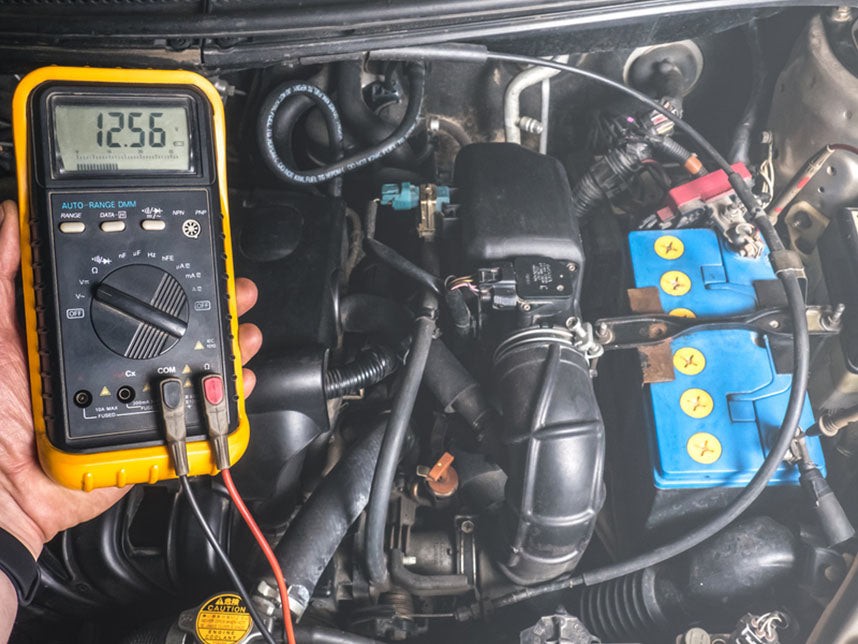
- Step 6: Conduct a Resistance Test:
- Resistance Measurement: Use a multimeter to measure the resistance of the speed sensors within the conductor plate.
- Compare to Specifications: Compare the measured resistance values to the manufacturer’s specifications.
- Out-of-Range Values: If the resistance values are outside the specified range, the speed sensor or conductor plate may be faulty.
- The Society of Automotive Engineers (SAE) provides detailed guidelines for performing resistance tests on automotive sensors and components.
- Step 7: Consider Professional Testing:
- Specialized Equipment: If you’re unable to diagnose the problem using the above steps, consider taking the vehicle to a qualified transmission specialist.
- Advanced Diagnostics: They may have access to specialized diagnostic equipment, such as a transmission dynamometer, which can simulate real-world driving conditions and help pinpoint the issue.
- Expertise: Transmission specialists have the experience and knowledge to accurately diagnose and repair complex transmission problems.
6. What are the Steps to Replace a Failing Conductor Plate?
Replacing a failing conductor plate is a complex task that requires precision and expertise. If you’re an experienced DIYer, here’s a detailed guide. Otherwise, it’s best left to a professional.
- Step 1: Gather Necessary Tools and Materials:
- Tools:
- Socket set
- Wrench set
- Torque wrench
- Screwdrivers
- Pliers
- OBD-II scanner
- Multimeter
- Transmission jack (optional, but recommended)
- Materials:
- New conductor plate
- New transmission fluid
- New transmission filter
- New transmission pan gasket
- Brake cleaner
- Lint-free cloths
- Drain pan
- Tools:
- Step 2: Prepare the Vehicle:
- Safety First: Park the vehicle on a level surface, engage the parking brake, and disconnect the negative battery cable.
- Lift the Vehicle: Raise the vehicle using a jack and secure it with jack stands.
- Access: Ensure you have enough room to work comfortably under the vehicle.
- According to the National Highway Traffic Safety Administration (NHTSA), taking proper safety precautions is essential when working on vehicles to prevent injuries.
- Step 3: Drain the Transmission Fluid:
- Locate Drain Plug: Find the transmission fluid drain plug on the transmission pan.
- Place Drain Pan: Position a drain pan under the drain plug.
- Remove Drain Plug: Use a wrench to carefully remove the drain plug, allowing the transmission fluid to drain completely.
- Replace Drain Plug: Once the fluid has drained, reinstall the drain plug and tighten it to the manufacturer’s specified torque.
- Step 4: Remove the Transmission Pan:
- Remove Bolts: Use a socket to remove the bolts holding the transmission pan to the transmission housing.
- Carefully Lower Pan: Carefully lower the transmission pan, being mindful of any remaining fluid.
- Dispose of Fluid: Properly dispose of the used transmission fluid according to local regulations.
- A study by the Environmental Protection Agency (EPA) emphasizes the importance of properly disposing of used automotive fluids to protect the environment.
- Step 5: Remove the Transmission Filter:
- Locate Filter: Identify the transmission filter, which is typically located near the valve body.
- Remove Fasteners: Remove any fasteners holding the filter in place.
- Gently Pull Down: Gently pull the filter straight down to remove it from the valve body.
- Step 6: Disconnect the Conductor Plate:
- Locate Conductor Plate: Find the conductor plate, which is attached to the valve body.
- Disconnect Wiring: Carefully disconnect the wiring harness from the conductor plate.
- Remove Fasteners: Use a socket to remove the bolts or screws securing the conductor plate to the valve body.
- According to the Institute of Electrical and Electronics Engineers (IEEE), proper handling of electrical connectors is essential to prevent damage to electronic components.
- Step 7: Remove the Valve Body (if necessary):
- Valve Body Removal: In some cases, it may be necessary to remove the entire valve body to access the conductor plate.
- Disconnect Components: If removing the valve body, carefully disconnect any remaining components, such as solenoids or sensors.
- Mark Locations: Take photos or make notes of the locations of any components you disconnect to ensure proper reassembly.
- The American Society of Mechanical Engineers (ASME) recommends documenting the disassembly process to avoid errors during reassembly.
- Step 8: Install the New Conductor Plate:
- Install Conductor Plate: Carefully position the new conductor plate onto the valve body.
- Secure Fasteners: Use a torque wrench to tighten the bolts or screws to the manufacturer’s specified torque.
- Connect Wiring: Reconnect the wiring harness to the conductor plate, ensuring a secure connection.
- Step 9: Reinstall the Valve Body (if removed):
- Reinstall Valve Body: If you removed the valve body, carefully reinstall it into the transmission housing.
- Reconnect Components: Reconnect any solenoids, sensors, or other components you disconnected during removal.
- Torque Fasteners: Use a torque wrench to tighten the valve body bolts to the manufacturer’s specified torque.
- Step 10: Install the New Transmission Filter:
- Lubricate Seal: Lightly lubricate the seal on the new transmission filter with transmission fluid.
- Push into Place: Align the filter with the valve body and gently push it into place until it is securely seated.
- Step 11: Reinstall the Transmission Pan:
- Install New Gasket: Place a new transmission pan gasket onto the transmission pan.
- Align Pan: Align the transmission pan with the transmission housing.
- Install Bolts: Install the transmission pan bolts and tighten them in a crisscross pattern to the manufacturer’s specified torque.
- Step 12: Refill the Transmission Fluid:
- Locate Fill Tube: Find the transmission fluid fill tube, typically located under the hood.
- Add Fluid: Use a funnel to add the correct type and amount of transmission fluid, as specified in the vehicle’s owner’s manual.
- Check Level: Use the transmission fluid dipstick to check the fluid level. Add more fluid as needed until the level is correct.
- Step 13: Perform a Test Drive:
- Start Engine: Start the engine and let it idle for a few minutes.
- Shift Gears: Shift through all the gears (P, R, N, D) to ensure smooth engagement.
- Test Drive: Take the vehicle for a test drive, paying attention to any unusual transmission behavior.
- Check Fluid Level: After the test drive, check the transmission fluid level again and add fluid as needed.
- Step 14: Clear Diagnostic Trouble Codes:
- Use Scanner: Use an OBD-II scanner to clear any diagnostic trouble codes that may have been stored during the repair process.
- Verify Repair: Ensure that no new codes appear after clearing the old ones.
7. Can You Rebuild a Conductor Plate?
Yes, conductor plates can be rebuilt. Rebuilding offers a cost-effective alternative to purchasing a new unit, and it can be a reliable solution when performed by skilled technicians. CARDIAGTECH.BIZ offers comprehensive rebuilding services, ensuring your conductor plate meets or exceeds OEM standards.
- Process Overview:
- Diagnosis: The conductor plate undergoes thorough testing to identify faulty components.
- Disassembly: The unit is carefully disassembled, and all components are cleaned and inspected.
- Component Replacement: Faulty sensors, solenoids, and other parts are replaced with high-quality, upgraded components.
- Testing: The rebuilt conductor plate is rigorously tested to ensure proper function and performance.
- According to a report by the Automotive Parts Remanufacturers Association (APRA), rebuilt automotive components can perform as well as or better than new parts when properly remanufactured.
- Benefits of Rebuilding:
- Cost Savings: Rebuilding is typically less expensive than purchasing a new conductor plate.
- Improved Reliability: Rebuilt units often incorporate upgraded components that enhance durability and performance.
- Environmental Benefits: Rebuilding reduces waste and conserves resources compared to manufacturing new parts.
- The EPA supports automotive component remanufacturing as a sustainable practice that reduces environmental impact.
- CARDIAGTECH.BIZ Rebuild Services:
- Expert Technicians: Our skilled technicians have extensive experience rebuilding conductor plates for a wide range of Mercedes-Benz models.
- Advanced Equipment: We use state-of-the-art diagnostic and testing equipment to ensure the highest quality rebuilds.
- Warranty: Our rebuilt conductor plates come with a comprehensive warranty, providing peace of mind and assurance of quality.
8. How Much Does it Cost to Replace or Rebuild a Conductor Plate?
The cost to replace or rebuild a conductor plate can vary significantly depending on several factors. Understanding these cost drivers can help you make an informed decision.
- Replacement Costs:
- New Conductor Plate: The cost of a new conductor plate can range from $800 to $1500, depending on the vehicle model and manufacturer.
- Labor Costs: Labor costs for replacement can range from $500 to $1000, depending on the complexity of the job and the hourly rate of the mechanic.
- Total Replacement Cost: The total cost for replacing a conductor plate can range from $1300 to $2500.
- According to RepairPal, a trusted source for automotive repair cost estimates, these ranges are consistent with national averages for conductor plate replacement.
- Rebuilding Costs:
- Rebuild Service: The cost of rebuilding a conductor plate typically ranges from $500 to $800.
- Labor Costs: Labor costs for removal and reinstallation can range from $300 to $600.
- Total Rebuilding Cost: The total cost for rebuilding a conductor plate can range from $800 to $1400.
- The Automotive Parts Remanufacturers Association (APRA) estimates that rebuilding automotive components can save consumers up to 50% compared to purchasing new parts.
- Factors Affecting Cost:
- Vehicle Model: The make and model of the vehicle can affect the cost of the conductor plate and the complexity of the repair.
- Labor Rates: Labor rates vary depending on the location and the experience of the mechanic.
- Parts Availability: The availability of parts can affect the cost, especially for older or less common vehicles.
- Additional Repairs: If other transmission components are damaged or worn, additional repairs may be necessary, increasing the overall cost.
- Cost Comparison Table:
| Cost | Replacement | Rebuilding |
|---|---|---|
| New Conductor Plate/Service | $800 – $1500 | $500 – $800 |
| Labor | $500 – $1000 | $300 – $600 |
| Total Cost | $1300 – $2500 | $800 – $1400 |
9. What are the Benefits of Regular Transmission Maintenance?
Regular transmission maintenance is crucial for preventing conductor plate failures and extending the lifespan of your transmission. Here’s why proactive maintenance is essential.
- Preventative Measures:
- Regular Fluid Changes: Changing the transmission fluid at the recommended intervals helps remove contaminants and maintain proper lubrication.
- Filter Replacement: Replacing the transmission filter prevents debris from clogging valves and damaging sensors.
- Inspections: Regular inspections can identify potential problems early, before they lead to major repairs.
- According to a study by the American Automobile Association (AAA), regular maintenance can reduce the likelihood of costly repairs by as much as 50%.
- Benefits of Maintenance:
- Extended Lifespan: Proper maintenance can significantly extend the lifespan of the transmission and its components, including the conductor plate.
- Improved Performance: Regular maintenance ensures smooth and efficient gear changes, optimizing vehicle performance.
- Reduced Repair Costs: Preventative maintenance can help avoid costly repairs and replacements.
- Increased Fuel Efficiency: A well-maintained transmission operates more efficiently, improving fuel economy.
- Enhanced Reliability: Regular maintenance enhances the reliability of the transmission, reducing the risk of breakdowns.
- The Car Care Council recommends following the manufacturer’s recommended maintenance schedule to ensure optimal vehicle performance and longevity.
- Maintenance Schedule:
| Maintenance Task | Frequency |
|---|---|
| Transmission Fluid Change | Every 30,000 – 60,000 miles |
| Transmission Filter Change | Every 30,000 – 60,000 miles |
| Inspection | Every 12 months |
10. How Can CARDIAGTECH.BIZ Help with Conductor Plate Issues?
At CARDIAGTECH.BIZ, we’re dedicated to providing top-quality solutions for all your automotive diagnostic and repair needs. Here’s how we can assist you with conductor plate issues:
- High-Quality Diagnostic Tools:
- OBD-II Scanners: We offer a wide range of professional-grade OBD-II scanners to accurately diagnose transmission problems.
- Live Data Analysis: Our scanners provide live data streaming capabilities, allowing you to monitor transmission speed sensor readings in real-time.
- Advanced Features: Many of our scanners include advanced features such as bidirectional control and component testing.
- Leading automotive diagnostic tool manufacturers, such as Snap-on and Autel, emphasize the importance of using high-quality tools for accurate diagnostics.
- Conductor Plate Rebuilding Services:
- Expert Technicians: Our skilled technicians have extensive experience rebuilding conductor plates for Mercedes-Benz vehicles.
- Upgraded Components: We use high-quality, upgraded components to ensure the reliability and longevity of our rebuilt units.
- Warranty: Our rebuilt conductor plates come with a comprehensive warranty, providing peace of mind and assurance of quality.
- Replacement Parts:
- New Conductor Plates: We offer a wide selection of new conductor plates for various Mercedes-Benz models.
- OEM and Aftermarket Options: Choose from OEM (Original Equipment Manufacturer) or high-quality aftermarket parts to meet your needs and budget.
- Transmission Fluids and Filters: We also carry a complete line of transmission fluids and filters to keep your transmission running smoothly.
- Expert Advice and Support:
- Technical Support: Our knowledgeable technical support team is available to answer your questions and provide guidance on diagnosing and repairing conductor plate issues.
- Online Resources: We offer a variety of online resources, including technical articles, troubleshooting guides, and videos, to help you with your repairs.
- Community Forum: Join our online community forum to connect with other automotive enthusiasts and share your experiences.
Don’t let a failing conductor plate keep you off the road. Contact CARDIAGTECH.BIZ today at +1 (641) 206-8880 for expert advice, top-quality parts, and reliable rebuilding services. Visit our website at CARDIAGTECH.BIZ or stop by our location at 276 Reock St, City of Orange, NJ 07050, United States, and let us help you get your transmission running smoothly again. We can help you find the perfect tools to get the job done right, saving you time and money.
FAQ: Conductor Plate (Valve Body Speed Sensors)
- What does a conductor plate do in a transmission?
The conductor plate, or valve body speed sensor, is an electronic control unit within an automatic transmission that monitors rotational speeds and controls hydraulic fluid flow for gear engagement.
- How do I know if my conductor plate is failing?
Common symptoms include erratic shifting, limp mode, inability to select gears, being stuck in gear, and the check engine light illuminating. Diagnostic trouble codes (DTCs) related to speed sensors will also be present.
- Can I drive with a failing conductor plate?
Driving with a failing conductor plate is not recommended as it can cause further damage to the transmission and may leave you stranded. Limp mode restricts vehicle speed and performance.
- Is it better to replace or rebuild a conductor plate?
Rebuilding a conductor plate is often more cost-effective, especially if done by skilled technicians using upgraded components. Both options can restore proper transmission function.
- How long does a conductor plate last?
Conductor plates typically last between 100,000 and 150,000 miles, depending on driving conditions and maintenance practices.
- What are the most common diagnostic trouble codes (DTCs) associated with a failing conductor plate?
Common DTCs include P0715, P0717, P0718, P0720, P0722, P2767, and P2768, all related to transmission speed sensors.
- How often should I change my transmission fluid to prevent conductor plate issues?
Change your transmission fluid every 30,000 to 60,000 miles to remove contaminants and maintain proper lubrication.
- Can heat damage a conductor plate?
Yes, excessive heat can degrade the electronic components within the conductor plate over time.
- What Mercedes-Benz models are most prone to conductor plate failures?
Mercedes-Benz models with the 7G-Tronic transmission, such as the C-Class, E-Class, and S-Class, are more prone to conductor plate failures.
- Where can I get my conductor plate rebuilt?
CARDIAGTECH.BIZ offers professional conductor plate rebuilding services with expert technicians and a comprehensive warranty. Contact us today at +1 (641) 206-8880 or visit our website at CARDIAGTECH.BIZ.