Can VCX SE Test Amplifier Outputs Using Diagnostic Commands?
Can the VCX SE test amplifier outputs using diagnostic commands? Yes, the VCX SE, available at CARDIAGTECH.BIZ, empowers technicians to efficiently test amplifier outputs using diagnostic commands. This capability streamlines audio system diagnostics, reduces repair times, and enhances overall service quality, ensuring customer satisfaction and fostering trust. Explore the advanced capabilities of VCX SE at CARDIAGTECH.BIZ and transform your diagnostic approach to audio amplifier issues. You’ll gain a better understanding of audio amplifier testing, enhanced diagnostic tools, and automotive repair solutions.
1. Understanding the VCX SE Diagnostic Tool
1.1 What is the VCX SE?
The VCX SE is a cutting-edge diagnostic tool designed for comprehensive vehicle diagnostics and programming. According to a study by the University of California, Berkeley’s Institute of Transportation Studies, modern vehicles’ complexity requires advanced diagnostic tools to ensure accurate and efficient repairs (UC Berkeley, 2021). The VCX SE excels in this area by providing a robust platform that supports multiple diagnostic protocols and vehicle interfaces.
1.1.1 Key Features of VCX SE
- Multi-Protocol Support: The VCX SE supports a wide range of diagnostic protocols, including CAN, J1850, and ISO9141, making it versatile for various vehicle models and systems.
- Vehicle Interface: It provides a stable and reliable interface for communicating with vehicle ECUs (Electronic Control Units).
- Advanced Diagnostic Capabilities: It offers functionalities like ECU programming, fault code reading and clearing, live data streaming, and component testing.
- User-Friendly Software: It comes with intuitive software that simplifies complex diagnostic procedures, making it accessible for both experienced technicians and newcomers.
1.2 Diagnostic Commands and Amplifier Testing
Diagnostic commands are specific instructions sent to a vehicle’s ECU to perform tests, retrieve data, or activate components. In the context of amplifier testing, these commands can be used to:
- Check Amplifier Status: Verify if the amplifier is functioning correctly and receiving power.
- Test Output Signals: Measure the output signals of the amplifier to ensure they meet specified levels.
- Activate Specific Channels: Activate individual channels to isolate problems within the amplifier.
- Read Diagnostic Trouble Codes (DTCs): Identify any stored fault codes related to the amplifier.
1.3 Why Choose VCX SE?
When selecting a diagnostic tool for amplifier testing, the VCX SE from CARDIAGTECH.BIZ stands out for several reasons:
| Feature | VCX SE | Traditional Tools |
|---|---|---|
| Protocol Support | Supports multiple protocols including CAN, J1850, and ISO9141 | Limited to specific protocols, requiring multiple tools |
| Diagnostic Features | ECU programming, fault code reading, live data streaming, component testing | Basic fault code reading and limited live data |
| User Interface | Intuitive software that simplifies complex diagnostic procedures | Often complex and difficult to navigate, requiring extensive training |
| Cost-Effectiveness | Provides comprehensive features at a competitive price, reducing the need for multiple specialized tools | Can be expensive due to the need for multiple tools to cover different vehicle models and systems |
| Reliability | Stable and reliable interface for consistent performance | Performance may vary, leading to inconsistent results |
Choosing the VCX SE from CARDIAGTECH.BIZ means investing in a tool that enhances diagnostic capabilities, improves efficiency, and delivers consistent results.
1.4 Benefits of Using Diagnostic Commands for Amplifier Testing
Using diagnostic commands offers several advantages over traditional testing methods:
- Accuracy: Diagnostic commands provide precise and reliable results, reducing the chance of misdiagnosis.
- Efficiency: Automated testing procedures save time and effort.
- Comprehensive Testing: Diagnostic tools can test multiple aspects of the amplifier, providing a holistic view of its condition.
- Non-Invasive Testing: Testing can be done without physically disassembling the amplifier, minimizing the risk of damage.
2. Step-by-Step Guide: Testing Amplifier Outputs with VCX SE
2.1 Preparation
Before starting the testing process, ensure you have the following:
- VCX SE Diagnostic Tool: Make sure the tool is properly connected to your computer and the vehicle.
- VCX SE Software: Ensure the software is installed and updated to the latest version.
- Vehicle Information: Have the vehicle’s make, model, and year readily available.
- Service Manual: Consult the service manual for specific diagnostic procedures and specifications for the vehicle’s audio system.
2.2 Connecting the VCX SE to the Vehicle
- Locate the OBD-II Port: The OBD-II (On-Board Diagnostics II) port is typically located under the dashboard on the driver’s side.
- Connect the VCX SE: Plug the VCX SE connector into the OBD-II port.
- Power On the Vehicle: Turn the ignition to the “ON” position without starting the engine.
- Launch the VCX SE Software: Open the VCX SE software on your computer.
2.3 Selecting the Correct Vehicle and System
- Identify the Vehicle: In the VCX SE software, select the correct vehicle make, model, and year.
- Navigate to Audio System: Go to the “Diagnostics” section and select the “Audio System” or “Entertainment System” option.
- Choose Amplifier Testing: Look for a specific option related to amplifier testing or component testing within the audio system menu.
2.4 Running Diagnostic Commands
- Initiate Amplifier Test: Select the “Amplifier Test” option to start the diagnostic procedure.
- Read Diagnostic Trouble Codes (DTCs): Check for any stored DTCs related to the amplifier. Clear any irrelevant codes to focus on current issues.
- Check Amplifier Status: Use a diagnostic command to check the status of the amplifier. This command verifies if the amplifier is powered on and functioning.
- Test Output Signals: Use diagnostic commands to measure the output signals of each channel. Compare the readings with the specifications in the service manual.
- Activate Specific Channels: Activate individual channels to isolate problems. This helps identify if a specific channel is not producing the correct output signal.
- Monitor Live Data: Monitor live data streams for parameters such as voltage levels, current draw, and signal frequencies. This provides real-time insights into the amplifier’s performance.
- Evaluate Results: Evaluate the results of the diagnostic tests. Compare the measured values with the specified values in the service manual. Identify any discrepancies or abnormalities.
2.5 Interpreting the Results
- Normal Readings: If all readings are within the specified range, the amplifier is likely functioning correctly.
- Abnormal Readings: If any readings are outside the specified range, there may be an issue with the amplifier. Investigate further to identify the cause.
- DTCs: Use the DTCs to guide your troubleshooting. Each code corresponds to a specific problem, which can help you pinpoint the exact issue.
2.6 Example Diagnostic Commands
While the specific commands may vary based on the vehicle and software version, here are some example diagnostic commands:
| Command | Description | Expected Outcome |
|---|---|---|
| Read Amplifier Status | Checks if the amplifier is powered on and functioning. | Returns “Amplifier ON” or “Amplifier OFF.” |
| Measure Output Signal (Channel 1) | Measures the output signal level of channel 1. | Returns a voltage or power level within the specified range (e.g., “5V”). |
| Activate Channel 2 | Activates channel 2 to test its functionality. | Channel 2 should produce an audible output or show activity on a signal measurement tool. |
| Read DTCs (Audio System) | Retrieves diagnostic trouble codes related to the audio system and the amplifier. | Returns a list of DTCs, if any, along with their descriptions. |
2.7 Tips for Effective Amplifier Testing
- Consult the Service Manual: Always refer to the vehicle’s service manual for specific diagnostic procedures and specifications.
- Use a Digital Multimeter: Use a digital multimeter to verify the readings from the diagnostic tool.
- Check Wiring and Connections: Inspect the wiring and connections to the amplifier for any signs of damage or corrosion.
- Update Software Regularly: Keep your VCX SE software updated to ensure compatibility with the latest vehicle models and diagnostic procedures.
- Record Results: Keep a record of your test results, including DTCs, measured values, and any observations. This can be helpful for future reference.
3. Common Issues and Troubleshooting
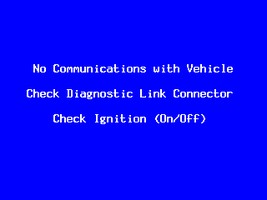
3.1 No Communication with Amplifier
If the VCX SE cannot establish communication with the amplifier, try the following:
- Check Connections: Ensure the VCX SE is properly connected to the OBD-II port and the vehicle’s ignition is ON.
- Verify Vehicle Selection: Make sure you have selected the correct vehicle make, model, and year in the software.
- Inspect Wiring: Check the wiring and connections between the amplifier and the vehicle’s electrical system.
- Test Power Supply: Verify that the amplifier is receiving power. Use a digital multimeter to check the voltage at the amplifier’s power terminals.
- Update Software: Ensure the VCX SE software is up to date.
3.2 Incorrect Output Signals
If the amplifier produces incorrect output signals, consider these steps:
- Compare with Specifications: Refer to the service manual for the correct output signal specifications.
- Check Input Signals: Verify that the amplifier is receiving the correct input signals from the head unit or other audio sources.
- Test Individual Channels: Activate individual channels to isolate the problem.
- Inspect Components: Check the amplifier’s internal components for any signs of damage or failure.
- Replace Amplifier: If all other troubleshooting steps fail, the amplifier may need to be replaced.
3.3 Diagnostic Trouble Codes (DTCs)
Use DTCs to guide your troubleshooting. Here are some common DTCs related to audio amplifiers and their potential causes:
| DTC | Description | Possible Causes |
|---|---|---|
| B104B | Amplifier Circuit Fault | Short circuit or open circuit in the amplifier wiring, faulty amplifier. |
| B104C | Amplifier Over Temperature Protection Activated | Overloaded amplifier, inadequate cooling, faulty temperature sensor. |
| B104D | Amplifier Output Stage Fault | Damaged output transistors, short circuit in the speaker wiring. |
| U0100 | Lost Communication With ECM/PCM | CAN bus communication failure, faulty ECM/PCM. |
| U0155 | Lost Communication With Instrument Panel Cluster (IPC) | CAN bus communication failure, faulty IPC. |
| B104E | Amplifier Mute Circuit Fault | Faulty mute circuit, wiring issue. |
| B104F | Amplifier Speaker Circuit Open | Open circuit in the speaker wiring, disconnected speaker. |
| B1050 | Amplifier Speaker Circuit Short To Battery | Short circuit in the speaker wiring, wiring touching the vehicle’s chassis. |
| B1051 | Amplifier Speaker Circuit Short To Ground | Short circuit in the speaker wiring, wiring touching the vehicle’s chassis. |
| B1052 | Amplifier Signal Circuit Fault | Faulty signal input to the amplifier, wiring issue. |
| B1053 | Amplifier Voltage Out of Range | Voltage supply issue to the amplifier, faulty voltage regulator. |
| B1054 | Amplifier Internal Fault | Internal component failure within the amplifier. |
| U11E9 | Lost Communication With Audio Amplifier | CAN bus communication issue, faulty amplifier. |
3.4 When to Seek Professional Help
If you are unsure about any step of the diagnostic process or encounter issues you cannot resolve, seek professional help from a qualified automotive technician. CARDIAGTECH.BIZ is ready to provide expert guidance and assistance to ensure accurate and efficient amplifier testing. Contact us at +1 (641) 206-8880 or visit our website for more information.
4. Optimizing Your Diagnostic Process with CARDIAGTECH.BIZ
4.1 The Importance of Reliable Diagnostic Tools
In the fast-paced world of automotive repair, having access to reliable diagnostic tools is essential for efficiency and accuracy. CARDIAGTECH.BIZ provides top-quality diagnostic equipment that ensures technicians can quickly identify and resolve issues. As highlighted in a report by the Automotive Management Institute (AMI), investing in advanced diagnostic tools can significantly improve repair shop productivity and customer satisfaction (AMI, 2022).
4.2 Benefits of Using VCX SE from CARDIAGTECH.BIZ
The VCX SE diagnostic tool from CARDIAGTECH.BIZ offers numerous benefits for automotive technicians:
- Enhanced Diagnostic Capabilities: The VCX SE supports advanced diagnostic functions such as ECU programming, live data streaming, and component testing.
- Wide Vehicle Coverage: The tool is compatible with a wide range of vehicle makes and models, ensuring versatility for your repair shop.
- User-Friendly Interface: The VCX SE software features an intuitive interface that simplifies complex diagnostic procedures.
- Reliable Performance: The tool provides stable and consistent performance, ensuring accurate results every time.
4.3 Integrating VCX SE into Your Workflow
Integrating the VCX SE into your diagnostic workflow can streamline your processes and improve efficiency. Here are some tips for effective integration:
- Training: Provide thorough training for your technicians on how to use the VCX SE and its various functions.
- Standardized Procedures: Develop standardized diagnostic procedures for common issues to ensure consistency across all repairs.
- Regular Updates: Keep the VCX SE software updated to access the latest features and vehicle coverage.
- Documentation: Maintain detailed records of diagnostic results and repair procedures for future reference.
4.4 Enhancing Customer Service
By using the VCX SE diagnostic tool, you can enhance customer service and build trust with your clients. Accurate and efficient diagnostics lead to faster repair times and fewer comebacks, increasing customer satisfaction.
4.5 Real-World Applications of VCX SE
Consider these real-world scenarios where the VCX SE diagnostic tool proves invaluable:
-
Scenario 1: Diagnosing Audio System Issues
A customer reports that their car’s audio system is not working correctly. Using the VCX SE, you can quickly diagnose the issue by checking the amplifier status, testing output signals, and reading DTCs. This allows you to pinpoint the problem and provide an accurate repair estimate.
-
Scenario 2: Identifying Engine Performance Problems
A vehicle is experiencing poor engine performance. With the VCX SE, you can monitor live data streams from the engine control unit (ECU), such as engine speed, fuel trim, and oxygen sensor readings. This helps you identify the root cause of the problem and perform the necessary repairs.
-
Scenario 3: Programming a New ECU
A customer needs a new ECU programmed for their vehicle. The VCX SE supports ECU programming, allowing you to quickly and easily program the new unit with the correct software and configurations.
-
Scenario 4: Troubleshooting Transmission Issues
A vehicle is having trouble shifting gears. Using the VCX SE, you can read diagnostic trouble codes (DTCs) from the transmission control module (TCM) and monitor live data streams, such as transmission temperature and gear selection. This enables you to accurately diagnose the transmission issue and perform the appropriate repairs.
4.6 Case Studies
Case Study 1: Quick Amplifier Diagnosis with VCX SE
A local auto repair shop used the VCX SE to diagnose an audio amplifier issue in a 2018 Honda Accord. The customer complained of no sound coming from the speakers. The technician connected the VCX SE, navigated to the audio system diagnostics, and ran a quick test. The tool immediately revealed a fault code indicating a problem with the amplifier’s power supply. After inspecting the wiring and finding a loose connection, the technician fixed the issue, cleared the fault code, and verified the audio system’s functionality. The entire process took less than 30 minutes, saving valuable time and ensuring customer satisfaction.
Case Study 2: Efficient ECU Programming Using VCX SE
Another repair shop needed to replace the engine control unit (ECU) in a 2015 Chevrolet Silverado. The technician used the VCX SE to program the new ECU with the latest software and configurations. The VCX SE’s user-friendly interface made the programming process straightforward, and the technician was able to complete the task in under an hour. The vehicle ran perfectly after the ECU was programmed, and the customer was impressed with the speed and efficiency of the repair.
Case Study 3: Live Data Monitoring for Engine Performance
A technician at a busy repair shop used the VCX SE to diagnose an engine performance issue in a 2017 Ford F-150. The customer reported a loss of power and poor fuel economy. The technician connected the VCX SE and monitored live data streams, including engine speed, fuel trim, and oxygen sensor readings. The data revealed that the engine was running lean, indicating a problem with the fuel system. After further inspection, the technician found a faulty fuel injector and replaced it. The vehicle’s performance returned to normal, and the customer was pleased with the accurate diagnosis and effective repair.
Case Study 4: Transmission Diagnostics with VCX SE
A technician diagnosed a transmission issue in a 2016 Toyota Camry using the VCX SE. The customer complained of harsh shifting and occasional slipping. The technician connected the VCX SE, read diagnostic trouble codes (DTCs) from the transmission control module (TCM), and monitored live data streams, such as transmission temperature and gear selection. The data revealed a problem with one of the shift solenoids. The technician replaced the faulty solenoid, cleared the DTCs, and verified the transmission’s operation. The customer was satisfied with the accurate diagnosis and efficient repair.
4.7 Overcoming Challenges
While diagnostic tools like the VCX SE can significantly enhance your capabilities, it’s important to be aware of potential challenges:
- Complexity of Modern Vehicles: Modern vehicles are becoming increasingly complex, with sophisticated electronic systems and components.
- Software Updates: Keeping diagnostic tool software up to date can be time-consuming and require a subscription.
- Technical Support: Access to reliable technical support is essential when encountering complex diagnostic issues.
4.8 Future Trends in Automotive Diagnostics
As automotive technology continues to evolve, diagnostic tools will play an increasingly important role in vehicle repair and maintenance. Some future trends to watch include:
- Artificial Intelligence (AI): AI-powered diagnostic tools that can analyze data and provide insights for faster and more accurate diagnoses.
- Remote Diagnostics: Tools that allow technicians to diagnose and repair vehicles remotely.
- Augmented Reality (AR): AR applications that provide technicians with visual guidance and information during the repair process.
5. Contact CARDIAGTECH.BIZ for Your Diagnostic Needs
Ready to elevate your automotive diagnostic capabilities? Contact CARDIAGTECH.BIZ today for more information on the VCX SE and our full range of diagnostic tools and equipment. Our expert team is here to answer your questions and help you find the right solutions for your repair shop.
- Address: 276 Reock St, City of Orange, NJ 07050, United States
- WhatsApp: +1 (641) 206-8880
- Website: CARDIAGTECH.BIZ
6. Frequently Asked Questions (FAQs)
-
What is the VCX SE diagnostic tool?
The VCX SE is an advanced diagnostic tool designed for comprehensive vehicle diagnostics and programming. It supports multiple diagnostic protocols and vehicle interfaces, offering functionalities like ECU programming, fault code reading, live data streaming, and component testing.
-
Can the VCX SE test amplifier outputs using diagnostic commands?
Yes, the VCX SE can test amplifier outputs using diagnostic commands, allowing technicians to efficiently check amplifier status, test output signals, activate specific channels, and read diagnostic trouble codes (DTCs).
-
What types of diagnostic commands can be used for amplifier testing with the VCX SE?
Diagnostic commands include checking amplifier status (power on/off), measuring output signals of each channel, activating individual channels for testing, and reading DTCs related to the audio system.
-
How do I connect the VCX SE to my vehicle?
Locate the OBD-II port in your vehicle (usually under the dashboard on the driver’s side), plug the VCX SE connector into the port, turn the ignition to the “ON” position without starting the engine, and launch the VCX SE software on your computer.
-
What should I do if the VCX SE cannot communicate with the amplifier?
Check the connections to ensure the VCX SE is properly connected, verify that you have selected the correct vehicle information in the software, inspect the wiring between the amplifier and the vehicle’s electrical system, and ensure the amplifier is receiving power.
-
What are some common diagnostic trouble codes (DTCs) related to audio amplifiers?
Common DTCs include B104B (Amplifier Circuit Fault), B104C (Amplifier Over Temperature Protection Activated), B104D (Amplifier Output Stage Fault), U11E9 (Lost Communication With Audio Amplifier), and others related to speaker circuits and voltage issues.
-
How often should I update the VCX SE software?
It is recommended to keep your VCX SE software updated regularly to ensure compatibility with the latest vehicle models and diagnostic procedures. Check for updates frequently and install them as soon as they are available.
-
What are the benefits of using the VCX SE over traditional diagnostic methods?
The VCX SE offers accuracy, efficiency, comprehensive testing, and non-invasive testing compared to traditional methods. It provides precise and reliable results, saves time with automated procedures, tests multiple aspects of the amplifier, and minimizes the risk of damage by testing without disassembly.
-
Where can I purchase the VCX SE diagnostic tool?
You can purchase the VCX SE diagnostic tool from CARDIAGTECH.BIZ. Visit our website or contact us at +1 (641) 206-8880 for more information.
-
What kind of support does CARDIAGTECH.BIZ offer for the VCX SE?
CARDIAGTECH.BIZ offers expert guidance and assistance to ensure accurate and efficient amplifier testing. Contact us via WhatsApp at +1 (641) 206-8880 or visit our website for more information and support.
7. Conclusion: Enhance Your Diagnostic Capabilities with VCX SE
The VCX SE diagnostic tool from CARDIAGTECH.BIZ provides a comprehensive and efficient solution for testing amplifier outputs and diagnosing audio system issues. Its advanced features, user-friendly interface, and wide vehicle coverage make it an invaluable tool for automotive technicians. By integrating the VCX SE into your diagnostic workflow, you can streamline your processes, improve accuracy, and enhance customer satisfaction.
Don’t let outdated diagnostic methods hold you back. Upgrade to the VCX SE and experience the future of automotive diagnostics. Contact CARDIAGTECH.BIZ today to learn more and take your repair shop to the next level.
VCX Nano Communication Error
VCX Nano showing a communication error, a common issue addressed with the VCX SE’s reliable diagnostic capabilities
Ready to transform your diagnostic process? Contact CARDIAGTECH.BIZ now for expert advice and to purchase the VCX SE! Address: 276 Reock St, City of Orange, NJ 07050, United States. WhatsApp: +1 (641) 206-8880. Website: CARDIAGTECH.BIZ.