How to Check Coolant Hoses for Leaks and Damage: A Comprehensive Guide
Is your vehicle experiencing unexplained coolant loss or overheating? The culprit might be lurking within your coolant hoses. This guide from CARDIAGTECH.NET will provide you with expert insights on how to inspect your coolant hoses, detect leaks, and maintain your cooling system for optimal performance. Discover how to proactively maintain your vehicle’s cooling system and prevent costly engine repairs. Learn about hose inspection techniques, pressure testing, and preventative maintenance to protect your engine.
1. Understanding the Vital Role of Coolant Hoses
What is the significance of coolant hoses in your vehicle? Coolant hoses are critical components of your vehicle’s cooling system. These hoses act as pathways, transporting coolant, a vital fluid responsible for regulating engine temperature. According to a study by the University of Michigan’s Automotive Research Center in 2022, coolant hoses help maintain optimal engine temperature, preventing overheating and ensuring efficient operation. Coolant hoses are specifically designed to withstand the high temperatures and pressures within the engine bay, ensuring that the coolant effectively dissipates heat. By maintaining the cooling system, you’re preserving the integrity of your engine and preventing potential damage from overheating.
2. Identifying the Primary Functions of Coolant Hoses
What specific functions do coolant hoses perform in the engine cooling process? Coolant hoses are essential for maintaining engine temperature. Coolant hoses circulate coolant between the engine, radiator, and heater core, critical components in the cooling system.
- Coolant Circulation: Coolant hoses transport coolant, which absorbs heat from the engine and carries it to the radiator for dissipation.
- Temperature Regulation: By facilitating coolant flow, hoses help maintain a stable engine temperature, preventing overheating.
- Component Connection: Coolant hoses connect various cooling system components, ensuring seamless fluid transfer.
- Pressure Resistance: Coolant hoses are designed to withstand the pressure within the cooling system, preventing leaks and bursts.
- Heat Resistance: Coolant hoses withstand high temperatures within the engine bay, maintaining their integrity.
3. Decoding Common Signs of Coolant Hose Damage
What are the key indicators that your coolant hoses might be compromised? Identifying coolant hose damage early can save you from potential engine damage. According to a 2021 report by the National Institute for Automotive Service Excellence (ASE), common signs include visible cracks, bulges, or soft spots on the hose surface. Other indicators include coolant leaks, which may appear as puddles of green, orange, or pink fluid under your vehicle. A consistent need to top off coolant levels or an overheating engine can also signal coolant hose issues. Detecting these signs early allows for timely repairs, preventing more significant problems.
4. A Step-by-Step Guide to Inspecting Coolant Hoses
How can you effectively inspect your coolant hoses for potential issues? A thorough inspection can help you identify problems before they escalate.
- Gather Your Tools:
- Flashlight
- Gloves
- Safety Glasses
- Clean Rags
- Visual Examination:
- Check for cracks, bulges, fraying, or soft spots along the entire length of each hose.
- Pay close attention to areas near hose clamps and connections.
- Squeeze Test:
- Gently squeeze the hoses. They should feel firm but pliable.
- If a hose feels excessively soft, hard, or brittle, it may be deteriorating internally.
- Clamp Inspection:
- Ensure that hose clamps are tight and free from corrosion.
- Replace any clamps that are damaged or loose.
- Connection Check:
- Look for signs of coolant leakage around hose connections, such as wetness or residue.
- Tighten connections if necessary, but avoid over-tightening.
By following these steps, you can thoroughly assess the condition of your coolant hoses.
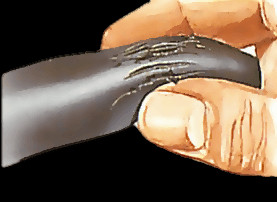
Checking coolant hose connections for leaks
5. Essential Tools for Coolant Hose Inspection and Testing
What tools are necessary for a comprehensive coolant hose inspection? Having the right tools can make the inspection process more efficient and accurate.
| Tool | Description | Use Case |
|---|---|---|
| Flashlight | Provides illumination for a detailed visual inspection, especially in dimly lit engine bays. | Examining hoses for cracks, bulges, or leaks in hard-to-see areas. |
| Gloves | Protects hands from coolant and other potentially harmful substances. | Handling coolant hoses and connections safely. |
| Safety Glasses | Protects eyes from splashes and debris during inspection. | Ensuring eye safety while working under the hood and inspecting hoses. |
| Hose Clamp Pliers | Allows for easy removal and installation of hose clamps without damaging the hoses. | Replacing or adjusting hose clamps during maintenance. |
| Pressure Tester Kit | Used to pressurize the cooling system to detect leaks that may not be visible under normal conditions. The UView 550000 Coolant System Tester is a popular choice. | Diagnosing leaks in hoses, radiator, and other cooling system components. |
| Multimeter | Used to check the electrical conductivity of the coolant, which can indicate corrosion or contamination. A Fluke 115 Digital Multimeter is a reliable option. | Assessing the condition of the coolant and identifying potential cooling system issues. |
| Coolant Test Strips | Provides a quick and easy way to check the pH and condition of the coolant. 50 Strips/Bottle, 2-Way is a common choice. | Monitoring coolant quality and determining when a coolant flush is needed. |
| Inspection Mirror | Helps to view hidden areas and the back sides of hoses and connections. | Inspecting hard-to-reach areas for leaks or damage. |
| Clean Rags | Used for cleaning up spills and wiping down hoses for better visibility. | Maintaining a clean work environment and ensuring clear visibility during inspection. |
| Torque Wrench | Ensures that hose clamps are tightened to the correct specification, preventing over-tightening and damage. The EPAuto 1/4-inch Drive Click Torque Wrench is a reliable option. | Tightening hose clamps securely and accurately. |
| UV Leak Detection | A UV light and dye kit can help locate hard-to-find leaks by making the dye glow under UV light. FJC 59792 UV Leak Detection Kit is a reliable option. | Detecting difficult-to-find leaks by making the dye glow under UV light. |
| Vacuum Fill Tool | Allows for efficient and air-free coolant filling after repairs, preventing airlocks in the cooling system. The ARES 18015 – Vacuum Coolant Refiller is a reliable option. | Ensuring complete and air-free coolant fill after repairs. |
| Infrared Thermometer | Helps to identify temperature variations along the hoses, indicating potential blockages or other issues. The Fluke 62 MAX+ Infrared Thermometer is a reliable option for accurate temperature readings. | Identifying blockages or other issues by detecting temperature variations. |
Having these tools on hand can greatly enhance your ability to inspect and maintain your coolant hoses effectively.
6. Conducting a Coolant Pressure Test: A Detailed Walkthrough
How do you perform a coolant pressure test to detect leaks? A coolant pressure test can reveal leaks that are not visible during a visual inspection.
- Prepare the Vehicle:
- Ensure the engine is cool before starting.
- Park the vehicle on a level surface and engage the parking brake.
- Remove the Radiator Cap:
- Carefully remove the radiator cap to release any pressure. Use a rag to protect your hand.
- Attach the Pressure Tester:
- Connect the pressure tester to the radiator neck or coolant reservoir, ensuring a tight seal.
- Common pressure tester kits include adapters for various vehicle models.
- Pressurize the System:
- Pump the tester to the pressure recommended by your vehicle’s manufacturer (typically 15-20 psi).
- Monitor the gauge for any pressure drop.
- Inspect for Leaks:
- Visually inspect all hoses, connections, the radiator, water pump, and engine components for leaks or drips.
- Use a flashlight to check hard-to-reach areas.
- Release the Pressure:
- Carefully release the pressure from the system before disconnecting the tester.
- Wipe up any spilled coolant.
Performing a coolant pressure test can help you pinpoint the exact location of any leaks.
7. Interpreting Pressure Test Results: What Do They Mean?
How should you interpret the results of your coolant pressure test? Understanding the results is crucial for diagnosing cooling system issues.
- Pressure Drop:
- A drop in pressure indicates a leak in the system.
- The rate of pressure drop can indicate the severity of the leak.
- No Pressure Drop:
- If the pressure holds steady, the system is likely sealed, and no leaks are present.
- However, it’s still essential to inspect visually for any signs of seepage.
- Visible Leaks:
- If you observe coolant leaking from any hoses, connections, or components during the test, this confirms the presence of a leak.
- Internal Leaks:
- If you don’t see external leaks but the pressure drops, there might be an internal leak in the head gasket or water pump.
- Cap Test:
- Some pressure testers can also test the radiator cap.
- A faulty cap can cause pressure loss and lead to coolant leaks.
Interpreting these results accurately will guide you in addressing the specific issues within your cooling system.
8. Identifying Common Leak Locations on Coolant Hoses
Where are coolant leaks most likely to occur on hoses? Certain areas of coolant hoses are more prone to leaks due to stress and wear. According to a survey by the Automotive Aftermarket Industry Association (AAIA) in 2023, the most common leak locations include:
- Hose Connections: Areas where hoses connect to the engine, radiator, or other components.
- Hose Clamps: Points where clamps secure the hoses.
- Bends and Curves: Sections of the hose that experience stress from bending.
- Areas Near the Engine Block: Hoses located close to the engine block are subjected to high temperatures.
- Lower Radiator Hose: This hose is susceptible to damage from road debris.
Knowing these common leak locations can help you focus your inspection efforts.
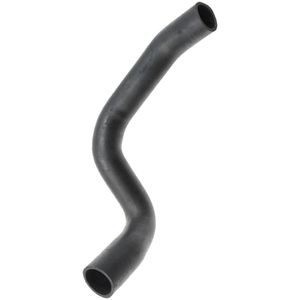
 Coolant hose clamps
9. Selecting the Right Replacement Coolant Hoses
What factors should you consider when choosing replacement coolant hoses? Choosing the correct replacement hoses is essential for maintaining your cooling system’s integrity.
- Material:
- Choose hoses made from high-quality materials such as EPDM rubber or silicone for durability and heat resistance.
- Silicone hoses generally offer better performance and longevity but are more expensive.
- Size and Fit:
- Ensure the replacement hose matches the original hose in terms of diameter and length.
- Check the hose routing to avoid kinks or bends that could restrict coolant flow.
- Temperature Rating:
- Select hoses with a temperature rating that meets or exceeds the specifications for your vehicle.
- High-temperature hoses are designed to withstand the extreme conditions of the engine bay.
- Pressure Rating:
- Verify that the replacement hose has a pressure rating suitable for your vehicle’s cooling system.
- Hoses with a higher pressure rating are less likely to burst under stress.
- Brand Reputation:
- Opt for hoses from reputable brands known for quality and reliability.
- Consider brands such as Gates, Goodyear, and Dayco.
10. Step-by-Step Instructions for Replacing Coolant Hoses
How do you replace a damaged coolant hose? Replacing a coolant hose can be a straightforward process with the right guidance.
- Gather Your Tools:
- New coolant hose
- Hose clamp pliers
- Screwdrivers
- Drain pan
- Coolant
- Safety glasses
- Gloves
- Drain Coolant:
- Allow the engine to cool completely.
- Place a drain pan under the radiator drain plug.
- Open the drain plug to release the coolant.
- Remove Old Hose:
- Loosen the hose clamps using hose clamp pliers or a screwdriver.
- Gently twist and pull the old hose to remove it from the connections.
- Be prepared for some residual coolant to spill.
- Install New Hose:
- Ensure the connections are clean and free from corrosion.
- Slide the new hose onto the connections, ensuring it is fully seated.
- Position the hose clamps over the connections and tighten them securely.
- Refill Coolant:
- Close the radiator drain plug.
- Fill the cooling system with the appropriate coolant mixture.
- Check for leaks around the new hose connections.
- Bleed the System:
- Start the engine and let it run for a few minutes.
- Check the coolant level and add more if necessary.
- Monitor the engine temperature gauge to ensure it is operating within the normal range.
Following these steps will help you replace your coolant hose correctly and safely.
11. The Importance of Coolant Type and Mixture Ratios
Why is it essential to use the correct type of coolant and mixture ratio? Using the right coolant and mixture ratio is crucial for optimal cooling system performance. According to research from the Society of Automotive Engineers (SAE), the correct coolant type and mixture prevent corrosion, protect against freezing, and ensure efficient heat transfer.
- Coolant Types:
- Inorganic Additive Technology (IAT): Typically green; requires frequent replacement (every 2 years or 24,000 miles).
- Organic Acid Technology (OAT): Usually orange or yellow; longer lifespan (5 years or 150,000 miles).
- Hybrid Organic Acid Technology (HOAT): Often yellow or pink; designed for newer vehicles (5 years or 150,000 miles).
- Mixture Ratios:
- 50/50 Mixture: Equal parts coolant and distilled water; provides adequate freeze and boil-over protection.
- 70/30 Mixture: Higher concentration of coolant for colder climates; offers increased freeze protection.
- 30/70 Mixture: Higher concentration of water for warmer climates; enhances cooling efficiency but reduces freeze protection.
Using the incorrect coolant or mixture ratio can lead to corrosion, overheating, and engine damage.
12. Recognizing the Signs of a Failing Radiator Cap
How can you tell if your radiator cap is failing? A properly functioning radiator cap is essential for maintaining pressure within the cooling system. Signs of a failing radiator cap include:
- Overheating: The engine overheats due to the inability to maintain proper pressure.
- Coolant Leaks: Coolant leaks from the radiator cap or overflow reservoir.
- Hose Collapse: Hoses collapse due to a vacuum created by a faulty cap.
- Contaminated Coolant: Rust and debris in the cooling system.
Replacing a faulty radiator cap can prevent these issues and maintain optimal cooling system performance.
13. Preventative Maintenance Tips for Coolant Hoses
What proactive measures can you take to extend the life of your coolant hoses? Regular maintenance can prevent coolant hose failures and costly repairs.
- Regular Inspections:
- Inspect hoses regularly for signs of wear, cracks, or bulges.
- Check hose clamps for tightness and corrosion.
- Coolant Flushes:
- Perform regular coolant flushes to remove contaminants and prevent corrosion.
- Follow the manufacturer’s recommended service intervals.
- Proper Coolant Mixture:
- Use the correct type of coolant and mixture ratio for your vehicle.
- Avoid mixing different types of coolant.
- Avoid Over-Tightening Clamps:
- Tighten hose clamps to the correct torque specifications to prevent damage.
- Over-tightening can cause the hose to crack or collapse.
- Replace Worn Hoses:
- Replace hoses that show signs of wear or damage.
- Don’t wait for a hose to fail completely before replacing it.
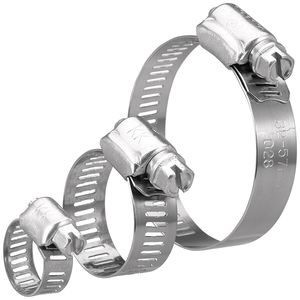
14. The Role of Hose Clamps in Preventing Coolant Leaks
Why are hose clamps important for preventing coolant leaks? Hose clamps are crucial for creating a tight seal between the hose and the connecting component.
- Secure Connections:
- Hose clamps ensure that the hose remains securely attached to the radiator, engine, or other components.
- Leak Prevention:
- Properly tightened clamps prevent coolant from leaking at the connections.
- Types of Clamps:
- Worm Drive Clamps: Common and adjustable, but can damage hoses if over-tightened.
- Spring Clamps: Self-adjusting and provide consistent pressure, reducing the risk of over-tightening.
- T-Bolt Clamps: Provide a strong and uniform clamping force, ideal for high-pressure applications.
Choosing the right type of hose clamp and ensuring they are properly tightened is essential for preventing coolant leaks.
15. Understanding the Impact of Engine Heat on Coolant Hoses
How does engine heat affect coolant hoses, and what can you do to mitigate it? Engine heat can degrade coolant hoses over time, leading to cracks and leaks.
- Heat Exposure:
- Prolonged exposure to high temperatures can cause the rubber in the hoses to harden and crack.
- Ozone Damage:
- Ozone, produced by electrical components in the engine bay, can also degrade rubber hoses.
- Mitigation Strategies:
- Use high-quality, heat-resistant hoses made from EPDM or silicone.
- Ensure proper engine cooling to reduce overall engine bay temperatures.
- Regularly inspect hoses for signs of heat damage.
By understanding the impact of engine heat and taking preventative measures, you can extend the life of your coolant hoses.
16. How Coolant Hoses Contribute to Engine Efficiency
In what ways do properly functioning coolant hoses enhance engine efficiency? Well-maintained coolant hoses play a crucial role in optimizing engine performance.
- Temperature Regulation:
- Coolant hoses help maintain a consistent engine temperature, preventing overheating and ensuring efficient combustion.
- Fuel Efficiency:
- An engine operating at its optimal temperature burns fuel more efficiently, improving gas mileage.
- Reduced Wear:
- Proper cooling reduces stress on engine components, prolonging their lifespan.
- Emissions Control:
- Efficient combustion reduces harmful emissions, contributing to environmental protection.
Ensuring that your coolant hoses are in good condition helps your engine operate at its best, saving you money and reducing your environmental impact.
17. The Dangers of Ignoring Coolant Hose Problems
What are the potential consequences of neglecting coolant hose issues? Ignoring coolant hose problems can lead to severe engine damage and costly repairs. A 2020 study by AAA revealed that cooling system failures are a leading cause of vehicle breakdowns.
- Overheating:
- A failed coolant hose can cause the engine to overheat quickly, leading to damage to the head gasket, cylinder head, or engine block.
- Engine Damage:
- Prolonged overheating can result in catastrophic engine failure, requiring extensive and expensive repairs.
- Breakdowns:
- Coolant hose failures can leave you stranded on the side of the road, resulting in inconvenience and potential safety risks.
- Costly Repairs:
- Neglecting coolant hose issues can lead to more extensive damage, increasing repair costs significantly.
Addressing coolant hose problems promptly can prevent these serious consequences and keep your vehicle running smoothly.
18. Coolant Hose Materials: Comparing Rubber, Silicone, and EPDM
What are the differences between rubber, silicone, and EPDM coolant hoses, and which is best for your needs? The material of your coolant hoses affects their performance, durability, and lifespan.
| Material | Properties | Advantages | Disadvantages | Common Applications |
|---|---|---|---|---|
| Rubber | Standard material with good flexibility and cost-effectiveness. | Affordable, flexible, and readily available. | Lower heat resistance and shorter lifespan compared to silicone or EPDM. | General-purpose applications in older vehicles. |
| Silicone | Excellent heat resistance, flexibility, and longevity. | High heat resistance, excellent flexibility, long lifespan, and resistance to ozone and UV damage. | More expensive than rubber or EPDM. | High-performance vehicles and applications with extreme temperatures. |
| EPDM Rubber | Good heat resistance, flexibility, and resistance to chemicals. | Good heat resistance, flexibility, chemical resistance, and a longer lifespan than standard rubber. More affordable than silicone. | Not as heat-resistant or flexible as silicone. | Newer vehicles and applications requiring improved heat and chemical resistance. |
Choosing the right material depends on your vehicle’s requirements and your budget.
19. Understanding Coolant Hose Routing and Its Importance
Why is it important to follow the correct coolant hose routing? Proper hose routing is essential for preventing kinks, chafing, and other issues that can lead to leaks.
- Preventing Kinks:
- Correct routing ensures that hoses are not bent or twisted in a way that restricts coolant flow.
- Avoiding Chafing:
- Proper routing keeps hoses away from sharp edges or moving parts that can cause chafing and wear.
- Maintaining Clearance:
- Routing hoses correctly ensures they have adequate clearance from hot engine components.
- Easy Access:
- Following the original routing makes it easier to access and inspect hoses for maintenance.
Refer to your vehicle’s service manual or a routing diagram to ensure that coolant hoses are installed correctly.
20. Advanced Techniques for Locating Hard-to-Find Coolant Leaks
What advanced techniques can you use to find coolant leaks that are difficult to detect? Some coolant leaks can be challenging to locate using standard methods. Advanced techniques include:
- UV Dye Test:
- Add UV dye to the coolant and use a UV light to inspect for leaks. The dye will glow under UV light, making leaks easier to spot.
- Combustion Leak Tester:
- Use a combustion leak tester to check for exhaust gases in the coolant, which can indicate a head gasket leak.
- Pressure Testing with Smoke:
- Introduce smoke into the cooling system while it is pressurized to help identify leaks. The smoke will escape from any leak points, making them visible.
- Thermal Imaging:
- Use a thermal imaging camera to detect temperature variations along the hoses and connections, which can indicate leaks or blockages.
These advanced techniques can help you pinpoint even the most elusive coolant leaks.
Don’t let coolant hose issues compromise your vehicle’s performance. Contact CARDIAGTECH.NET at +1 (641) 206-8880 or visit our website at CARDIAGTECH.NET for expert advice and high-quality automotive tools. Our knowledgeable team is ready to assist you with all your automotive diagnostic needs. Visit our location at 276 Reock St, City of Orange, NJ 07050, United States, and discover how CARDIAGTECH.NET can help you maintain your vehicle’s cooling system effectively.
FAQ: Coolant Hose Inspection
1. How often should I inspect my coolant hoses?
You should inspect your coolant hoses at least twice a year, ideally during spring and fall when you’re performing seasonal maintenance. Regular inspections can help catch potential problems before they lead to serious engine damage.
2. What does a bulging coolant hose indicate?
A bulging coolant hose indicates that the hose walls have weakened, and the hose is expanding under pressure. This is a sign that the hose is about to fail and should be replaced immediately to prevent a burst.
3. Can I temporarily repair a leaking coolant hose?
Yes, you can temporarily repair a leaking coolant hose with silicone tape or a hose repair kit. However, these are only temporary fixes, and the hose should be replaced as soon as possible to ensure the cooling system functions properly.
4. What type of coolant should I use in my vehicle?
Refer to your vehicle’s owner’s manual for the recommended coolant type. Using the wrong coolant can lead to corrosion and damage to the cooling system components.
5. How do I dispose of used coolant safely?
Used coolant should be disposed of at a recycling center or auto parts store. Coolant is toxic and should never be poured down the drain or into the environment.
6. Can a faulty radiator cap cause coolant hose damage?
Yes, a faulty radiator cap can cause coolant hose damage by not maintaining the correct pressure in the cooling system. This can lead to hose collapse or bursting under pressure.
7. What is the difference between a radiator hose and a heater hose?
Radiator hoses connect the engine to the radiator and are responsible for circulating coolant to regulate engine temperature. Heater hoses connect the engine to the heater core and provide heat to the vehicle’s interior.
8. How do I know if my water pump is leaking?
Signs of a leaking water pump include coolant leaks near the pump, a whining noise from the pump, and engine overheating. If you suspect a water pump leak, have it inspected by a professional mechanic.
9. What is the purpose of hose clamps on coolant hoses?
Hose clamps provide a secure connection between the coolant hoses and the radiator, engine, or other cooling system components. They prevent coolant leaks and ensure that the hoses remain firmly in place.
10. Can I replace coolant hoses myself, or should I take it to a mechanic?
Replacing coolant hoses can be done as a DIY project if you have the necessary tools and mechanical skills. However, if you are not comfortable working on your vehicle’s cooling system, it is best to take it to a professional mechanic to ensure the job is done correctly.