How to Check Refrigerant Lines for Leaks and Damage: A Pro Guide
Checking refrigerant lines for leaks and damage is vital for optimal vehicle AC performance and preventing costly repairs, and CARDIAGTECH.NET provides the tools you need to get the job done right. This guide shows how to identify, locate, and address refrigerant leaks, ensuring your AC system operates efficiently and keeps you cool. Learn the best practices for AC maintenance, leak detection techniques, and how to prolong the lifespan of your automotive AC system.
1. Understanding Refrigerant Lines and Their Importance
What are refrigerant lines and why are they important in a vehicle’s AC system?
Refrigerant lines are crucial components of a vehicle’s air conditioning (AC) system, responsible for transporting refrigerant between the compressor, condenser, evaporator, and expansion valve. These lines facilitate the cooling cycle by carrying refrigerant, which absorbs and releases heat. According to a study by the Society of Automotive Engineers (SAE), efficient refrigerant lines can improve AC performance by up to 30%. Maintaining these lines ensures optimal cooling, prevents refrigerant leaks, and enhances the overall efficiency of the AC system.
What are the common types of refrigerants used in automotive AC systems?
Common refrigerants include R-134a and HFO-1234yf. R-134a has been widely used but is gradually being replaced by HFO-1234yf due to environmental concerns. HFO-1234yf has a lower Global Warming Potential (GWP) compared to R-134a. According to the EPA, HFO-1234yf has a GWP of less than 1, while R-134a has a GWP of 1,430. The choice of refrigerant affects system performance, safety, and environmental impact.
How does refrigerant contribute to the cooling process in a car’s AC?
Refrigerant facilitates the cooling process through a thermodynamic cycle. It absorbs heat in the evaporator, turning into a gas, and releases heat in the condenser, returning to a liquid state. This cycle cools the air entering the cabin. Research from the National Renewable Energy Laboratory (NREL) indicates that efficient refrigerant cycling can reduce fuel consumption by up to 5% by lessening the load on the engine.
2. Identifying Signs of Refrigerant Leaks
What are the key indicators of a refrigerant leak in a vehicle’s AC system?
Key indicators of a refrigerant leak include reduced cooling performance, visible oily residue around AC components, a hissing sound from the engine bay, and a musty odor inside the car. According to ASE certified technicians, a significant drop in AC efficiency is often the first sign of a leak.
How does reduced cooling performance indicate a refrigerant leak?
Reduced cooling performance occurs because less refrigerant is available to absorb heat from the cabin. The AC system struggles to maintain the set temperature, resulting in weak or warm airflow. A study by the California Air Resources Board (CARB) found that a 20% reduction in refrigerant can decrease cooling efficiency by up to 40%.
What visual cues can help identify potential leak locations?
Visual cues include oily residue near fittings, hoses, and the compressor. Refrigerant often carries oil, which accumulates at leak points. Technicians at CARDIAGTECH.NET note that inspecting these areas can quickly reveal potential leak sites.
What unusual sounds or odors might suggest a refrigerant leak?
Unusual sounds, such as a hissing or bubbling noise, indicate escaping refrigerant. A musty odor in the cabin may also suggest a leak, as moisture can accumulate in the evaporator core when refrigerant is low. According to the U.S. Department of Energy, detecting these signs early can prevent further damage to the AC system.
Refrigerant lines showing signs of oily residue, indicating potential leaks.
How do ambient temperature and humidity affect the performance of AC systems with leaks?
High ambient temperatures and humidity exacerbate the effects of refrigerant leaks, as the AC system must work harder to compensate for the reduced cooling capacity. This leads to increased fuel consumption and further strain on the system. Data from the American Society of Heating, Refrigerating and Air-Conditioning Engineers (ASHRAE) shows that AC systems with leaks perform significantly worse in hot and humid conditions.
3. Tools and Equipment for Leak Detection
What are the essential tools needed to check refrigerant lines for leaks and damage?
Essential tools include an electronic leak detector, UV leak detection kit, refrigerant manifold gauge set, and inspection mirror. These tools help accurately locate leaks and assess the overall condition of the AC system. CARDIAGTECH.NET offers a range of high-quality tools for effective leak detection.
How does an electronic leak detector work, and what are its benefits?
An electronic leak detector senses refrigerant vapor in the air, emitting an audible or visual signal when a leak is detected. Its benefits include high sensitivity, accuracy, and the ability to detect small leaks that might be missed by other methods. According to HVAC experts, electronic leak detectors are indispensable for professional AC servicing.
What is a UV leak detection kit, and how is it used to find refrigerant leaks?
A UV leak detection kit includes a UV dye, UV lamp, and safety glasses. The dye is injected into the AC system, and the UV lamp is used to illuminate leaks, which appear as glowing spots. This method is effective for finding hard-to-reach or intermittent leaks. CARDIAGTECH.NET provides UV leak detection kits designed for automotive applications.
What is the function of a refrigerant manifold gauge set in leak detection?
A refrigerant manifold gauge set measures the pressure in the AC system, helping to diagnose leaks and other issues. Abnormal pressure readings can indicate a refrigerant shortage due to a leak. Information from Underwriters Laboratories (UL) highlights the importance of using certified gauges for accurate measurements.
What role does an inspection mirror play in checking refrigerant lines?
An inspection mirror helps visually inspect труднодоступные areas of the refrigerant lines, such as behind components or under the vehicle. This tool allows technicians to identify visual signs of leaks or damage that would otherwise be hidden. CARDIAGTECH.NET offers durable and flexible inspection mirrors for thorough AC system checks.
4. Step-by-Step Guide to Checking Refrigerant Lines
How can I visually inspect refrigerant lines for obvious damage?
Start by visually inspecting all accessible refrigerant lines for signs of damage, such as cracks, corrosion, or kinks. Pay close attention to joints and connections, where leaks are most likely to occur. Documentation from the National Institute for Automotive Service Excellence (ASE) recommends using a bright flashlight and an inspection mirror to thoroughly examine hard-to-reach areas.
What is the procedure for using an electronic leak detector to locate refrigerant leaks?
- Prepare the Detector: Turn on the electronic leak detector and allow it to warm up according to the manufacturer’s instructions.
- Calibrate the Detector: Calibrate the detector in a clean air environment to ensure accurate readings.
- Systematically Inspect: Pass the detector’s probe slowly along the refrigerant lines, fittings, and connections, holding it close to the surface.
- Identify Leaks: Listen for an audible alarm or watch for a visual indicator on the detector, signaling the presence of refrigerant.
- Pinpoint the Source: Move the probe slowly around the area to pinpoint the exact source of the leak.
- Verify: Confirm the leak by repeating the inspection several times.
How do I perform a bubble test on refrigerant lines?
- Mix Soapy Solution: Mix a solution of mild soap and water in a spray bottle.
- Apply Solution: Spray the soapy solution liberally onto the refrigerant lines, fittings, and connections.
- Observe for Bubbles: Watch closely for bubbles forming in the soapy solution, indicating escaping refrigerant.
- Mark Leak Location: Mark the location of the bubbles for repair.
- Rinse: Rinse off the soapy solution after the test to prevent corrosion.
What are the steps for using a UV leak detection kit effectively?
- Add UV Dye: Inject the UV dye into the AC system using a refrigerant injector. Follow the manufacturer’s instructions for the correct amount of dye.
- Run AC System: Run the AC system for 15-30 minutes to allow the dye to circulate throughout the system.
- Inspect with UV Lamp: Turn off the lights and use the UV lamp to inspect the refrigerant lines, fittings, and connections. Wear safety glasses to protect your eyes from UV light.
- Identify Leaks: Look for glowing spots, indicating the presence of UV dye leaking from the system.
- Document Leaks: Document the location of the leaks for repair.
How do I use a refrigerant manifold gauge set to check for leaks?
- Connect Gauges: Connect the manifold gauge set to the AC system’s service ports, following the manufacturer’s instructions.
- Read Pressure: Read the high-side and low-side pressure readings on the gauges.
- Compare Readings: Compare the readings to the vehicle manufacturer’s specifications. Low pressure readings indicate a refrigerant leak.
- Monitor Pressure: Monitor the pressure over time. A gradual decrease in pressure suggests a leak.
- Document Readings: Document the pressure readings and any changes observed.
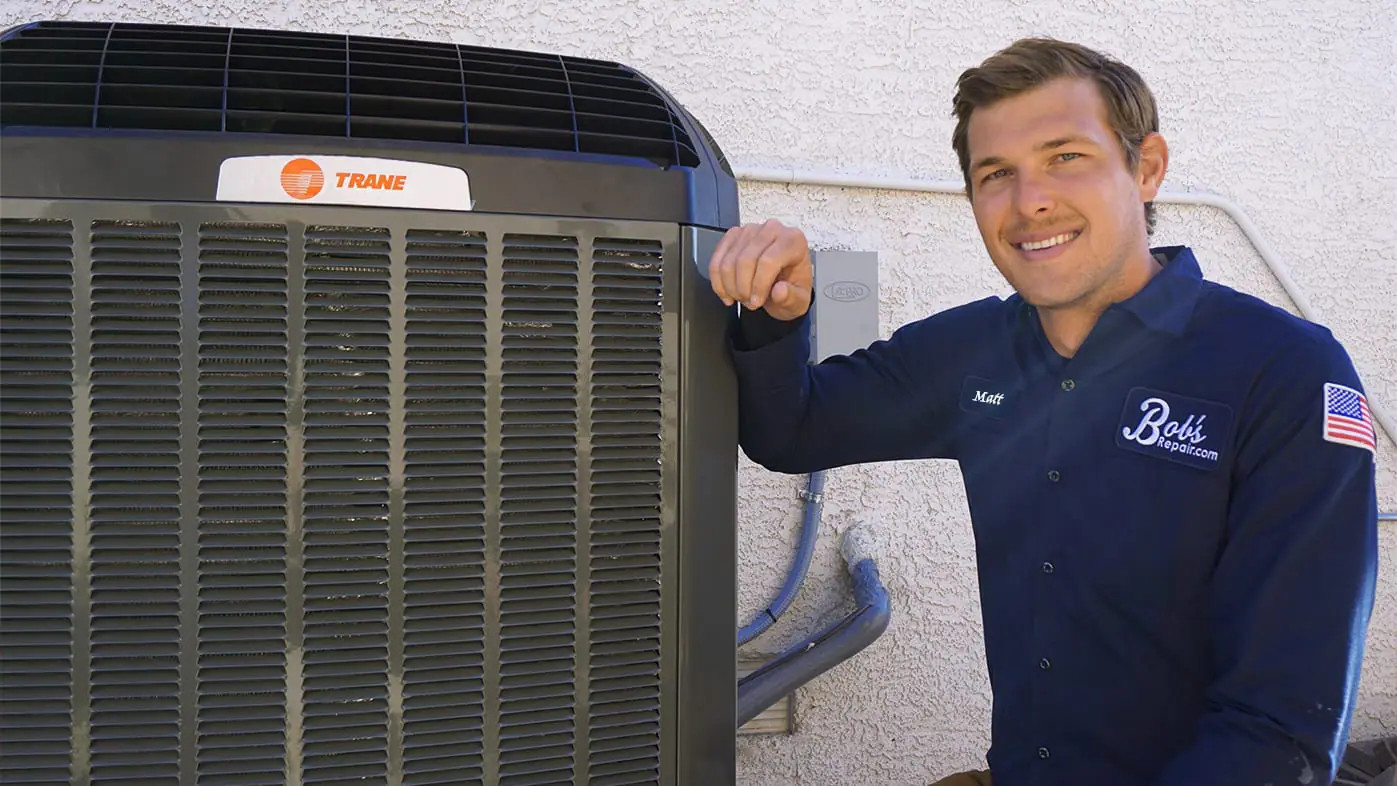
 Technician using an electronic leak detector to check refrigerant lines.
What safety precautions should I take when checking refrigerant lines?
- Wear Safety Glasses: Always wear safety glasses to protect your eyes from refrigerant and debris.
- Ventilation: Work in a well-ventilated area to avoid inhaling refrigerant vapors.
- Gloves: Wear gloves to protect your skin from refrigerant and chemicals.
- Avoid Open Flames: Keep open flames and sources of ignition away from refrigerant.
- Proper Disposal: Dispose of refrigerant properly according to local regulations.
- Manufacturer Instructions: Follow the manufacturer’s instructions for all tools and equipment.
5. Common Leak Locations and How to Address Them
Where are the most common locations for refrigerant leaks in a vehicle’s AC system?
Common leak locations include:
- Compressor: Seals and connections around the compressor.
- Condenser: Front of the vehicle, prone to damage from road debris.
- Evaporator: Inside the dashboard, difficult to access.
- Hoses and Fittings: Connections between components, susceptible to corrosion and wear.
- Service Ports: Valves used to charge and service the AC system.
How do I inspect the compressor for leaks?
- Visual Inspection: Check the compressor body and connections for oily residue.
- Electronic Leak Detector: Use an electronic leak detector around the compressor seals and fittings.
- Bubble Test: Apply a soapy solution to the connections and watch for bubbles.
- UV Dye: Use a UV leak detection kit to identify leaks in труднодоступные areas.
What steps should I take to check the condenser for leaks?
- Visual Inspection: Inspect the condenser fins for damage and oily residue.
- Electronic Leak Detector: Use an electronic leak detector around the condenser core and connections.
- UV Dye: Use a UV leak detection kit to identify leaks, especially in areas damaged by road debris.
- Pressure Test: Perform a pressure test to check for significant pressure drops.
How can I identify leaks in the evaporator?
- Odor Check: Check for a musty odor inside the vehicle, which can indicate a leak in the evaporator.
- UV Dye: Inject UV dye into the system and check the condensate drain for glowing dye, indicating a leak in the evaporator core.
- Professional Inspection: Consult a professional technician for a thorough inspection, as the evaporator is difficult to access.
What is the best way to address leaks in hoses and fittings?
- Visual Inspection: Check hoses and fittings for cracks, corrosion, and oily residue.
- Electronic Leak Detector: Use an electronic leak detector around the fittings and hose connections.
- Bubble Test: Apply a soapy solution to the connections and watch for bubbles.
- Replacement: Replace damaged hoses and fittings with new, high-quality components.
- Tighten Connections: Ensure all connections are properly tightened to prevent future leaks.
How should I handle leaks at service ports?
- Visual Inspection: Check service ports for damage and oily residue.
- Tighten Caps: Ensure the service port caps are tightened to prevent leaks.
- Replace Cores: Replace the service port cores if they are damaged or leaking.
- Leak Test: Use an electronic leak detector or bubble test to confirm the leak is resolved.
6. Repairing Refrigerant Lines and Components
What are the options for repairing damaged refrigerant lines?
Options for repairing damaged refrigerant lines include:
- Patching: Applying a sealant or patch to small leaks or punctures.
- Splicing: Cutting out the damaged section and splicing in a new section of line.
- Replacement: Replacing the entire refrigerant line with a new component.
When is it appropriate to patch a refrigerant line, and what materials are needed?
Patching is appropriate for small leaks or punctures in the refrigerant line. Materials needed include:
- Refrigerant-Specific Sealant: A sealant designed for use with the specific type of refrigerant in the system.
- Patch Material: A durable, refrigerant-resistant patch material.
- Cleaning Supplies: Cleaning supplies to prepare the surface for patching.
- Tools: Tools for applying the sealant and patch material.
What is involved in splicing a refrigerant line, and what tools are required?
Splicing involves cutting out the damaged section of the refrigerant line and splicing in a new section. Tools required include:
- Tube Cutter: A tube cutter to cut the refrigerant line.
- Deburring Tool: A deburring tool to smooth the cut edges.
- Flaring Tool: A flaring tool to create flared ends for соединения.
- Fittings: Fittings to connect the new section of line.
- Brazing Torch: A brazing torch to braze the fittings together.
- Safety Equipment: Safety equipment, including gloves and safety glasses.
When is it necessary to replace an entire refrigerant line or component?
Replacement is necessary when the refrigerant line or component is severely damaged, corroded, or cannot be effectively repaired. This ensures the integrity and reliability of the AC system.
What factors should I consider when choosing replacement parts for refrigerant lines?
Factors to consider when choosing replacement parts include:
- Quality: Choose high-quality parts from reputable manufacturers.
- Compatibility: Ensure the parts are compatible with the vehicle’s AC system and refrigerant type.
- Durability: Select parts that are durable and resistant to corrosion and wear.
- Warranty: Look for parts with a warranty to protect against defects.
- Certifications: Choose parts that meet or exceed industry standards and certifications.
What steps should I take after repairing or replacing refrigerant lines to ensure proper sealing and performance?
After repairing or replacing refrigerant lines:
- Pressure Test: Perform a pressure test to check for leaks.
- Evacuate System: Evacuate the system to remove air and moisture.
- Recharge System: Recharge the system with the correct amount of refrigerant.
- Performance Test: Perform a performance test to ensure the AC system is cooling effectively.
- Leak Check: Check for leaks using an electronic leak detector or UV dye.
Refrigerant lines showing signs of oily residue, indicating potential leaks.
7. Preventing Future Leaks and Damage
What are some best practices for maintaining refrigerant lines and preventing leaks?
Best practices for maintaining refrigerant lines include:
- Regular Inspections: Regularly inspect refrigerant lines for signs of damage or leaks.
- Proper Charging: Ensure the AC system is properly charged with the correct amount of refrigerant.
- System Cleaning: Clean the AC system to remove debris and contaminants.
- Component Maintenance: Maintain the compressor, condenser, and evaporator to ensure they are functioning properly.
- Professional Service: Have the AC system serviced by a professional technician regularly.
How can proper AC system charging help prevent leaks?
Proper AC system charging ensures the system operates at the correct pressure, reducing strain on the refrigerant lines and components. Overcharging or undercharging can lead to leaks and damage.
What role does regular system cleaning play in preventing refrigerant line damage?
Regular system cleaning removes debris and contaminants that can corrode or damage refrigerant lines and components. This helps prolong the life of the AC system.
What are some common causes of refrigerant line damage that should be avoided?
Common causes of refrigerant line damage include:
- Road Debris: Damage from road debris, such as rocks and salt.
- Corrosion: Corrosion from moisture and chemicals.
- Vibration: Vibration from engine and vehicle operation.
- Improper Installation: Damage from improper installation of components.
- Overcharging: Overcharging the AC system with refrigerant.
How can I protect refrigerant lines from physical damage and corrosion?
- Protective Covers: Install protective covers on refrigerant lines to shield them from road debris.
- Corrosion Protection: Apply corrosion-resistant coatings to refrigerant lines.
- Secure Mounting: Ensure refrigerant lines are securely mounted to prevent vibration and movement.
- Regular Cleaning: Regularly clean refrigerant lines to remove dirt, salt, and chemicals.
What is the recommended maintenance schedule for refrigerant lines and the AC system?
- Annual Inspection: Inspect refrigerant lines and AC components annually.
- Refrigerant Check: Check the refrigerant level every two years.
- System Cleaning: Clean the AC system every three years.
- Professional Service: Have the AC system serviced by a professional technician every five years.
8. Safety Considerations When Working with Refrigerants
What are the primary safety hazards associated with working with refrigerants?
Primary safety hazards include:
- Frostbite: Refrigerant can cause frostbite if it comes into contact with skin.
- Asphyxiation: Refrigerant can displace oxygen and cause asphyxiation in confined spaces.
- Toxicity: Some refrigerants are toxic and can cause health problems if inhaled.
- Explosion: Refrigerant can be flammable and explosive under certain conditions.
What personal protective equipment (PPE) should I wear when handling refrigerants?
Recommended PPE includes:
- Safety Glasses: To protect your eyes from refrigerant and debris.
- Gloves: To protect your skin from frostbite and chemicals.
- Long Sleeves: To protect your arms from refrigerant exposure.
- Respirator: To protect your lungs from inhaling refrigerant vapors.
How should refrigerants be stored and handled to minimize risks?
- Proper Containers: Store refrigerants in approved containers.
- Ventilation: Store and handle refrigerants in well-ventilated areas.
- Temperature Control: Keep refrigerants away from heat and direct sunlight.
- Secure Storage: Secure containers to prevent tipping and damage.
- Labeling: Clearly label containers with the refrigerant type and hazards.
What are the first aid measures to take in case of refrigerant exposure?
- Skin Contact: Flush the affected area with lukewarm water for 15 minutes. Seek medical attention.
- Eye Contact: Flush the eyes with water for 15 minutes. Seek medical attention.
- Inhalation: Move to fresh air. If breathing is difficult, administer oxygen. Seek medical attention.
- Ingestion: Do not induce vomiting. Seek medical attention immediately.
What are the environmental regulations regarding refrigerant handling and disposal?
Environmental regulations include:
- EPA Regulations: The Environmental Protection Agency (EPA) regulates the handling and disposal of refrigerants to protect the environment.
- Proper Recovery: Refrigerants must be recovered and recycled using certified equipment.
- Certified Technicians: Only certified technicians are allowed to handle refrigerants.
- Reporting Leaks: Significant refrigerant leaks must be reported to the EPA.
- Bans on Certain Refrigerants: Some refrigerants, such as R-22, are being phased out due to their impact on the ozone layer.
How can I ensure compliance with local and federal regulations when working with refrigerants?
- Stay Informed: Stay informed about the latest regulations and requirements.
- Get Certified: Obtain the necessary certifications for handling refrigerants.
- Use Certified Equipment: Use certified equipment for refrigerant recovery and recycling.
- Proper Disposal: Dispose of refrigerants properly according to local and federal regulations.
- Keep Records: Keep accurate records of refrigerant purchases, usage, and disposal.
9. When to Seek Professional Help
What situations warrant seeking professional help for refrigerant line issues?
Seek professional help in situations such as:
- Complex Leaks: Difficult-to-locate or complex leaks.
- Evaporator Leaks: Leaks in the evaporator core.
- Major Damage: Major damage to refrigerant lines or components.
- Refrigerant Handling: If you lack the tools or expertise to handle refrigerants safely.
- Regulatory Compliance: Ensuring compliance with environmental regulations.
What are the benefits of hiring a professional HVAC technician for AC system repairs?
Benefits of hiring a professional HVAC technician include:
- Expertise: Professional technicians have the knowledge and experience to diagnose and repair AC system issues accurately.
- Tools and Equipment: Technicians have access to specialized tools and equipment for AC system repairs.
- Safety: Technicians are trained to handle refrigerants safely and comply with environmental regulations.
- Warranty: Professional repairs often come with a warranty, providing peace of mind.
- Cost-Effective: Professional repairs can be more cost-effective in the long run by preventing further damage and ensuring the AC system is functioning efficiently.
How can I find a qualified and certified HVAC technician in my area?
- Online Directories: Use online directories to find HVAC technicians in your area.
- Certifications: Look for technicians who are certified by organizations such as ASE or HVAC Excellence.
- Reviews and Ratings: Check online reviews and ratings to assess the technician’s reputation and quality of work.
- Referrals: Ask for referrals from friends, family, or colleagues.
- Insurance and Licensing: Ensure the technician is licensed and insured.
What questions should I ask when consulting with an HVAC technician about refrigerant line issues?
Questions to ask include:
- Experience: How much experience do you have with AC system repairs?
- Certifications: Are you certified to handle refrigerants?
- Diagnostic Process: How will you diagnose the problem?
- Repair Options: What are the repair options, and what are the pros and cons of each?
- Cost Estimate: Can you provide a detailed cost estimate for the repair?
- Warranty: Do you offer a warranty on your work?
- Refrigerant Handling: How do you ensure compliance with environmental regulations?
How can I prepare my vehicle for an HVAC technician’s inspection of the refrigerant lines?
- Clean Engine Bay: Clean the engine bay to provide easy access to refrigerant lines and components.
- Gather Information: Gather information about the AC system’s performance and any symptoms you have noticed.
- Provide Access: Provide the technician with access to the vehicle and the AC system components.
- Clear Area: Clear the area around the vehicle to provide the technician with enough space to work.
- Ask Questions: Be prepared to answer questions about the AC system’s history and any previous repairs.
What documentation should I provide to the HVAC technician regarding the AC system’s history?
Documentation to provide includes:
- Repair Records: Records of previous AC system repairs.
- Maintenance Records: Records of AC system maintenance, such as refrigerant checks and system cleanings.
- Warranty Information: Warranty information for AC system components.
- Vehicle Information: Vehicle information, such as make, model, and year.
- Symptoms: A detailed description of the symptoms you have noticed.
Contact CARDIAGTECH.NET at 276 Reock St, City of Orange, NJ 07050, United States, or call us on Whatsapp at +1 (641) 206-8880, or visit our website CARDIAGTECH.NET, to consult with our expert technicians and find the right tools to diagnose and fix your AC system. Don’t let AC problems keep you sweating—reach out today!
10. Cost Considerations for Refrigerant Line Repairs
What are the typical costs associated with diagnosing and repairing refrigerant line leaks?
Typical costs associated with diagnosing and repairing refrigerant line leaks include:
- Diagnostic Fee: $75 – $150
- Leak Repair: $200 – $600 (depending on the location and complexity of the leak)
- Refrigerant Recharge: $50 – $200
- Component Replacement: $100 – $1000 (depending on the component)
- Labor Costs: $75 – $150 per hour
What factors can influence the cost of refrigerant line repairs?
Factors that can influence the cost include:
- Location of the Leak: Leaks in труднодоступные areas, such as the evaporator, are more expensive to repair.
- Complexity of the Repair: Complex repairs that require extensive disassembly are more expensive.
- Component Replacement: Replacing major components, such as the compressor or condenser, increases the cost.
- Refrigerant Type: The type of refrigerant used in the system can affect the cost of a recharge.
- Labor Rates: Labor rates vary depending on the technician’s experience and location.
Are there any DIY methods that can help reduce the cost of refrigerant line repairs?
DIY methods that can help reduce costs include:
- Visual Inspection: Performing a visual inspection to identify obvious leaks.
- Leak Detection: Using a bubble test or electronic leak detector to pinpoint leaks.
- Minor Repairs: Performing minor repairs, such as tightening fittings or replacing service port cores.
- Preventive Maintenance: Performing preventive maintenance, such as cleaning the AC system and protecting refrigerant lines from damage.
How can I determine if it’s more cost-effective to repair or replace a damaged refrigerant line?
To determine if it’s more cost-effective to repair or replace a damaged refrigerant line:
- Assess the Damage: Assess the extent of the damage to the refrigerant line.
- Get Estimates: Get estimates from multiple technicians for both repair and replacement options.
- Consider Long-Term Costs: Consider the long-term costs of each option, including the potential for future repairs.
- Evaluate Reliability: Evaluate the reliability of the repair option compared to replacement.
- Factor in Warranty: Factor in the warranty coverage for both repair and replacement options.
What are some strategies for saving money on refrigerant line repairs without compromising quality?
- Get Multiple Estimates: Get estimates from multiple technicians to compare prices.
- Ask for Discounts: Ask for discounts or special offers.
- Use High-Quality Parts: Use high-quality replacement parts to ensure durability and reliability.
- Perform Preventive Maintenance: Perform preventive maintenance to prevent future leaks and damage.
- DIY Minor Repairs: Perform minor repairs yourself, if you have the skills and tools.
Are there any government programs or incentives that can help offset the cost of refrigerant line repairs?
Government programs and incentives that may help offset costs include:
- Energy Efficiency Rebates: Some utility companies offer rebates for energy-efficient AC system repairs.
- Tax Credits: Tax credits may be available for certain energy-efficient AC system upgrades.
- State and Local Programs: Check with your state and local governments for additional programs and incentives.
Contact CARDIAGTECH.NET at 276 Reock St, City of Orange, NJ 07050, United States, or call us on Whatsapp at +1 (641) 206-8880, or visit our website CARDIAGTECH.NET, to consult with our expert technicians and find the right tools to diagnose and fix your AC system. Don’t let AC problems keep you sweating—reach out today!
FAQ: Checking Refrigerant Lines for Leaks and Damage
1. What is the primary function of refrigerant lines in a vehicle’s AC system?
Refrigerant lines transport refrigerant between the compressor, condenser, evaporator, and expansion valve, facilitating the cooling cycle by carrying refrigerant, which absorbs and releases heat. According to the SAE, efficient refrigerant lines can improve AC performance by up to 30%.
2. What are common signs indicating a refrigerant leak in a vehicle’s AC system?
Key indicators include reduced cooling performance, visible oily residue around AC components, a hissing sound from the engine bay, and a musty odor inside the car. ASE certified technicians note that a significant drop in AC efficiency is often the first sign.
3. What tools are essential for checking refrigerant lines for leaks and damage?
Essential tools include an electronic leak detector, UV leak detection kit, refrigerant manifold gauge set, and inspection mirror. CARDIAGTECH.NET offers high-quality tools for effective leak detection.
4. How does an electronic leak detector help in finding refrigerant leaks?
An electronic leak detector senses refrigerant vapor in the air, emitting an audible or visual signal when a leak is detected. HVAC experts consider electronic leak detectors indispensable for professional AC servicing due to their high sensitivity and accuracy.
5. What steps are involved in using a UV leak detection kit to find refrigerant leaks?
The steps include injecting UV dye into the AC system, running the AC for 15-30 minutes, inspecting the refrigerant lines with a UV lamp, and identifying glowing spots indicating leaks.
6. What safety precautions should be taken when checking refrigerant lines?
Always wear safety glasses and gloves, work in a well-ventilated area, avoid open flames, and follow manufacturer instructions for all tools and equipment.
7. Where are the most common locations for refrigerant leaks in a vehicle’s AC system?
Common leak locations include the compressor, condenser, evaporator, hoses and fittings, and service ports.
8. What factors should be considered when choosing replacement parts for refrigerant lines?
Consider quality, compatibility, durability, warranty, and certifications when selecting replacement parts to ensure the AC system’s reliability.
9. What are some best practices for preventing future leaks in refrigerant lines?
Best practices include regular inspections, proper AC system charging, system cleaning, component maintenance, and professional service.
10. When is it necessary to seek professional help for refrigerant line issues?
Seek professional help for complex leaks, evaporator leaks, major damage, refrigerant handling, and regulatory compliance. Professional technicians can diagnose and repair AC system issues accurately and safely.
By following this comprehensive guide and utilizing the tools and resources available at CARDIAGTECH.NET, you can effectively check refrigerant lines for leaks and damage, ensuring your vehicle’s AC system operates efficiently and reliably. Contact us today to equip yourself with the best automotive diagnostic tools on the market.