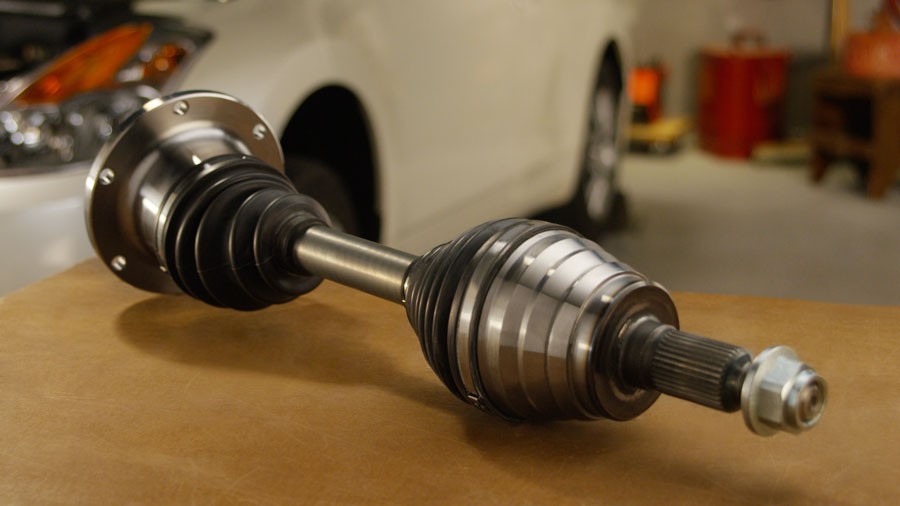
**How to Check Oxygen Sensors Before and After Catalytic Converter**
Oxygen sensors are crucial for optimal engine performance and emissions. CARDIAGTECH.NET provides the tools and knowledge necessary to accurately assess these sensors. Understanding how to check them both before and after the catalytic converter ensures your vehicle runs efficiently, reduces emissions, and avoids costly repairs, making it essential to use reliable diagnostic tools and stay informed about sensor technology.
1. Understanding Oxygen Sensors: An Overview
Do you know what oxygen sensors are and why they’re important in your vehicle? Oxygen sensors, often called O2 sensors, measure the amount of oxygen in your car’s exhaust system. They play a vital role in managing the air-fuel mixture and keeping your car running efficiently. According to a study by the University of California, Berkeley, efficient O2 sensors can reduce fuel consumption by up to 15%.
- Function: Oxygen sensors monitor the oxygen levels in the exhaust gases.
- Location: Typically, there are two or more O2 sensors: one before the catalytic converter (upstream) and one or more after (downstream).
- Importance: These sensors help the engine control unit (ECU) adjust the air-fuel mixture, ensuring optimal combustion and reduced emissions.
2. Types of Oxygen Sensors: Narrowband vs. Wideband
What are the different types of oxygen sensors, and how do they work? There are two main types of oxygen sensors: narrowband and wideband. Narrowband sensors provide a simple lean or rich indication, while wideband sensors offer a more precise measurement of the air-fuel ratio. Research from Bosch indicates that wideband sensors improve engine efficiency by up to 20% compared to narrowband sensors.
- Narrowband Sensors: These are the older type of O2 sensor, providing a basic indication of whether the air-fuel mixture is lean or rich.
- Wideband Sensors: These sensors offer a more accurate measurement of the air-fuel ratio, allowing for finer adjustments by the ECU.
- Operation: Both types work by measuring the difference in oxygen levels between the exhaust gas and the outside air, generating a voltage signal that the ECU interprets.
3. Why Oxygen Sensors Fail: Common Causes
Why do oxygen sensors fail, and what factors contribute to their malfunction? Oxygen sensors can fail due to contamination, high temperatures, and normal wear and tear. Contaminants like oil, coolant, and excessive fuel can coat the sensor, reducing its accuracy. According to a study by the National Institute for Automotive Service Excellence (ASE), about 90% of O2 sensor failures are due to contamination.
- Contamination: Oil leaks, coolant leaks, and excessive fuel can contaminate the sensor.
- High Temperatures: Constant exposure to high exhaust temperatures can degrade the sensor over time.
- Wear and Tear: Like any component, O2 sensors have a limited lifespan and will eventually wear out.
4. Symptoms of a Failing Oxygen Sensor: What to Look For
What are the signs that an oxygen sensor is failing, and how can you identify these issues? Common symptoms of a failing oxygen sensor include a check engine light, poor fuel economy, rough idling, and sluggish engine performance. Addressing these symptoms promptly can prevent further damage and maintain your vehicle’s efficiency.
- Check Engine Light: This is often the first sign of an O2 sensor problem.
- Poor Fuel Economy: A faulty sensor can cause the engine to use more fuel.
- Rough Idling: The engine may idle roughly or stall.
- Sluggish Performance: The vehicle may feel less responsive than usual.
5. Essential Tools for Checking Oxygen Sensors
What tools do you need to check oxygen sensors effectively? To properly check oxygen sensors, you’ll need a diagnostic scan tool, a multimeter, and potentially an oscilloscope. These tools help you read fault codes, measure sensor voltage, and analyze sensor signals. CARDIAGTECH.NET offers a range of diagnostic tools to suit every need.
- Diagnostic Scan Tool: Reads fault codes from the vehicle’s computer.
- Multimeter: Measures voltage and resistance to check sensor performance.
- Oscilloscope: Analyzes the sensor’s signal pattern for irregularities.
6. Step-by-Step Guide: Checking the Upstream Oxygen Sensor
How can you check the upstream oxygen sensor, and what steps should you follow? Here’s a detailed guide to checking the upstream O2 sensor:
- Visual Inspection: Check the sensor for any visible damage or contamination.
- Access the Sensor: Locate the upstream O2 sensor, usually on the exhaust manifold before the catalytic converter.
- Start the Engine: Let the engine run until it reaches operating temperature.
- Connect the Scan Tool: Plug the diagnostic scan tool into the OBD-II port.
- Read Fault Codes: Check for any O2 sensor-related fault codes, such as P0131 or P0132.
- Live Data: Use the scan tool to monitor the sensor’s live data, including voltage and response time.
- Voltage Test: Use a multimeter to measure the sensor’s voltage output. It should fluctuate between 0.1 and 0.9 volts.
- Response Time: Observe how quickly the sensor responds to changes in the air-fuel mixture. A slow response indicates a problem.
7. Step-by-Step Guide: Checking the Downstream Oxygen Sensor
How do you check the downstream oxygen sensor, and what specific steps are involved? To check the downstream O2 sensor, follow these steps:
- Visual Inspection: Look for any visible damage or contamination.
- Access the Sensor: Find the downstream O2 sensor, located after the catalytic converter.
- Start the Engine: Allow the engine to reach operating temperature.
- Connect the Scan Tool: Plug the diagnostic scan tool into the OBD-II port.
- Read Fault Codes: Check for any O2 sensor-related fault codes, such as P0137 or P0138.
- Live Data: Monitor the sensor’s live data using the scan tool.
- Voltage Test: Use a multimeter to measure the sensor’s voltage output. The voltage should be relatively steady, typically around 0.45 volts.
- Catalytic Converter Efficiency: Compare the readings from the upstream and downstream sensors to assess the catalytic converter’s efficiency.
8. Interpreting O2 Sensor Readings: What Do the Numbers Mean?
How do you interpret oxygen sensor readings, and what do the voltage numbers indicate? Understanding O2 sensor readings is essential for diagnosing issues. The voltage readings indicate whether the air-fuel mixture is lean or rich, and the sensor’s response time reflects its overall health. According to a technical bulletin from Toyota, a healthy O2 sensor should switch between lean and rich at least once per second.
- High Voltage (0.6-0.9V): Indicates a rich mixture (too much fuel, not enough oxygen).
- Low Voltage (0.1-0.3V): Indicates a lean mixture (not enough fuel, too much oxygen).
- Steady Voltage (0.45V): Indicates a stable mixture, which is typical for downstream sensors.
- Response Time: A slow response time suggests the sensor is failing.
9. Using a Scan Tool: Reading and Clearing Fault Codes
How do you use a scan tool to read and clear oxygen sensor fault codes? A diagnostic scan tool is invaluable for reading and clearing fault codes related to O2 sensors. Here’s how to use it effectively:
- Connect the Scan Tool: Plug the scan tool into the OBD-II port.
- Turn on the Ignition: Turn the ignition key to the “on” position without starting the engine.
- Read Fault Codes: Select the option to read fault codes. The scan tool will display any stored codes.
- Identify O2 Sensor Codes: Look for codes like P0130, P0131, P0132, P0137, P0138, etc.
- Record the Codes: Note down all the O2 sensor-related codes for further diagnosis.
- Clear Fault Codes: After addressing the issue, select the option to clear fault codes.
- Verify the Repair: Start the engine and check if the check engine light comes back on. If it does, the problem may still exist.
10. Testing the Heater Circuit: Ensuring Proper Function
Why is it important to test the heater circuit in oxygen sensors, and how do you do it? Many O2 sensors have an internal heater to help them reach operating temperature quickly. Testing the heater circuit ensures the sensor functions correctly, especially during cold starts. Research from Denso indicates that heated O2 sensors can reduce emissions by up to 30% during the initial warm-up phase.
- Locate the Heater Wires: Identify the two wires that power the heater circuit (usually the same color).
- Disconnect the Sensor: Unplug the electrical connector from the O2 sensor.
- Resistance Test: Use a multimeter to measure the resistance between the heater wires.
- Check the Reading: The resistance should typically be between 2 and 20 ohms. Refer to the vehicle’s service manual for the exact specification.
- Open or Short Circuit: An open circuit (infinite resistance) or a short circuit (zero resistance) indicates a faulty heater.
11. Live Data Analysis: Monitoring Sensor Performance in Real-Time
What is live data analysis, and how can it help in monitoring oxygen sensor performance? Live data analysis involves monitoring the O2 sensor’s readings in real-time using a diagnostic scan tool. This allows you to observe how the sensor responds to changes in the air-fuel mixture and identify any irregularities. By monitoring the sensor’s voltage fluctuations and response time, you can quickly diagnose issues and verify repairs.
- Voltage Fluctuations: Watch for the sensor’s voltage to switch between rich and lean.
- Response Time: Check how quickly the sensor responds to changes in the air-fuel mixture.
- Identifying Problems: Look for slow response times, erratic readings, or a lack of activity.
12. Checking for Contamination: Visual Inspection and Common Culprits
How do you check for contamination on oxygen sensors, and what are the usual causes? Contamination is a common cause of O2 sensor failure. Visually inspect the sensor for signs of oil, coolant, or fuel deposits. Common culprits include oil leaks, coolant leaks, and overly rich fuel mixtures. According to a study by the EPA, contaminated O2 sensors can increase vehicle emissions by up to 50%.
- Visual Inspection: Remove the sensor and inspect the probe for deposits.
- Check for Oil: Look for oily residue on the sensor.
- Check for Coolant: Inspect for white or greenish deposits.
- Check for Fuel: Look for black, sooty deposits.
- Address the Source: Identify and fix the source of the contamination to prevent future issues.
13. Vacuum Leaks: How They Affect Oxygen Sensor Readings
How do vacuum leaks affect oxygen sensor readings, and what should you look for? Vacuum leaks can significantly affect O2 sensor readings by introducing extra air into the system, causing a lean mixture. Common sources of vacuum leaks include cracked hoses, faulty gaskets, and damaged intake manifolds. Addressing vacuum leaks can improve engine performance and fuel efficiency.
- Lean Mixture: Vacuum leaks cause a lean mixture, resulting in low voltage readings from the O2 sensor.
- Check Hoses: Inspect all vacuum hoses for cracks or damage.
- Check Gaskets: Look for leaks around the intake manifold and throttle body gaskets.
- Smoke Test: Use a smoke machine to identify hard-to-find vacuum leaks.
14. Fuel Injector Issues: Impact on Oxygen Sensor Performance
How do fuel injector issues affect oxygen sensor performance, and what are the symptoms? Fuel injector problems, such as clogged or leaking injectors, can disrupt the air-fuel mixture and affect O2 sensor performance. Clogged injectors can cause a lean mixture, while leaking injectors can cause a rich mixture. According to a study by SAE International, faulty fuel injectors can reduce fuel efficiency by up to 15%.
- Lean or Rich Mixture: Fuel injector issues can cause either a lean or rich mixture, depending on the nature of the problem.
- Rough Idling: The engine may idle roughly or misfire.
- Poor Acceleration: The vehicle may have difficulty accelerating.
- Fuel Smell: You may smell fuel if injectors are leaking.
15. Catalytic Converter Efficiency: Evaluating with Oxygen Sensors
How can oxygen sensors be used to evaluate catalytic converter efficiency? Oxygen sensors play a crucial role in evaluating the efficiency of the catalytic converter. By comparing the readings from the upstream and downstream sensors, you can determine whether the catalytic converter is functioning correctly. A healthy catalytic converter should reduce the levels of pollutants in the exhaust gas.
- Upstream Sensor: Measures the oxygen levels before the catalytic converter.
- Downstream Sensor: Measures the oxygen levels after the catalytic converter.
- Voltage Comparison: The downstream sensor should have a more stable voltage reading compared to the upstream sensor, indicating that the catalytic converter is effectively reducing pollutants.
- Fault Codes: Codes like P0420 (Catalyst System Efficiency Below Threshold) indicate a problem with the catalytic converter.
16. Multimeter Testing: Voltage and Resistance Checks
How do you use a multimeter to perform voltage and resistance checks on oxygen sensors? A multimeter is an essential tool for testing O2 sensors. You can use it to check the sensor’s voltage output, heater circuit resistance, and continuity. Here’s how:
- Voltage Test:
- Set the multimeter to DC voltage mode.
- Connect the positive lead to the sensor’s signal wire and the negative lead to ground.
- Start the engine and observe the voltage readings.
- Resistance Test:
- Disconnect the sensor.
- Set the multimeter to resistance mode.
- Connect the leads to the heater circuit wires.
- Check the resistance reading against the specification in the vehicle’s service manual.
- Continuity Test:
- Set the multimeter to continuity mode.
- Check for continuity between the sensor’s ground wire and a known good ground point on the vehicle.
17. Oscilloscope Analysis: Understanding Sensor Signal Patterns
How can an oscilloscope be used to analyze oxygen sensor signal patterns, and what do these patterns indicate? An oscilloscope provides a visual representation of the O2 sensor’s signal pattern, allowing you to identify subtle issues that may not be apparent with a multimeter or scan tool. By analyzing the waveform, you can assess the sensor’s response time, amplitude, and overall health.
- Waveform Shape: A healthy O2 sensor should produce a waveform that switches between high and low voltage levels.
- Response Time: The oscilloscope can measure how quickly the sensor responds to changes in the air-fuel mixture.
- Identifying Problems: Look for slow response times, erratic waveforms, or a lack of activity.
18. Troubleshooting Common Fault Codes: P0130 to P0140 Series
How do you troubleshoot common oxygen sensor fault codes, specifically the P0130 to P0140 series? The P0130 to P0140 series of fault codes relate to O2 sensor issues. Here’s how to troubleshoot them:
- P0130 (O2 Sensor Circuit Malfunction): Check the sensor’s wiring, connector, and the sensor itself.
- P0131 (O2 Sensor Low Voltage): Indicates a lean mixture or a faulty sensor. Check for vacuum leaks and fuel delivery issues.
- P0132 (O2 Sensor High Voltage): Indicates a rich mixture or a faulty sensor. Check for fuel injector leaks and high fuel pressure.
- P0133 (O2 Sensor Slow Response): The sensor is not responding quickly enough. Replace the sensor.
- P0134 (O2 Sensor No Activity): The sensor is not producing any signal. Check the wiring, heater circuit, and the sensor itself.
- P0135 (O2 Sensor Heater Circuit Malfunction): Check the heater circuit wiring, relay, and the sensor itself.
- P0136 to P0140 (Related to Downstream Sensors): Follow the same troubleshooting steps as above, but focus on the downstream sensors and the catalytic converter.
19. Replacing Oxygen Sensors: A Step-by-Step Guide
How do you replace oxygen sensors, and what steps should you follow for a successful replacement? Replacing an O2 sensor is a straightforward task that can improve your vehicle’s performance and fuel efficiency. Here’s a step-by-step guide:
- Gather Tools: You’ll need a wrench or O2 sensor socket, new O2 sensor, penetrating oil, and gloves.
- Locate the Sensor: Identify the sensor you need to replace.
- Disconnect the Electrical Connector: Unplug the electrical connector from the old sensor.
- Apply Penetrating Oil: Spray penetrating oil onto the sensor’s threads and let it soak for a few minutes.
- Remove the Old Sensor: Use the wrench or O2 sensor socket to unscrew the old sensor.
- Install the New Sensor: Apply anti-seize compound to the threads of the new sensor and screw it into place.
- Tighten the Sensor: Tighten the sensor to the recommended torque specification.
- Reconnect the Electrical Connector: Plug the electrical connector into the new sensor.
- Clear Fault Codes: Use a scan tool to clear any O2 sensor-related fault codes.
- Test Drive: Take the vehicle for a test drive to ensure the new sensor is functioning correctly.
20. Preventative Maintenance: Extending Oxygen Sensor Life
How can you extend the life of oxygen sensors through preventative maintenance? Preventative maintenance can significantly extend the life of your O2 sensors. Regularly inspect your vehicle for oil and coolant leaks, address any fuel delivery issues, and avoid using leaded fuel. According to a study by AAA, regular maintenance can prevent up to 40% of O2 sensor failures.
- Check for Leaks: Regularly inspect your vehicle for oil and coolant leaks.
- Address Fuel Issues: Resolve any fuel delivery problems, such as clogged injectors or high fuel pressure.
- Use Quality Fuel: Avoid using leaded fuel, which can damage O2 sensors.
- Regular Inspections: Periodically inspect the O2 sensors for signs of contamination or damage.
21. Choosing the Right Replacement Oxygen Sensor
How do you choose the right replacement oxygen sensor for your vehicle? Selecting the correct replacement O2 sensor is crucial for ensuring optimal performance. Make sure to choose a sensor that is specifically designed for your vehicle’s make, model, and year. CARDIAGTECH.NET offers a wide selection of high-quality O2 sensors to meet your needs.
- Vehicle Specifications: Check your vehicle’s make, model, and year.
- Sensor Type: Determine whether you need a narrowband or wideband sensor.
- OEM or Aftermarket: Consider whether you want an OEM (Original Equipment Manufacturer) or aftermarket sensor.
- Quality and Reliability: Choose a sensor from a reputable brand to ensure quality and reliability.
22. Aftermarket vs. OEM Oxygen Sensors: Pros and Cons
What are the pros and cons of aftermarket versus OEM oxygen sensors? When replacing O2 sensors, you have the option of choosing between aftermarket and OEM (Original Equipment Manufacturer) sensors. Each type has its advantages and disadvantages. OEM sensors are made by the vehicle manufacturer or a supplier approved by the manufacturer. They are designed to meet the exact specifications of your vehicle. Aftermarket sensors are made by third-party manufacturers and are often less expensive than OEM sensors.
- OEM Oxygen Sensors:
- Pros: Guaranteed compatibility, high quality, and reliability.
- Cons: Higher cost.
- Aftermarket Oxygen Sensors:
- Pros: Lower cost, wider availability.
- Cons: May not meet OEM specifications, potential compatibility issues, and variable quality.
23. The Role of Oxygen Sensors in Emission Testing
Why are oxygen sensors important in emission testing, and how do they affect the results? Oxygen sensors play a vital role in emission testing. They help ensure that your vehicle meets the required emission standards. Faulty O2 sensors can cause your vehicle to fail an emission test, leading to fines and the need for repairs. According to the EPA, properly functioning O2 sensors can reduce vehicle emissions by up to 25%.
- Emission Standards: O2 sensors help maintain optimal air-fuel mixture, reducing harmful emissions.
- Test Failure: Faulty sensors can cause your vehicle to fail an emission test.
- Environmental Impact: Properly functioning sensors contribute to cleaner air and a healthier environment.
24. Oxygen Sensor Myths: Debunking Common Misconceptions
What are some common myths about oxygen sensors, and what is the truth behind them? There are several myths surrounding O2 sensors. Let’s debunk some of the most common ones:
- Myth 1: O2 sensors last forever.
- Truth: O2 sensors have a limited lifespan and need to be replaced periodically.
- Myth 2: All O2 sensors are the same.
- Truth: There are different types of O2 sensors, and it’s important to choose the right one for your vehicle.
- Myth 3: Replacing O2 sensors improves fuel economy.
- Truth: Replacing faulty O2 sensors can improve fuel economy, but replacing properly functioning sensors will not provide any benefit.
- Myth 4: You can clean O2 sensors to restore their function.
- Truth: Cleaning O2 sensors is generally not effective and can damage them. It’s better to replace them.
25. Advanced Diagnostic Techniques: Using Lab Scopes and Gas Analyzers
What are some advanced diagnostic techniques for checking oxygen sensors, such as using lab scopes and gas analyzers? For advanced diagnostics, you can use a lab scope or gas analyzer. A lab scope provides a detailed view of the sensor’s signal, while a gas analyzer measures the levels of different gases in the exhaust. These tools can help you identify subtle issues that may not be apparent with basic testing methods.
- Lab Scope: Provides a visual representation of the sensor’s signal, allowing you to analyze its response time and waveform.
- Gas Analyzer: Measures the levels of different gases in the exhaust, providing insights into the engine’s combustion process and the catalytic converter’s efficiency.
26. Frequently Asked Questions (FAQs) About Oxygen Sensors
Have questions about oxygen sensors? Here are some frequently asked questions to help you understand them better:
- What is an oxygen sensor?
An oxygen sensor measures the amount of oxygen in your vehicle’s exhaust system. - Where are oxygen sensors located?
Typically, there are two or more O2 sensors: one before the catalytic converter (upstream) and one or more after (downstream). - How do I know if my oxygen sensor is bad?
Common symptoms include a check engine light, poor fuel economy, rough idling, and sluggish engine performance. - Can a bad oxygen sensor affect gas mileage?
Yes, a faulty oxygen sensor can cause the engine to use more fuel, resulting in poor gas mileage. - How often should I replace my oxygen sensors?
Most manufacturers recommend replacing O2 sensors every 60,000 to 100,000 miles. - Can I replace an oxygen sensor myself?
Yes, replacing an O2 sensor is a straightforward task that most DIY mechanics can handle. - What tools do I need to replace an oxygen sensor?
You’ll need a wrench or O2 sensor socket, new O2 sensor, penetrating oil, and gloves. - How do I test an oxygen sensor with a multimeter?
You can use a multimeter to check the sensor’s voltage output, heater circuit resistance, and continuity. - What is the difference between an upstream and downstream oxygen sensor?
The upstream sensor regulates fuel supply, while the downstream sensor measures the efficiency of the catalytic converter. - Can a bad oxygen sensor cause other problems?
Yes, a faulty oxygen sensor can cause damage to the catalytic converter and other engine components.
27. Why Choose CARDIAGTECH.NET for Your Diagnostic Needs
Looking for the best tools to diagnose and repair oxygen sensors? CARDIAGTECH.NET offers a wide range of diagnostic tools and equipment to help you accurately assess and repair O2 sensor issues. Our high-quality products, combined with expert support, ensure you get the job done right. With our equipment, you can quickly identify O2 sensor problems, increasing your efficiency and accuracy.
We understand the challenges you face: the physical demands, constant need for updated knowledge, and pressure to deliver fast, accurate service. That’s why we provide tools that enhance your efficiency, precision, and safety. By using CARDIAGTECH.NET products, you can reduce repair times, minimize errors, and ensure customer satisfaction.
Ready to improve your diagnostic capabilities? Contact us today for expert advice on the best tools for your needs.
- Address: 276 Reock St, City of Orange, NJ 07050, United States
- WhatsApp: +1 (641) 206-8880
- Website: CARDIAGTECH.NET
Let CARDIAGTECH.NET help you elevate your service and drive your business forward.