How to Check the Purge Valve: A Comprehensive Guide

Is your Hyundai acting up? How to check the purge valve is critical for diagnosing EVAP system issues. At CARDIAGTECH.NET, we provide top-notch diagnostic tools and expert advice to help you maintain your vehicle’s performance and environmental compliance. Learn to identify a failing purge valve with our in-depth guide, ensuring your car runs smoothly and efficiently while reducing emissions. Discover the best tools and practices for effective vehicle maintenance.
1. Understanding the Canister Purge Valve
1.1. What is a Canister Purge Valve?
A canister purge valve is a critical component of the Evaporative Emission Control (EVAP) system in modern vehicles. It manages fuel vapors to prevent them from escaping into the atmosphere. When the engine is running, the valve opens, allowing these vapors to be drawn into the engine and burned, reducing emissions and improving fuel efficiency. According to the EPA, EVAP systems can reduce hydrocarbon emissions by up to 95%.
1.2. How Does the EVAP System Work?
The EVAP system captures fuel vapors from the fuel tank and temporarily stores them in a charcoal canister. This canister, filled with activated charcoal, absorbs and holds the fuel vapors when the engine is off. When the engine is running and conditions are optimal, the Engine Control Unit (ECU) opens the canister purge valve. This valve allows the stored fuel vapors to be sucked into the engine’s intake manifold.
Key Components of the EVAP System:
| Component | Description |
|---|---|
| Fuel Tank | Stores fuel and allows vapors to escape into the EVAP system. |
| Charcoal Canister | Contains activated charcoal to absorb and store fuel vapors. |
| Purge Valve | Controls the flow of fuel vapors from the canister to the engine. |
| Vent Valve | Allows fresh air into the canister as vapors are purged. |
| ECU (Engine Control Unit) | Manages the operation of the purge and vent valves based on engine conditions. |
| Hoses and Lines | Connect all components, ensuring a sealed pathway for vapor flow. |
1.3. The Role of the Canister Purge Valve
The canister purge valve is an electronically controlled valve typically located between the charcoal canister and the intake manifold. The ECU precisely controls the timing and duration of the valve’s opening based on engine parameters such as speed, load, and temperature. This ensures the fuel vapors are recycled efficiently, reducing emissions and improving fuel economy.
According to a study by the University of California, Berkeley, a properly functioning EVAP system, including the canister purge valve, can improve fuel efficiency by up to 5%.
2. Common Symptoms of a Failing Purge Valve
2.1. Decreased Fuel Efficiency
A failing purge valve can disrupt the fuel system, leading to decreased fuel efficiency. If you notice you’re visiting the gas station more often without changes in driving habits, it could be a sign of a failing canister valve. An inefficient purge valve can cause the engine to run richer than necessary, wasting fuel.
2.2. Increased Emissions
A malfunctioning valve can result in increased emissions. As the valve regulates the release of fuel vapors into the engine, a faulty valve may cause an unusual amount of smoke or emissions from your vehicle’s exhaust. Regular emission checks are essential to maintain environmental compliance.
2.3. Rough Idling
Rough idling is another common symptom of a failing purge valve. When the valve is stuck open, it can create a vacuum leak, causing the engine to idle unevenly. This can manifest as shaking, stalling, or overall poor engine performance at idle.
2.4. Difficulty Starting
A failing purge valve can cause difficulty starting the engine. If the valve is stuck open, it can flood the engine with fuel vapors, making it hard to start. This issue is more noticeable after refueling or when the engine is warm.
2.5. Strong Fuel Odors
A faulty canister valve may cause fuel vapors to escape into the atmosphere, resulting in strong fuel odors around your vehicle. If you smell gasoline even when the car is parked, it’s worth inspecting the EVAP system.
2.6. Check Engine Light
The check engine light illuminating is a clear sign that something is wrong. Use an OBD-II scanner to retrieve the specific trouble codes associated with the EVAP system. Codes such as P0443, P0444, P0445, or P0446 often point to canister purge valve issues.
Common OBD-II Codes Related to Purge Valve Issues:
| Code | Description | Possible Causes |
|---|---|---|
| P0443 | EVAP Canister Purge Control Valve Circuit | Faulty purge valve, wiring issues, or a defective ECU. |
| P0444 | EVAP Canister Purge Control Valve Circuit Open | Open circuit in the purge valve system. |
| P0445 | EVAP Canister Purge Control Valve Circuit Shorted | Short circuit in the purge valve system. |
| P0446 | EVAP Emission Control System Vent Control Circuit | Issues with the vent control valve or its circuit. |
| P0455 | EVAP System Leak Detected (Gross Leak) | Large leak in the EVAP system, often due to a faulty purge valve or disconnected hoses. |
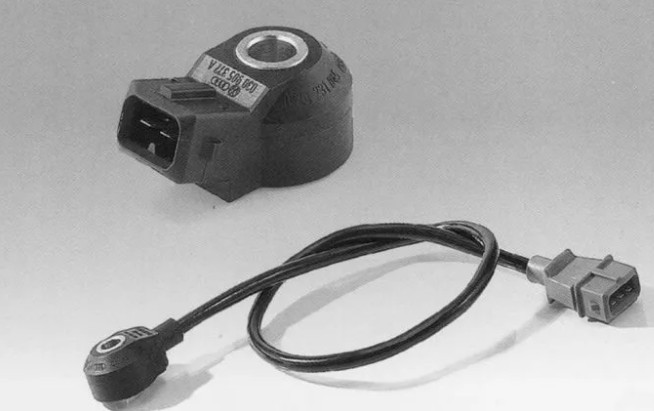
EVAP Canister Purge Valve
3. Step-by-Step Guide: How to Check the Purge Valve
3.1. Gather Your Tools and Equipment
Before you start, gather the necessary tools and equipment:
- OBD-II Scanner: To read diagnostic trouble codes.
- Hand-held Vacuum Pump: To test the valve’s ability to hold a vacuum.
- Multimeter: To check electrical continuity.
- Wrench Set: To disconnect hoses and remove the valve.
- Safety Glasses and Gloves: For personal protection.
- CARDIAGTECH Diagnostic Tools: For accurate and reliable diagnostics.
Having the right tools from CARDIAGTECH ensures you can perform the tests efficiently and accurately.
3.2. Visual Inspection
Begin with a visual inspection of the purge valve and its connecting hoses. Look for signs of damage, wear, cracks, or disconnected hoses. Ensure all electrical connectors are properly attached. Addressing visible issues promptly can prevent further damage to the valve.
Checklist for Visual Inspection:
- Inspect hoses for cracks and leaks.
- Check electrical connectors for corrosion and proper attachment.
- Look for any visible damage to the valve body.
- Ensure the valve is securely mounted.
3.3. Using an OBD-II Scanner
- Connect the Scanner: Plug the OBD-II scanner into the diagnostic port, usually located under the dashboard.
- Turn On the Ignition: Turn the ignition to the “ON” position without starting the engine.
- Read Trouble Codes: Use the scanner to read any stored trouble codes. Note down any codes related to the EVAP system, such as P0443, P0444, P0445, or P0446.
- Clear Codes (Optional): After noting the codes, you can clear them to see if they reappear after testing the valve.
CARDIAGTECH.NET offers a range of advanced OBD-II scanners that provide accurate and detailed diagnostic information.
3.4. Electrical Continuity Test
- Disconnect the Valve: Disconnect the electrical connector from the purge valve.
- Set the Multimeter: Set your multimeter to the ohms setting (Ω).
- Test Continuity: Place the multimeter probes on the valve’s terminals. You should see a resistance value within the manufacturer’s specified range. An open circuit (no continuity) or a short circuit (very low resistance) indicates a faulty valve.
Refer to your vehicle’s service manual for the correct resistance range for your specific model.
3.5. Vacuum Test
- Disconnect the Valve: Disconnect the purge valve from the EVAP system hoses.
- Attach Vacuum Pump: Attach a hand-held vacuum pump to the vacuum port of the purge valve.
- Apply Vacuum: Apply vacuum to the valve and observe the gauge on the pump. The valve should hold the vacuum. If the valve fails to maintain the vacuum, it is likely faulty and needs replacement.
- Check for Leaks: Use a small brush to apply soapy water to the valve’s body and connections. If bubbles appear, it indicates a leak.
A vacuum test helps determine if the valve is sealing properly, which is crucial for its correct operation.
3.6. Activation Test (If Applicable)
Some advanced diagnostic tools, like those available at CARDIAGTECH.NET, can activate the purge valve. This test allows you to see if the valve opens and closes as commanded by the ECU.
- Connect Diagnostic Tool: Connect the diagnostic tool to the vehicle’s diagnostic port.
- Access Activation Function: Navigate to the EVAP system section and find the purge valve activation function.
- Activate the Valve: Follow the tool’s instructions to activate the valve. You should hear the valve clicking open and closed. If the valve does not respond, it may be faulty.
This test requires a diagnostic tool with bidirectional control capabilities.
4. Diagnosing Specific Issues
4.1. Valve Stuck Open
If the purge valve is stuck open, it can cause a continuous vacuum leak. This results in rough idling, difficulty starting, and decreased fuel efficiency. Perform a vacuum test to confirm if the valve is not sealing properly.
4.2. Valve Stuck Closed
If the purge valve is stuck closed, fuel vapors will not be drawn into the engine, leading to increased emissions and potentially affecting engine performance. Use an OBD-II scanner to check for related trouble codes and perform an activation test to see if the valve responds.
4.3. Electrical Problems
Electrical issues such as open circuits or short circuits can prevent the purge valve from functioning correctly. Use a multimeter to check the continuity of the valve and its wiring. Ensure all electrical connections are clean and secure.
5. Replacing the Purge Valve
5.1. Step-by-Step Replacement Guide
- Disconnect the Battery: Disconnect the negative terminal of the battery to prevent electrical shocks.
- Locate the Purge Valve: The purge valve is typically located near the engine, between the charcoal canister and the intake manifold. Refer to your vehicle’s service manual for the exact location.
- Disconnect Hoses and Electrical Connector: Carefully disconnect the hoses and electrical connector from the purge valve. Use a wrench if necessary.
- Remove the Old Valve: Remove the old purge valve from its mounting bracket.
- Install the New Valve: Install the new purge valve in the mounting bracket. Ensure it is securely fastened.
- Connect Hoses and Electrical Connector: Reconnect the hoses and electrical connector to the new purge valve.
- Reconnect the Battery: Reconnect the negative terminal of the battery.
- Start the Engine: Start the engine and check for any leaks or unusual noises.
- Clear Trouble Codes: Use an OBD-II scanner to clear any stored trouble codes.
5.2. Choosing the Right Replacement Valve
Ensure you choose a replacement purge valve that is compatible with your vehicle’s make and model. Check the manufacturer’s specifications and consider purchasing from a reputable supplier to ensure quality and reliability. CARDIAGTECH.NET can provide recommendations for high-quality replacement valves.
5.3. Post-Replacement Checks
After replacing the purge valve, perform the following checks:
- Check for Leaks: Inspect all connections for leaks.
- Monitor Engine Performance: Monitor the engine for any signs of rough idling or decreased fuel efficiency.
- Read Trouble Codes: Use an OBD-II scanner to ensure no new trouble codes have appeared.
- Test Drive: Take the vehicle for a test drive to ensure it is running smoothly.
6. Maintaining Your EVAP System
6.1. Regular Inspections
Regularly inspect the EVAP system components, including the charcoal canister, hoses, and purge valve, for any signs of damage or wear. Addressing issues early can prevent more significant problems and maintain optimal performance.
6.2. Replacing the Charcoal Canister
The charcoal canister can become saturated over time, reducing its ability to absorb fuel vapors. Replace the canister according to the manufacturer’s recommended service intervals to ensure the EVAP system functions correctly.
6.3. Proper Fuel Cap Maintenance
A loose or damaged fuel cap can cause EVAP system leaks. Ensure the fuel cap is properly tightened after each refueling and replace it if it is damaged.
6.4. Avoiding Overfilling the Fuel Tank
Overfilling the fuel tank can saturate the charcoal canister with liquid fuel, damaging it and reducing its effectiveness. Avoid overfilling the tank and stop filling when the pump clicks off automatically.
7. Advanced Diagnostic Techniques
7.1. Using Smoke Machines
A smoke machine can be used to detect leaks in the EVAP system. The machine introduces smoke into the system, and any leaks can be easily identified by the escaping smoke.
7.2. EVAP System Pressure Testing
Pressure testing involves sealing the EVAP system and applying pressure to check for leaks. This method can help identify even small leaks that may be difficult to find visually.
7.3. Advanced OBD-II Scanner Functions
Advanced OBD-II scanners, such as those offered by CARDIAGTECH.NET, provide access to advanced diagnostic functions, including:
- Live Data Monitoring: Monitor real-time data from the EVAP system sensors to identify anomalies.
- Bidirectional Control: Activate and deactivate EVAP system components to test their functionality.
- Freeze Frame Data: Analyze the data captured when a trouble code was triggered to help diagnose the issue.
8. The Importance of Professional Assistance
8.1. When to Seek a Professional Mechanic
While many purge valve issues can be diagnosed and resolved with the right tools and knowledge, some situations require professional assistance. Seek a professional mechanic if:
- You are uncomfortable performing diagnostic tests or repairs.
- You are unable to identify the cause of the problem.
- The issue is complex and requires specialized equipment.
8.2. Benefits of Professional Diagnostics
Professional mechanics have the expertise and equipment to accurately diagnose and resolve complex EVAP system issues. They can also provide valuable insights into the overall health of your vehicle.
8.3. Choosing a Reputable Mechanic
When choosing a mechanic, consider the following factors:
- Certification: Ensure the mechanic is certified by a reputable organization, such as ASE (Automotive Service Excellence).
- Experience: Choose a mechanic with experience working on your vehicle’s make and model.
- Reputation: Read online reviews and ask for recommendations from friends and family.
- Warranty: Check if the mechanic offers a warranty on their work.
9. Real-World Case Studies
9.1. Case Study 1: Hyundai Elantra with P0443 Code
A Hyundai Elantra owner reported a check engine light and rough idling. An OBD-II scan revealed a P0443 code, indicating an issue with the EVAP canister purge control valve circuit.
Diagnosis:
- Visual inspection revealed no obvious damage to the valve or hoses.
- Electrical continuity test showed an open circuit in the valve.
- Vacuum test confirmed the valve was not sealing properly.
Solution:
The purge valve was replaced, and the trouble code was cleared. The engine ran smoothly, and the check engine light did not reappear.
9.2. Case Study 2: Hyundai Sonata with Fuel Odor
A Hyundai Sonata owner noticed a strong fuel odor around the vehicle. An inspection of the EVAP system was performed.
Diagnosis:
- Visual inspection revealed a cracked hose connected to the purge valve.
- Smoke test confirmed a leak in the hose.
Solution:
The cracked hose was replaced, and the fuel odor disappeared. The EVAP system was functioning correctly.
9.3. Case Study 3: Hyundai Tucson with Decreased Fuel Efficiency
A Hyundai Tucson owner experienced a significant decrease in fuel efficiency. An OBD-II scan revealed no trouble codes, but further investigation was warranted.
Diagnosis:
- Live data monitoring showed the purge valve was not operating correctly.
- Activation test confirmed the valve was not responding to commands from the ECU.
Solution:
The purge valve was replaced, and the fuel efficiency returned to normal. The EVAP system was functioning correctly.
10. Frequently Asked Questions (FAQs)
10.1. What does the purge valve do?
The purge valve controls the flow of fuel vapors from the charcoal canister to the engine intake manifold, reducing emissions and improving fuel efficiency.
10.2. How do I know if my purge valve is bad?
Common symptoms include decreased fuel efficiency, increased emissions, rough idling, difficulty starting, strong fuel odors, and a check engine light.
10.3. Can I drive with a bad purge valve?
While it’s generally not very dangerous, driving with a bad valve can lead to increased wear on engine components and potentially damage the catalytic converter.
10.4. How often should I replace the purge valve?
The purge valve should be replaced according to the manufacturer’s recommended service intervals or when it shows signs of failure.
10.5. Can a bad purge valve cause a car to stall?
Yes, a bad purge valve can cause a car to stall, especially if it is stuck open and creating a vacuum leak.
10.6. How much does it cost to replace a purge valve?
The cost to replace a purge valve can vary depending on the vehicle’s make and model, as well as labor costs. On average, it can range from $100 to $300.
10.7. Can a bad purge valve affect gas mileage?
Yes, a bad purge valve can affect gas mileage by disrupting the fuel system and causing the engine to run richer than necessary.
10.8. Where is the purge valve located?
The purge valve is typically located near the engine, between the charcoal canister and the intake manifold.
10.9. What tools do I need to check the purge valve?
You will need an OBD-II scanner, a hand-held vacuum pump, a multimeter, a wrench set, safety glasses, and gloves.
10.10. Can I clean a purge valve instead of replacing it?
While cleaning a purge valve may sometimes resolve minor issues, it is generally recommended to replace it for optimal performance and reliability.
11. CARDIAGTECH: Your Partner in Automotive Diagnostics
At CARDIAGTECH.NET, we understand the challenges faced by automotive technicians and DIY enthusiasts. That’s why we offer a comprehensive range of diagnostic tools and equipment designed to make your job easier and more efficient.
11.1. High-Quality Diagnostic Tools
Our diagnostic tools are built to the highest standards, ensuring accuracy, reliability, and durability. Whether you need an OBD-II scanner, a multimeter, or an advanced diagnostic tool with bidirectional control, we have you covered.
11.2. Expert Support and Training
We provide expert support and training to help you get the most out of our diagnostic tools. Our team of experienced technicians is available to answer your questions and provide guidance on diagnostic procedures.
11.3. Competitive Pricing
We offer competitive pricing on all our products, making professional-grade diagnostic tools accessible to everyone.
11.4. Customer Satisfaction
Your satisfaction is our top priority. We are committed to providing exceptional customer service and ensuring you are completely satisfied with your purchase.
12. Take Action Today
Don’t let a failing purge valve compromise your vehicle’s performance and environmental compliance. Take action today by following our comprehensive guide on how to check the purge valve. With the right tools and knowledge, you can diagnose and resolve common EVAP system issues, ensuring your vehicle runs smoothly and efficiently.
Ready to get started?
- Visit CARDIAGTECH.NET to explore our range of diagnostic tools and equipment.
- Contact us for expert advice and support.
Address: 276 Reock St, City of Orange, NJ 07050, United States
WhatsApp: +1 (641) 206-8880
Website: CARDIAGTECH.NET
Is your Hyundai showing signs of a failing canister purge valve? Don’t wait! Contact CARDIAGTECH.NET now for expert advice on the best diagnostic tools and solutions. Our team is ready to assist you in maintaining your vehicle’s performance and ensuring environmental compliance. Reach out today and let us help you keep your Hyundai running smoothly and efficiently!