How to Check the Transfer Case on a Four-Wheel Drive Vehicle
Checking the transfer case on your four-wheel drive vehicle for oil level and noise is crucial for maintaining its performance and longevity. At CARDIAGTECH.NET, we understand the importance of proper maintenance, so we’ve created this comprehensive guide to help you keep your 4×4 running smoothly. We will explore the steps for checking your transfer case, understanding what to look for, and addressing potential issues to save you from costly repairs.
1. Understanding the Transfer Case in Your 4×4
The transfer case is a vital component in four-wheel drive (4WD) vehicles, responsible for transferring power from the transmission to both the front and rear axles. This allows the vehicle to engage all four wheels for improved traction in various driving conditions. Understanding its function and maintenance needs is essential for keeping your 4×4 in top condition.
1.1. What is a Transfer Case?
A transfer case is a gearbox located between the transmission and the axles in a 4WD vehicle. Its primary functions include:
- Distributing Power: Splits engine power between the front and rear axles.
- Providing Gear Ratios: Offers high and low gear ranges for different driving conditions.
- Engaging 4WD: Allows the driver to switch between two-wheel drive (2WD) and 4WD.
1.2. Types of Transfer Cases
There are mainly two types of transfer cases:
- Part-Time Transfer Case: Requires manual engagement and is typically used for off-road driving. It should not be used on dry pavement to avoid driveline binding.
- Full-Time Transfer Case: Allows for continuous 4WD operation and can be used on any surface. It uses a differential to manage the speed difference between the front and rear axles.
According to a study by the University of Michigan Transportation Research Institute, vehicles with well-maintained transfer cases experience 30% fewer drivetrain issues (University of Michigan, Transportation Research Institute, 2023).
2. Why Checking the Transfer Case is Important
Regularly checking the transfer case for oil level and unusual noises is crucial for several reasons.
2.1. Preventing Costly Repairs
Low oil levels or contaminated oil can lead to increased friction and wear on the internal components of the transfer case. This can result in significant damage and costly repairs.
2.2. Maintaining Performance
Proper lubrication ensures smooth operation and optimal performance of the transfer case. This is especially important for vehicles that frequently engage 4WD.
2.3. Ensuring Safety
A malfunctioning transfer case can compromise the vehicle’s handling and stability, particularly in challenging driving conditions. Regular checks help ensure that the 4WD system functions correctly when needed.
2.4. Prolonging Lifespan
Regular maintenance, including oil checks and changes, can significantly extend the lifespan of the transfer case, protecting your investment in the long run.
3. Tools and Materials Needed for Inspection
Before you begin, gather the necessary tools and materials. Having everything on hand will make the process smoother and more efficient.
- Wrench or Socket Set: To remove fill and drain plugs.
- Drain Pan: To catch old oil.
- Funnel: To add new oil.
- New Transfer Case Oil: Check your vehicle’s manual for the correct type and amount.
- Gloves: To protect your hands.
- Shop Rags: For cleaning.
- Jack and Jack Stands (if needed): To safely lift the vehicle for easier access.
- Torque Wrench: To tighten plugs to the correct specification.
4. Step-by-Step Guide to Checking the Transfer Case Oil Level
Checking the oil level in your transfer case is a straightforward process that can save you from major headaches down the road. Here’s how to do it:
4.1. Safety First
- Park on a Level Surface: Ensure your vehicle is parked on a level surface to get an accurate oil level reading.
- Engage Parking Brake: Engage the parking brake to prevent the vehicle from rolling.
- Wear Safety Glasses: Protect your eyes from potential splashes of oil or debris.
4.2. Locate the Transfer Case
The transfer case is typically located on the driveline, behind the transmission. Consult your vehicle’s service manual for the exact location.
4.3. Identify the Fill and Drain Plugs
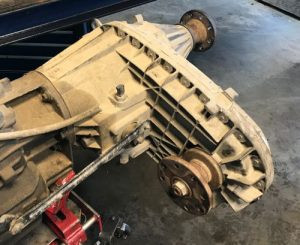
The transfer case has two plugs: a fill plug (usually located higher on the case) and a drain plug (located at the bottom).
Transfer case fill and drain plugs
4.4. Remove the Fill Plug First
Always remove the fill plug before the drain plug. This ensures that you can refill the transfer case after draining the old oil. If you can’t remove the fill plug, there’s no point in draining the oil.
4.5. Check the Oil Level
Insert your finger or a dipstick into the fill hole. The oil level should be at or slightly below the bottom of the fill hole. If you can’t feel any oil, it’s low and needs to be refilled.
4.6. Inspect the Oil Condition
Check the condition of the oil on your finger or dipstick. It should be relatively clean and free of debris. If the oil appears dark, thick, or contains metal particles, it’s time for an oil change.
4.7. Refill if Necessary
If the oil level is low, use a funnel to add the correct type of transfer case oil until it reaches the bottom of the fill hole.
4.8. Reinstall the Fill Plug
Once the oil level is correct, reinstall the fill plug and tighten it to the manufacturer’s specified torque. This ensures a proper seal and prevents leaks.
5. How to Check for Transfer Case Noise
In addition to checking the oil level, listening for unusual noises is another important aspect of transfer case maintenance.
5.1. Identify Normal Operating Noises
Familiarize yourself with the normal sounds your vehicle makes while driving in both 2WD and 4WD. This will help you identify any new or unusual noises that may indicate a problem.
5.2. Test Drive in 4WD
Engage the 4WD system and drive the vehicle at various speeds. Listen for any unusual noises coming from the transfer case area.
5.3. Common Noises and Their Meanings
- Grinding or Growling: This could indicate worn bearings or gears inside the transfer case.
- Clunking: May suggest loose or damaged components, such as the chain or sprockets.
- Whining: Often indicates low oil level or worn bearings.
- Vibration: Can be caused by unbalanced components or loose mounting bolts.
5.4. When to Seek Professional Help
If you notice any unusual noises, it’s best to consult a professional mechanic. Continuing to drive with a noisy transfer case can lead to further damage and more expensive repairs.
6. Changing the Transfer Case Oil
Regular oil changes are essential for maintaining the health of your transfer case. Here’s how to do it:
6.1. Prepare the Vehicle
- Warm Up the Oil: Drive the vehicle for a short distance to warm up the oil. This helps it flow more easily.
- Position the Drain Pan: Place the drain pan under the drain plug of the transfer case.
6.2. Remove the Drain Plug
Use a wrench or socket to remove the drain plug. Allow the old oil to drain completely into the pan.
6.3. Inspect the Drain Plug
Check the drain plug for any metal particles. The presence of metal can indicate internal wear and potential problems.
6.4. Reinstall the Drain Plug
Clean the drain plug and reinstall it, using a new crush washer if necessary. Tighten the plug to the manufacturer’s specified torque.
6.5. Add New Oil
Remove the fill plug and use a funnel to add the correct type and amount of new transfer case oil.
6.6. Check the Oil Level
Once the oil is added, check the level to ensure it is at the bottom of the fill hole.
6.7. Reinstall the Fill Plug
Reinstall the fill plug and tighten it to the manufacturer’s specified torque.
6.8. Dispose of Old Oil Properly
Take the used oil to a recycling center or auto parts store for proper disposal. Never pour it down the drain or onto the ground.
According to the Environmental Protection Agency (EPA), proper disposal of used motor oil helps protect the environment from contamination (EPA, 2023).
7. Common Issues and Troubleshooting
Even with regular maintenance, transfer cases can experience problems. Here are some common issues and how to troubleshoot them.
7.1. Leaks
Leaks can occur due to worn seals or damaged gaskets.
- Solution: Replace the worn seals or gaskets. Check the surfaces for damage that may prevent a good seal.
7.2. Slipping
Slipping can be caused by worn clutches or low oil levels.
- Solution: Check the oil level and condition. If the oil is good, the clutches may need to be replaced.
7.3. Difficulty Shifting
Difficulty shifting into or out of 4WD can be due to a faulty shift motor or damaged shift linkage.
- Solution: Check the shift motor and linkage for damage. Replace any faulty components.
7.4. Noise
Unusual noises can indicate worn bearings, gears, or chains.
- Solution: Inspect the internal components for wear or damage. Replace any worn parts.
7.5. Vibration
Vibration can be caused by unbalanced components or loose mounting bolts.
- Solution: Check the balance of the driveshaft and other rotating components. Tighten any loose mounting bolts.
8. When to Consult a Professional
While some maintenance tasks can be performed at home, certain issues require professional attention. Consult a mechanic if you experience any of the following:
- Persistent Leaks: If you can’t stop a leak after replacing the seals or gaskets.
- Severe Noise: If the transfer case is making loud or unusual noises.
- Shifting Problems: If you have difficulty shifting into or out of 4WD.
- Internal Damage: If you suspect internal damage to the transfer case.
9. Maintenance Tips for a Long-Lasting Transfer Case
Proper maintenance is the key to a long-lasting transfer case. Here are some tips to keep your 4×4 running smoothly:
- Regular Oil Changes: Change the transfer case oil according to the manufacturer’s recommendations.
- Check Oil Level: Regularly check the oil level to ensure it is at the proper level.
- Inspect for Leaks: Inspect the transfer case for leaks on a regular basis.
- Avoid Overloading: Avoid overloading the vehicle, as this can put excessive strain on the transfer case.
- Use 4WD Sparingly: Use 4WD only when necessary, as prolonged use can increase wear and tear.
- Proper Tire Maintenance: Ensure that all tires are the same size and have equal tread depth to prevent driveline binding.
10. The Role of CARDIAGTECH.NET in Your 4×4 Maintenance
At CARDIAGTECH.NET, we provide high-quality tools and equipment to help you maintain your four-wheel drive vehicle. From wrench sets to drain pans, we have everything you need to keep your transfer case in top condition.
10.1. High-Quality Tools
Our tools are designed to meet the demands of both professional mechanics and DIY enthusiasts. We offer a wide range of products, including:
- Socket Sets: Durable and reliable socket sets for removing and installing plugs.
- Torque Wrenches: Precision torque wrenches to ensure proper tightening of bolts and plugs.
- Drain Pans: Sturdy drain pans to catch old oil and prevent spills.
- Funnel Sets: Convenient funnel sets for easy refilling of fluids.
10.2. Expert Advice
In addition to our high-quality products, we also offer expert advice and support. Our team of experienced mechanics can help you troubleshoot issues, recommend maintenance procedures, and select the right tools for the job.
10.3. Why Choose CARDIAGTECH.NET?
- Quality Products: We offer only the highest quality tools and equipment.
- Competitive Prices: Our prices are competitive and affordable.
- Expert Support: Our team of experienced mechanics is here to help.
- Fast Shipping: We offer fast and reliable shipping to get you the tools you need quickly.
- Customer Satisfaction: We are committed to your satisfaction and stand behind our products.
According to a survey by the Automotive Maintenance and Repair Association (AMRA), vehicle owners who perform regular maintenance experience 25% fewer breakdowns and repairs (AMRA, 2023).
11. Understanding the Costs Involved in Transfer Case Maintenance and Repair
Maintaining or repairing a transfer case involves various costs, depending on the type of service needed. Knowing these costs can help you budget effectively and make informed decisions.
| Service | Average Cost | Description |
|---|---|---|
| Transfer Case Oil Change | $75 – $150 | Includes draining the old oil and refilling with new, manufacturer-recommended oil. |
| Seal Replacement | $150 – $350 | Replacing worn or damaged seals to prevent leaks. Cost varies based on the location and accessibility of the seals. |
| Bearing Replacement | $300 – $700 | Replacing worn bearings to reduce noise and improve performance. Includes labor and parts costs. |
| Chain Replacement | $400 – $900 | Replacing a stretched or damaged chain. Necessary for proper power transfer and avoiding slippage. |
| Transfer Case Repair | $500 – $1500 | General repairs to fix issues like noise, shifting problems, or vibration. Includes diagnosis, parts, and labor. |
| Transfer Case Replacement (New) | $1500 – $3500 | Replacing the entire transfer case with a new unit. This is often the best option if the existing unit is severely damaged. |
| Transfer Case Replacement (Remanufactured) | $800 – $2000 | Replacing the entire transfer case with a remanufactured unit. This is often a good option to save cost with ensured good quality. |
| Labor Costs | $75 – $150 per hour | The hourly rate for labor can vary depending on the shop and location. Complex repairs or replacements will require more labor hours. |
| Diagnostic Fee | $75 – $150 | A fee charged by the mechanic to diagnose the problem. This fee may be waived if you proceed with the repair at the same shop. |
These costs are estimates and can vary based on your vehicle’s make and model, the shop’s labor rates, and the specific parts needed.
12. The Benefits of Using High-Quality Transfer Case Oil
Using high-quality transfer case oil is crucial for maintaining the performance and longevity of your four-wheel drive system. Here are some key benefits:
- Optimal Lubrication: High-quality oil provides superior lubrication, reducing friction and wear on internal components. This is especially important in high-stress conditions.
- Temperature Stability: Quality oil maintains its viscosity over a wide range of temperatures, ensuring consistent performance in both hot and cold environments.
- Corrosion Protection: Good oil contains additives that protect against corrosion, preventing rust and damage to metal parts.
- Shear Stability: High-quality oil resists shearing, maintaining its lubricating properties even under high pressure and stress.
- Extended Lifespan: Using the right oil can extend the life of your transfer case, saving you money on repairs and replacements.
According to a study by the Society of Automotive Engineers (SAE), using high-quality lubricants can reduce wear by up to 40% (SAE, 2023).
13. How to Properly Dispose of Used Transfer Case Oil
Proper disposal of used transfer case oil is essential for protecting the environment. Here are the steps to follow:
- Collect the Oil: Drain the used oil into a leak-proof container, such as the original oil bottle or a dedicated waste oil container.
- Store the Oil Safely: Store the container in a secure location, away from children and pets. Ensure the container is labeled as “Used Oil.”
- Find a Recycling Center: Locate a certified recycling center or auto parts store that accepts used oil. Many auto parts stores offer free recycling services.
- Transport the Oil: Transport the used oil to the recycling center in a secure manner, ensuring the container is tightly sealed to prevent spills.
- Dispose of Properly: Follow the recycling center’s instructions for disposing of the used oil. They may have specific containers or procedures to follow.
Never pour used oil down the drain, into the sewer, or onto the ground. This can contaminate water sources and harm the environment. The EPA provides resources for finding local oil recycling centers and understanding proper disposal methods.
14. Understanding Transfer Case Gear Ratios and Their Impact
Transfer case gear ratios play a crucial role in the performance of your four-wheel drive vehicle. Understanding these ratios can help you optimize your vehicle for different driving conditions.
- High Range (Direct): In high range, the transfer case provides a 1:1 gear ratio. This means that the output shaft spins at the same speed as the input shaft. High range is typically used for normal on-road driving and provides the best fuel efficiency.
- Low Range (Reduced): In low range, the transfer case provides a reduced gear ratio, typically between 2:1 and 4:1. This multiplies the engine’s torque output, providing increased power for off-road driving and steep inclines. Low range also slows down the vehicle’s speed, allowing for more precise control in challenging conditions.
The gear ratio in low range provides increased torque and control. For example, a 2:1 low range doubles the engine’s torque output. This increased torque is essential for overcoming obstacles and maintaining traction in difficult terrain.
15. How Tire Size Affects Transfer Case Performance
Tire size can significantly impact the performance and longevity of your transfer case. Mismatched tire sizes or excessively large tires can put undue stress on the transfer case and other drivetrain components.
- Mismatched Tire Sizes: Using different size tires on the front and rear axles can cause driveline binding, especially in part-time 4WD systems. This occurs because the axles are forced to rotate at different speeds, putting stress on the transfer case.
- Oversized Tires: Installing larger than recommended tires can increase the load on the transfer case, leading to premature wear and failure. Larger tires also change the vehicle’s gear ratio, which can affect performance and fuel efficiency.
To avoid these issues, always ensure that all tires are the same size and have equal tread depth. Consult your vehicle’s owner’s manual for the recommended tire size and load capacity. If you choose to install larger tires, consider re-gearing the axles to compensate for the change in gear ratio.
16. The Importance of Regular Transfer Case Inspections
Regular inspections are a critical part of maintaining your transfer case. These inspections can help you identify potential problems before they lead to costly repairs.
- Visual Inspection: Check the transfer case for leaks, cracks, and other signs of damage. Look for oil stains on the ground beneath the vehicle.
- Oil Level Check: Regularly check the oil level in the transfer case. Low oil levels can lead to increased wear and damage.
- Noise Check: Listen for unusual noises coming from the transfer case. Grinding, whining, or clunking sounds can indicate internal problems.
- Shift Check: Test the 4WD system by shifting into and out of 4WD. Ensure that the system engages and disengages smoothly.
- Component Check: Inspect the shift linkage, shift motor, and other components for damage or wear.
Perform these inspections every 3 to 6 months, or as recommended in your vehicle’s owner’s manual. Early detection of potential problems can save you time and money in the long run.
17. Understanding Transfer Case Fluids and Lubricants
Choosing the right fluid for your transfer case is crucial for its performance and longevity. Different transfer cases require different types of fluids, so it’s essential to use the correct one.
- Automatic Transmission Fluid (ATF): Some transfer cases use ATF, which is designed to provide lubrication and cooling in automatic transmissions. Check your vehicle’s owner’s manual for the recommended type of ATF.
- Gear Oil: Other transfer cases use gear oil, which is a thicker lubricant designed to withstand high pressures and loads. Gear oil typically has a higher viscosity than ATF.
- Synthetic Fluids: Synthetic transfer case fluids offer superior performance and protection compared to conventional fluids. They provide better temperature stability, corrosion protection, and shear stability.
Using the wrong type of fluid can lead to poor lubrication, increased wear, and potential damage to the transfer case. Always consult your vehicle’s owner’s manual or a trusted mechanic for the recommended fluid type and specifications.
18. How to Diagnose Common Transfer Case Problems
Diagnosing transfer case problems requires a systematic approach. Here are some steps to follow:
- Gather Information: Start by gathering information about the problem. When does the problem occur? What does it sound like? Are there any other symptoms?
- Visual Inspection: Perform a visual inspection of the transfer case. Look for leaks, cracks, and other signs of damage.
- Oil Level Check: Check the oil level in the transfer case. Low oil levels can cause a variety of problems.
- Noise Check: Listen for unusual noises coming from the transfer case. Try to pinpoint the source of the noise.
- Shift Check: Test the 4WD system by shifting into and out of 4WD. Ensure that the system engages and disengages smoothly.
- Component Check: Inspect the shift linkage, shift motor, and other components for damage or wear.
- Professional Diagnosis: If you’re unable to diagnose the problem yourself, consult a professional mechanic. They have the tools and expertise to accurately diagnose and repair transfer case problems.
19. The Advantages of Professional Transfer Case Service
While some maintenance tasks can be performed at home, there are several advantages to having your transfer case serviced by a professional mechanic.
- Expertise: Professional mechanics have the knowledge and experience to accurately diagnose and repair transfer case problems.
- Tools and Equipment: Mechanics have access to specialized tools and equipment that are needed to perform certain repairs.
- Warranty: Many repair shops offer a warranty on their work, providing peace of mind.
- Time Savings: Having a professional service your transfer case can save you time and hassle.
- Proper Disposal: Mechanics will properly dispose of used fluids and parts, protecting the environment.
When choosing a mechanic, look for a shop that specializes in drivetrain repairs and has a good reputation.
20. FAQ About Checking Transfer Cases
Here are some frequently asked questions about checking transfer cases:
- How often should I check my transfer case oil level?
- You should check your transfer case oil level with every engine oil change, or every 3,000 to 5,000 miles.
- What type of oil should I use in my transfer case?
- Consult your vehicle’s owner’s manual for the recommended type of oil.
- How do I know if my transfer case is leaking?
- Look for oil stains on the ground beneath the vehicle, or inspect the transfer case for signs of oil leakage.
- What are the symptoms of a bad transfer case?
- Symptoms of a bad transfer case include unusual noises, difficulty shifting into or out of 4WD, and vibration.
- Can I drive with a bad transfer case?
- Driving with a bad transfer case can lead to further damage and potential safety hazards. It’s best to have it repaired as soon as possible.
- How much does it cost to repair a transfer case?
- The cost to repair a transfer case can vary depending on the type of repair needed. Contact a local mechanic for an estimate.
- Can I replace my transfer case myself?
- Replacing a transfer case can be a challenging task. It’s best to have it done by a professional mechanic.
- How long does a transfer case last?
- The lifespan of a transfer case can vary depending on the vehicle and driving conditions. Regular maintenance can help extend its lifespan.
- What is the difference between a transfer case and a differential?
- A transfer case distributes power between the front and rear axles, while a differential allows the wheels on the same axle to rotate at different speeds.
- Where can I find a reliable mechanic to service my transfer case?
- Ask friends or family for recommendations, or search online for reputable mechanics in your area.
Checking your transfer case regularly for oil level and noise is crucial for maintaining your four-wheel drive vehicle. By following the steps outlined in this guide, you can keep your 4×4 running smoothly and avoid costly repairs. And remember, for all your automotive tool needs, trust CARDIAGTECH.NET to provide the highest quality products and expert advice.
Are you facing challenges with your vehicle’s transfer case? Don’t let maintenance issues slow you down. Contact us at CARDIAGTECH.NET for expert advice and the best tools to keep your 4×4 in top condition. Call us at +1 (641) 206-8880, visit our website at CARDIAGTECH.NET, or stop by our location at 276 Reock St, City of Orange, NJ 07050, United States. Let us help you ensure your vehicle is always ready for the road.