How to Check the Wires and Connections of the Starter System?
Checking the wires and connections of the starter system is crucial for diagnosing starting issues. CARDIAGTECH.NET provides expert guidance and tools to ensure your vehicle starts reliably. By understanding the starter system and knowing how to inspect its components, you can troubleshoot problems effectively. Proper maintenance and inspection of the starter wires and connections can prevent unexpected breakdowns, ensuring your vehicle operates smoothly.
1. Understanding the Starter System
The starter system is responsible for initiating the combustion process in your engine. It consists of several key components working together to crank the engine until it starts. What are these components, and how do they interact?
1.1 What are the Main Components of the Starter System?
The starter system includes the battery, ignition switch, starter solenoid, starter motor, and related wiring. Each component plays a vital role in the starting process.
- Battery: Provides the electrical power needed to start the engine.
- Ignition Switch: Activates the starter circuit when you turn the key.
- Starter Solenoid: A relay that delivers high current from the battery to the starter motor.
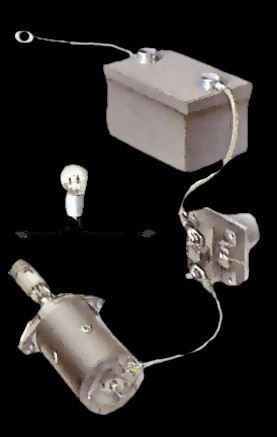
- Starter Motor: Converts electrical energy into mechanical energy to turn the engine’s flywheel.
- Wiring: Connects all the components, allowing electrical current to flow.
1.2 How Does the Starter System Work?
When you turn the ignition key, the following sequence occurs:
- The ignition switch sends a signal to the starter solenoid.
- The solenoid closes, allowing a large current to flow from the battery to the starter motor.
- The starter motor engages with the engine’s flywheel, turning the crankshaft and starting the engine.
- Once the engine starts, the starter disengages to prevent damage.
Understanding this process helps you pinpoint potential issues when troubleshooting starting problems.
2. Identifying Potential Issues with Starter Wires and Connections
Faulty wires and connections can cause a range of starting problems. Recognizing these symptoms early can save time and prevent further damage. What are the common symptoms of bad starter wires and connections?
2.1 Common Symptoms of Bad Starter Wires and Connections
- Engine Fails to Crank: The most obvious sign is when the engine does not turn over at all when you turn the key.
- Slow Cranking: The engine turns over slowly, struggling to start.
- Clicking Sound: A single click or rapid clicking noise when you try to start the engine, indicating the solenoid is not receiving enough power.
- Intermittent Starting: The engine starts sometimes but not others, suggesting a loose or corroded connection.
- Dimming Lights: Headlights or dashboard lights dim significantly when you try to start the engine, indicating a voltage drop.
2.2 Why are Good Connections Important for the Starter System?
Good electrical connections are essential for the starter system to function correctly. Poor connections increase resistance, reducing the amount of current that reaches the starter motor. This can lead to:
- Reduced Starting Power: Insufficient current to turn the engine effectively.
- Overheating: Increased resistance causes wires and components to heat up, potentially leading to damage or fire.
- Component Failure: The starter motor and solenoid may fail prematurely due to the strain of operating with insufficient power.
- Battery Drain: Poor connections can cause the battery to work harder, shortening its lifespan.
3. Tools Needed to Check Starter Wires and Connections
Before you begin inspecting the starter system, gather the necessary tools. Having the right equipment ensures you can perform the checks safely and effectively. What tools are essential for this task?
3.1 Essential Tools for Checking Starter Wires and Connections
- Multimeter: Used to measure voltage, current, and resistance in the electrical circuit.
- Test Light: A simple tool to check for the presence of voltage in a circuit.
- Socket Set and Wrenches: For disconnecting and tightening battery terminals and starter connections.
- Wire Brush or Terminal Cleaner: To clean corroded terminals and connections.
- Gloves and Safety Glasses: To protect yourself from electrical shock and debris.
- Jumper Cables: In case you need to jump-start the vehicle during testing.
- Battery Terminal Puller: To safely remove corroded battery terminals.
3.2 Where to Buy Quality Tools for Automotive Repairs
For high-quality automotive repair tools, consider CARDIAGTECH.NET. They offer a wide range of tools designed for professionals and DIY enthusiasts, ensuring you have the right equipment for any job. Their products are durable, reliable, and designed to make your work easier and more efficient. Contact them at +1 (641) 206-8880 or visit their location at 276 Reock St, City of Orange, NJ 07050, United States.
4. Step-by-Step Guide to Checking Starter Wires and Connections
Checking the starter wires and connections involves a systematic approach to identify and address any issues. Follow these steps to ensure a thorough inspection. How do you systematically check the starter wires and connections?
4.1 Step 1: Safety Precautions
Before starting any electrical work on your vehicle, follow these safety precautions:
- Disconnect the Battery: Disconnect the negative terminal of the battery to prevent electrical shock.
- Wear Safety Gear: Wear gloves and safety glasses to protect yourself from potential hazards.
- Work in a Well-Ventilated Area: Ensure proper ventilation to avoid inhaling harmful fumes.
- Use Proper Tools: Use insulated tools to prevent electrical shock.
- Follow the Vehicle’s Manual: Refer to your vehicle’s manual for specific instructions and safety guidelines.
4.2 Step 2: Inspecting the Battery Terminals
The battery terminals are a common source of starting problems. Inspect them for corrosion, looseness, and damage.
- Visual Inspection: Check the terminals for white or bluish-green corrosion.
- Tightness: Ensure the terminals are securely attached to the battery posts.
- Cleaning: If corrosion is present, disconnect the terminals and clean them with a wire brush or terminal cleaner. Apply a corrosion protectant after cleaning.
- Testing Voltage: Use a multimeter to check the battery voltage. A fully charged battery should read around 12.6 volts.
4.3 Step 3: Checking the Battery Cables
The battery cables connect the battery to the starter system. Inspect them for damage and proper connection.
- Visual Inspection: Look for cuts, cracks, or frayed wires on the cables.
- Continuity Test: Use a multimeter to check the continuity of the cables. Set the multimeter to the continuity setting and touch one probe to each end of the cable. The multimeter should beep, indicating a good connection.
- Ground Connection: Ensure the ground cable is securely attached to the vehicle’s frame. Clean the connection point if necessary.
4.4 Step 4: Inspecting the Starter Solenoid Connections
The starter solenoid is responsible for delivering power to the starter motor. Check its connections for looseness and corrosion.
- Location: Locate the starter solenoid, usually mounted on the starter motor or nearby.
- Visual Inspection: Check the connections for corrosion, looseness, or damage.
- Tightness: Ensure all connections are tight and secure.
- Voltage Test: Use a multimeter to check the voltage at the solenoid terminals when the ignition key is turned to the start position. You should see battery voltage at the terminal that sends power to the starter motor.
4.5 Step 5: Checking the Starter Motor Connections
The starter motor itself needs to be checked for proper connections and functionality.
- Location: Locate the starter motor, usually mounted on the engine block near the flywheel.
- Visual Inspection: Check the connections for corrosion, looseness, or damage.
- Tightness: Ensure all connections are tight and secure.
- Voltage Test: Use a multimeter to check the voltage at the starter motor terminal when the ignition key is turned to the start position. You should see battery voltage at the terminal.
4.6 Step 6: Performing a Voltage Drop Test
A voltage drop test can identify high resistance in the starter circuit. This test measures the voltage loss across each connection and wire.
- Setup: Connect the positive lead of the multimeter to the positive terminal of the battery and the negative lead to the starter motor’s positive terminal.
- Test: Have someone turn the ignition key to the start position while you observe the multimeter reading.
- Interpretation: A voltage drop of more than 0.5 volts indicates high resistance in the circuit. Investigate the connections and wires between the battery and starter motor to find the source of the resistance.
4.7 Step 7: Checking the Ignition Switch
The ignition switch sends the signal to activate the starter system. If the switch is faulty, it may not send the signal, preventing the engine from starting.
- Location: Locate the ignition switch, usually behind the steering column.
- Continuity Test: Use a multimeter to check the continuity of the switch. Disconnect the switch and set the multimeter to the continuity setting. Turn the key to the start position and check for continuity between the appropriate terminals.
- Voltage Test: Use a multimeter to check for voltage at the switch terminals when the key is turned to the start position. You should see voltage at the terminal that sends the signal to the starter solenoid.
4.8 Step 8: Checking the Engine Ground Strap
The engine ground strap connects the engine to the vehicle’s frame, providing a ground path for the starter system. A faulty ground strap can cause starting problems.
- Location: Locate the engine ground strap, usually connected between the engine block and the vehicle’s frame.
- Visual Inspection: Check the ground strap for corrosion, looseness, or damage.
- Tightness: Ensure the connections are tight and secure.
- Continuity Test: Use a multimeter to check the continuity of the ground strap. Set the multimeter to the continuity setting and touch one probe to each end of the strap. The multimeter should beep, indicating a good connection.
5. Repairing or Replacing Faulty Wires and Connections
Once you have identified faulty wires and connections, you need to repair or replace them to restore the starter system’s functionality. What are the best practices for repairing or replacing these components?
5.1 How to Repair Damaged Wires
- Disconnect the Battery: Always disconnect the battery before working on electrical wires.
- Inspect the Damage: Examine the wire to determine the extent of the damage. If the wire is frayed or corroded, it may need to be replaced.
- Cut the Wire: Use wire cutters to cut out the damaged section of the wire.
- Strip the Ends: Use wire strippers to remove the insulation from the ends of the wire.
- Connect the Wires: Use a wire connector to join the two ends of the wire. Ensure the connection is secure and tight.
- Insulate the Connection: Wrap the connection with electrical tape to protect it from moisture and corrosion.
5.2 When to Replace Wires and Connections
In some cases, it is better to replace wires and connections rather than attempt to repair them. Consider replacement when:
- The wire is severely corroded or damaged.
- The connection is loose or cannot be tightened.
- The wire is too short to repair properly.
- The cost of repair exceeds the cost of replacement.
5.3 Choosing the Right Replacement Parts
When replacing wires and connections, choose high-quality parts that meet or exceed the original equipment manufacturer (OEM) specifications. This ensures proper fit, performance, and reliability. CARDIAGTECH.NET offers a range of high-quality replacement parts for your vehicle’s starter system. Their products are designed to provide long-lasting performance and reliability.
5.4 Tips for Replacing Wires and Connections
- Use the Correct Gauge Wire: Ensure the replacement wire is the same gauge as the original wire.
- Use Quality Connectors: Use high-quality connectors that are designed for automotive applications.
- Secure Connections: Ensure all connections are tight and secure.
- Protect Connections: Protect connections from moisture and corrosion with electrical tape or corrosion protectant.
- Follow the Vehicle’s Manual: Refer to your vehicle’s manual for specific instructions and torque specifications.
6. Preventing Future Issues with Starter Wires and Connections
Preventative maintenance can help you avoid future problems with your vehicle’s starter system. What steps can you take to keep your starter wires and connections in good condition?
6.1 Regular Inspection and Cleaning
Inspect the starter wires and connections regularly for corrosion, looseness, and damage. Clean the connections with a wire brush or terminal cleaner to remove corrosion. Apply a corrosion protectant to prevent future corrosion. Aim to do this every 6 months or during routine maintenance checks.
6.2 Applying Corrosion Protectant
Applying a corrosion protectant to the battery terminals and other connections can help prevent corrosion and extend the life of the starter system. Choose a protectant that is specifically designed for automotive applications.
6.3 Ensuring Secure Connections
Make sure all connections are tight and secure. Loose connections can cause increased resistance, leading to starting problems. Check the connections regularly and tighten them as needed.
6.4 Protecting Wires from Damage
Protect wires from damage by routing them away from heat sources, sharp edges, and moving parts. Use wire loom or conduit to protect wires from abrasion and impact.
6.5 Professional Maintenance
Consider having a professional mechanic inspect and maintain your vehicle’s starter system during routine maintenance checks. A professional can identify potential problems early and address them before they cause a breakdown.
7. Advanced Troubleshooting Techniques
If you have checked the wires and connections and are still experiencing starting problems, you may need to use advanced troubleshooting techniques. What are some advanced methods for diagnosing starter system issues?
7.1 Using a Scan Tool
A scan tool can read diagnostic trouble codes (DTCs) from the vehicle’s computer, providing valuable information about the starter system. Connect the scan tool to the vehicle’s diagnostic port and follow the instructions to retrieve any stored codes.
7.2 Checking the Starter Relay
The starter relay is a switch that controls the flow of current to the starter solenoid. A faulty relay can prevent the starter system from working. Use a multimeter to check the relay for proper operation.
- Location: Locate the starter relay in the vehicle’s fuse box.
- Testing: Use a multimeter to check the continuity of the relay. Disconnect the relay and set the multimeter to the continuity setting. Apply voltage to the relay’s control terminals and check for continuity between the power terminals.
7.3 Testing the Starter Motor
If you have ruled out other potential causes of starting problems, the starter motor itself may be faulty. Use a multimeter to test the starter motor for proper operation.
- Direct Power Test: Connect the starter motor directly to the battery using jumper cables. If the starter motor does not turn, it is likely faulty and needs to be replaced.
- Voltage Drop Test: Perform a voltage drop test on the starter motor circuit to check for high resistance.
7.4 Seeking Professional Help
If you are unable to diagnose or repair the starting problem yourself, it is best to seek professional help from a qualified mechanic. A professional has the expertise, tools, and experience to diagnose and repair complex automotive problems.
8. Why Choose CARDIAGTECH.NET for Your Automotive Needs
CARDIAGTECH.NET is your trusted partner for all your automotive repair needs. They offer a wide range of high-quality tools, equipment, and services to help you keep your vehicle in top condition. Why should you choose CARDIAGTECH.NET?
8.1 High-Quality Tools and Equipment
CARDIAGTECH.NET offers a wide selection of high-quality tools and equipment for automotive repair. Their products are durable, reliable, and designed to make your work easier and more efficient. Whether you are a professional mechanic or a DIY enthusiast, you can find the right tools for the job at CARDIAGTECH.NET.
8.2 Expert Advice and Support
CARDIAGTECH.NET provides expert advice and support to help you diagnose and repair your vehicle. Their knowledgeable staff can answer your questions, provide technical assistance, and help you choose the right tools and equipment for your needs.
8.3 Convenient Location and Contact Information
CARDIAGTECH.NET is conveniently located at 276 Reock St, City of Orange, NJ 07050, United States. You can also contact them by phone at +1 (641) 206-8880. Their friendly and helpful staff is ready to assist you with all your automotive needs.
8.4 Commitment to Customer Satisfaction
CARDIAGTECH.NET is committed to customer satisfaction. They stand behind their products and services and are dedicated to providing the best possible experience for their customers. You can trust CARDIAGTECH.NET to provide you with the quality, value, and support you need to keep your vehicle running smoothly.
Ready to get your hands on top-notch automotive tools? Don’t let faulty starter wires and connections leave you stranded. Contact CARDIAGTECH.NET at +1 (641) 206-8880 or visit us at 276 Reock St, City of Orange, NJ 07050, United States. Our team is ready to assist you with expert advice and the highest quality tools to get your vehicle running smoothly. Reach out now and experience the CARDIAGTECH.NET difference!
9. Understanding Inertia and Pre-Engaged Starter Systems
The type of starter system your vehicle uses can affect how you diagnose and address issues. What are the differences between inertia and pre-engaged starter systems?
9.1 Inertia Starter System
An inertia starter system utilizes a separate solenoid, often mounted away from the starter motor. This system relies on the inertia of a spinning pinion gear to engage with the flywheel.
Key Characteristics:
- Separate Solenoid: The solenoid is mounted elsewhere in the engine compartment.
- Mechanical Engagement: The pinion gear uses inertia to engage with the flywheel.
- Older Design: Commonly found in older vehicles.
9.2 Pre-Engaged Starter System
A pre-engaged starter system has the solenoid mounted directly on the starter motor casing. When activated, the solenoid pushes the pinion gear into mesh with the flywheel before the motor starts spinning.
Key Characteristics:
- Integrated Solenoid: The solenoid is mounted on the motor casing.
- Direct Engagement: The pinion gear is mechanically engaged before the motor starts.
- Modern Design: Common in modern vehicles.
9.3 How to Tell the Difference
- Solenoid Location: Check if the solenoid is mounted on the starter motor or located separately.
- Wiring Configuration: Observe the wiring. Pre-engaged starters have simpler wiring due to the integrated solenoid.
- Vehicle Age: Older vehicles are more likely to have inertia starters.
Knowing which type of starter system your vehicle uses can help you troubleshoot issues more effectively, ensuring you address the specific components and connections involved.
10. FAQ: Troubleshooting Starter System Wires and Connections
Here are some frequently asked questions to help you better understand how to troubleshoot issues with starter system wires and connections.
10.1 Why is my car not starting, even with a new battery?
The issue may be with the starter wires and connections, a faulty starter motor, or a problem with the ignition switch. Check the connections for corrosion and tightness, and test the starter motor and solenoid.
10.2 What does a clicking sound when starting my car indicate?
A clicking sound usually indicates that the starter solenoid is not receiving enough power. This can be due to a weak battery, corroded connections, or a faulty solenoid.
10.3 How can I test the starter solenoid?
You can test the starter solenoid by carefully bridging its main terminals with a well-insulated screwdriver. If the starter motor turns, the solenoid is likely faulty.
10.4 What is a voltage drop test, and how does it help?
A voltage drop test measures the voltage loss across a circuit, identifying areas of high resistance. This can help pinpoint faulty wires and connections in the starter system.
10.5 How often should I clean my battery terminals?
You should clean your battery terminals every 6 months or as needed if you notice corrosion. This helps ensure a good electrical connection and prevents starting problems.
10.6 Can a bad ground connection cause starting problems?
Yes, a bad ground connection can cause significant starting problems. Ensure the engine ground strap and battery ground cable are securely attached and free from corrosion.
10.7 What tools do I need to check my starter wires and connections?
Essential tools include a multimeter, test light, socket set, wire brush, gloves, and safety glasses.
10.8 Where can I buy quality automotive tools?
CARDIAGTECH.NET offers a wide range of high-quality automotive tools. You can contact them at +1 (641) 206-8880 or visit their location at 276 Reock St, City of Orange, NJ 07050, United States.
10.9 How do I know if my starter motor is bad?
If you have checked the wires, connections, and solenoid and the starter motor still does not turn, it is likely faulty and needs to be replaced.
10.10 What safety precautions should I take when working on the starter system?
Always disconnect the battery, wear safety glasses and gloves, work in a well-ventilated area, and use insulated tools to prevent electrical shock.
Checking Starter Connections
11. The Role of the Ignition Switch in the Starter System
The ignition switch is a critical component that often gets overlooked when troubleshooting starter problems. What exactly does it do, and how can you check if it’s working correctly?
11.1 What Does the Ignition Switch Do?
The ignition switch has several key functions:
- Initiates the Starting Process: When you turn the key to the start position, the switch sends a signal to the starter solenoid.
- Completes the Circuit: It closes the circuit that allows power to flow from the battery to the solenoid and, subsequently, to the starter motor.
- Activates Other Systems: It also activates other electrical systems necessary for starting the engine, such as the fuel pump and ignition system.
11.2 Symptoms of a Faulty Ignition Switch
- No Response When Turning the Key: The most obvious symptom is that nothing happens when you turn the key to the start position.
- Intermittent Starting: The car starts sometimes but not others, suggesting a loose connection or worn contacts within the switch.
- Clicking Sound: Similar to a bad solenoid, a faulty ignition switch may cause a clicking sound due to insufficient power reaching the starter.
- Dashboard Lights Don’t Come On: If the ignition switch is not functioning correctly, the dashboard lights may not illuminate when you turn the key.
11.3 How to Test the Ignition Switch
- Visual Inspection: Check the switch for any visible damage or loose connections.
- Continuity Test:
- Disconnect the switch from the wiring harness.
- Set your multimeter to the continuity setting.
- Place one probe on the power input terminal and the other on the starter output terminal.
- Turn the key to the start position. The multimeter should beep, indicating continuity. If not, the switch is likely faulty.
- Voltage Test:
- Reconnect the switch to the wiring harness.
- Use a multimeter to check for voltage at the switch terminals when the key is turned to the start position.
- You should see battery voltage at the terminal that sends the signal to the starter solenoid.
11.4 Common Issues with the Ignition Switch
- Worn Contacts: Over time, the contacts within the switch can wear out, leading to poor electrical connection.
- Loose Connections: The wiring connections to the switch can become loose, causing intermittent starting problems.
- Internal Damage: The switch can suffer internal damage due to electrical surges or physical stress.
11.5 Replacing the Ignition Switch
If you determine that the ignition switch is faulty, it’s important to replace it promptly. Follow these steps:
- Disconnect the Battery: Disconnect the negative terminal of the battery to prevent electrical shock.
- Remove the Steering Column Covers: You’ll likely need to remove the covers around the steering column to access the ignition switch.
- Disconnect the Wiring Harness: Carefully disconnect the wiring harness from the switch.
- Remove the Old Switch: Remove the screws or bolts that secure the switch to the steering column.
- Install the New Switch: Install the new switch, ensuring it is properly aligned and secured.
- Reconnect the Wiring Harness: Reconnect the wiring harness to the switch.
- Reinstall the Steering Column Covers: Reinstall the covers around the steering column.
- Reconnect the Battery: Reconnect the negative terminal of the battery.
- Test the Switch: Test the switch to ensure it is functioning correctly.
12. Understanding Voltage Drop and Resistance in the Starter System
Voltage drop and resistance are critical concepts when troubleshooting the electrical components of your vehicle, especially the starter system. What do these terms mean, and how do they affect the performance of your vehicle?
12.1 What is Voltage Drop?
Voltage drop is the decrease in electrical potential along a circuit element. In simpler terms, it’s the amount of voltage lost as electricity flows through a wire, connection, or component. Ideally, the voltage drop should be minimal, indicating efficient power delivery.
12.2 What is Resistance?
Resistance is the opposition to the flow of electrical current in a circuit. It’s measured in ohms (Ω). High resistance can impede current flow, reducing the power available to operate components like the starter motor.
12.3 How Does Voltage Drop Affect the Starter System?
Excessive voltage drop can lead to several issues:
- Reduced Starter Motor Power: Insufficient voltage reaching the starter motor can cause it to turn slowly or not at all.
- Solenoid Failure: The starter solenoid may not engage properly if the voltage is too low, leading to a clicking sound or no start condition.
- Overheating: High resistance causes wires and connections to heat up, potentially leading to damage or fire.
12.4 How to Measure Voltage Drop
- Set Up:
- Set your multimeter to the DC voltage setting.
- Connect the positive lead of the multimeter to the positive terminal of the battery.
- Connect the negative lead of the multimeter to the positive terminal of the component you want to test (e.g., starter motor).
- Perform the Test:
- Have someone turn the ignition key to the start position while you observe the multimeter reading.
- Interpret the Results:
- A voltage drop of more than 0.5 volts indicates high resistance in the circuit.
- Investigate the connections and wires between the battery and the component to find the source of the resistance.
12.5 Common Causes of High Resistance and Voltage Drop
- Corroded Connections: Corrosion on battery terminals, wire connectors, and ground points increases resistance.
- Loose Connections: Loose connections prevent proper electrical contact, leading to voltage drop.
- Damaged Wires: Cut, frayed, or internally corroded wires impede current flow.
- Faulty Components: Worn or damaged components like the starter solenoid or ignition switch can cause high resistance.
12.6 Practical Tips for Reducing Voltage Drop
- Clean and Tighten Connections: Regularly clean battery terminals and other connections with a wire brush or terminal cleaner. Ensure all connections are tight and secure.
- Replace Damaged Wires: Replace any wires that are cut, frayed, or internally corroded.
- Use High-Quality Components: Use high-quality replacement parts that meet or exceed OEM specifications.
- Apply Corrosion Protectant: Apply a corrosion protectant to battery terminals and other connections to prevent corrosion.
13. Diagnosing Starter System Issues with a Multimeter
A multimeter is an indispensable tool for diagnosing electrical problems in your vehicle, including issues with the starter system. How can you effectively use a multimeter to troubleshoot these problems?
13.1 Understanding the Basics of Multimeter Use
A multimeter measures voltage, current (amps), and resistance (ohms). For starter system diagnostics, voltage and resistance measurements are most commonly used.
- Voltage (V): Measures the electrical potential difference between two points in a circuit.
- Resistance (Ω): Measures the opposition to the flow of electrical current.
- Continuity: A special resistance measurement that indicates whether a circuit is complete or broken.
13.2 Essential Multimeter Settings for Starter System Testing
- DC Voltage (VDC): Used to measure the battery voltage and voltage at various points in the starter circuit.
- Ohms (Ω): Used to measure resistance in wires, connections, and components.
- Continuity Test: Used to check for broken circuits or faulty switches.
13.3 Testing the Battery Voltage
- Set Up:
- Set your multimeter to the DC voltage (VDC) setting.
- Connect the red (positive) lead to the positive terminal of the battery.
- Connect the black (negative) lead to the negative terminal of the battery.
- Read the Voltage:
- A fully charged battery should read around 12.6 volts.
- A reading below 12.0 volts indicates a discharged battery.
- Load Test:
- Have someone try to start the car while you observe the voltage reading.
- The voltage should not drop below 10.5 volts during cranking. A significant drop indicates a weak battery.
13.4 Checking for Voltage at the Starter Solenoid
- Set Up:
- Set your multimeter to the DC voltage (VDC) setting.
- Connect the black (negative) lead to a good ground point on the vehicle.
- Test the Input Terminal:
- Connect the red (positive) lead to the input terminal of the starter solenoid (the terminal connected directly to the battery).
- You should see battery voltage at this terminal at all times.
- Test the Output Terminal:
- Connect the red (positive) lead to the output terminal of the starter solenoid (the terminal that sends power to the starter motor).
- Have someone turn the ignition key to the start position.
- You should see battery voltage at this terminal only when the key is in the start position.
13.5 Measuring Resistance in Wires and Connections
- Disconnect the Battery: Disconnect the negative terminal of the battery before testing resistance.
- Set Up:
- Set your multimeter to the ohms (Ω) setting.
- Touch the two probes together to ensure the multimeter reads zero ohms, indicating a good connection between the probes.
- Test the Wire or Connection:
- Place one probe on each end of the wire or connection you want to test.
- The multimeter should read close to zero ohms for a good wire or connection.
- A high resistance reading indicates a faulty wire or connection.
13.6 Performing a Continuity Test
- Disconnect the Battery: Disconnect the negative terminal of the battery before performing a continuity test.
- Set Up:
- Set your multimeter to the continuity test setting (usually indicated by a sound wave symbol).
- Touch the two probes together to ensure the multimeter beeps, indicating continuity.
- Test the Component:
- Place one probe on each end of the component you want to test (e.g., a switch or a wire).
- The multimeter should beep, indicating continuity. If it doesn’t beep, the component is faulty.
13.7 Practical Tips for Using a Multimeter
- Read the Manual: Familiarize yourself with the functions and settings of your multimeter.
- Use Proper Probes: Use probes that are in good condition and properly insulated.
- Check Your Connections: Ensure the probes are making good contact with the components you are testing.
- Disconnect the Power: Always disconnect the power before testing resistance or continuity.
- Take Accurate Readings: Take multiple readings to ensure accuracy.
14. Benefits of Maintaining a Healthy Starter System
Maintaining a healthy starter system offers numerous benefits, from reliable vehicle operation to cost savings. What are the key advantages of keeping your starter system in good condition?
14.1 Reliable Vehicle Operation
A well-maintained starter system ensures your vehicle starts reliably every time. This prevents frustrating situations where you are stranded with a non-starting car, especially in inconvenient locations or during emergencies.
14.2 Extended Component Lifespan
Regular maintenance can extend the lifespan of starter system components such as the battery, starter motor, and solenoid. By addressing minor issues early, you prevent them from escalating into major problems that require costly replacements.
14.3 Improved Fuel Efficiency
A properly functioning starter system helps the engine start quickly and efficiently. This reduces the amount of fuel needed to start the engine, improving overall fuel efficiency.
14.4 Reduced Repair Costs
Preventative maintenance can help you avoid costly repairs in the future. By regularly inspecting and maintaining your starter system, you can identify and address potential problems before they cause significant damage.
14.5 Increased Vehicle Value
A well-maintained vehicle is more valuable than one that has been neglected. Keeping your starter system in good condition helps maintain the overall value of your vehicle.
14.6 Enhanced Safety
A reliable starter system ensures your vehicle is always ready to go when you need it. This enhances safety by preventing situations where you are stranded in potentially dangerous locations.
14.7 Peace of Mind
Knowing that your starter system is in good condition provides peace of mind. You can drive with confidence, knowing that your vehicle is reliable and ready to start whenever you need it.
14.8 Environmental Benefits
A well-maintained starter system contributes to environmental sustainability by reducing fuel consumption and emissions. By ensuring efficient engine starts, you minimize the environmental impact of your vehicle.
14.9 Avoiding Inconvenience
A non-starting vehicle can disrupt your daily routine and cause significant inconvenience. Maintaining a healthy starter system helps you avoid these disruptions and stay on schedule.
14.10 Compliance with Maintenance Schedules
Following the recommended maintenance schedules for your vehicle’s starter system ensures compliance with warranty requirements and manufacturer guidelines. This helps maintain your vehicle’s warranty coverage and ensures optimal performance.