L663 3D Surround Camera: Enhance Your Defender’s Vision
L663 3D Surround Camera systems from CARDIAGTECH.NET provide an unparalleled view of your vehicle’s surroundings, boosting safety and confidence. This comprehensive guide dives into the features, benefits, installation, and troubleshooting of these advanced camera systems, ensuring you get the most out of this innovative technology. Discover how this cutting-edge technology enhances visibility and vehicle safety.
1. Understanding the L663 3D Surround Camera System
The L663 3D Surround Camera system is more than just a rearview camera; it’s a comprehensive vision enhancement system designed for modern vehicles, particularly the Land Rover Defender L663. It utilizes multiple cameras strategically positioned around the vehicle to provide a 360-degree, real-time view of the surroundings. This bird’s-eye perspective is then digitally stitched together to create a seamless, three-dimensional representation of the vehicle and its immediate environment. This advanced system is designed to improve situational awareness, making parking, maneuvering in tight spaces, and off-road navigation significantly safer and easier.
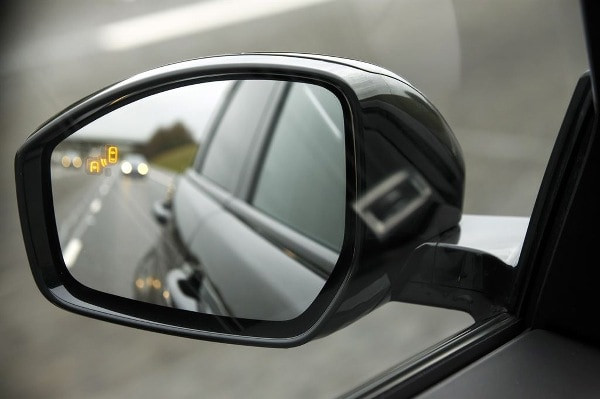
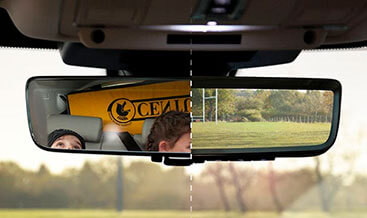
L663 ClearSight interior rear view mirror providing a clear unobstructed rear view
1.1 Key Components of the System
The L663 3D Surround Camera system integrates several key components that work in harmony to deliver a superior visual experience:
- Cameras: Typically, the system includes four high-resolution cameras: one at the front grille, one at the rear, and one in each side mirror. These cameras capture a wide-angle view of the vehicle’s surroundings.
- Electronic Control Unit (ECU): The ECU is the “brain” of the system. It receives the video feeds from all cameras, processes the images, and stitches them together to create the 3D surround view. The ECU also handles image correction, distortion removal, and dynamic calibration.
- Display Screen: The processed video is displayed on the vehicle’s infotainment screen, providing the driver with a clear and intuitive view of the surroundings.
- Wiring Harness: A network of cables connects all the components, ensuring seamless communication and power supply.
1.2 Benefits of Using a 3D Surround Camera System
- Enhanced Safety: By providing a comprehensive view of the surroundings, the system minimizes blind spots and reduces the risk of collisions, especially in parking lots and urban environments. According to the National Highway Traffic Safety Administration (NHTSA), camera systems can reduce backing accidents by a significant margin.
- Improved Maneuverability: Navigating tight parking spaces or off-road trails becomes much easier with the 3D surround view. The driver can precisely position the vehicle, avoiding obstacles and potential damage.
- Increased Confidence: Knowing exactly what surrounds your vehicle enhances driver confidence, reducing stress during challenging driving situations. This is particularly valuable for new drivers or those driving larger vehicles.
- Damage Prevention: By providing a clear view of potential hazards, the system helps prevent minor scrapes and dents, saving on costly repairs.
1.3 Common Use Cases for the L663 3D Surround Camera
- Parking Assistance: The system provides visual aids and guidelines to make parallel parking, perpendicular parking, and bay parking easier and safer.
- Off-Road Navigation: When navigating challenging terrain, the 3D surround view helps drivers avoid rocks, ditches, and other obstacles that might damage the vehicle.
- Towing and Hitching: The system can provide a clear view of the trailer hitch, making it easier to connect and disconnect trailers.
- Tight Spaces: Maneuvering through narrow alleyways, construction zones, or crowded streets becomes less stressful with the comprehensive view provided by the system.
1.4 Statistics Highlighting the Importance of Vehicle Camera Systems
| Statistic | Source |
|---|---|
| Rearview cameras reduce backing accidents by up to 41%. | NHTSA |
| Surround-view systems can prevent up to 25% of parking-related accidents. | Insurance Institute for Highway Safety (IIHS) |
| Camera systems can lower insurance premiums by up to 10%. | Various Insurance Providers |
These statistics underscore the tangible benefits of installing and using a 3D surround camera system in your vehicle.
2. Key Features of the L663 3D Surround Camera
The L663 3D Surround Camera system is packed with features designed to provide an intuitive and comprehensive view of the vehicle’s surroundings. Understanding these features is essential for maximizing the system’s benefits and ensuring optimal performance.
2.1 High-Resolution Camera Quality
- Image Clarity: The L663 system utilizes high-resolution cameras, typically offering 720p or 1080p resolution. This ensures clear and detailed images, even in low-light conditions.
- Wide-Angle Lenses: The cameras are equipped with wide-angle lenses, typically with a field of view of 180 degrees or more. This allows them to capture a broad area around the vehicle, minimizing blind spots.
- Low-Light Performance: Advanced image sensors and processing algorithms enable the cameras to perform well in low-light conditions, such as at night or in dimly lit parking garages.
2.2 Dynamic Guidelines and Overlays
- Parking Guidelines: The system overlays dynamic guidelines on the display screen, indicating the vehicle’s projected path. These guidelines adjust as the steering wheel is turned, making parking maneuvers more precise.
- Distance Indicators: Visual cues and color-coded indicators provide real-time distance information, helping the driver judge the proximity of obstacles.
- Customizable Views: The system allows drivers to switch between different camera views, such as front view, rear view, side views, and the 3D surround view, to suit their specific needs.
2.3 Obstacle Detection and Alerts
- Moving Object Detection: The system can detect moving objects, such as pedestrians or vehicles, that are approaching the vehicle. It provides visual and audible alerts to warn the driver of potential hazards.
- Blind Spot Monitoring: Some L663 systems integrate with the vehicle’s blind spot monitoring system, providing alerts when a vehicle is detected in the driver’s blind spot.
- Parking Sensors: The system integrates with the vehicle’s parking sensors, providing audible alerts that increase in frequency as the vehicle gets closer to an obstacle.
2.4 Seamless Image Stitching and Processing
- Real-Time Processing: The ECU processes the video feeds from all cameras in real-time, ensuring a smooth and lag-free display on the infotainment screen.
- Distortion Correction: Advanced algorithms correct for lens distortion, ensuring that the displayed image is accurate and natural-looking.
- Dynamic Calibration: The system dynamically calibrates the cameras to compensate for changes in vehicle position, ensuring that the 3D surround view remains accurate even on uneven surfaces.
2.5 Additional Features
- Recording Capability: Some L663 systems offer the ability to record video from the cameras, providing a valuable record of driving events.
- Remote Viewing: Certain systems allow remote viewing of the camera feeds via a smartphone app, providing added security and peace of mind.
- Integration with Vehicle Systems: The L663 system seamlessly integrates with the vehicle’s other systems, such as the infotainment system, parking sensors, and blind spot monitoring system, to provide a comprehensive driving experience.
| Feature | Description | Benefit |
|---|---|---|
| High-Resolution Cameras | 720p or 1080p resolution with wide-angle lenses | Provides clear, detailed images with a broad field of view, even in low-light conditions |
| Dynamic Guidelines | Overlays dynamic guidelines on the display screen, indicating the vehicle’s projected path | Makes parking maneuvers more precise and easier |
| Obstacle Detection | Detects moving objects and provides visual and audible alerts | Warns the driver of potential hazards and helps prevent collisions |
| Seamless Image Stitching | Processes video feeds in real-time and corrects for lens distortion | Ensures a smooth, accurate, and natural-looking display on the infotainment screen |
| Recording Capability | Offers the ability to record video from the cameras | Provides a valuable record of driving events |
| Remote Viewing | Allows remote viewing of the camera feeds via a smartphone app | Provides added security and peace of mind |
| Integration with Systems | Seamlessly integrates with the vehicle’s other systems, such as the infotainment system, parking sensors, and blind spot monitoring system | Provides a comprehensive and integrated driving experience |
By leveraging these key features, the L663 3D Surround Camera system enhances driver awareness, improves safety, and makes driving more enjoyable.
3. Step-by-Step Installation Guide for the L663 3D Surround Camera
Installing the L663 3D Surround Camera system requires careful attention to detail and a methodical approach. While professional installation is always recommended, this step-by-step guide provides a comprehensive overview of the process for those who prefer a DIY approach. Always consult your vehicle’s service manual and follow all safety precautions. Contact CARDIAGTECH.NET for expert advice if needed.
3.1 Tools and Materials Needed
- L663 3D Surround Camera System Kit (including cameras, ECU, wiring harness, and display screen)
- Socket Set
- Screwdriver Set
- Wire Strippers
- Wire Crimpers
- Electrical Tape
- Multimeter
- Trim Removal Tools
- Drill with various drill bits
- Vehicle Service Manual
- Safety Glasses
- Gloves
3.2 Pre-Installation Steps
- Disconnect the Battery: Before starting any electrical work, disconnect the negative terminal of the vehicle’s battery to prevent electrical shorts or shocks.
- Review the Instructions: Carefully read the installation instructions provided with the L663 3D Surround Camera system kit. Familiarize yourself with the components and the installation process.
- Plan the Camera Placement: Determine the optimal locations for the cameras on the vehicle. Typically, the front camera is mounted on the front grille, the rear camera on the tailgate or above the license plate, and the side cameras on the side mirrors.
- Plan the Wiring Route: Determine the best route for the wiring harness, avoiding moving parts, sharp edges, and heat sources.
3.3 Camera Installation
- Front Camera:
- Remove the front grille or bumper cover to access the mounting location.
- Drill a hole (if necessary) for the camera wiring.
- Mount the front camera securely using the provided hardware.
- Route the camera wiring through the hole and secure it with electrical tape.
- Rear Camera:
- Remove the tailgate trim or license plate bracket to access the mounting location.
- Drill a hole (if necessary) for the camera wiring.
- Mount the rear camera securely using the provided hardware.
- Route the camera wiring through the hole and secure it with electrical tape.
- Side Cameras:
- Remove the side mirror housings to access the mounting locations.
- Drill a hole (if necessary) for the camera wiring.
- Mount the side cameras securely using the provided hardware.
- Route the camera wiring through the hole and into the vehicle’s door.
3.4 Wiring Harness Installation
- Route the Wiring: Carefully route the wiring harness from each camera to the location where the ECU will be mounted. Use trim removal tools to remove interior panels and route the wiring behind them.
- Connect the Cameras: Connect the camera wiring to the wiring harness, following the color-coded wiring diagram provided with the kit. Use wire strippers and crimpers to make secure connections.
- Grounding: Ensure that the wiring harness is properly grounded to the vehicle’s chassis. Use a multimeter to verify the ground connection.
3.5 ECU Installation
- Mount the ECU: Choose a secure and accessible location for the ECU, such as under the seat or in the glove compartment. Mount the ECU using the provided hardware.
- Connect the Wiring: Connect the wiring harness to the ECU, following the wiring diagram.
- Power Connection: Connect the ECU to the vehicle’s power supply, typically by tapping into the vehicle’s ignition wire or accessory wire. Use a multimeter to verify the power connection.
3.6 Display Screen Installation
- Mount the Display: Choose a suitable location for the display screen, such as on the dashboard or in the center console. Mount the display using the provided hardware.
- Connect the Wiring: Connect the display screen to the ECU, following the wiring diagram.
3.7 Testing and Calibration
- Reconnect the Battery: Reconnect the negative terminal of the vehicle’s battery.
- Test the System: Turn on the vehicle’s ignition and test the L663 3D Surround Camera system. Verify that all cameras are functioning properly and that the 3D surround view is displayed on the screen.
- Calibrate the System: Follow the calibration procedure outlined in the installation instructions. This may involve driving the vehicle in a specific pattern to allow the system to learn the vehicle’s dimensions and camera positions.
3.8 Post-Installation Checklist
- Verify that all cameras are securely mounted.
- Ensure that all wiring connections are secure and properly insulated.
- Check that the 3D surround view is accurate and distortion-free.
- Test all features of the system, such as the parking guidelines and obstacle detection.
- Reinstall any interior panels or trim that were removed during the installation process.
| Step | Description |
|---|---|
| Pre-Installation | Disconnect the battery, review instructions, plan camera placement, and plan wiring route. |
| Front Camera Installation | Remove grille, drill hole, mount camera, route wiring. |
| Rear Camera Installation | Remove tailgate trim, drill hole, mount camera, route wiring. |
| Side Camera Installation | Remove mirror housings, drill hole, mount cameras, route wiring. |
| Wiring Harness Installation | Route wiring from cameras to ECU location, connect cameras to harness, ground the harness. |
| ECU Installation | Mount ECU in a secure location, connect wiring harness to ECU, connect ECU to power supply. |
| Display Screen Installation | Mount display screen in a suitable location, connect display screen to ECU. |
| Testing and Calibration | Reconnect battery, test the system, verify camera functionality, and calibrate the system. |
| Post-Installation | Verify camera mounting, wiring connections, 3D surround view accuracy, test all features, reinstall any removed panels. |
By following these steps, you can successfully install the L663 3D Surround Camera system in your vehicle. Remember to consult your vehicle’s service manual and follow all safety precautions. For professional installation and expert advice, contact CARDIAGTECH.NET at 276 Reock St, City of Orange, NJ 07050, United States, or call us at +1 (641) 206-8880.
4. Troubleshooting Common Issues with the L663 3D Surround Camera
Even with careful installation, issues can sometimes arise with the L663 3D Surround Camera system. Here are some common problems and their solutions.
4.1 Camera Image Quality Issues
- Problem: Blurry or distorted images.
- Solution: Check the camera lens for dirt, debris, or moisture. Clean the lens with a soft, lint-free cloth. Ensure that the camera is securely mounted and properly aligned.
- Problem: Poor image quality in low-light conditions.
- Solution: Verify that the camera’s low-light settings are properly configured. Consider upgrading to a camera with better low-light performance.
- Problem: Flickering or unstable images.
- Solution: Check the camera’s power and signal connections. Ensure that the wiring is properly grounded.
4.2 Display Issues
- Problem: No image displayed on the screen.
- Solution: Check the power and signal connections to the display screen. Verify that the display screen is turned on and properly configured.
- Problem: Incorrect or distorted 3D surround view.
- Solution: Recalibrate the L663 3D Surround Camera system following the calibration procedure outlined in the installation instructions.
- Problem: Intermittent display issues.
- Solution: Check the wiring harness for loose connections or damaged wires.
4.3 System Errors and Malfunctions
- Problem: System error messages on the display screen.
- Solution: Consult the system’s troubleshooting guide to identify the cause of the error message. Check the wiring connections, camera functionality, and ECU performance.
- Problem: System not turning on.
- Solution: Check the power connections to the ECU and display screen. Verify that the vehicle’s ignition is turned on.
- Problem: Obstacle detection not working.
- Solution: Verify that the obstacle detection settings are properly configured. Check the functionality of the parking sensors.
4.4 Interference and Compatibility Issues
- Problem: Interference with other vehicle systems.
- Solution: Ensure that the L663 3D Surround Camera system is properly grounded. Use shielded cables to minimize interference.
- Problem: Compatibility issues with the vehicle’s infotainment system.
- Solution: Consult the system’s compatibility list to ensure that it is compatible with the vehicle’s infotainment system. Update the infotainment system software to the latest version.
4.5 Troubleshooting Table
| Problem | Possible Cause(s) | Solution(s) |
|---|---|---|
| Blurry/Distorted Images | Dirty lens, loose mounting, misalignment | Clean lens, secure mounting, realign camera |
| Poor Low-Light Performance | Incorrect low-light settings, inadequate camera | Adjust settings, upgrade camera |
| Flickering/Unstable Images | Power/signal connection issues, grounding problems | Check connections, verify grounding |
| No Image on Display | Power/signal connection issues, display turned off, incorrect configuration | Check connections, turn on display, configure settings |
| Distorted 3D Surround View | Calibration issues | Recalibrate system |
| Intermittent Display Issues | Loose wiring, damaged wires | Check wiring harness |
| System Error Messages | Wiring issues, camera malfunction, ECU performance issues | Consult troubleshooting guide, check wiring, check camera, check ECU |
| System Not Turning On | Power connection issues, ignition off | Check power connections, turn on ignition |
| Obstacle Detection Not Working | Incorrect settings, parking sensor malfunction | Verify settings, check parking sensors |
| Interference with Systems | Grounding issues, unshielded cables | Verify grounding, use shielded cables |
| Compatibility Issues | Incompatible infotainment system, outdated software | Consult compatibility list, update software |
By following these troubleshooting steps, you can resolve many common issues with the L663 3D Surround Camera system. For more complex problems or professional assistance, contact CARDIAGTECH.NET at 276 Reock St, City of Orange, NJ 07050, United States, or call us at +1 (641) 206-8880.
5. Maintenance Tips for Long-Term Performance
Proper maintenance is essential to ensure the long-term performance and reliability of your L663 3D Surround Camera system. By following these maintenance tips, you can keep your system functioning optimally for years to come.
5.1 Regular Cleaning and Inspection
- Clean the Camera Lenses: Regularly clean the camera lenses with a soft, lint-free cloth to remove dirt, debris, and moisture. Avoid using harsh chemicals or abrasive cleaners that could damage the lenses.
- Inspect the Wiring: Periodically inspect the wiring harness for loose connections, damaged wires, or signs of wear and tear. Repair or replace any damaged wiring immediately.
- Check the Camera Mounts: Ensure that the cameras are securely mounted and properly aligned. Tighten any loose screws or mounting hardware.
5.2 Software Updates and Calibration
- Update the System Software: Check for software updates from the manufacturer and install them promptly. Software updates can improve system performance, add new features, and fix bugs.
- Recalibrate the System: Recalibrate the L663 3D Surround Camera system periodically, especially after any changes to the vehicle’s suspension or alignment.
5.3 Environmental Considerations
- Protect from Extreme Temperatures: Avoid exposing the L663 3D Surround Camera system to extreme temperatures, as this can damage the components. Park the vehicle in a shaded area or garage whenever possible.
- Avoid High-Pressure Washing: Avoid using high-pressure washing equipment near the cameras, as this can force water into the camera housings and damage the internal components.
- Protect from Corrosion: If you live in an area with harsh weather conditions or road salt, take steps to protect the L663 3D Surround Camera system from corrosion. Apply a corrosion-resistant coating to the camera housings and wiring connections.
5.4 Professional Servicing
- Schedule Regular Checkups: Schedule regular checkups with a qualified technician to inspect the L663 3D Surround Camera system and perform any necessary maintenance or repairs.
- Consult Experts: If you experience any persistent issues or malfunctions, consult with a professional who is familiar with the system.
5.5 Maintenance Schedule Table
| Task | Frequency | Description |
|---|---|---|
| Clean Camera Lenses | Monthly | Use a soft, lint-free cloth to remove dirt, debris, and moisture. |
| Inspect Wiring Harness | Every 6 Months | Check for loose connections, damaged wires, or wear and tear. |
| Check Camera Mounts | Every 6 Months | Ensure cameras are securely mounted and properly aligned; tighten loose screws. |
| Update System Software | As Available | Check for and install software updates from the manufacturer. |
| Recalibrate System | Annually | Recalibrate the system, especially after suspension or alignment changes. |
| Protect from Extreme Temperatures | Daily | Park in shaded areas to prevent damage from heat and UV exposure. |
| Avoid High-Pressure Washing | As Needed | Use caution when washing to prevent water from entering camera housings. |
| Protect from Corrosion | Annually | Apply corrosion-resistant coating to camera housings and wiring in harsh weather areas. |
| Professional Checkups | Every 2 Years | Schedule a professional inspection and maintenance service. |
By adhering to these maintenance tips, you can prolong the life and ensure the optimal performance of your L663 3D Surround Camera system. For expert servicing and advice, contact CARDIAGTECH.NET at 276 Reock St, City of Orange, NJ 07050, United States, or call us at +1 (641) 206-8880.
6. Comparative Analysis: L663 3D Surround Camera vs. Traditional Systems
When considering an upgrade to your vehicle’s camera system, it’s important to understand the differences between the L663 3D Surround Camera and traditional systems. Here’s a comparative analysis to help you make an informed decision.
6.1 Field of View and Coverage
- L663 3D Surround Camera: Provides a comprehensive 360-degree view of the vehicle’s surroundings, eliminating blind spots and providing a complete picture of the environment.
- Traditional Systems: Typically offer a limited field of view, such as a rearview camera or a front-facing camera. These systems may leave significant blind spots, especially on the sides of the vehicle.
6.2 Image Quality and Clarity
- L663 3D Surround Camera: Utilizes high-resolution cameras and advanced image processing algorithms to deliver clear, detailed images, even in low-light conditions.
- Traditional Systems: May offer lower resolution images and less advanced image processing, resulting in less clarity, especially in challenging lighting conditions.
6.3 Features and Functionality
- L663 3D Surround Camera: Offers a range of advanced features, such as dynamic guidelines, obstacle detection, and customizable views.
- Traditional Systems: Typically offer basic functionality, such as a rearview image with static guidelines.
6.4 Ease of Use
- L663 3D Surround Camera: Provides an intuitive and user-friendly interface, making it easy for drivers to access and interpret the information provided by the system.
- Traditional Systems: May be less intuitive and offer fewer customization options.
6.5 Installation Complexity
- L663 3D Surround Camera: Typically requires more complex installation due to the multiple cameras and wiring involved.
- Traditional Systems: May be easier to install, especially if the vehicle is already equipped with a basic camera system.
6.6 Cost
- L663 3D Surround Camera: Generally more expensive than traditional systems due to the advanced technology and multiple components involved.
- Traditional Systems: More affordable, making them a popular choice for budget-conscious consumers.
6.7 Comparative Table
| Feature | L663 3D Surround Camera | Traditional Systems |
|---|---|---|
| Field of View | 360-degree coverage | Limited, significant blind spots |
| Image Quality | High-resolution, clear | Lower resolution, less clear |
| Features | Advanced, customizable | Basic functionality |
| Ease of Use | Intuitive, user-friendly | Less intuitive |
| Installation | More complex | Easier |
| Cost | More expensive | More affordable |
6.8 Benefits of Upgrading to the L663 3D Surround Camera
- Enhanced Safety: Provides a comprehensive view of the surroundings, minimizing blind spots and reducing the risk of accidents.
- Improved Maneuverability: Makes parking and navigating tight spaces easier and safer.
- Increased Confidence: Enhances driver confidence, especially in challenging driving situations.
- Advanced Technology: Offers a range of advanced features and functionality.
While the L663 3D Surround Camera system may be more expensive and require more complex installation, the benefits in terms of enhanced safety, improved maneuverability, and advanced technology make it a worthwhile investment for many drivers. Contact CARDIAGTECH.NET at 276 Reock St, City of Orange, NJ 07050, United States, or call us at +1 (641) 206-8880 for expert advice on upgrading your vehicle’s camera system.
7. The Future of Automotive Camera Technology
Automotive camera technology is rapidly evolving, with new innovations emerging all the time. Here’s a glimpse into the future of this exciting field.
7.1 Higher Resolution Cameras
- 4K and 8K Resolution: Future automotive camera systems will feature even higher resolution cameras, offering even greater image clarity and detail.
- HDR Imaging: High Dynamic Range (HDR) imaging will become more common, allowing cameras to capture a wider range of light and shadow, improving visibility in challenging lighting conditions.
7.2 Artificial Intelligence (AI) Integration
- Object Recognition: AI algorithms will be used to identify and classify objects in the camera’s field of view, such as pedestrians, cyclists, and other vehicles.
- Predictive Analytics: AI will be used to predict the behavior of other road users, allowing the vehicle to anticipate potential hazards and take evasive action.
7.3 Enhanced Sensor Technology
- LiDAR Integration: Light Detection and Ranging (LiDAR) sensors will be integrated with camera systems to provide more accurate depth perception and obstacle detection.
- Thermal Imaging: Thermal cameras will be used to detect heat signatures, allowing the vehicle to see through fog, smoke, and darkness.
7.4 Improved User Interface
- Augmented Reality (AR) Overlays: AR technology will be used to overlay information onto the camera’s display, such as navigation directions, speed limits, and hazard warnings.
- Voice Control: Voice control will allow drivers to control the camera system hands-free, improving safety and convenience.
7.5 Connectivity and Cloud Integration
- Over-the-Air Updates: Camera systems will receive over-the-air software updates, ensuring that they are always up-to-date with the latest features and security patches.
- Cloud-Based Data Analysis: Data from the camera systems will be uploaded to the cloud for analysis, allowing manufacturers to improve system performance and develop new features.
7.6 The Future Landscape Table
| Technology | Description | Benefit |
|---|---|---|
| 4K/8K Resolution | Ultra-high-definition cameras | Greater image clarity and detail for better visibility. |
| HDR Imaging | Captures a wider range of light and shadow | Improved visibility in challenging lighting conditions. |
| AI Object Recognition | Identifies and classifies objects (pedestrians, cyclists, vehicles) | Enhanced awareness of surroundings and improved safety. |
| Predictive Analytics | Predicts the behavior of other road users | Anticipates potential hazards and allows for proactive safety measures. |
| LiDAR Integration | Provides accurate depth perception and obstacle detection | More precise and reliable sensing of the environment. |
| Thermal Imaging | Detects heat signatures | Allows visibility through fog, smoke, and darkness. |
| AR Overlays | Overlays information (navigation, speed limits, warnings) onto the display | Enhances situational awareness and provides critical information in real-time. |
| Voice Control | Hands-free control of camera system | Improves safety and convenience. |
| Over-the-Air Updates | Software updates delivered wirelessly | Ensures systems are always up-to-date with the latest features and security patches. |
| Cloud Data Analysis | Data uploaded to the cloud for analysis | Allows manufacturers to improve system performance and develop new features. |
The future of automotive camera technology is bright, with a range of innovations on the horizon that promise to make driving safer, more convenient, and more enjoyable. Stay informed about these advancements by following CARDIAGTECH.NET and consulting with our experts at 276 Reock St, City of Orange, NJ 07050, United States, or call us at +1 (641) 206-8880.
8. Choosing the Right L663 3D Surround Camera for Your Needs
Selecting the appropriate L663 3D Surround Camera system for your vehicle depends on various factors, including your budget, vehicle type, and specific requirements. Here are key considerations to guide your decision-making process.
8.1 Compatibility
- Vehicle Make and Model: Ensure the system is compatible with your vehicle’s make, model, and year. Check compatibility lists and consult with experts.
- Infotainment System: Verify compatibility with your vehicle’s infotainment system to ensure seamless integration.
8.2 Camera Quality and Resolution
- Resolution: Opt for systems with high-resolution cameras (720p or 1080p) for clear and detailed images.
- Low-Light Performance: Assess the camera’s performance in low-light conditions, especially if you frequently drive at night.
8.3 Features
- Dynamic Guidelines: Look for systems with dynamic guidelines for easier parking.
- Obstacle Detection: Choose systems with obstacle detection and alerts for enhanced safety.
- Customizable Views: Select systems that offer customizable views and camera angles to suit your preferences.
8.4 Installation
- DIY vs. Professional: Decide whether you prefer DIY installation or professional installation. DIY installation can save money, but professional installation ensures proper setup and calibration.
- Installation Complexity: Consider the complexity of the installation process and choose a system that matches your skill level.
8.5 Budget
- Set a Budget: Determine your budget and compare different systems within that range.
- Consider Long-Term Value: Consider the long-term value of the system in terms of safety, convenience, and potential savings on repairs.
8.6 Brand Reputation and Reviews
- Research Brands: Research different brands and read customer reviews to assess the reliability and performance of the systems.
- Check Warranty: Look for systems with a good warranty to protect against defects and malfunctions.
8.7 Decision Matrix Table
| Factor | Considerations |
|---|---|
| Compatibility | Vehicle make and model, infotainment system compatibility |
| Camera Quality | Resolution (720p or 1080p), low-light performance |
| Features | Dynamic guidelines, obstacle detection, customizable views |
| Installation | DIY vs. professional installation, complexity of installation process |
| Budget | Set a budget, consider long-term value |
| Brand and Reviews | Research brands, check customer reviews, look for a good warranty |
8.8 Expert Recommendations
- Consult Professionals: Consult with professionals at CARDIAGTECH.NET for expert advice and recommendations tailored to your specific needs.