How Do I Fix My Car Shaking At High Speeds?
Is your car shaking at high speeds? CARDIAGTECH.NET is here to help you diagnose and resolve this common and concerning issue, ensuring a smoother, safer, and more enjoyable driving experience. Learn about potential causes like unbalanced tires, worn suspension components, or engine issues, and discover practical solutions to get your car running smoothly again. Let’s explore vibration troubleshooting, imbalance correction, and suspension repair to keep you safe on the road.
1. Understanding Why Your Car Shakes At High Speeds
A car shaking at high speeds can be unsettling and indicates underlying mechanical issues. Identifying the root cause is crucial for effective repair. Numerous factors, ranging from tire problems to suspension issues, can contribute to this vibration. Let’s explore the common culprits that might be causing your car to shake, shimmy, or vibrate when you hit the gas pedal.
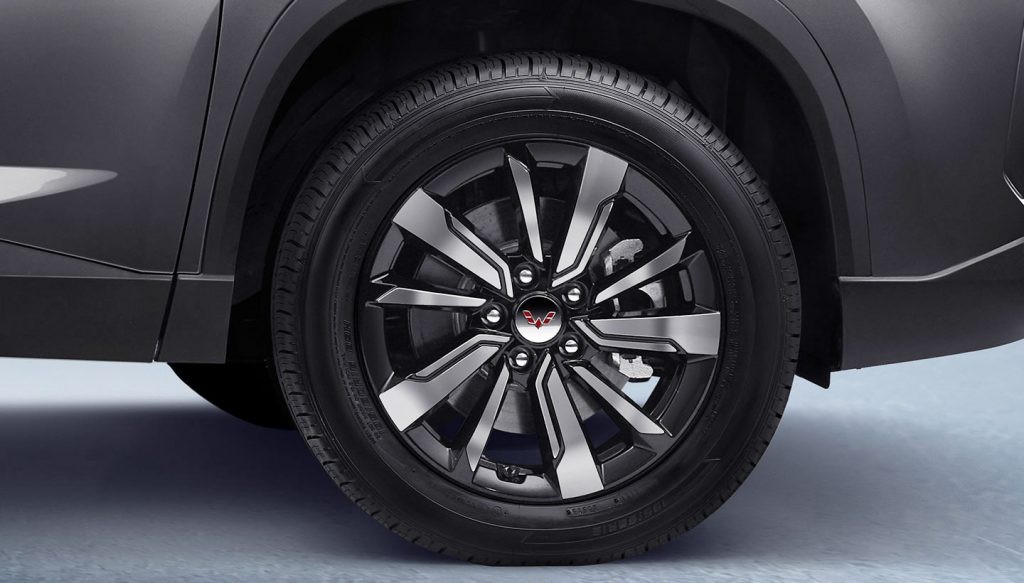
1.1. The Role of Tires in Vehicle Stability
Tires are the foundation of your vehicle’s stability and ride comfort. When they are not in optimal condition, vibrations can occur, especially at higher speeds.
- Unbalanced Tires: When the weight distribution around a tire is uneven, it causes the tire to wobble, leading to vibrations. This is one of the most common reasons for a car shaking at high speeds.
- Tire Wear: Uneven tire wear, such as cupping or feathering, can also cause vibrations. These wear patterns change the tire’s shape and affect its ability to roll smoothly.
- Tire Damage: Bulges, sidewall cracks, or separations in the tire structure can lead to significant vibrations and are dangerous.
- Tire Pressure: Incorrect tire pressure can affect the tire’s shape and contact with the road, leading to vibrations. Ensuring your tires are inflated to the recommended pressure is vital.
Tire Wear and Damage
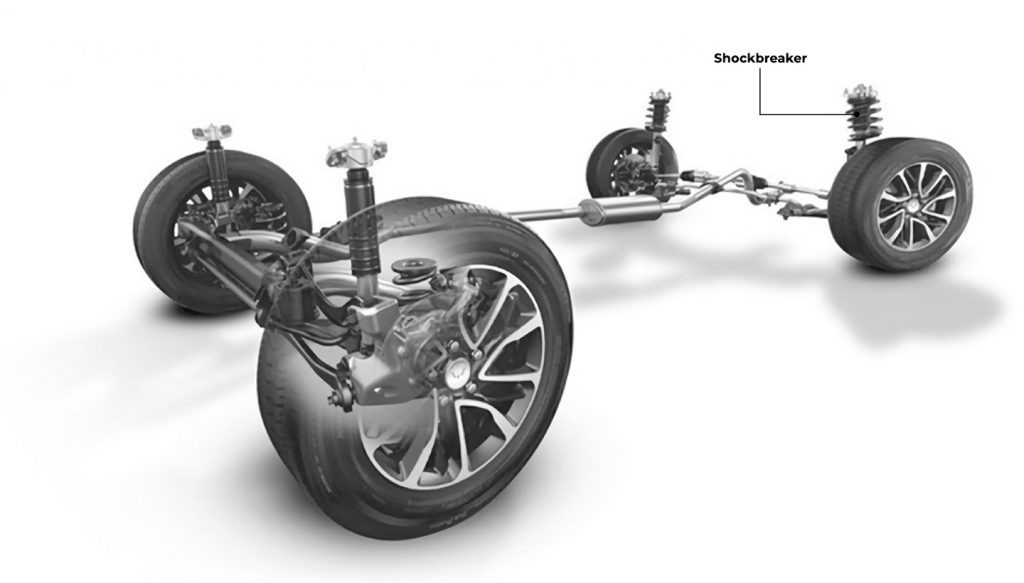
1.2. Suspension System Components and Vibration
The suspension system is designed to absorb shocks and maintain stability. Worn or damaged components can cause vibrations, especially at higher speeds.
- Worn Shocks and Struts: These components dampen the up-and-down movement of the suspension. When they wear out, they lose their ability to control the vehicle’s movement, leading to vibrations.
- Loose Ball Joints and Tie Rods: These connect the suspension to the wheels. If they are loose or worn, they can cause the wheels to wobble and vibrate.
- Damaged Bushings: Bushings cushion the connection points in the suspension system. When they deteriorate, they allow excessive movement, leading to vibrations.
1.3. Engine and Drivetrain Issues
Problems within the engine and drivetrain can also manifest as vibrations, particularly at higher speeds.
- Misfiring Engine: When one or more cylinders are not firing correctly, it can cause the engine to run unevenly, leading to vibrations.
- Worn Engine Mounts: These mounts secure the engine to the frame. If they are worn or broken, the engine can vibrate excessively, transferring that vibration to the rest of the vehicle.
- Driveshaft Imbalance: In rear-wheel-drive vehicles, an unbalanced driveshaft can cause vibrations, especially at higher speeds.
1.4. Wheel Alignment Problems
Proper wheel alignment is crucial for vehicle stability and tire wear. Misalignment can lead to vibrations and other handling issues.
- Misaligned Wheels: When the wheels are not aligned according to the manufacturer’s specifications, it can cause the tires to scrub against the road, leading to vibrations.
- Bent Wheels: A bent wheel can cause vibrations at any speed, but they are often more noticeable at higher speeds.
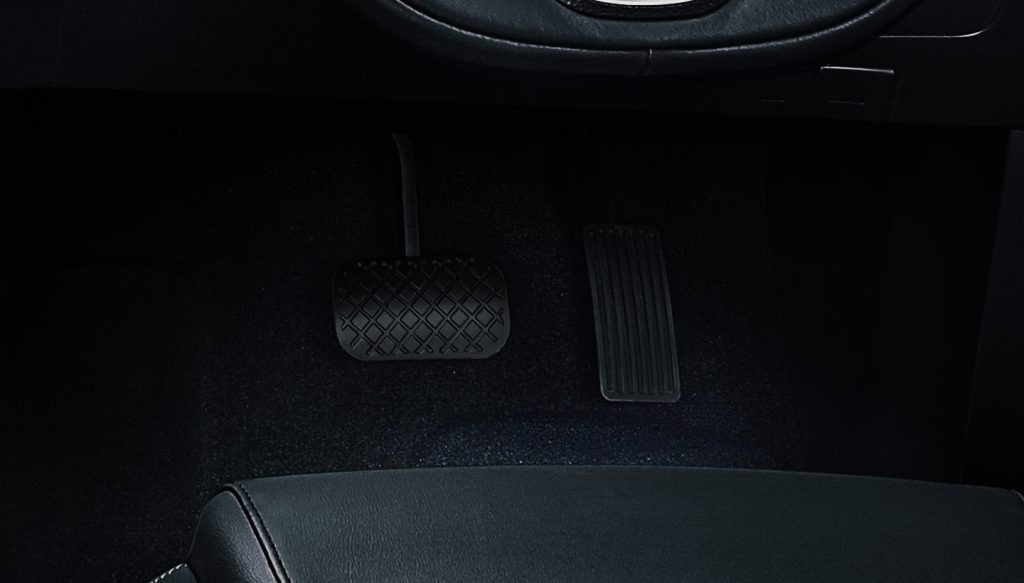
1.5. Brake System Issues
Problems with the brake system can also cause vibrations, particularly when braking at higher speeds.
- Warped Brake Rotors: When brake rotors become warped, they can cause the vehicle to vibrate when the brakes are applied.
- Uneven Brake Pad Wear: Uneven wear on the brake pads can cause vibrations and reduce braking performance.
2. Diagnosing the Cause of the Vibration
To effectively address the issue of your car shaking at high speeds, you must accurately diagnose the cause. Here’s a comprehensive guide to help you pinpoint the problem.
2.1. Identifying When the Vibration Occurs
Pay close attention to when the vibration occurs. This can provide valuable clues about the source of the problem.
- Constant Vibration: If the vibration is present whenever the car is moving, it may indicate a problem with the tires, wheels, or suspension.
- Vibration While Braking: If the vibration occurs only when you apply the brakes, the issue is likely with the brake system, such as warped rotors.
- Vibration at Certain Speeds: Vibrations that appear at specific speeds, typically between 45 and 65 mph, often indicate tire imbalance or wheel alignment issues.
- Vibration During Acceleration: If the vibration is most noticeable when accelerating, it could be related to engine issues, such as a misfire, or problems with the drivetrain.
2.2. Inspecting the Tires
A thorough inspection of the tires is a critical step in diagnosing vibrations.
- Visual Inspection: Look for any signs of damage, such as bulges, cuts, or uneven wear patterns. Check the sidewalls for cracks or separations.
- Tire Pressure Check: Use a reliable tire pressure gauge to ensure that all tires are inflated to the recommended pressure. The correct pressure is usually listed on a sticker inside the driver’s side door or in the owner’s manual.
- Tire Wear Patterns: Examine the tire treads for uneven wear. Feathering (where one side of the tread blocks is worn more than the other) can indicate alignment issues, while cupping (scalloped dips around the tire) can suggest suspension problems.
2.3. Evaluating the Suspension System
A careful examination of the suspension system can reveal potential sources of vibration.
- Shock and Strut Test: Push down firmly on each corner of the vehicle and release it. The car should rebound and then settle quickly. If it continues to bounce, the shocks or struts may be worn out.
- Visual Inspection of Components: Look for any signs of damage or wear on the shocks, struts, ball joints, tie rods, and bushings. Check for leaks around the shocks and struts.
- Check for Play: Jack up the car and support it with jack stands. Grab the tire at the 3 and 9 o’clock positions and try to move it back and forth. Any play could indicate worn tie rod ends or ball joints. Repeat the test at the 6 and 12 o’clock positions to check for wheel bearing issues.
 Damaged Shock Absorber
2.4. Assessing the Engine and Drivetrain
Engine and drivetrain issues can also be a source of vibration, especially during acceleration.
- Listen for Engine Noises: Pay attention to any unusual noises coming from the engine, such as misfires or knocking sounds.
- Check Engine Mounts: Inspect the engine mounts for signs of wear or damage. Look for cracks, breaks, or excessive movement.
- Driveshaft Inspection: In rear-wheel-drive vehicles, inspect the driveshaft for any signs of damage or imbalance. Check the U-joints for wear or play.
2.5. Checking the Brakes
If the vibration occurs when braking, inspect the brake system for potential issues.
- Visual Inspection of Rotors and Pads: Check the brake rotors for signs of warping, scoring, or excessive wear. Inspect the brake pads for uneven wear or damage.
- Brake Pedal Feel: Pay attention to how the brake pedal feels when you apply the brakes. A pulsating pedal can indicate warped rotors.
2.6. Using Diagnostic Tools
For more complex issues, diagnostic tools can help pinpoint the source of the vibration.
- OBD-II Scanner: Use an OBD-II scanner to check for any engine codes that could indicate a misfire or other engine-related problems.
- Vibration Analyzer: A vibration analyzer can be used to measure the frequency and amplitude of vibrations, helping to identify the source of the problem.
3. Step-by-Step Guide to Fixing a Car Shaking at High Speeds
Once you’ve diagnosed the cause, you can begin the process of fixing your car. Here’s a step-by-step guide to addressing common issues.
3.1. Balancing Tires
Balancing your tires is one of the simplest and most effective ways to eliminate vibrations caused by uneven weight distribution.
-
Why Balance Tires? Over time, tires can become unbalanced due to wear and tear, impacts from potholes, and other factors. Balancing ensures that the weight is evenly distributed around the tire, reducing vibrations and improving ride quality.
-
Tools Needed:
- Tire balancing machine
- Wheel weights
- Hammer or pliers for installing weights
-
Steps:
- Mount the Tire: Place the wheel on the tire balancing machine and secure it properly.
- Spin the Wheel: Start the machine, which will spin the wheel and measure the imbalance.
- Read the Measurements: The machine will display the amount and location of the imbalance.
- Apply Weights: Attach the appropriate wheel weights to the rim at the locations indicated by the machine.
- Re-Spin the Wheel: Spin the wheel again to ensure that the imbalance has been corrected.
- Repeat if Necessary: If the wheel is still out of balance, repeat the process until it is properly balanced.
-
Professional Balancing: If you don’t have access to a tire balancing machine, take your car to a professional tire shop. They have the equipment and expertise to balance your tires quickly and accurately.
3.2. Replacing Worn Shocks and Struts
Worn shocks and struts can significantly impact your car’s stability and ride comfort. Replacing them can eliminate vibrations and improve handling.
-
Why Replace Shocks and Struts? Shocks and struts dampen the movement of the suspension, keeping your tires in contact with the road. When they wear out, they lose their ability to control the vehicle’s movement, leading to vibrations, poor handling, and increased braking distances.
-
Tools Needed:
- New shocks or struts
- Jack and jack stands
- Wrench set
- Socket set
- Spring compressor (for struts)
-
Steps:
- Prepare the Vehicle: Loosen the lug nuts on the wheel, jack up the car, and secure it with jack stands. Remove the wheel.
- Disconnect Brake Lines and Sensors: Carefully disconnect any brake lines, ABS sensors, or other components attached to the strut assembly.
- Remove Old Shock or Strut: Unbolt the shock or strut from the vehicle. This may involve removing bolts from the top and bottom mounts.
- Compress the Spring (for Struts): If you’re replacing a strut, use a spring compressor to compress the coil spring. This is a critical safety step.
- Disassemble the Strut (for Struts): Once the spring is compressed, remove the top nut and disassemble the strut assembly.
- Assemble New Strut (for Struts): Transfer the spring and other components to the new strut. Ensure that everything is properly aligned and tightened.
- Install New Shock or Strut: Bolt the new shock or strut into place, ensuring that all bolts are tightened to the correct torque specifications.
- Reconnect Brake Lines and Sensors: Reconnect any brake lines, ABS sensors, or other components that you disconnected earlier.
- Reinstall Wheel: Reinstall the wheel and tighten the lug nuts.
- Lower the Vehicle: Lower the vehicle and torque the lug nuts to the correct specification.
- Repeat for Other Side: Repeat the process for the other side of the vehicle.
-
Professional Installation: If you’re not comfortable replacing shocks and struts yourself, take your car to a professional mechanic. They have the experience and tools to do the job safely and correctly.
3.3. Replacing Worn Ball Joints and Tie Rods
Worn ball joints and tie rods can cause vibrations and affect your car’s steering and handling. Replacing them can restore stability and improve safety.
-
Why Replace Ball Joints and Tie Rods? Ball joints and tie rods connect the suspension to the wheels, allowing them to move and steer. When they wear out, they can cause excessive play in the steering system, leading to vibrations, poor handling, and uneven tire wear.
-
Tools Needed:
- New ball joints and tie rods
- Jack and jack stands
- Wrench set
- Socket set
- Ball joint separator (pickle fork or ball joint press)
- Torque wrench
-
Steps:
- Prepare the Vehicle: Loosen the lug nuts on the wheel, jack up the car, and secure it with jack stands. Remove the wheel.
- Disconnect Ball Joint or Tie Rod: Use a ball joint separator to disconnect the ball joint or tie rod from the steering knuckle. This may require some force.
- Remove Old Component: Unbolt the old ball joint or tie rod from the suspension arm or steering rack.
- Install New Component: Install the new ball joint or tie rod, ensuring that it is properly aligned and tightened to the correct torque specifications.
- Reconnect to Steering Knuckle: Reconnect the ball joint or tie rod to the steering knuckle.
- Reinstall Wheel: Reinstall the wheel and tighten the lug nuts.
- Lower the Vehicle: Lower the vehicle and torque the lug nuts to the correct specification.
- Repeat for Other Side: Repeat the process for the other side of the vehicle if necessary.
- Get an Alignment: After replacing ball joints or tie rods, it’s essential to get a wheel alignment to ensure that your car steers properly and your tires wear evenly.
-
Professional Replacement: If you’re not comfortable replacing ball joints and tie rods yourself, take your car to a professional mechanic. They have the expertise and tools to do the job safely and correctly.
3.4. Wheel Alignment
A proper wheel alignment ensures that all wheels are set to the correct angles, improving handling, tire wear, and overall stability.
-
Why Get a Wheel Alignment? Over time, the wheels can become misaligned due to impacts from potholes, curbs, and other factors. Misalignment can cause uneven tire wear, poor handling, and vibrations.
-
Tools Needed:
- Wheel alignment machine
-
Steps:
- Mount the Car on Alignment Rack: Drive the car onto the alignment rack and attach the alignment sensors to each wheel.
- Take Initial Measurements: The alignment machine will take initial measurements of the wheel angles, including camber, caster, and toe.
- Adjust Wheel Angles: The technician will adjust the wheel angles to bring them within the manufacturer’s specifications. This may involve adjusting the tie rods, control arms, or other suspension components.
- Take Final Measurements: Once the adjustments are complete, the technician will take final measurements to ensure that the wheel angles are correct.
- Print Alignment Report: The technician will provide you with an alignment report showing the before and after measurements.
-
Professional Alignment: Wheel alignment requires specialized equipment and expertise. It’s best to take your car to a professional alignment shop or mechanic.
3.5. Addressing Engine Misfires
An engine misfire can cause significant vibrations, especially during acceleration. Addressing the misfire can smooth out the engine and eliminate vibrations.
-
Why Address Engine Misfires? A misfire occurs when one or more cylinders in the engine are not firing correctly. This can be caused by a variety of factors, including faulty spark plugs, ignition coils, fuel injectors, or vacuum leaks.
-
Tools Needed:
- OBD-II scanner
- Spark plug socket
- Wrench set
- Screwdriver set
- Multimeter
-
Steps:
- Diagnose the Misfire: Use an OBD-II scanner to read the engine codes and identify which cylinder is misfiring.
- Check Spark Plugs: Remove the spark plug from the misfiring cylinder and inspect it for signs of wear, damage, or fouling. Replace the spark plug if necessary.
- Check Ignition Coil: Use a multimeter to test the ignition coil for the misfiring cylinder. Replace the ignition coil if it is faulty.
- Check Fuel Injector: Use a stethoscope to listen to the fuel injector for the misfiring cylinder. If the injector is not clicking, it may be clogged or faulty. You can try cleaning the injector or replacing it if necessary.
- Check for Vacuum Leaks: Inspect the vacuum lines and intake manifold for any signs of leaks. Use a vacuum gauge to check the engine vacuum. Repair any leaks that you find.
- Clear Engine Codes: After addressing the misfire, clear the engine codes using the OBD-II scanner.
-
Professional Diagnosis: If you’re not comfortable diagnosing and repairing engine misfires yourself, take your car to a professional mechanic. They have the expertise and tools to identify and fix the problem.
3.6. Replacing Engine Mounts
Worn or broken engine mounts can cause excessive vibrations, especially at idle or during acceleration. Replacing them can smooth out the engine and reduce vibrations.
-
Why Replace Engine Mounts? Engine mounts secure the engine to the frame of the vehicle. Over time, they can wear out or break, allowing the engine to move excessively. This can cause vibrations, noise, and even damage to other components.
-
Tools Needed:
- New engine mounts
- Jack and jack stands
- Wrench set
- Socket set
- Engine support bar or engine hoist
-
Steps:
- Prepare the Vehicle: Loosen the lug nuts on the wheel, jack up the car, and secure it with jack stands.
- Support the Engine: Use an engine support bar or engine hoist to support the engine from above. This will prevent the engine from falling when you remove the mounts.
- Remove Old Mounts: Unbolt the old engine mounts from the engine and the frame.
- Install New Mounts: Install the new engine mounts, ensuring that they are properly aligned and tightened to the correct torque specifications.
- Lower the Engine: Lower the engine onto the new mounts and remove the engine support bar or engine hoist.
- Reinstall Wheel: Reinstall the wheel and tighten the lug nuts.
- Lower the Vehicle: Lower the vehicle and torque the lug nuts to the correct specification.
-
Professional Replacement: Replacing engine mounts can be challenging, especially on some vehicles. If you’re not comfortable doing the job yourself, take your car to a professional mechanic.
3.7. Repairing or Replacing Warped Brake Rotors
Warped brake rotors can cause vibrations when braking, especially at higher speeds. Repairing or replacing them can restore smooth braking performance.
-
Why Repair or Replace Warped Brake Rotors? Over time, brake rotors can become warped due to heat, stress, and uneven wear. This can cause the brake pads to vibrate against the rotor, leading to vibrations and reduced braking performance.
-
Tools Needed:
- New brake rotors (or brake rotor resurfacing equipment)
- Jack and jack stands
- Wrench set
- Socket set
- Brake caliper compressor tool
- Torque wrench
-
Steps:
- Prepare the Vehicle: Loosen the lug nuts on the wheel, jack up the car, and secure it with jack stands. Remove the wheel.
- Remove Brake Caliper: Unbolt the brake caliper from the steering knuckle and remove it from the rotor. Support the caliper so that it doesn’t hang by the brake line.
- Remove Old Rotor: Remove the old brake rotor from the hub. This may require some force or the use of a penetrating lubricant.
- Resurface or Replace Rotor: If you’re resurfacing the rotor, take it to a professional machine shop. If you’re replacing the rotor, install the new rotor onto the hub.
- Reinstall Brake Caliper: Reinstall the brake caliper onto the steering knuckle, ensuring that the brake pads are properly aligned with the rotor.
- Reinstall Wheel: Reinstall the wheel and tighten the lug nuts.
- Lower the Vehicle: Lower the vehicle and torque the lug nuts to the correct specification.
- Repeat for Other Side: Repeat the process for the other side of the vehicle if necessary.
-
Professional Service: Resurfacing or replacing brake rotors requires specialized equipment and expertise. It’s best to take your car to a professional mechanic or brake shop.
 Damaged Brake Rotor
4. Preventive Maintenance to Avoid Future Vibrations
Preventive maintenance is crucial to keep your car running smoothly and avoid vibrations at high speeds. Regular check-ups and timely replacements can save you from costly repairs and ensure a safe driving experience.
4.1. Regular Tire Maintenance
Maintaining your tires properly can significantly reduce the risk of vibrations and extend their lifespan.
- Regular Tire Rotation: Rotating your tires every 5,000 to 7,000 miles helps to ensure even wear, preventing imbalances and vibrations.
- Proper Inflation: Check your tire pressure regularly and inflate your tires to the recommended pressure. Underinflated or overinflated tires can cause uneven wear and vibrations.
- Tire Balancing: Have your tires balanced whenever you get new tires or notice any vibrations.
- Wheel Alignment: Get a wheel alignment check at least once a year, or whenever you replace suspension components or notice uneven tire wear.
4.2. Suspension System Inspections
Regular inspections of your suspension system can help identify and address potential issues before they cause vibrations.
- Visual Inspections: Periodically inspect the shocks, struts, ball joints, tie rods, and bushings for any signs of wear, damage, or leaks.
- Professional Inspections: Have your suspension system inspected by a professional mechanic during routine maintenance.
4.3. Engine Maintenance
Proper engine maintenance is essential for preventing misfires and other issues that can cause vibrations.
- Regular Tune-Ups: Follow the manufacturer’s recommended maintenance schedule for tune-ups, including spark plug replacement, air filter replacement, and fuel system cleaning.
- Oil Changes: Change your engine oil and filter regularly to keep the engine running smoothly and prevent wear.
- Check Engine Mounts: Inspect the engine mounts for any signs of wear or damage during routine maintenance.
4.4. Brake System Maintenance
Maintaining your brake system can help prevent vibrations and ensure safe braking performance.
- Regular Inspections: Inspect the brake pads, rotors, and calipers for any signs of wear, damage, or leaks.
- Brake Fluid Flushes: Flush the brake fluid every two to three years to remove moisture and contaminants.
- Replace Worn Components: Replace worn brake pads and rotors promptly to maintain optimal braking performance.
5. Advanced Troubleshooting Techniques
When the usual fixes don’t fully resolve the issue, it might be time to delve into more advanced troubleshooting techniques. These methods often require specialized tools and a deeper understanding of vehicle mechanics.
5.1. Dynamic Balancing
Unlike static balancing, which only addresses imbalance when the wheel is stationary, dynamic balancing corrects imbalance while the wheel is spinning. This method is particularly effective for addressing vibrations at high speeds.
- How It Works: Dynamic balancing uses a machine that spins the wheel and tire assembly, measuring imbalance in multiple planes. The machine then indicates where to place weights to correct these imbalances.
- When to Use: Dynamic balancing is recommended for vehicles that frequently experience high-speed driving, as it provides a more precise balance than static balancing.
5.2. Road Force Balancing
Road force balancing simulates the load of the vehicle on the tire, providing a more accurate assessment of tire and wheel uniformity. This method can detect issues that regular balancing might miss.
- How It Works: A road force balancer uses a roller that presses against the tire as it spins, measuring the tire’s stiffness and identifying any high spots or inconsistencies.
- Benefits:
- Detects Tire Uniformity Issues: Identifies tires that may be out-of-round or have excessive sidewall stiffness.
- Improves Ride Quality: By matching the stiffest part of the tire with the lowest point on the wheel, road force balancing minimizes vibrations and enhances ride comfort.
- Solves Complex Vibration Problems: Effective for addressing vibrations that persist after traditional balancing.
5.3. Vibration Analysis with NVH Diagnostic Tools
Noise, Vibration, and Harshness (NVH) diagnostic tools can pinpoint the exact source of vibrations by measuring frequency, amplitude, and location of the vibration.
- How It Works: NVH tools use accelerometers and microphones to capture and analyze vibrations and sounds within the vehicle. The data is then processed to identify the source of the issue.
- Applications:
- Pinpointing Vibration Sources: Identifies whether the vibration is coming from the engine, drivetrain, suspension, or other components.
- Diagnosing Complex Issues: Helps in diagnosing issues that are difficult to detect with visual inspection alone.
- Ensuring Accurate Repairs: Provides precise data to guide repairs, reducing the likelihood of misdiagnosis and unnecessary part replacements.
5.4. Chassis Ear Diagnostics
Chassis ear diagnostics involve using multiple microphones attached to different parts of the vehicle to listen for noises and vibrations while driving.
- How It Works: Microphones are strategically placed on the chassis, suspension, and other components. A technician can then listen to each microphone individually while driving to identify the source of unusual noises or vibrations.
- Benefits:
- Real-Time Analysis: Allows for real-time analysis of noises and vibrations while the vehicle is in motion.
- Precise Location of Issues: Helps pinpoint the exact location of the problem, whether it’s a worn-out bushing, a loose component, or a failing bearing.
- Cost-Effective Troubleshooting: Reduces guesswork and helps focus repairs on the specific area causing the issue.
5.5. Driveline Angle Adjustments
In rear-wheel-drive and four-wheel-drive vehicles, incorrect driveline angles can cause vibrations, especially at higher speeds. Adjusting these angles can help eliminate vibrations and improve driveline efficiency.
- How It Works: Driveline angles refer to the angles between the transmission, driveshaft, and differential. Incorrect angles can cause U-joints to bind and vibrate.
- Adjustment Process:
- Measure Driveline Angles: Use an angle finder or a specialized driveline angle measuring tool to determine the current angles.
- Compare to Specifications: Compare the measured angles to the manufacturer’s specifications.
- Adjust Components: Adjust the transmission or differential mounting points to bring the driveline angles within the specified range.
- Benefits:
- Reduces Vibrations: Correcting driveline angles minimizes vibrations and improves ride comfort.
- Extends Component Life: Proper angles reduce stress on U-joints and other driveline components, extending their lifespan.
- Improves Efficiency: Optimizing driveline angles can improve power transfer and fuel efficiency.
6. When to Seek Professional Help
While many car shaking issues can be resolved with DIY methods, some situations require the expertise of a professional mechanic. Recognizing when to seek professional help can save you time, money, and potential safety hazards.
6.1. Complex Diagnostic Issues
If you’ve tried basic troubleshooting steps and are still unable to identify the source of the vibration, it’s time to consult a professional. Complex issues may require specialized diagnostic tools and expertise to pinpoint the root cause.
- Engine Misfires: Persistent engine misfires that cannot be resolved with basic maintenance (such as spark plug replacement) may indicate more serious problems, such as a faulty fuel injector or a damaged cylinder head.
- Transmission Problems: Vibrations that occur during shifting or at specific gears may indicate internal transmission issues that require professional diagnosis and repair.
- ABS or Stability Control Problems: Issues with the Anti-lock Braking System (ABS) or stability control system can sometimes cause vibrations. These systems require specialized diagnostic equipment to troubleshoot.
6.2. Safety-Critical Repairs
Certain repairs involve safety-critical components that should only be handled by qualified professionals.
- Brake System Repairs: Brake repairs, including replacing brake lines, master cylinders, or ABS components, require precise knowledge and attention to detail. Improper brake repairs can lead to serious safety hazards.
- Steering System Repairs: Steering system repairs, such as replacing steering racks or power steering pumps, should be performed by professionals to ensure proper alignment and function.
- Suspension System Repairs: Major suspension repairs, such as replacing control arms or rebuilding struts, require specialized tools and expertise to ensure proper alignment and handling.
6.3. Lack of Experience or Tools
If you lack the necessary experience or tools to perform a repair safely and effectively, it’s best to seek professional help.
- Specialized Tools: Some repairs require specialized tools that are not commonly available, such as spring compressors, ball joint presses, or diagnostic scanners.
- Technical Knowledge: Certain repairs require a deep understanding of vehicle mechanics and electronics. Attempting these repairs without the necessary knowledge can lead to mistakes and further damage.
- Safety Concerns: Some repairs involve safety risks, such as working with high-pressure fuel systems or electrical components. It’s important to prioritize your safety and seek professional help when needed.
6.4. Recurring Issues
If you’ve attempted to fix a vibration issue yourself and it continues to recur, it may indicate a more complex problem that requires professional attention.
- Hidden Damage: Recurring vibrations may be caused by hidden damage, such as a bent frame or a cracked suspension component, that is not easily visible.
- Intermittent Problems: Intermittent problems that are difficult to reproduce can be challenging to diagnose without specialized equipment and expertise.
- Underlying Issues: Sometimes, a vibration is a symptom of a more fundamental problem that needs to be addressed to prevent further damage.
7. How CARDIAGTECH.NET Can Help
At CARDIAGTECH.NET, we understand the frustration and concern that come with a car shaking at high speeds. That’s why we offer a wide range of diagnostic tools and equipment to help you pinpoint the cause of the vibration and get your car running smoothly again. Here are some of the ways CARDIAGTECH.NET can assist you:
7.1. Diagnostic Tools for Accurate Assessments
Our selection of diagnostic tools enables you to perform accurate assessments of your vehicle’s condition, identifying the root cause of the vibration.
- OBD-II Scanners: Quickly read and interpret engine codes to diagnose misfires, sensor issues, and other engine-related problems.
- Vibration Analyzers: Measure the frequency and amplitude of vibrations to pinpoint the source, whether it’s the tires, suspension, or engine.
- Chassis Ears: Use multiple microphones to listen for noises and vibrations in real-time, helping you identify the exact location of the problem.
7.2. High-Quality Repair Equipment
We offer a comprehensive range of high-quality repair equipment to help you address the issues causing the vibration.
- Tire Balancing Machines: Balance your tires accurately to eliminate vibrations caused by uneven weight distribution.
- Spring Compressors: Safely compress coil springs when replacing shocks and struts.
- Ball Joint Separators: Easily disconnect ball joints and tie rods during suspension repairs.
- Torque Wrenches: Ensure that all bolts are tightened to the correct specifications, preventing future problems.
7.3. Expert Advice and Support
Our team of experienced technicians is available to provide expert advice and support, helping you diagnose and resolve complex vibration issues.
- Technical Support: Contact us for technical support and guidance on using our diagnostic tools and equipment.
- Troubleshooting Assistance: We can help you troubleshoot difficult vibration problems and provide recommendations for the best course of action.
- Product Recommendations: We can recommend the right tools and equipment for your specific needs and budget.
7.4. Wide Range of Automotive Tools and Equipment
In addition to diagnostic and repair tools, CARDIAGTECH.NET offers a wide range of other automotive tools and equipment to help you maintain and repair your vehicle.
- Hand Tools: Wrenches, sockets, screwdrivers, and other essential hand tools.
- Power Tools: Drills, impact wrenches, and other power tools for faster and more efficient repairs.
- Lifting Equipment: Jacks, jack stands, and lifts for safely raising and supporting your vehicle.
- Specialty Tools: Brake tools, engine tools, and other specialty tools for specific repair tasks.
Don’t let a shaking car ruin your driving experience. Contact CARDIAGTECH.NET today at 276 Reock St, City of Orange, NJ 07050, United States or via WhatsApp at +1 (641) 206-8880, or visit our website at CARDIAGTECH.NET to learn more about our products and services. Let us help you diagnose and fix the vibration, so you can enjoy a smooth and safe ride.
8. FAQ: Addressing Your Concerns About Car Shaking
8.1. Why is my car shaking when I reach 60 mph?
The most common reason for a car shaking at 60 mph is unbalanced tires. At higher speeds, even slight imbalances can cause noticeable vibrations. Other potential causes include wheel alignment issues, worn suspension components, or a bent wheel.
8.2. Can a bad wheel bearing cause a car to shake?
Yes, a bad wheel bearing can definitely cause a car to shake. As the wheel bearing wears out, it can create excessive play and vibration in the wheel assembly, which can be felt throughout the vehicle, especially at higher speeds.
8.3. How much does it cost to fix a shaking car?
The cost to fix a shaking car can vary widely depending on the cause of the vibration and the extent of the repairs needed. Simple fixes like tire balancing may cost around $50 to $100, while more complex repairs like replacing suspension components or engine mounts could cost several hundred dollars or more.
8.4. Is it safe to drive a car that shakes?
Driving a car that shakes is generally not safe, as it can indicate underlying mechanical issues that could compromise your vehicle’s handling and braking performance. It’s best to have the problem diagnosed and repaired as soon as possible.
8.5. How do I know if my car needs a wheel alignment?
Signs that your car may need a wheel alignment include uneven tire wear, pulling to one side, a crooked steering wheel, and vibrations at higher speeds. If you notice any of these symptoms, it’s a good idea to have your wheel alignment checked by a professional.
8.6. Can a misfiring engine cause a car to shake?
Yes, a misfiring engine can cause a car to shake, especially at idle or during acceleration. When one or more cylinders are not firing correctly, it can create an imbalance in the engine, leading to vibrations.
8.7. What are the symptoms of worn shocks or struts?
Symptoms of worn shocks or struts include excessive bouncing after hitting bumps, poor handling, increased braking distances, and uneven tire wear. If you notice any of these symptoms, it’s a good idea to have your shocks