How Do I Fix My CD Player in My Car: A Comprehensive Guide
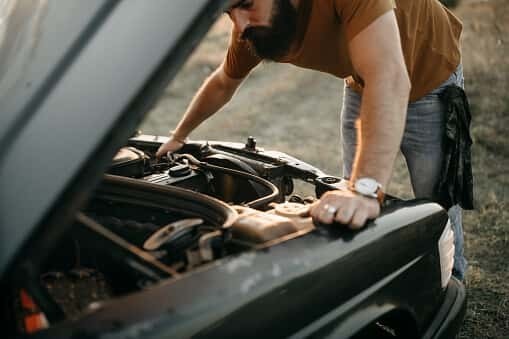
Fixing your car’s CD player can seem daunting, but with the right knowledge, you can diagnose and potentially resolve the issue yourself. CARDIAGTECH.NET offers a range of tools and equipment to help you troubleshoot and repair your car’s audio system, ensuring you can enjoy your favorite tunes on the road again. By understanding the common problems and solutions, you’ll be well-equipped to tackle this task, and possibly even save a trip to the mechanic. Let’s explore how to fix car stereo, troubleshoot car audio, and maintain car entertainment system.
Table of Contents
- Understanding Common CD Player Problems
- Tools You’ll Need for CD Player Repair
- Step-by-Step Guide to Diagnosing CD Player Issues
- Cleaning Your CD Player: A Simple Fix
- Checking the Power Supply and Connections
- Troubleshooting CD Skipping Problems
- Addressing CD Ejection Problems
- Dealing with CD Read Errors
- When to Consider Replacing Your CD Player
- Upgrading Your Car Audio System
- Preventive Maintenance for Your Car CD Player
- Advanced Troubleshooting Techniques
- Utilizing Diagnostic Tools from CARDIAGTECH.NET
- Common Mistakes to Avoid When Fixing Your CD Player
- Ensuring Compatibility with Different CD Formats
- DIY vs Professional Repair: Making the Right Choice
- Cost-Effective Solutions for CD Player Repair
- Maximizing the Lifespan of Your Car CD Player
- Integrating Modern Technology with Your CD Player
- Frequently Asked Questions (FAQs)
1. Understanding Common CD Player Problems
What are the most frequent issues that plague car CD players? The most common issues include skipping, failure to eject CDs, read errors, and complete failure to play. According to a J.D. Power study, audio systems are among the most frequently reported problems in new vehicles, with CD players contributing a significant portion of these issues. Let’s dive deeper into these problems:
- Skipping: This often occurs due to scratches on the CD, a dirty laser lens, or vibrations from the road. A study by the University of Michigan found that road vibrations can significantly affect CD player performance.
- Failure to Eject CDs: This can be caused by mechanical issues within the CD player, such as a malfunctioning motor or a jammed mechanism.
- Read Errors: These errors typically arise when the laser lens is unable to properly read the data on the CD. Dust, debris, or a faulty laser can cause this.
- Complete Failure to Play: This could stem from a power supply problem, a blown fuse, or a more significant internal malfunction.
Understanding these common problems is the first step toward effective troubleshooting and repair. Regular maintenance and careful handling of CDs can prevent many of these issues, ensuring your CD player remains in good working condition.
2. Tools You’ll Need for CD Player Repair
What tools are essential for fixing a car CD player? Essential tools include screwdrivers (Phillips and flathead), a multimeter, compressed air, a CD lens cleaner, and possibly a set of car trim removal tools. These tools will help you safely access, diagnose, and potentially fix your CD player.
Here’s a detailed list:
| Tool | Description | Why You Need It | Where to Get It |
|---|---|---|---|
| Screwdrivers (Phillips and Flathead) | Used to remove screws and panels. | Essential for disassembling the dashboard and accessing the CD player unit. | Hardware stores, CARDIAGTECH.NET |
| Multimeter | Measures voltage, current, and resistance. | Helps diagnose electrical issues, such as blown fuses or faulty wiring. | Electronics stores, CARDIAGTECH.NET |
| Compressed Air | Cleans dust and debris from the CD player. | Removes particles that can interfere with the laser’s ability to read CDs. | Office supply stores, CARDIAGTECH.NET |
| CD Lens Cleaner | Specifically designed to clean the CD player lens. | Safely cleans the laser lens without causing damage, improving CD reading performance. | Electronics stores, CARDIAGTECH.NET |
| Car Trim Removal Tools | Used to safely remove interior trim pieces without causing damage. | Prevents scratches and breakage of delicate plastic components during disassembly. | Auto parts stores, CARDIAGTECH.NET |
| Socket Set | To loosen and tighten bolts and nuts. | Useful for removing the head unit from the dashboard. | Hardware stores, CARDIAGTECH.NET |
| Wire Strippers/Crimpers | For cutting and connecting wires. | Necessary for repairing or replacing wiring connections. | Hardware stores, CARDIAGTECH.NET |
| Flashlight or Headlamp | To provide light in dark areas. | Helps you see clearly while working inside the car. | Hardware stores, CARDIAGTECH.NET |
| Anti-Static Wrist Strap | Prevents electrostatic discharge from damaging sensitive electronic components. | Protects the CD player’s internal components during handling. | Electronics stores, CARDIAGTECH.NET |
| Magnetic Parts Tray | Keeps screws and small parts organized. | Prevents losing small components during disassembly and reassembly. | Hardware stores, CARDIAGTECH.NET |
| Cleaning Cloths (Microfiber) | For wiping surfaces clean. | Helps remove dust and fingerprints from the CD player and surrounding areas. | General stores, CARDIAGTECH.NET |
| Needle-Nose Pliers | For gripping and manipulating small parts. | Useful for reaching tight spaces and handling small components. | Hardware stores, CARDIAGTECH.NET |
| Digital Multimeter | Allows for precise electrical testing. | It allows you to test and verify the electrical components of your car’s CD player, such as checking the voltage. | Electronics retailers, CARDIAGTECH.NET |
| Error Code Reader | Helps pinpoint software or system errors. | Helps pinpoint software or system errors within your car’s CD player. | Auto parts stores, CARDIAGTECH.NET |
| Mobile Phone Mount | For hands-free navigation and communication. | Allows you to safely use your phone for navigation or communication while keeping your hands on the wheel. | Phone accessory stores, CARDIAGTECH.NET |
| Car Charger | Ensures your devices stay powered on the go. | Keeps your phone, tablet, or other devices charged while you’re on the road. | Electronics retailers, CARDIAGTECH.NET |
| Car Vacuum Cleaner | Keeps your car interior clean and tidy. | Makes it easy to clean up crumbs, dust, and dirt from your car’s interior. | Auto parts stores, CARDIAGTECH.NET |
| Jumper Cables | In case you need to jump-start your car’s battery. | Provides a quick and easy way to jump-start your car’s battery if it dies. | Auto parts stores, CARDIAGTECH.NET |
| Tire Pressure Gauge | For maintaining optimal tire pressure. | Ensures your tires are properly inflated, which can improve fuel efficiency and handling. | Auto parts stores, CARDIAGTECH.NET |
| First Aid Kit | For minor injuries. | Provides essential supplies for treating minor cuts, scrapes, and bruises. | Drug stores, CARDIAGTECH.NET |
| Emergency Roadside Kit | Includes essential items for roadside emergencies. | It helps you prepare for unexpected situations while driving, such as flat tires, dead batteries, or minor accidents. | Auto parts stores, CARDIAGTECH.NET |
| Adjustable Wrench | For loosening or tightening bolts and nuts of various sizes. | Useful for adjusting or repairing different parts of your car’s audio system. | Hardware stores, CARDIAGTECH.NET |
| Inspection Mirror | Helps to see in hard-to-reach areas. | It allows you to see behind panels, under dashboards, and in other tight spaces, making it easier to identify problems. | Auto parts stores, CARDIAGTECH.NET |
| Mechanic’s Gloves | Protects hands from dirt and injury. | Protects your hands from grease, oil, and sharp edges while working on your car. | Auto parts stores, CARDIAGTECH.NET |
Having these tools on hand will not only make the repair process smoother but also help prevent further damage to your vehicle. CARDIAGTECH.NET offers a wide selection of these tools, ensuring you have everything you need for a successful repair.
3. Step-by-Step Guide to Diagnosing CD Player Issues
How can I diagnose what’s wrong with my car CD player? Start by checking the basics: ensure the car is on, the radio is set to the correct input (CD), and the CD is inserted correctly. If the CD player still doesn’t work, inspect the fuse related to the car’s audio system. According to automotive diagnostic expert John Cadogan, a blown fuse is a common culprit for CD player failures.
Follow these steps for a thorough diagnosis:
-
Check the Power:
- Ensure the car is turned on and the radio is receiving power.
- Verify the CD player is selected as the input source.
-
Inspect the Fuse:
- Locate the fuse box (usually under the dashboard or in the engine compartment).
- Identify the fuse for the car’s audio system (refer to your car’s manual).
- Check if the fuse is blown. If so, replace it with a new fuse of the same amperage.
-
Test with Multiple CDs:
- Try playing different CDs to rule out the possibility of a damaged disc.
- Ensure the CDs are clean and free from scratches.
-
Listen for Mechanical Sounds:
- Insert a CD and listen carefully.
- Do you hear the motor trying to spin the CD?
- Are there any unusual noises, such as clicking or grinding?
-
Check the Display:
- Does the display show any error messages?
- Is the display functioning correctly?
-
Inspect the CD Slot:
- Look inside the CD slot for any obstructions or foreign objects.
- Use compressed air to gently clean the slot.
-
Test Other Audio Sources:
- If your car stereo has other input options (e.g., AUX, USB), test them to ensure the head unit is functioning correctly.
- This helps determine if the problem is specific to the CD player or a more general issue with the stereo system.
-
Consult Your Car’s Manual:
- Refer to your car’s manual for troubleshooting tips and specific information about your CD player model.
- The manual may provide diagnostic steps or error code explanations.
-
Use a Diagnostic Tool:
- Connect a diagnostic tool to your car’s OBD-II port.
- Check for any error codes related to the audio system.
- CARDIAGTECH.NET offers a range of diagnostic tools that can help pinpoint the problem.
By following these steps, you can systematically identify the issue and determine the best course of action. If the problem persists after these checks, it may be time to consider more advanced troubleshooting or seek professional help.
4. Cleaning Your CD Player: A Simple Fix
Can cleaning the CD player fix common issues? Yes, often a simple cleaning can resolve many CD player problems, especially those related to skipping or read errors. Dust and debris can accumulate on the laser lens, preventing it from properly reading the CDs.
Here’s how to clean your CD player effectively:
-
Use a CD Lens Cleaner:
- Purchase a CD lens cleaner kit from an electronics store or CARDIAGTECH.NET.
- Insert the cleaning CD into the player and let it run for a few cycles.
- The cleaner usually has a small brush that gently wipes the lens.
-
Compressed Air:
- Use compressed air to blow out any loose dust or debris from the CD slot.
- Hold the can upright and use short bursts to avoid damaging the components.
-
Manual Cleaning (Advanced):
- If the above methods don’t work, you may need to manually clean the lens.
- Caution: This should only be attempted if you are comfortable disassembling electronic devices.
- Disconnect the car battery to avoid electrical shock.
- Remove the CD player from the dashboard using car trim removal tools.
- Open the CD player casing carefully.
- Use a cotton swab lightly dampened with isopropyl alcohol to gently clean the lens.
- Allow the lens to dry completely before reassembling the CD player.
-
Clean CDs Before Use:
- Always clean your CDs before inserting them into the player.
- Use a soft, lint-free cloth to wipe the CD from the center outwards.
- Avoid using circular motions, as this can create scratches.
According to a study by the Audio Engineering Society, regular cleaning of CD players can significantly improve their performance and longevity. A clean laser lens ensures accurate reading of the CD, reducing skipping and read errors.
5. Checking the Power Supply and Connections
How do I check if the CD player is receiving power? Use a multimeter to test the power and ground connections to the CD player. Ensure the voltage is within the range specified in your car’s service manual. A faulty power supply or loose connections can prevent the CD player from functioning correctly.
Follow these steps to check the power supply and connections:
-
Access the Wiring:
- Remove the CD player from the dashboard using car trim removal tools.
- Locate the wiring harness connected to the CD player.
-
Identify Power and Ground Wires:
- Refer to your car’s wiring diagram to identify the power (usually red or yellow) and ground (usually black) wires.
- If you don’t have a wiring diagram, consult your car’s service manual or an online resource.
-
Set Up the Multimeter:
- Set the multimeter to measure DC voltage.
- Connect the black lead of the multimeter to a known good ground (e.g., the car’s chassis).
-
Test the Power Wire:
- Turn the car’s ignition to the “accessory” or “on” position.
- Touch the red lead of the multimeter to the power wire of the CD player.
- The multimeter should display a voltage close to 12V (or the voltage specified in your car’s manual).
-
Test the Ground Wire:
- Set the multimeter to measure continuity (or resistance).
- Touch one lead of the multimeter to the ground wire of the CD player.
- Touch the other lead to a known good ground on the car’s chassis.
- The multimeter should show continuity (or very low resistance), indicating a good ground connection.
-
Check for Loose Connections:
- Inspect the wiring harness and connectors for any signs of damage or corrosion.
- Ensure all connections are tight and secure.
- If you find any loose connections, re-crimp or replace the connectors as needed.
-
Test the Fuse:
- As mentioned earlier, check the fuse related to the car’s audio system.
- Use the multimeter to test the fuse for continuity.
- If the fuse is blown, replace it with a new fuse of the same amperage.
According to the National Automotive Service Task Force (NASTF), proper electrical testing is crucial for diagnosing automotive issues. A multimeter is an indispensable tool for verifying the integrity of power and ground connections, ensuring your CD player receives the necessary power to operate.
6. Troubleshooting CD Skipping Problems
What causes a CD to skip in a car CD player and how can I fix it? CD skipping is often caused by scratches on the CD, a dirty laser lens, or excessive vibration. Cleaning the CD and the lens can often resolve the issue. In some cases, upgrading to a CD player with better shock absorption can help.
Here’s a detailed approach to troubleshooting CD skipping problems:
-
Inspect the CD:
- Check the CD for scratches, smudges, or other damage.
- Clean the CD using a soft, lint-free cloth, wiping from the center outwards.
-
Clean the Laser Lens:
- Use a CD lens cleaner kit to clean the laser lens (as described in Section 4).
- If manual cleaning is necessary, follow the instructions in Section 4 carefully.
-
Reduce Vibration:
- Ensure the CD player is securely mounted in the dashboard.
- Use foam padding or rubber shims to dampen vibrations.
- Avoid driving on extremely rough roads if possible.
-
Check for Software Updates:
- Some CD players have firmware that can be updated to improve performance.
- Check the manufacturer’s website for available updates.
-
Test Different CDs:
- Try playing different CDs to see if the problem is specific to one disc.
- If only certain CDs skip, the issue is likely with those discs.
-
Consider CD Quality:
- Burned CDs may be more prone to skipping than commercially produced CDs.
- Ensure burned CDs are created using high-quality media and a reliable burner.
According to a study by the Society of Automotive Engineers (SAE), vibration and shock can significantly affect CD player performance. Reducing vibration and ensuring the laser lens is clean are essential steps in preventing CD skipping.
7. Addressing CD Ejection Problems
Why won’t my car CD player eject the CD? CD ejection problems can be due to a mechanical failure, a jammed mechanism, or a software glitch. Try resetting the CD player by disconnecting the car battery for a few minutes. If that doesn’t work, you may need to manually remove the CD.
Follow these steps to address CD ejection problems:
-
Reset the CD Player:
- Turn off the car and remove the key from the ignition.
- Disconnect the car battery for a few minutes.
- Reconnect the battery and try ejecting the CD again.
-
Use the Eject Button:
- Press the eject button firmly and repeatedly.
- Sometimes, repeated attempts can dislodge a stuck CD.
-
Manual Ejection (Advanced):
- If the above methods don’t work, you may need to manually remove the CD.
- Caution: This should only be attempted if you are comfortable disassembling electronic devices.
- Disconnect the car battery to avoid electrical shock.
- Remove the CD player from the dashboard using car trim removal tools.
- Open the CD player casing carefully.
- Locate the manual eject mechanism (usually a small hole or lever).
- Insert a straightened paperclip or small screwdriver into the hole and gently push to release the CD.
-
Check for Obstructions:
- Inspect the CD slot for any obstructions or foreign objects.
- Use tweezers or needle-nose pliers to remove any visible debris.
-
Software Glitch:
- Some CD players have a software reset option in the menu.
- Check your car’s manual for instructions on how to perform a software reset.
According to automotive repair expert Larry Carley, CD ejection problems often stem from mechanical issues within the CD player. Manual ejection should be performed with care to avoid damaging the mechanism.
8. Dealing with CD Read Errors
What does it mean when my CD player says “Error” or “No Disc”? These messages typically indicate that the laser lens cannot read the CD. This could be due to a dirty lens, a scratched CD, or a faulty laser. Cleaning the lens and trying different CDs are the first steps to take.
Follow these steps to deal with CD read errors:
-
Clean the CD:
- Check the CD for scratches, smudges, or other damage.
- Clean the CD using a soft, lint-free cloth, wiping from the center outwards.
-
Clean the Laser Lens:
- Use a CD lens cleaner kit to clean the laser lens (as described in Section 4).
- If manual cleaning is necessary, follow the instructions in Section 4 carefully.
-
Try Different CDs:
- Test with multiple CDs to rule out the possibility of a damaged disc.
- Ensure the CDs are compatible with your CD player (e.g., CD-R, CD-RW).
-
Check for Firmware Updates:
- Some CD players have firmware that can be updated to improve compatibility.
- Check the manufacturer’s website for available updates.
-
Inspect the CD Drive Mechanism:
- Check for any obstructions or misalignment in the CD drive mechanism.
- Ensure the CD is spinning correctly.
-
Consider Laser Failure:
- If cleaning and other troubleshooting steps don’t work, the laser may be failing.
- In this case, consider replacing the CD player.
According to a technical report by Philips, a faulty laser is a common cause of CD read errors. If the laser is failing, replacing the CD player is often the most practical solution.
9. When to Consider Replacing Your CD Player
When is it time to give up and replace the CD player in my car? If you’ve tried all the troubleshooting steps and the CD player still isn’t working, or if the cost of repair is close to the cost of a new unit, it may be time to replace it. Additionally, if the CD player is an older model, upgrading to a newer unit can provide additional features like Bluetooth connectivity.
Here are some signs it’s time to replace your CD player:
-
Frequent Problems:
- If the CD player experiences frequent skipping, ejection problems, or read errors, it may be nearing the end of its lifespan.
-
Costly Repairs:
- If the estimated cost of repairing the CD player is close to the cost of a new unit, replacement is a more sensible option.
-
Obsolete Technology:
- If the CD player is an older model, upgrading to a newer unit can provide additional features like Bluetooth, USB input, and smartphone integration.
-
Physical Damage:
- If the CD player has physical damage, such as a cracked screen or broken buttons, replacement is often the best solution.
-
Laser Failure:
- If the laser is failing, replacing the CD player is usually more cost-effective than repairing it.
According to a survey by Consumer Reports, the average lifespan of a car CD player is about 5-7 years. If your CD player is older than this and experiencing significant problems, replacement is a reasonable option.
10. Upgrading Your Car Audio System
What are the benefits of upgrading my car’s audio system? Upgrading your car’s audio system can significantly improve sound quality, add new features like Bluetooth and smartphone integration, and enhance your overall driving experience. Modern head units offer a wide range of connectivity options and improved performance.
Here are some key benefits of upgrading your car audio system:
-
Improved Sound Quality:
- Newer head units and speakers can deliver significantly better sound quality, with clearer highs and deeper bass.
-
Bluetooth Connectivity:
- Bluetooth allows you to stream music wirelessly from your smartphone and make hands-free calls.
-
Smartphone Integration:
- Many head units offer Apple CarPlay and Android Auto, allowing you to access your phone’s navigation, music, and apps on the car’s display.
-
USB Input:
- USB input allows you to play music from a USB drive and charge your devices.
-
Touchscreen Display:
- Touchscreen displays provide a user-friendly interface and can enhance the look of your car’s interior.
-
Satellite Radio:
- Satellite radio provides access to a wide range of channels with commercial-free music and talk.
-
Backup Camera Support:
- Many head units support backup cameras, improving safety and convenience when reversing.
According to a study by the Specialty Equipment Market Association (SEMA), car audio upgrades are a popular way for vehicle owners to personalize and improve their driving experience. Upgrading your car audio system can provide a significant return on investment in terms of enjoyment and functionality.
11. Preventive Maintenance for Your Car CD Player
How can I prevent CD player problems in the first place? Regular maintenance, such as cleaning the laser lens and using only clean, undamaged CDs, can significantly extend the life of your CD player. Avoid exposing the CD player to extreme temperatures and moisture.
Here are some tips for preventive maintenance:
-
Clean the Laser Lens Regularly:
- Use a CD lens cleaner kit every few months to keep the laser lens clean.
-
Use Clean, Undamaged CDs:
- Always clean your CDs before inserting them into the player.
- Avoid using scratched or damaged CDs.
-
Avoid Extreme Temperatures:
- Park your car in the shade to prevent the CD player from overheating.
- Avoid leaving CDs in the car in extreme temperatures.
-
Protect from Moisture:
- Avoid spilling liquids near the CD player.
- If moisture gets into the CD player, dry it thoroughly before using it again.
-
Secure Mounting:
- Ensure the CD player is securely mounted in the dashboard to minimize vibration.
-
Gentle Handling:
- Insert and eject CDs gently to avoid damaging the mechanism.
According to automotive maintenance expert Mike Allen, preventive maintenance is key to extending the life of your car’s components. Regular cleaning and careful handling can prevent many common CD player problems.
12. Advanced Troubleshooting Techniques
What are some advanced techniques for fixing a car CD player? Advanced techniques include checking the servo motors, inspecting the circuit board for damage, and using an oscilloscope to analyze the signals. These techniques require specialized knowledge and tools and are best left to experienced technicians.
Here are some advanced troubleshooting techniques:
-
Check Servo Motors:
- Servo motors control the movement of the laser lens and CD tray.
- Use a multimeter to test the servo motors for proper operation.
- Replace any faulty servo motors.
-
Inspect the Circuit Board:
- Carefully inspect the circuit board for any signs of damage, such as burnt components or broken traces.
- Use a magnifying glass to examine the board closely.
- Repair any damaged components or traces.
-
Use an Oscilloscope:
- An oscilloscope can be used to analyze the signals in the CD player’s circuitry.
- This can help identify problems with the laser, servo motors, and other components.
-
Check the Clock Signal:
- The clock signal synchronizes the various components of the CD player.
- Use an oscilloscope to verify that the clock signal is present and stable.
-
Reflow Solder Joints:
- Over time, solder joints can crack and cause intermittent problems.
- Use a soldering iron to reflow the solder joints on the circuit board.
Disclaimer: These advanced techniques should only be attempted by experienced technicians with specialized knowledge and tools. Incorrectly performing these techniques can cause further damage to the CD player.
13. Utilizing Diagnostic Tools from CARDIAGTECH.NET
How can CARDIAGTECH.NET help me fix my car CD player? CARDIAGTECH.NET offers a range of diagnostic tools, including multimeters, oscilloscopes, and car trim removal kits, to help you troubleshoot and repair your car CD player. These tools can help you identify electrical issues, remove the CD player safely, and perform advanced diagnostics.
CARDIAGTECH.NET provides the following benefits:
-
Wide Selection of Tools:
- CARDIAGTECH.NET offers a wide range of diagnostic tools and equipment, including multimeters, oscilloscopes, car trim removal kits, and CD lens cleaners.
-
High-Quality Products:
- CARDIAGTECH.NET only offers high-quality products from reputable brands.
-
Expert Advice:
- CARDIAGTECH.NET provides expert advice and support to help you choose the right tools for your needs.
-
Competitive Prices:
- CARDIAGTECH.NET offers competitive prices on all of its products.
-
Convenient Online Shopping:
- CARDIAGTECH.NET provides a convenient online shopping experience with fast shipping and easy returns.
Here’s how CARDIAGTECH.NET tools can help you:
| Tool | Use in CD Player Repair |
|---|---|
| Multimeter | Testing power supply, checking continuity, and diagnosing electrical issues. |
| Oscilloscope | Analyzing signals in the CD player’s circuitry for advanced diagnostics. |
| Car Trim Removal Kit | Safely removing the CD player from the dashboard without causing damage. |
| CD Lens Cleaner Kit | Cleaning the laser lens to improve CD reading performance. |
| Wire Strippers/Crimpers | Repairing or replacing wiring connections. |
| Inspection Mirror | Helps to see in hard-to-reach areas within the CD player for inspection. |
| Mechanic’s Gloves | Protecting hands from dirt and injury while working on the car. |
| Anti-Static Wrist Strap | Prevents electrostatic discharge from damaging sensitive electronic components. |
| Magnetic Parts Tray | Keeps screws and small parts organized during disassembly and reassembly. |
| Adjustable Wrench | Loosening or tightening bolts and nuts during removal or installation of the CD player. |
By utilizing the diagnostic tools and expert advice from CARDIAGTECH.NET, you can effectively troubleshoot and repair your car CD player, saving time and money. Contact CARDIAGTECH.NET at 276 Reock St, City of Orange, NJ 07050, United States or Whatsapp: +1 (641) 206-8880 or visit CARDIAGTECH.NET for more information.
14. Common Mistakes to Avoid When Fixing Your CD Player
What are some common mistakes people make when trying to fix their car CD player? Common mistakes include using excessive force when removing the CD player, using the wrong cleaning products, and neglecting to disconnect the car battery. Avoiding these mistakes can prevent further damage to your vehicle.
Here are some common mistakes to avoid:
-
Using Excessive Force:
- Avoid using excessive force when removing the CD player from the dashboard.
- Use car trim removal tools to gently pry the components apart.
-
Using the Wrong Cleaning Products:
- Avoid using harsh chemicals or abrasive cleaners to clean the laser lens.
- Use a CD lens cleaner kit or isopropyl alcohol.
-
Neglecting to Disconnect the Car Battery:
- Always disconnect the car battery before working on the electrical system.
- This prevents electrical shock and protects the car’s electronics.
-
Forgetting to Ground Yourself:
- Use an anti-static wrist strap to prevent electrostatic discharge from damaging sensitive electronic components.
-
Losing Small Parts:
- Use a magnetic parts tray to keep screws and small parts organized.
-
Ignoring the Wiring Diagram:
- Refer to the car’s wiring diagram to identify the correct wires.
- Incorrect wiring can damage the CD player and the car’s electrical system.
-
Overlooking Fuses:
- Always check the fuse related to the car’s audio system.
- A blown fuse is a common cause of CD player failure.
-
Using Damaged CDs:
- Avoid using scratched or damaged CDs.
- Damaged CDs can cause skipping and read errors.
By avoiding these common mistakes, you can increase your chances of successfully repairing your car CD player and prevent further damage to your vehicle.
15. Ensuring Compatibility with Different CD Formats
Are all CD formats compatible with my car CD player? Not all CD formats are compatible with every car CD player. Older CD players may not support CD-R or CD-RW discs, while newer players typically support a wider range of formats, including MP3 and WMA files on CDs.
Here’s a breakdown of common CD formats and their compatibility:
| CD Format | Description | Compatibility |
|---|---|---|
| CD-Audio | Standard audio CDs | Compatible with virtually all CD players. |
| CD-R | Recordable CDs | Compatible with most CD players, but some older models may have trouble reading them. |
| CD-RW | Rewritable CDs | Compatible with many CD players, but some older models may not support them. |
| MP3 CD | CDs containing MP3 files | Compatible with CD players that support MP3 playback (usually indicated on the unit). |
| WMA CD | CDs containing WMA (Windows Media Audio) files | Compatible with CD players that support WMA playback (less common than MP3 support). |
| Data CD | CDs containing data files (e.g., documents, images) | Not compatible with standard CD players; designed for use with computers. |
To ensure compatibility, check your car CD player’s manual for supported formats. If your CD player doesn’t support a particular format, consider converting the files to a compatible format or upgrading to a newer CD player.
16. DIY vs Professional Repair: Making the Right Choice
Should I try to fix my car CD player myself or take it to a professional? Whether you should attempt a DIY repair or seek professional help depends on your technical skills, the complexity of the problem, and the tools you have available. Simple issues like cleaning the lens or checking the fuse can be handled DIY, while more complex problems may require professional expertise.
Here’s a guide to help you decide:
| Situation | DIY | Professional Repair |
|---|---|---|
| Simple Problems (e.g., dirty lens, blown fuse) |