How Do I Fix My Gas Gauge on My Car: A Complete Guide
Is your car’s gas gauge acting up? Are you tired of guessing how much fuel you have left? Don’t worry, CARDIAGTECH.NET is here to help. This comprehensive guide will walk you through troubleshooting and fixing your gas gauge, ensuring you never get stranded again. We’ll cover everything from basic checks to more advanced diagnostics, empowering you to tackle this common automotive issue with confidence.
1. Understanding the Fuel Gauge System
Before diving into repairs, let’s understand how your gas gauge works. The system consists of three main components:
- Fuel Sending Unit: Located inside the fuel tank, this unit measures the fuel level using a float attached to a variable resistor (rheostat). As the fuel level changes, the float moves, altering the resistance.
- Wiring: Wires connect the sending unit to the fuel gauge, transmitting the resistance signal.
- Fuel Gauge: Located on the instrument cluster, the gauge interprets the resistance signal from the sending unit and displays the corresponding fuel level.
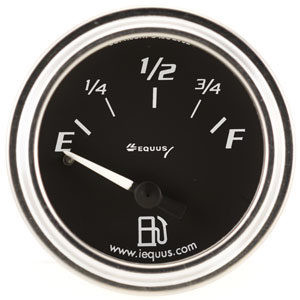
Fuel gauge showing empty
2. Identifying the Symptoms of a Faulty Gas Gauge
Recognizing the symptoms is the first step in diagnosing the problem. Here are some common signs of a malfunctioning gas gauge:
- Gauge Reads Empty When Tank is Full: The needle stays at “E” even after filling the tank.
- Gauge Reads Full When Tank is Empty: The needle remains at “F” despite the low fuel level.
- Erratic Readings: The gauge fluctuates wildly, providing inconsistent and unreliable information.
- Gauge Stuck at a Certain Level: The needle doesn’t move at all, remaining fixed at a specific point.
- Inaccurate Readings: The gauge shows a fuel level that doesn’t match the actual amount of fuel in the tank.
3. Preliminary Checks: The First Steps to Take
Before getting your hands dirty, start with these simple checks:
3.1. Check the Fuel Cap
A loose or missing fuel cap can cause evaporative emissions system (EVAP) issues, which can sometimes affect the fuel gauge reading. Ensure the fuel cap is properly tightened.
3.2. Inspect the Fuses
A blown fuse can disrupt the power supply to the fuel gauge. Locate the fuse box (usually under the dashboard or in the engine compartment) and check the fuse labeled “Fuel Gauge” or “Instrument Cluster”.
| Fuse Location | Fuse Label | Amperage |
|---|---|---|
| Under Dashboard | Fuel Gauge | 10A |
| Engine Compartment | Instrument Cluster | 15A |
3.3. Perform an Instrument Cluster Self-Test
Many modern vehicles have a self-test function that cycles the instrument cluster gauges. Consult your owner’s manual for instructions on how to activate this test. If the fuel gauge doesn’t move during the self-test, it could indicate a problem with the gauge itself.
4. Tools and Materials You’ll Need
Before you start diagnosing and repairing your gas gauge, gather the necessary tools and materials. Having everything on hand will make the process smoother and more efficient. Here’s a list of essential items:
- Multimeter: For testing voltage, continuity, and resistance.
- Wiring Diagram: To help trace circuits and identify components.
- Screwdrivers: Assorted sizes and types (Phillips, flathead).
- Socket Set: For removing and installing components.
- Pliers: For gripping and manipulating wires and connectors.
- Wire Strippers/Crimpers: For preparing and connecting wires.
- Test Light: For checking for power and ground.
- Fuel Tank Sender Wrench: For removing the fuel sending unit (if necessary).
- Safety Glasses: To protect your eyes from debris.
- Gloves: To protect your hands from dirt, grease, and chemicals.
- Jack and Jack Stands: For safely raising the vehicle (if accessing the fuel tank).
- Wheel Chocks: For preventing the vehicle from rolling.
- Shop Rags: For cleaning up spills and messes.
- Pen and Paper: For taking notes and documenting your findings.
- New Fuel Sending Unit (if needed): Replacement part.
- CARDIAGTECH Diagnostic Scan Tool: Advanced diagnostics (optional but recommended).
 Multimeter for electrical testing
5. Diagnosing the Problem: A Step-by-Step Guide
If the preliminary checks don’t reveal the issue, it’s time for more in-depth diagnostics. Follow these steps to pinpoint the source of the problem:
5.1. Accessing the Fuel Sending Unit
The fuel sending unit is located inside the fuel tank. Accessing it usually involves one of the following methods:
- Access Panel: Some vehicles have an access panel under the rear seat or in the trunk that allows you to reach the sending unit without dropping the fuel tank.
- Dropping the Fuel Tank: If there’s no access panel, you’ll need to safely drop the fuel tank. This requires jacking up the vehicle, supporting it with jack stands, and disconnecting the fuel lines and electrical connectors. Note: This should only be done if you are qualified and experienced. Fuel is highly flammable, and extreme caution must be taken.
5.2. Inspecting the Wiring and Connectors
Once you have access to the sending unit, carefully inspect the wiring and connectors for:
- Corrosion: Look for green or white residue on the terminals.
- Damage: Check for frayed, cracked, or broken wires.
- Loose Connections: Ensure the connectors are securely attached.
Clean any corrosion with a wire brush and electrical contact cleaner. Repair or replace any damaged wires or connectors.
5.3. Testing the Fuel Sending Unit
Use a multimeter to test the resistance of the sending unit. Refer to your vehicle’s repair manual or a reliable online source for the correct resistance range at different fuel levels (e.g., empty, half, full).
- If the resistance is outside the specified range: The sending unit is likely faulty and needs to be replaced.
- If the resistance doesn’t change as you move the float: The sending unit is also faulty.
5.4. Testing the Wiring Continuity
Use a multimeter to test the continuity of the wires between the sending unit and the fuel gauge.
- If there’s no continuity: There’s a break in the wire somewhere along the circuit. You’ll need to trace the wire and repair the break or replace the wire.
- If there’s continuity: The wire is intact.
5.5. Testing the Fuel Gauge
Testing the fuel gauge itself can be more challenging and may require specialized equipment. However, here’s a basic test you can try:
- Disconnect the sending unit wire from the fuel gauge.
- Connect a jumper wire from the fuel gauge terminal to ground.
- Turn on the ignition.
- If the fuel gauge reads full: The gauge is likely working correctly, and the problem is in the sending unit or wiring.
- If the fuel gauge doesn’t move: The gauge itself may be faulty.
6. Repairing the Gas Gauge System
Based on your diagnosis, you can now proceed with the necessary repairs:
6.1. Replacing the Fuel Sending Unit
If the sending unit is faulty, replace it with a new one. Follow these steps:
- Disconnect the electrical connector and fuel lines from the sending unit.
- Use a fuel tank sender wrench to unscrew the sending unit from the fuel tank.
- Remove the old sending unit.
- Install the new sending unit, ensuring the gasket or O-ring is properly seated.
- Tighten the sending unit with the fuel tank sender wrench.
- Reconnect the electrical connector and fuel lines.
6.2. Repairing or Replacing Wiring
If you find damaged or broken wires, repair them using wire connectors or replace the entire wire. Ensure the connections are secure and properly insulated.
6.3. Replacing the Fuel Gauge
If the fuel gauge itself is faulty, replace it with a new one. This usually involves removing the instrument cluster from the dashboard and disconnecting the old gauge.
7. Advanced Diagnostics with CARDIAGTECH Diagnostic Scan Tool
For more accurate and efficient diagnostics, consider using a CARDIAGTECH diagnostic scan tool. These tools can:
- Read Diagnostic Trouble Codes (DTCs): Identify specific fault codes related to the fuel gauge system.
- Access Live Data: Monitor the fuel level sensor readings in real-time.
- Perform Actuator Tests: Activate the fuel gauge to verify its functionality.
Contact CARDIAGTECH.NET at +1 (641) 206-8880 or visit our website to learn more about our diagnostic scan tools and how they can help you troubleshoot your gas gauge issues. Our address is 276 Reock St, City of Orange, NJ 07050, United States.
8. Preventing Future Problems
To prevent future gas gauge problems, consider these tips:
- Avoid Running the Tank Too Low: Regularly running the fuel tank near empty can damage the fuel pump and sending unit.
- Use Fuel Additives: Some fuel additives can help clean the fuel system and prevent corrosion.
- Regular Maintenance: Inspect the fuel system components during routine maintenance.
9. Estimated Repair Costs
The cost to fix a gas gauge can vary depending on the cause of the problem and the type of vehicle. Here’s a general estimate:
| Repair | Estimated Cost (USD) |
|---|---|
| Fuse Replacement | $5 – $10 |
| Wiring Repair | $50 – $200 |
| Fuel Sending Unit Replacement | $150 – $500 |
| Fuel Gauge Replacement | $200 – $600 |
| Diagnostic Scan | $75 – $150 |
These are just estimates, and the actual cost may vary. It’s always a good idea to get a quote from a qualified mechanic before proceeding with any repairs.
10. Why Choose CARDIAGTECH for Your Automotive Needs?
At CARDIAGTECH.NET, we understand the challenges faced by auto technicians and garage owners. We are committed to providing high-quality diagnostic tools and equipment that help you:
- Increase Efficiency: Our tools streamline the diagnostic process, reducing repair time.
- Improve Accuracy: Our advanced technology ensures precise and reliable results.
- Enhance Customer Satisfaction: Our tools help you provide top-notch service and build customer trust.
We offer a wide range of products, including:
- Diagnostic Scan Tools: For comprehensive vehicle diagnostics.
- Battery Testers: For assessing battery health and performance.
- TPMS Tools: For diagnosing and repairing tire pressure monitoring systems.
- EV Charging Solutions: For servicing electric vehicles.
11. Real-World Example
Scenario: A 2015 Honda Civic owner notices that their gas gauge is stuck at half full, even after filling the tank.
Troubleshooting Steps:
- Check the fuse: The owner finds that the fuel gauge fuse is blown and replaces it. However, the gauge still doesn’t work.
- Access the fuel sending unit: The owner removes the access panel under the rear seat to access the sending unit.
- Inspect the wiring: The owner finds a corroded connector at the sending unit and cleans it with electrical contact cleaner.
- Test the sending unit: The owner uses a multimeter to test the resistance of the sending unit. The resistance doesn’t change as the float is moved, indicating a faulty sending unit.
- Replace the sending unit: The owner replaces the sending unit with a new one.
Result: The gas gauge now works correctly, displaying the accurate fuel level.
12. Call to Action: Get Expert Assistance from CARDIAGTECH
Are you struggling with a faulty gas gauge or other automotive issues? Don’t waste time and money on guesswork. Contact CARDIAGTECH.NET today for expert assistance. Our knowledgeable team can help you:
- Diagnose the problem accurately.
- Recommend the right tools and equipment.
- Provide technical support and guidance.
Call us at +1 (641) 206-8880 or visit our website at CARDIAGTECH.NET to learn more. We are located at 276 Reock St, City of Orange, NJ 07050, United States. Let CARDIAGTECH be your trusted partner for all your automotive diagnostic needs. Equip yourself with the right tools and expertise to keep your vehicles running smoothly and your customers satisfied.
13. Common Mistakes to Avoid
- Ignoring the Basics: Always start with the simple checks, like fuses and wiring, before assuming a more complex problem.
- Improper Grounding: Ensure all ground connections are clean and secure. A poor ground can cause inaccurate readings.
- Using Incorrect Parts: Always use the correct replacement parts for your vehicle’s make and model.
- Skipping Safety Precautions: When working with fuel, always take necessary safety precautions to avoid fire or explosion.
14. FAQ Section
Here are some frequently asked questions about gas gauge problems:
1. Why is my gas gauge reading empty when I know I have gas?
- Possible causes include a faulty fuel sending unit, a blown fuse, or a wiring problem.
2. Can a bad fuel pump affect the gas gauge?
- In some cases, yes. If the fuel pump is not providing adequate pressure, it can affect the fuel level sensor reading.
3. How much does it cost to replace a fuel sending unit?
- The cost can range from $150 to $500, depending on the vehicle and the labor involved.
4. Is it safe to drive with a faulty gas gauge?
- It’s not recommended. Driving with an inaccurate gas gauge can lead to running out of fuel unexpectedly.
5. Can I fix a gas gauge problem myself?
- If you have the necessary tools and experience, you can attempt to diagnose and repair the problem yourself. However, it’s always best to consult a qualified mechanic if you’re not comfortable working on your car.
6. What are the symptoms of a bad fuel gauge?
- Symptoms include the gauge reading empty when the tank is full, the gauge reading full when the tank is empty, erratic readings, or the gauge being stuck at a certain level.
7. How do I test a fuel sending unit with a multimeter?
- Set your multimeter to ohms (resistance) and connect the probes to the sending unit terminals. Move the float up and down and observe the resistance reading. The resistance should change smoothly as the float moves.
8. Can a loose gas cap cause my fuel gauge to malfunction?
- While a loose gas cap primarily affects the EVAP system, it can sometimes indirectly affect the fuel gauge reading.
9. Where is the fuel sending unit located?
- The fuel sending unit is located inside the fuel tank, typically attached to the fuel pump assembly.
10. What should I do if my gas gauge is giving me erratic readings?
- Start by checking the wiring and connections to the sending unit and fuel gauge. If the wiring is okay, the sending unit may be faulty.
15. Conclusion
Fixing a gas gauge problem can seem daunting, but with the right knowledge and tools, you can diagnose and repair the issue effectively. Remember to start with the basics, follow a systematic approach, and don’t hesitate to seek professional help when needed. CARDIAGTECH.NET is here to support you with high-quality diagnostic tools and expert advice. Contact us today at +1 (641) 206-8880 or visit our website to learn more.