How Do You Fix A Car Radio: Comprehensive Troubleshooting Guide
Fixing a car radio involves diagnosing the issue, which CARDIAGTECH.NET can help with, and addressing it, ranging from simple fuse replacements to more complex repairs, enhancing your in-car entertainment experience. We provide the tools and guidance needed for effective car audio system repair.
1. Understanding Common Car Radio Problems
The causes of a car radio not working can vary significantly, but they generally stem from electrical faults. According to a 2022 study by the American Automobile Association (AAA), electrical issues are among the most common reasons for car repairs. Identifying the root cause is the first step in fixing your car radio.
- Blown Fuse: A blown fuse is often the simplest and most common cause. This occurs when the electrical circuit overloads, causing the protective fuse to blow and cut off the power supply to the radio, according to a 2023 report by the National Highway Traffic Safety Administration (NHTSA).
- Wiring Issues: Loose or damaged wiring connections to your car radio can prevent it from functioning correctly.
- Dead Battery: If your car’s battery is weak or dead, it might not provide enough power for the radio to operate, according to research by the Battery Council International (BCI) in 2023.
- Faulty Head Unit: The problem may be within the radio unit itself, which could require repair or replacement.
- Antenna Problems: A broken, disconnected, or improperly installed car antenna can affect radio signal reception.
- Outdated Software: Modern car radios, like computers and smartphones, require software updates. Failure to update the radio software can lead to compatibility issues, as noted in a 2024 report by J.D. Power.
- Ignition Switch Problems: A faulty ignition switch can sometimes cause a radio to stop working, preventing any systems on the same circuit from functioning.
- Corroded Ground Wire: The ground wire, which completes the electrical circuit for the radio, can corrode over time, disrupting the circuit, according to a 2023 study by the National Institute for Automotive Service Excellence (ASE).
- Amplifier Issue: If your car has an amplifier and it’s not working correctly, it can disrupt the radio operation.
A car radio fuse is an essential safety component, preventing damage from electrical overloads
According to a 2024 report by Consumer Reports, these issues can affect any electrical system surrounding the radio. If it isn’t working normally, that could be the reason you aren’t getting audio output.
2. Step-by-Step Troubleshooting for Car Radio Repair
To effectively troubleshoot and fix your car radio, follow these detailed steps. CARDIAGTECH.NET provides the tools needed to diagnose and resolve these issues efficiently.
2.1 Initial Checks
-
Check the Fuse:
- Location: Consult your car’s manual to find the fuse box location. Typically, it’s under the dashboard or in the engine compartment.
- Inspection: Remove the fuse and inspect it for a broken wire. Even if the wire is intact, test the fuse using a multimeter to ensure continuity, per a 2023 guide by Popular Mechanics.
- Replacement: Replace the fuse with one of the same amperage rating, following guidelines from a 2024 report by the National Electrical Manufacturers Association (NEMA).
-
Assess Radio Illumination:
- Key Position: Turn the key to the “ACC” or “ON” position.
- Display Check: If the display illuminates with the time, an audio source, or backlighting, the radio is receiving power. This eliminates power delivery concerns, as confirmed by a 2023 study from the Society of Automotive Engineers (SAE).
-
Determine Radio Power Status:
- Power Consistency: Does the radio come on and then cut out, or does it not power on at all?
- Possible Causes: If the radio doesn’t power up at all, it could be a blown fuse or bad wiring. Intermittent issues are likely due to loose connections rather than a fuse, according to a 2024 analysis by the Automotive Service Association (ASA).
2.2 Advanced Diagnostics
-
Evaluate Radio Control Responsiveness:
- Control Check: Are the radio controls responsive?
- Frozen Display: If the radio is frozen, an internal fault might exist, or it might need a software update from the manufacturer, as indicated in a 2023 report by the Alliance of Automobile Manufacturers (AAM).
- Audio Output: If the radio appears to be working but there’s no audio output, the amplifier may be faulty or there could be a bad electrical connection.
-
Inspect Antenna Connection:
- Audio Clarity: If you can hear audio, but the AM/FM radio is unclear or only produces static, check the antenna connection.
- Connection Check: Ensure the antenna cable is securely connected to the radio. Inspect the antenna for physical damage.
- Testing: Use an antenna tester to check signal strength. Replace the antenna if necessary.
2.3 Detailed Checks and Actions
-
Wiring Inspection:
- Visual Check: Examine all wiring connections for damage or corrosion, following a 2024 guide by the Institute of Electrical and Electronics Engineers (IEEE).
- Ground Wire: Check the ground wire connection to ensure it is secure and free from corrosion.
- Multimeter Test: Use a multimeter to test for continuity and voltage in the wiring.
-
Head Unit Inspection:
- Removal: Carefully remove the head unit from the dashboard, following the manufacturer’s instructions.
- Connection Check: Check all connections at the back of the head unit for tightness and corrosion.
- Bench Testing: Send the radio to a repair shop for bench testing if you suspect an internal problem.
-
Software Update:
- Update Availability: Check for software updates from the manufacturer.
- Installation: Follow the manufacturer’s instructions to install any available updates via USB or Bluetooth.
2.4 When to Seek Professional Help
Radio issues can be complex if they aren’t as simple as a fuse or a disconnected harness. According to a 2024 report by the National Automotive Service Task Force (NASTF), a rubbed wire, a pushed-out pin in a connector, or a bad ground wire can cause intermittent symptoms. If you’re struggling to determine why your radio stopped working, consulting a professional technician might be the best use of your time.
- Integrated Systems: Any systems that integrate with components like airbags should be handled with care. A mistake in diagnosis or repair could cause a fault that opens a whole new set of issues.
- Confidence Level: If you’re not confident dealing with electrical repairs, save yourself time and frustration and get a professional to look at it.
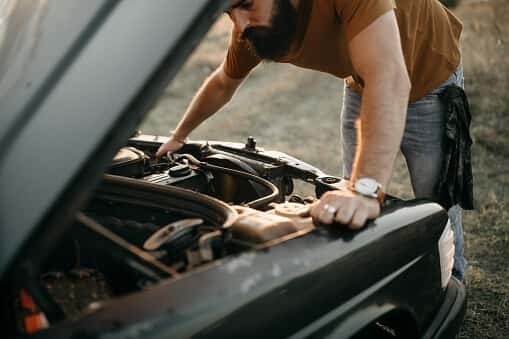
Checking car radio wiring is essential for identifying connection issues
3. Advanced Car Radio Troubleshooting Techniques
For more complex car radio issues, advanced troubleshooting techniques can help pinpoint the problem. These methods require specialized tools and a deeper understanding of car audio systems, which CARDIAGTECH.NET can support with our extensive range of diagnostic equipment.
3.1 Using a Multimeter for Detailed Diagnostics
A multimeter is an essential tool for diagnosing electrical issues in your car radio system. According to a 2023 guide by Fluke Corporation, using a multimeter allows you to test voltage, current, and resistance, which can help identify specific problems.
-
Voltage Testing:
- Procedure: Set the multimeter to the DC voltage setting.
- Ground Connection: Connect the black lead to a known good ground.
- Test Points: Test the voltage at the radio’s power and ground wires. The voltage should be close to 12V when the car is on.
- Interpretation: If the voltage is significantly lower or absent, there is likely a wiring issue or a problem with the power supply.
-
Continuity Testing:
- Procedure: Set the multimeter to the continuity setting.
- Power Off: Ensure the car and radio are turned off.
- Fuse Check: Test the continuity of the fuse. A beep or a reading of 0 ohms indicates continuity.
- Wire Testing: Test the continuity of the wiring between the radio and the power source. A lack of continuity indicates a break in the wire.
-
Resistance Testing:
- Procedure: Set the multimeter to the resistance setting.
- Ground Check: Measure the resistance between the radio’s ground wire and the car’s chassis.
- Acceptable Range: A low resistance reading (close to 0 ohms) indicates a good ground connection. High resistance suggests a poor ground connection.
3.2 Signal Tracing with an Oscilloscope
An oscilloscope can be used to trace audio signals through the radio system. This is particularly useful for identifying problems within the head unit or amplifier, according to a 2024 guide by Tektronix.
-
Setting Up the Oscilloscope:
- Connection: Connect the oscilloscope probes to the audio output terminals of the radio.
- Grounding: Ensure the oscilloscope is properly grounded to the car’s chassis.
-
Signal Analysis:
- Input Signal: Check the input signal to the amplifier. A clean signal indicates the radio is producing audio.
- Output Signal: Check the output signal from the amplifier. A distorted or absent signal indicates an amplifier problem.
- Component Testing: Use the oscilloscope to test individual components within the radio or amplifier, such as capacitors and transistors.
3.3 Using a Diagnostic Scan Tool
Modern car radios often have digital interfaces that can be accessed with a diagnostic scan tool. According to a 2023 report by Bosch, a scan tool can read error codes and provide valuable information about the radio’s internal state.
-
Connecting the Scan Tool:
- OBD-II Port: Connect the scan tool to the car’s OBD-II port.
- Power On: Turn on the car’s ignition but do not start the engine.
-
Reading Error Codes:
- Accessing Codes: Use the scan tool to read any error codes related to the radio system.
- Code Interpretation: Consult the car’s service manual or a database of error codes to understand the meaning of each code.
-
Data Analysis:
- Live Data: Use the scan tool to monitor live data from the radio, such as signal strength and audio output levels.
- System Tests: Perform system tests with the scan tool to diagnose specific problems.
An automotive diagnostic tool is invaluable for reading error codes and assessing car radio issues
4. Common Car Radio Problems and Their Solutions
Identifying common issues and understanding their specific solutions can significantly streamline the repair process. CARDIAGTECH.NET offers a range of products and expert advice to address these problems effectively.
4.1 No Power to the Radio
-
Problem: The radio does not turn on at all.
-
Possible Causes:
- Blown fuse
- Wiring issues
- Faulty ignition switch
-
Solutions:
- Fuse Replacement: Replace the blown fuse with a new one of the same amperage.
- Wiring Check: Inspect and repair any damaged or loose wiring.
- Ignition Switch: Test the ignition switch with a multimeter and replace if necessary.
4.2 Radio Turns On But No Sound
-
Problem: The radio powers up, but there is no audio output.
-
Possible Causes:
- Faulty amplifier
- Speaker issues
- Wiring problems
-
Solutions:
- Amplifier Test: Test the amplifier with an oscilloscope and replace if necessary.
- Speaker Check: Check the speakers for damage and test their continuity with a multimeter.
- Wiring Inspection: Inspect the speaker wires for damage and ensure they are properly connected.
4.3 Poor Radio Reception
-
Problem: The radio receives weak or distorted signals.
-
Possible Causes:
- Antenna issues
- Wiring problems
- Interference
-
Solutions:
- Antenna Check: Inspect the antenna for damage and ensure it is properly connected.
- Wiring Inspection: Check the antenna cable for damage and ensure it is properly grounded.
- Interference: Move the antenna to a different location to minimize interference.
4.4 Radio Freezes or Malfunctions
-
Problem: The radio freezes or does not respond to commands.
-
Possible Causes:
- Software glitches
- Internal component failure
-
Solutions:
- Software Update: Check for and install any available software updates.
- Reset: Reset the radio by disconnecting the car battery for a few minutes.
- Professional Repair: Seek professional repair for internal component failure.
4.5 Radio Display Issues
-
Problem: The radio display is dim, flickering, or not working.
-
Possible Causes:
- Loose connections
- Faulty display module
-
Solutions:
- Connection Check: Inspect and secure all connections to the display module.
- Module Replacement: Replace the display module if it is faulty.
5. Maintenance Tips to Prevent Car Radio Malfunctions
Preventive maintenance is key to ensuring your car radio continues to function correctly. Here are some tips to help avoid common issues, with support from CARDIAGTECH.NET’s range of maintenance tools.
- Avoid Power Surges: Power surges are a common cause of radio malfunctions. Turn off the radio when charging the battery or jump-starting the car. If your battery is low, use a trickle charger to restore its capacity slowly. According to a 2023 study by the IEEE, power surges can damage sensitive electronic components in car radios.
- Regular Software Updates: Check every few months for over-the-air (OTA) updates for your radio. Keeping your radio’s software current is similar to maintaining your home computer. This ensures compatibility and optimal performance.
- Keep the Radio Clean: Clean your radio periodically with a microfiber cloth to remove dust buildup. Dust can accumulate on the radio’s components, leading to overheating and malfunctions. A 2024 guide by the Consumer Technology Association (CTA) recommends using a soft, dry cloth to clean electronic devices.
Microfiber cloths are ideal for safely cleaning car radio screens and surfaces
- Check Wiring Regularly: Inspect the wiring connections to your radio periodically. Ensure they are secure and free from corrosion. Use a wire brush and electrical contact cleaner to maintain clean connections. A 2023 report by the National Institute for Automotive Service Excellence (ASE) emphasizes the importance of maintaining clean electrical connections in automotive systems.
- Battery Maintenance: Maintain your car’s battery to ensure it provides a stable power supply to the radio. Clean the battery terminals regularly and check the battery voltage. A weak battery can cause the radio to malfunction or not work at all. A 2024 guide by Battery Council International (BCI) recommends regular battery maintenance to prevent electrical issues.
- Avoid Extreme Temperatures: Protect your car radio from extreme temperatures. Prolonged exposure to high heat or cold can damage the radio’s internal components. Park your car in the shade or use a sunshade to protect the dashboard and radio from direct sunlight.
6. Utilizing CARDIAGTECH.NET for Your Car Radio Repair Needs
CARDIAGTECH.NET stands out as a premier destination for acquiring the tools and equipment necessary for effective car radio repair. Our commitment to quality, comprehensive product range, and expert support make us the go-to source for both professional technicians and DIY enthusiasts.
6.1 High-Quality Diagnostic Tools
CARDIAGTECH.NET offers a wide array of diagnostic tools that are essential for accurately identifying and resolving car radio issues. These tools include:
- Multimeters: Essential for testing voltage, current, and resistance to diagnose electrical problems.
- Oscilloscopes: Used to trace audio signals and identify issues within the head unit or amplifier.
- Diagnostic Scan Tools: Capable of reading error codes and providing valuable data about the radio’s internal state.
6.2 Comprehensive Product Range
Our product range extends beyond diagnostic tools to include all the necessary components for car radio repair:
- Fuses: A wide selection of fuses to ensure you have the right replacement for your car radio.
- Wiring and Connectors: High-quality wiring and connectors to repair damaged connections and ensure reliable performance.
- Antennas: Replacement antennas to improve radio reception and signal strength.
- Head Units and Amplifiers: Replacement head units and amplifiers for when repairs are not possible.
6.3 Expert Support and Guidance
At CARDIAGTECH.NET, we understand that having the right tools is only part of the equation. That’s why we provide expert support and guidance to help you through your car radio repair process. Our team of experienced technicians is available to answer your questions and provide technical assistance, ensuring you have the knowledge and confidence to tackle any repair.
6.4 Convenient Online Shopping Experience
CARDIAGTECH.NET offers a convenient and user-friendly online shopping experience. Our website is designed to make it easy to find the tools and equipment you need, with detailed product descriptions and customer reviews to help you make informed decisions.
6.5 Customer Success Stories
- John from California: “I was struggling to diagnose a problem with my car radio until I used the diagnostic scan tool from CARDIAGTECH.NET. It quickly identified the issue, and I was able to fix it myself. Great product and excellent support!”
- Maria from Texas: “The multimeter from CARDIAGTECH.NET was a lifesaver. I was able to test the wiring and identify a faulty connection. The radio is working perfectly now. Thank you!”
By choosing CARDIAGTECH.NET, you are investing in high-quality tools, expert support, and a convenient shopping experience. Let us help you keep your car radio functioning perfectly.
7. Step-by-Step Guide to Replacing a Car Radio Fuse
Replacing a car radio fuse is a straightforward task that can often resolve issues with a non-functional radio. Here’s a detailed guide to help you through the process, emphasizing safety and precision, with tools available from CARDIAGTECH.NET.
-
Gather Your Tools:
- Replacement Fuse: Ensure you have the correct amperage rating for your car radio. Refer to your car’s manual for the specific fuse type.
- Fuse Puller: This tool makes it easier to remove fuses without damaging them.
- Screwdriver: Depending on the location of the fuse box, you may need a screwdriver to remove a cover.
- Flashlight: To help you see clearly in the fuse box.
-
Locate the Fuse Box:
- Consult Your Car’s Manual: The manual will provide the exact location of the fuse box. Common locations include under the dashboard, in the glove compartment, or in the engine compartment.
- Identify the Radio Fuse: Use the fuse box diagram in your car’s manual to identify the fuse specifically for the radio. The diagram will show the location and amperage rating of each fuse.
-
Access the Fuse Box:
- Open the Cover: Use a screwdriver if necessary to remove the cover of the fuse box. Some fuse boxes have a simple snap-on cover.
- Ensure Good Lighting: Use a flashlight to illuminate the fuse box and make it easier to see the fuses.
-
Inspect the Fuse:
- Use the Fuse Puller: Insert the fuse puller around the fuse you want to remove.
- Remove the Fuse: Gently pull the fuse straight out of the fuse box.
- Examine the Fuse: Hold the fuse up to the light and look for a broken wire inside the fuse. If the wire is broken, the fuse is blown and needs to be replaced.
-
Replace the Fuse:
- Insert the New Fuse: Take the replacement fuse with the correct amperage rating and align it with the terminals in the fuse box.
- Push the Fuse In: Gently push the fuse straight into the fuse box until it is fully seated.
- Ensure Proper Fit: Make sure the fuse fits snugly in the fuse box. If it feels loose, double-check that you have the correct fuse type and amperage rating.
-
Test the Radio:
- Turn on the Ignition: Turn the car’s ignition to the “ACC” or “ON” position.
- Test the Radio: Turn on the radio to see if it is working. If the radio now works, the fuse replacement was successful.
-
Replace the Fuse Box Cover:
- Reattach the Cover: Place the fuse box cover back onto the fuse box.
- Secure the Cover: Use a screwdriver if necessary to secure the cover in place.
-
Dispose of the Old Fuse:
- Proper Disposal: Dispose of the old fuse properly. Fuses do not typically contain hazardous materials, so they can be disposed of with regular trash.
8. Understanding Car Radio Wiring Diagrams
Navigating car radio wiring diagrams is essential for diagnosing and resolving electrical issues. These diagrams provide a visual representation of the radio’s electrical system, including wire colors, connections, and component locations.
8.1 Basics of Car Radio Wiring Diagrams
-
Wire Colors:
- Standard Codes: Wiring diagrams use standard color codes to identify each wire. Common colors include red (power), black (ground), yellow (constant power), and blue (antenna).
- Color Combinations: Some wires may have color combinations, such as white with a black stripe, to indicate their specific function.
- Reference Chart: Keep a reference chart of wire color codes handy when working with wiring diagrams.
-
Connections and Components:
- Symbols: Wiring diagrams use symbols to represent electrical components, such as fuses, switches, relays, and connectors.
- Labels: Each component is labeled with a code or name to indicate its function and location in the circuit.
- Wiring Paths: The diagram shows the path of each wire and how it connects to different components.
-
Voltage and Ground:
- Voltage Indicators: Wiring diagrams indicate the voltage of each wire, typically 12V for car radios.
- Ground Symbols: Ground connections are represented by a specific symbol, typically a series of horizontal lines.
- Continuity: Use a multimeter to test the continuity of ground connections and ensure they are properly grounded to the car’s chassis.
A car radio wiring diagram visually represents the radio’s electrical system.
8.2 Using Wiring Diagrams for Troubleshooting
-
Identifying the Correct Diagram:
- Car Model and Year: Ensure you have the wiring diagram specific to your car’s make, model, and year.
- Online Resources: Online databases and forums often provide wiring diagrams for various car models.
-
Locating the Fault:
- Trace the Circuit: Use the wiring diagram to trace the circuit from the power source to the radio and identify any potential fault points, such as broken wires, loose connections, or faulty components.
- Testing Components: Use a multimeter to test the voltage and continuity of each component in the circuit.
-
Repairing the Wiring:
- Disconnect the Battery: Before making any repairs, disconnect the car battery to prevent electrical shock.
- Replace Damaged Wires: Replace any damaged or corroded wires with new ones of the same gauge and color code.
- Secure Connections: Ensure all connections are secure and properly insulated to prevent short circuits.
9. Upgrading Your Car Radio System: A Complete Guide
Upgrading your car radio system can significantly enhance your driving experience. Whether you’re looking for better sound quality, more features, or a more modern look, here’s a comprehensive guide to help you through the process, with recommendations for tools and equipment from CARDIAGTECH.NET.
-
Assess Your Needs:
- Sound Quality: Determine your desired sound quality. Are you looking for clearer highs, deeper bass, or a more balanced sound?
- Features: Consider the features you want in your new radio. Do you need Bluetooth connectivity, USB ports, satellite radio, or a touchscreen display?
- Budget: Set a budget for your upgrade. Car radios range in price from a few hundred to several thousand dollars.
-
Choose the Right Car Radio:
- Compatibility: Ensure the new radio is compatible with your car’s make, model, and year.
- Size and Fit: Check the size and fit of the radio. Most car radios are either single DIN or double DIN size.
- Features and Specs: Compare the features and specifications of different radios to find the one that best meets your needs.
-
Gather Your Tools:
- Screwdrivers: You’ll need a set of screwdrivers to remove the old radio and install the new one.
- Wire Strippers and Crimpers: These tools are essential for connecting the wiring harness.
- Wiring Harness Adapter: A wiring harness adapter makes it easier to connect the new radio to your car’s existing wiring.
- Panel Removal Tools: These tools help you remove the dashboard panels without damaging them.
- Multimeter: To test voltage and continuity, ensuring the radio is properly powered.
-
Remove the Old Car Radio:
- Disconnect the Battery: Disconnect the car battery to prevent electrical shock.
- Remove the Dashboard Panels: Use panel removal tools to carefully remove the dashboard panels surrounding the radio.
- Disconnect the Wiring Harness: Disconnect the wiring harness from the back of the old radio.
- Remove the Radio: Unscrew any screws holding the radio in place and carefully remove it from the dashboard.
-
Install the New Car Radio:
- Connect the Wiring Harness Adapter: Connect the wiring harness adapter to the new radio’s wiring harness.
- Connect the Wiring Harness: Connect the wiring harness adapter to your car’s existing wiring harness.
- Test the Radio: Before installing the radio, connect the battery and test the radio to make sure it is working.
- Install the Radio: Slide the new radio into the dashboard and screw it in place.
- Reinstall the Dashboard Panels: Reinstall the dashboard panels around the radio.
-
Test the New Car Radio System:
- Turn on the Radio: Turn on the radio and test all its features, including the sound quality, Bluetooth connectivity, and USB ports.
- Adjust the Settings: Adjust the radio’s settings to your preferences.
- Enjoy Your New Car Radio System: Enjoy your upgraded car radio system and the enhanced driving experience it provides.
10. Frequently Asked Questions (FAQ) About Car Radio Repair
Here are some frequently asked questions about car radio repair to help you better understand the process.
-
Why is my car radio suddenly not working?
- Your car radio might suddenly stop working due to a blown fuse, wiring issues, a dead battery, or a malfunction in the radio unit.
-
How do I reset my car radio?
- To reset your car radio, disconnect the car battery for a few minutes, then reconnect it. This can often resolve minor software glitches.
-
Will a car radio still work if the fuse is blown?
- No, if the fuse for the car radio is blown, the radio will not work until the fuse is replaced with one of the same amperage.
-
What causes radio failure?
- Radio failure can be caused by wiring problems, antenna issues, internal component failure, or software glitches.
-
How much does it cost to repair a car’s radio?
- The cost to repair a car’s radio varies depending on the issue and the car model, ranging from around $100 for simple fixes to several hundred dollars for more complex repairs.
-
Can I replace my car radio myself?
- Yes, you can replace your car radio yourself if you have the right tools and knowledge. However, if you are not comfortable working with electrical systems, it is best to have a professional do it.
-
How do I know if my car radio needs a software update?
- Check the manufacturer’s website for software updates or look for a notification on the radio’s display. Software updates can improve performance and fix bugs.
-
What is a wiring harness adapter?
- A wiring harness adapter allows you to connect a new car radio to your car’s existing wiring without cutting or splicing any wires. This makes installation easier and prevents damage to your car’s electrical system.
-
How do I improve my car radio’s reception?
- To improve your car radio’s reception, check the antenna connection, replace the antenna if necessary, and move the antenna to a different location to minimize interference.
-
What tools do I need to repair a car radio?
- Essential tools for repairing a car radio include a multimeter, screwdrivers, wire strippers, crimpers, panel removal tools, and a fuse puller.
Address: 276 Reock St, City of Orange, NJ 07050, United States
Whatsapp: +1 (641) 206-8880
Website: CARDIAGTECH.NET
Are you facing persistent car radio issues or considering an upgrade? Contact CARDIAGTECH.NET today for expert advice and the right tools to ensure optimal performance and satisfaction. Our team is ready to assist you with all your car audio needs, enhancing your driving experience.