**How Do You Fix a Deep Scratch on Your Car Like a Pro?**

Fixing a deep car scratch might seem daunting, but with the right tools and techniques, you can restore your car’s finish to its former glory. At CARDIAGTECH.NET, we provide the equipment and guidance you need for professional-quality results. From touch-up paint to advanced polishing systems, we’ve got you covered, ensuring your vehicle looks its best. Let’s explore how to tackle those unsightly blemishes, repair paint damage and achieve a flawless finish with our top-tier auto repair tools.
Here are the top 5 search intents for “how do you fix a deep scratch on your car”:
- DIY Repair Guide: Users want step-by-step instructions on fixing deep scratches themselves.
- Product Recommendations: Users seek advice on the best tools and materials for scratch repair.
- Professional vs. DIY: Users want to understand when a scratch requires professional attention.
- Cost Analysis: Users are interested in the cost of DIY repair versus professional services.
- Prevention Tips: Users look for tips on preventing future scratches and maintaining their car’s paint.
1. What Supplies Do I Need to Fix a Deep Scratch on My Car?
To properly fix a deep scratch on your car, gather these essential supplies: fine-grit sandpaper (2000-3000 grit), a sanding block, automotive touch-up paint matching your car’s color code, a paint primer, clear coat, rubbing compound, polishing compound, microfiber cloths, masking tape, and a detail brush. The specific tools needed depend on the depth and severity of the scratch.
1.1 Essential Supplies for Deep Scratch Repair
Having the right supplies on hand is crucial for effectively repairing deep scratches on your car. These tools not only ensure a professional finish but also protect your car’s paint during the repair process.
| Supply | Description | Use |
|---|---|---|
| Fine-Grit Sandpaper | 2000-3000 grit sandpaper is ideal. | Used for gently smoothing out the edges of the scratch and any applied paint. |
| Sanding Block | Provides a flat, even surface for sanding. | Ensures consistent pressure and prevents uneven sanding. |
| Touch-Up Paint | Make sure it matches your car’s color code. | Fills in the scratch, restoring the original color. |
| Paint Primer | Improves adhesion of the touch-up paint. | Creates a uniform base for the paint, enhancing its durability and appearance. |
| Clear Coat | Protects the paint and adds shine. | Provides a protective layer that shields the paint from UV rays and environmental damage, while also giving a glossy finish. |
| Rubbing Compound | Abrasive compound for leveling paint. | Removes imperfections and blends the new paint with the existing finish. |
| Polishing Compound | Finer compound for restoring gloss. | Refines the surface, removing swirl marks and enhancing the shine. |
| Microfiber Cloths | Soft cloths for cleaning and buffing. | Essential for wiping away residue and buffing the surface without causing scratches. |
| Masking Tape | Protects surrounding areas. | Prevents accidental damage to the adjacent paintwork during sanding and painting. |
| Detail Brush | Small brush for precise application. | Allows for accurate and controlled application of paint into the scratch. |
| Safety Gloves | Protects your hands from chemicals. | Ensures your skin is protected from the harsh chemicals found in automotive paints and compounds. According to the Occupational Safety and Health Administration (OSHA), wearing gloves is a crucial safety measure when handling such materials. |
| Safety Glasses | Protects your eyes from debris and splashes. | Protects your eyes from potential splashes and debris during sanding and buffing, minimizing the risk of eye injuries. |
| Automotive Clay Bar | Removes contaminants from the paint surface. | Cleans and smooths the surface, ensuring better adhesion of the touch-up paint and a flawless finish. |
| Isopropyl Alcohol | For cleaning the surface. | Removes wax, grease, and other contaminants, preparing the surface for paint application. |
| Compound Applicator Pad | Evenly distributes compound for polishing. | Ensures consistent and even application of rubbing and polishing compounds, enhancing the effectiveness of the buffing process. |
1.2 Selecting the Right Touch-Up Paint
Choosing the correct touch-up paint is crucial for a seamless repair. Always use your car’s color code to ensure a perfect match. This code can typically be found on a sticker inside the driver’s side doorjamb, in the glove compartment, or in the engine bay.
- Color Code Location: Check the driver’s side doorjamb, glove compartment, or engine bay.
- Professional Matching: If unsure, consult with an automotive paint supplier for precise color matching.
- Test the Paint: Before applying, test the paint on an inconspicuous area to verify the match.
1.3 Sandpaper Grades Explained
Using the correct sandpaper grit is vital for achieving a smooth finish without causing further damage. Here’s a breakdown of common sandpaper grits and their uses:
| Grit Range | Common Use |
|---|---|
| 800-1000 | Removing rust and paint |
| 1200-2000 | Removing minor scratches; Sanding the surfacer |
| 2500-3000 | Sanding & Refinishing; Sanding between coats of finish; Polishing and buffing; Wet Sanding |
| 4000-5000 | Light sanding, scratch removal, and other delicate tasks. |
| 6000-8000 | Achieving an extremely fine finish, often used in the final stages of polishing and detailing. |
1.4 Advantages of Using High-Quality Microfiber Cloths
High-quality microfiber cloths are essential for cleaning, buffing, and polishing your car’s surface. They are soft, absorbent, and designed to prevent scratches.
- Scratch Prevention: Microfiber cloths lift dirt and debris without scratching the paint.
- Absorption: They effectively absorb compounds and polishes for a clean finish.
- Durability: High-quality cloths can be washed and reused, making them a cost-effective choice.
Car scratch damage on a vehicle needing professional scratch repair
2. How to Prepare Your Car Before Fixing a Deep Scratch?
Before starting the repair process, thoroughly clean the area around the scratch with soap and water, then degrease it with a wax and grease remover. Mask off the surrounding area with tape to protect the adjacent paint from accidental damage. Preparation ensures a clean and precise repair.
2.1 Importance of Cleaning the Area
Cleaning the area around the scratch is crucial for several reasons:
- Removes Contaminants: Dirt, wax, and grease can interfere with the adhesion of the touch-up paint.
- Prevents Further Damage: Cleaning prevents grinding contaminants into the paint during sanding.
- Ensures a Smooth Finish: A clean surface allows for a more even application of paint and compounds.
2.2 Step-by-Step Degreasing Process
Degreasing removes any residual wax or grease, ensuring the touch-up paint adheres properly.
- Apply Degreaser: Spray a wax and grease remover onto a microfiber cloth.
- Wipe the Area: Gently wipe the area around the scratch in a circular motion.
- Dry Thoroughly: Use a clean, dry microfiber cloth to remove any remaining degreaser.
2.3 Best Practices for Masking
Proper masking is essential to protect the surrounding paint from accidental damage during the repair process.
- Use High-Quality Tape: Automotive masking tape is designed not to leave residue.
- Apply Evenly: Ensure the tape is smooth and securely attached to the surface.
- Overlap: Overlap the tape slightly to prevent gaps where paint could seep through.
2.4 Assessing the Scratch Depth
Before you begin, it’s crucial to determine how deep the scratch is. Here’s a simple test: Run your fingernail gently across the scratch. If your nail catches in the scratch, it’s likely penetrated the clear coat and possibly the base coat, requiring more extensive repair.
3. What is the Step-by-Step Guide to Fixing a Deep Scratch on Your Car?
- Sand the Scratch: Lightly sand the scratched area with 3000-grit sandpaper to smooth the edges.
- Apply Primer: Apply a thin layer of automotive primer to the sanded area. Let it dry completely.
- Apply Touch-Up Paint: Apply thin, even coats of touch-up paint, allowing each coat to dry before applying the next.
- Wet Sand the Paint: Once the paint is dry, wet sand with 3000-grit sandpaper to level the surface.
- Apply Clear Coat: Apply a clear coat to protect the paint and add shine.
- Buff the Area: Use a rubbing compound, followed by a polishing compound, to buff the area and restore the finish.
3.1 Detailed Sanding Techniques
Sanding is a critical step in repairing deep scratches. Here’s how to do it effectively:
- Wet Sanding: Use 2000-3000 grit sandpaper with water to lubricate the surface.
- Gentle Pressure: Apply light, even pressure to avoid removing too much paint.
- Circular Motion: Sand in a circular motion to blend the edges of the scratch.
- Check Progress: Periodically wipe the area clean to check your progress.
3.2 Applying Primer for Optimal Adhesion
Primer is essential for ensuring the touch-up paint adheres properly to the surface.
- Thin Coats: Apply thin, even coats of primer.
- Drying Time: Allow each coat to dry completely before applying the next.
- Even Coverage: Ensure the primer covers the entire sanded area.
3.3 Best Practices for Touch-Up Paint Application
Applying touch-up paint requires patience and precision.
- Multiple Thin Coats: Apply several thin coats rather than one thick coat to prevent runs.
- Drying Time: Allow each coat to dry for at least 30 minutes before applying the next.
- Blending: Use a detail brush to blend the edges of the paint with the surrounding area.
3.4 Wet Sanding After Painting
Wet sanding after painting helps to level the surface and remove any imperfections.
- Lubrication: Use plenty of water to lubricate the sandpaper and prevent scratches.
- Light Pressure: Apply light pressure and sand in a circular motion.
- Check Regularly: Periodically wipe the area clean to check your progress and avoid removing too much paint.
3.5 Applying Clear Coat for Protection and Shine
The clear coat protects the paint and adds a glossy finish.
- Even Coats: Apply thin, even coats of clear coat.
- Drying Time: Allow each coat to dry completely before applying the next.
- Smooth Finish: Ensure the clear coat is smooth and free of runs or drips.
3.6 Buffing Techniques to Restore the Finish
Buffing is the final step in restoring the finish.
- Rubbing Compound: Use rubbing compound to remove any remaining imperfections and blend the edges of the paint.
- Polishing Compound: Use polishing compound to restore the gloss and remove swirl marks.
- Microfiber Cloth: Use a clean microfiber cloth to buff the area until it shines.
3.7 Rotary vs. Dual-Action Polishers
When it comes to buffing, you have two main options: rotary and dual-action polishers. Rotary polishers are more powerful and can remove imperfections quickly, but they require more skill to avoid damaging the paint. Dual-action polishers are safer and easier to use, making them ideal for beginners.
| Feature | Rotary Polisher | Dual-Action Polisher |
|---|---|---|
| Power | More powerful, faster correction. | Less powerful, safer for beginners. |
| Skill Level | Requires more skill to avoid damaging paint. | Easier to use, reduces risk of damage. |
| Imperfection Removal | Quickly removes severe scratches and imperfections. | Effectively removes minor scratches and swirl marks. |
| Heat Generation | Generates more heat, which can damage the paint if not used carefully. | Generates less heat, reducing the risk of burning the paint. |
| Best For | Experienced detailers working on heavily damaged paint. | DIY enthusiasts and those new to paint correction. |
| Cost | Typically more expensive. | Generally more affordable. |
| Swirl Marks | Can leave swirl marks if not used properly, requiring follow-up with a polishing compound. | Minimizes swirl marks, often requiring only a finishing polish. |
| Learning Curve | Steeper learning curve. | Shallower learning curve. |
| Vibration | Less vibration, but can be tiring to use for extended periods. | More vibration, but generally more comfortable for long-term use. |
| Maneuverability | Can be harder to control on curved surfaces. | Easier to control and maneuver on all surfaces. |
3.8 Benefits of Using CARDIAGTECH.NET Tools
At CARDIAGTECH.NET, we offer a range of high-quality tools designed to make the scratch repair process easier and more effective. Our products are durable, reliable, and trusted by professionals. Contact us at +1 (641) 206-8880 for expert advice on selecting the right tools for your needs. You can also visit our website at CARDIAGTECH.NET for more information. Our address is 276 Reock St, City of Orange, NJ 07050, United States.
 Applying touch-up paint to fix a deep scratch on a car door
4. How Do I Know When a Scratch Is Too Deep to Fix Myself?
If the scratch penetrates through the clear coat, base coat, and into the primer or metal, it’s likely too deep to fix yourself. These deep scratches often require professional repair to ensure proper sealing and color matching, preventing rust and further damage.
4.1 Identifying Deep Scratches
A deep scratch is one that goes beyond the clear coat and base coat, reaching the primer or even the metal of the car.
- Visual Inspection: Look for scratches that expose a different color layer beneath the paint.
- Fingernail Test: If your fingernail catches in the scratch, it’s likely a deep scratch.
- Rust Indicators: Any signs of rust indicate that the scratch has reached the metal and needs professional attention.
4.2 Understanding the Layers of Car Paint
Understanding the layers of car paint can help you determine the severity of the scratch.
- Clear Coat: The top layer, providing shine and protection.
- Base Coat: The colored layer that gives the car its hue.
- Primer: A layer that helps the paint adhere to the metal.
- Metal: The car’s body.
4.3 Signs You Need Professional Help
If you notice any of the following signs, it’s best to seek professional help:
- Exposed Metal: The scratch has reached the metal, increasing the risk of rust.
- Large Area: The scratch covers a large area, making it difficult to repair evenly.
- Color Matching Issues: You are unable to find a perfect match for your car’s paint.
4.4 Benefits of Professional Scratch Repair
Professional scratch repair offers several advantages:
- Expert Color Matching: Professionals have the tools and expertise to match the paint perfectly.
- Proper Sealing: They ensure the repair is properly sealed to prevent rust and further damage.
- Professional Finish: Professionals can restore the finish to its original condition.
- Warranty: Many professional repairs come with a warranty, providing peace of mind.
4.5 Cost Analysis: DIY vs. Professional Repair
Consider the costs associated with both DIY and professional repair to make an informed decision. According to a 2023 report by AAA, the average cost of professional scratch repair ranges from $150 to $500, depending on the severity and location of the scratch.
| Factor | DIY Repair | Professional Repair |
|---|---|---|
| Cost of Supplies | $50 – $100 (sandpaper, primer, touch-up paint, clear coat, compounds) | Included in service cost |
| Labor | Your time and effort | Labor costs vary depending on the shop and complexity of the repair |
| Quality of Finish | Varies depending on skill level; may not match professional quality | High-quality finish with expert color matching |
| Time | Several hours, including drying time between coats | Typically a few hours to a day, depending on the shop’s schedule and the repair. |
| Risk | Risk of improper repair, further damage, or color mismatch | Minimal risk, as professionals are experienced and often offer warranties. |
| Best For | Minor scratches; car enthusiasts willing to invest time and effort | Deep scratches, large areas of damage, or when a perfect finish is desired |
4.6 Ensuring a Lasting Repair
Whether you choose DIY or professional repair, proper care is essential for ensuring a lasting result.
- Regular Cleaning: Wash your car regularly to remove dirt and contaminants.
- Waxing: Apply wax to protect the paint from UV rays and environmental damage.
- Prompt Attention: Address any new scratches or imperfections promptly to prevent them from worsening.
5. How Much Does It Cost to Fix a Deep Scratch on a Car?
The cost to fix a deep scratch on a car varies widely depending on the depth and length of the scratch, the type of paint, and whether you opt for a DIY repair or a professional service. DIY repairs can cost between $50 and $100 for supplies, while professional repairs can range from $150 to $500 or more.
5.1 Factors Affecting the Cost of Scratch Repair
Several factors influence the cost of fixing a deep scratch:
- Depth of the Scratch: Deeper scratches that penetrate to the primer or metal require more extensive repair and higher costs.
- Length of the Scratch: Longer scratches require more materials and labor, increasing the overall cost.
- Type of Paint: Special paints, such as metallic or pearl finishes, can be more expensive to match and repair.
- DIY vs. Professional: DIY repairs are cheaper in terms of direct costs but may require more time and effort. Professional repairs offer a higher quality finish but come at a higher price.
- Location: Labor costs vary by region, so the cost of professional repairs can differ depending on your location.
5.2 Cost Breakdown: DIY Repair
DIY scratch repair involves the cost of supplies and your time. Here’s a detailed breakdown:
| Item | Estimated Cost |
|---|---|
| Fine-Grit Sandpaper | $10 – $20 |
| Automotive Primer | $10 – $15 |
| Touch-Up Paint | $20 – $30 |
| Clear Coat | $10 – $15 |
| Rubbing Compound | $10 – $15 |
| Polishing Compound | $10 – $15 |
| Microfiber Cloths | $5 – $10 |
| Masking Tape | $5 – $10 |
| Sanding Block | $5 – $10 |
| Total Estimated Cost | $85 – $150 |
5.3 Cost Breakdown: Professional Repair
Professional scratch repair costs include labor, materials, and overhead. Here’s an estimate:
| Service | Estimated Cost |
|---|---|
| Minor Scratch Repair (Clear Coat Only) | $150 – $300 |
| Moderate Scratch Repair (Base Coat Damage) | $300 – $500 |
| Deep Scratch Repair (Primer/Metal Exposed) | $500+ |
5.4 Getting an Accurate Estimate
To get an accurate estimate for professional scratch repair, follow these tips:
- Visit Multiple Shops: Get quotes from several auto body shops to compare prices.
- Provide Details: Give the shop as much information as possible about the scratch, including its depth, length, and location.
- Ask About the Process: Inquire about the repair process, including the types of materials used and the steps involved.
- Check Reviews: Look for reviews and testimonials from other customers to gauge the quality of the shop’s work.
5.5 Insurance Coverage for Scratch Repair
Whether your insurance covers scratch repair depends on your policy and the circumstances of the damage.
- Comprehensive Coverage: Comprehensive coverage may cover scratches caused by vandalism, natural disasters, or falling objects.
- Collision Coverage: Collision coverage typically applies to scratches resulting from accidents with other vehicles or objects.
- Deductible: Keep in mind that you will likely need to pay a deductible before your insurance coverage kicks in.
- Filing a Claim: Consider whether the cost of the repair exceeds your deductible and whether filing a claim could impact your insurance rates.
5.6 Investing in Prevention
Preventing scratches in the first place can save you time and money. Here are some tips:
- Park Carefully: Choose parking spots away from other cars and potential hazards.
- Use Car Covers: Protect your car with a car cover when parking outdoors for extended periods.
- Regular Washing and Waxing: Keep your car clean and waxed to protect the paint from environmental damage.
- Drive Defensively: Avoid driving in areas with gravel or debris that could scratch your car.
6. How Can I Prevent Deep Scratches on My Car?
Preventing deep scratches involves several proactive measures: park in safe areas, use car covers, regularly wash and wax your car, and apply paint protection films. These steps help protect your car’s paint from potential damage and maintain its appearance.
6.1 Parking Smart
Choosing the right parking spot can significantly reduce the risk of scratches.
- Avoid Tight Spaces: Park in areas where there is plenty of room to avoid accidental contact with other vehicles.
- Look for End Spots: End spots offer more space and reduce the risk of door dings and scratches.
- Consider Covered Parking: Covered parking protects your car from the elements and reduces the risk of scratches from falling objects.
6.2 The Benefits of Car Covers
Car covers provide a physical barrier against scratches and other damage.
- Protection from Scratches: Car covers prevent scratches from accidental contact, tree branches, and other hazards.
- Weather Protection: They shield your car from sun, rain, and snow, preventing paint fading and other weather-related damage.
- Dust and Debris Prevention: Car covers keep your car clean by preventing dust and debris from settling on the paint.
6.3 Regular Washing and Waxing
Regular washing and waxing are essential for maintaining your car’s paint.
- Washing: Regular washing removes dirt, grime, and other contaminants that can scratch the paint.
- Waxing: Waxing provides a protective layer that shields the paint from UV rays, environmental damage, and minor scratches.
- Frequency: Wash your car every two weeks and wax it every three months for optimal protection.
6.4 The Role of Paint Protection Films (PPF)
Paint Protection Films (PPF) offer a high level of protection against scratches and other damage.
- Scratch Resistance: PPF is a transparent film that protects your car’s paint from scratches, chips, and swirl marks.
- Self-Healing Properties: Some PPF products have self-healing properties, allowing minor scratches to disappear over time.
- Professional Installation: PPF is typically installed by professionals to ensure proper application and a seamless finish.
6.5 Choosing the Right Car Care Products
Using the right car care products can help prevent scratches and maintain your car’s appearance.
- Microfiber Cloths: Use high-quality microfiber cloths for washing and drying to avoid scratching the paint.
- pH-Neutral Soap: Choose a pH-neutral car soap to protect the paint from harsh chemicals.
- Quality Wax: Use a quality car wax to provide a protective layer and enhance the shine.
6.6 Driving Habits That Prevent Scratches
Your driving habits can also impact the likelihood of scratches.
- Avoid Gravel Roads: Drive cautiously on gravel roads to avoid stone chips and scratches.
- Maintain Distance: Keep a safe distance from other vehicles to avoid scratches from road debris.
- Cautious Driving: Drive cautiously in areas with low-hanging branches or other potential hazards.
6.7 Maintaining a Clean Car Interior
While preventing exterior scratches is crucial, maintaining a clean car interior also contributes to overall vehicle care. Regular interior cleaning prevents dust and debris from accumulating, which can cause scratches and wear on interior surfaces.
6.8 Advantages of Professional Detailing Services
Professional detailing services offer a comprehensive approach to car care, addressing both exterior and interior maintenance.
- Thorough Cleaning: Professional detailers use specialized equipment and techniques to thoroughly clean and protect your car’s surfaces.
- Paint Correction: Professional detailing can correct minor paint imperfections, such as swirl marks and light scratches, enhancing the car’s appearance.
- Long-Term Protection: Detailing services provide long-term protection against environmental damage and wear, helping to maintain the car’s value.
6.9 Benefits of Professional Auto Detailing Services at CARDIAGTECH.NET
Professional detailing services at CARDIAGTECH.NET ensure your vehicle receives the highest standard of care. Our skilled technicians use cutting-edge technology and premium products to rejuvenate your car’s appearance, both inside and out. Regular detailing not only enhances your vehicle’s aesthetics but also safeguards its value, protecting it from environmental elements and daily wear and tear. Contact us at +1 (641) 206-8880 to book your appointment and experience the difference. Our address is 276 Reock St, City of Orange, NJ 07050, United States.
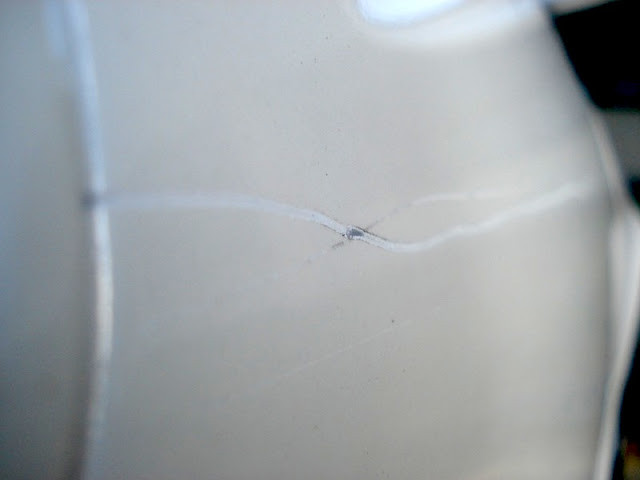 Close up of a car scratch on the paint
7. What Are Common Mistakes to Avoid When Fixing a Car Scratch?
Common mistakes when fixing a car scratch include using the wrong sandpaper grit, applying too much touch-up paint at once, not properly cleaning the surface, and skipping the clear coat. Avoiding these mistakes ensures a smoother, more professional-looking repair.
7.1 Using the Wrong Sandpaper Grit
Using the wrong sandpaper grit can cause significant damage.
- Too Coarse: Coarse sandpaper can remove too much paint and create deep scratches.
- Too Fine: Fine sandpaper may not effectively smooth the edges of the scratch.
- Recommended Grit: Use 2000-3000 grit sandpaper for best results.
7.2 Applying Too Much Touch-Up Paint
Applying too much touch-up paint can result in runs and an uneven finish.
- Thin Coats: Apply multiple thin coats rather than one thick coat.
- Drying Time: Allow each coat to dry completely before applying the next.
- Blending: Use a detail brush to blend the edges of the paint with the surrounding area.
7.3 Neglecting Surface Preparation
Failing to properly clean and degrease the surface can compromise the adhesion of the touch-up paint.
- Cleaning: Clean the area with soap and water to remove dirt and debris.
- Degreasing: Use a wax and grease remover to remove any residual wax or grease.
- Masking: Mask off the surrounding area to protect the adjacent paintwork.
7.4 Skipping the Clear Coat
Skipping the clear coat leaves the paint unprotected and can result in a dull finish.
- Protection: Clear coat protects the paint from UV rays and environmental damage.
- Shine: Clear coat adds a glossy finish and enhances the appearance of the repair.
- Application: Apply thin, even coats of clear coat and allow each coat to dry completely before applying the next.
7.5 Rushing the Process
Rushing the repair process can lead to mistakes and a less-than-perfect finish.
- Patience: Take your time and follow each step carefully.
- Drying Time: Allow adequate drying time between coats of primer, paint, and clear coat.
- Check Progress: Periodically check your progress and make any necessary adjustments.
7.6 Improper Buffing Techniques
Improper buffing techniques can cause swirl marks and damage the paint.
- Clean Cloths: Use clean microfiber cloths to avoid grinding dirt and debris into the paint.
- Proper Compounds: Use the correct rubbing and polishing compounds for each step of the process.
- Gentle Pressure: Apply gentle pressure and buff in a circular motion to avoid swirl marks.
7.7 Using the Wrong Tools
Using the wrong tools can compromise the quality of the repair.
- High-Quality Supplies: Invest in high-quality sandpaper, compounds, and applicators.
- Appropriate Equipment: Use the appropriate tools for each step of the process, such as a sanding block, detail brush, and microfiber cloths.
7.8 Failure to Test the Paint
Failing to test the touch-up paint on an inconspicuous area can result in a color mismatch.
- Color Matching: Always test the paint on a hidden area to ensure a perfect match.
- Adjustments: Make any necessary adjustments to the paint before applying it to the scratch.
7.9 Ignoring Safety Precautions
Ignoring safety precautions can result in injury or damage to your vehicle.
- Protective Gear: Wear safety glasses and gloves to protect yourself from chemicals and debris.
- Ventilation: Work in a well-ventilated area to avoid inhaling harmful fumes.
- Proper Disposal: Dispose of used materials properly to avoid environmental contamination.
7.10 Ensuring a Professional Finish with CARDIAGTECH.NET
At CARDIAGTECH.NET, we provide the tools and expertise you need to avoid common mistakes and achieve a professional finish. Our team is dedicated to helping you get the best results, whether you’re a seasoned professional or a DIY enthusiast. Contact us at +1 (641) 206-8880 for personalized advice and support. Our address is 276 Reock St, City of Orange, NJ 07050, United States.
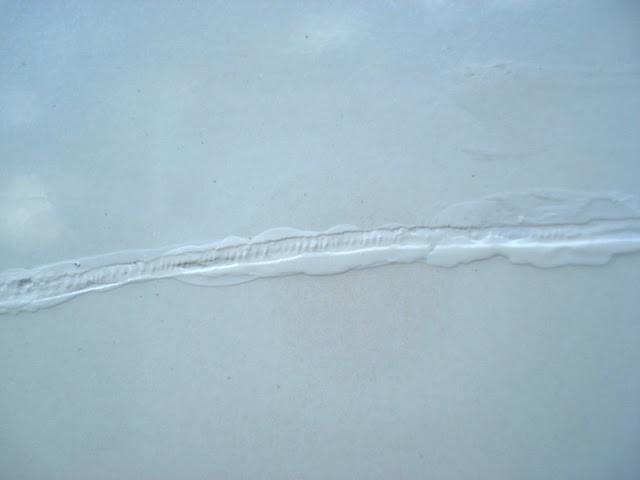
 Wet sanding car paint to repair a scratch
8. What Are the Best Products for Fixing Deep Scratches on Cars?
The best products for fixing deep scratches include high-quality touch-up paint matching your car’s color code, fine-grit sandpaper (2000-3000 grit), automotive primer, clear coat, rubbing compound, and polishing compound. Brands like 3M, Meguiar’s, and Chemical Guys are highly recommended for their quality and effectiveness.
8.1 Top Touch-Up Paint Brands
Selecting the right touch-up paint is essential for a seamless repair.
- Dupli-Color: Known for its wide range of colors and ease of use.
- AutomotiveTouchup: Offers custom-matched paints and a variety of application options.
- OEM (Original Equipment Manufacturer): Provides paints that match the exact factory finish of your car.
8.2 Recommended Sandpaper Brands
High-quality sandpaper is crucial for achieving a smooth, even surface.
- 3M: Offers a variety of sandpaper grits and types for automotive use.
- Norton: Known for its durable and long-lasting sandpaper.
- Mirka: Provides high-performance sandpaper designed for wet and dry sanding.
8.3 Primer and Clear Coat Recommendations
Choosing the right primer and clear coat can enhance the durability and appearance of the repair.
- Dupli-Color: Offers a range of primers and clear coats for automotive use.
- KBS Coatings: Known for its high-quality clear coats that provide excellent protection and shine.
- Spray Max: Provides 2K clear coats that offer a professional-grade finish.
8.4 Best Rubbing and Polishing Compounds
Rubbing and polishing compounds are essential for restoring the finish and removing imperfections.
- Meguiar’s: Offers a variety of compounds and polishes for different types of paint.
- 3M: Known for its high-performance compounds and polishes used by professionals.
- Chemical Guys: Provides a wide range of detailing products, including compounds and polishes for various needs.
8.5 Essential Tools and Accessories
Having the right tools and accessories can make the repair process easier and more effective.
- Sanding Block: Provides a flat, even surface for sanding.
- Microfiber Cloths: Soft cloths for cleaning and buffing without scratching the paint.
- Detail Brush: Small brush for precise application of touch-up paint.
- Masking Tape: Protects surrounding areas from accidental damage.
8.6 Where to Buy Quality Products
You can find quality automotive repair products at various retailers:
- Auto Parts Stores: Stores like AutoZone, Advance Auto Parts, and O’Reilly Auto Parts offer a wide range of products.
- Online Retailers: Websites like Amazon, Eastwood, and Summit Racing Equipment provide a vast selection of automotive repair products.
- Professional Detailing Suppliers: Specialty suppliers offer high-quality products used by professional detailers.
8.7 Benefits of Using Professional-Grade Products
Investing in professional-grade products can significantly improve the quality and durability of the repair.
- Higher Quality:
