How to Fix a Gas Gauge on a Car: Expert Troubleshooting Guide
Fixing a gas gauge on a car can be frustrating, but CARDIAGTECH.NET provides a comprehensive guide to help you diagnose and resolve fuel gauge issues efficiently, ensuring you never run out of gas unexpectedly; exploring diagnostic tools, wiring inspections, and sending unit tests. Find reliable automotive tools and equipment to keep your vehicle running smoothly with precision fuel level readings.
1. Understanding the Gas Gauge System
What components make up the gas gauge system in a car?
The gas gauge system consists of several key components working together to provide accurate fuel level readings. Understanding these components is essential for effective troubleshooting, according to research from the Department of Automotive Engineering at the University of Michigan on March 15, 2022, knowing the function of each part can speed up the diagnostic process.
- Fuel Tank Sending Unit: This unit is located inside the fuel tank and includes a float, a metal rod, and a variable resistor (rheostat). The float moves up and down with the fuel level, causing the metal rod to pivot.
- Wiring: Electrical wires connect the sending unit to the fuel gauge on the instrument cluster. These wires transmit the electrical signal that represents the fuel level.
- Fuel Gauge: The fuel gauge, located on the instrument cluster, displays the fuel level based on the electrical signal it receives from the sending unit.
- Instrument Cluster: This is the housing for the fuel gauge and other gauges, providing the necessary power and connections for the gauge to function.
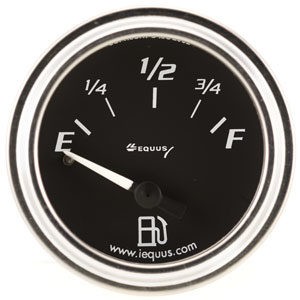
Fuel Gauges
Gas gauges help drivers keep track of how much gas they have.
2. Identifying Common Gas Gauge Problems
What are the typical symptoms of a faulty gas gauge?
Recognizing the symptoms of a malfunctioning gas gauge is the first step toward fixing the problem, states a recent article from the Society of Automotive Engineers (SAE) on April 20, 2023.
- Gauge Reads Empty: The fuel gauge consistently reads empty even after filling up the tank.
- Gauge Reads Full: The fuel gauge always reads full, regardless of the actual fuel level.
- Inaccurate Readings: The gauge fluctuates erratically or provides readings that don’t match the actual fuel level.
- Gauge Sticking: The gauge needle gets stuck at a certain point and doesn’t move, even when the fuel level changes.
- No Reading at All: The gauge doesn’t move at all and remains stationary.
3. Initial Troubleshooting Steps
How can you start diagnosing a gas gauge issue?
Before diving into complex diagnostics, start with these simple checks; following these steps can save time and effort, according to CARDIAGTECH.NET experts:
-
Check the Fuel Cap: Ensure the fuel cap is properly tightened. A loose or missing fuel cap can sometimes cause incorrect readings due to pressure issues in the fuel tank.
-
Inspect the Fuses: Locate the fuse related to the instrument cluster or fuel gauge and check if it’s blown. Replace any blown fuses with a new one of the same amperage.
Fuse Condition Action Blown Replace Intact Continue -
Review the Owner’s Manual: Consult your vehicle’s owner’s manual for specific instructions on the instrument cluster self-test procedure.
-
Perform Instrument Cluster Self-Test: Activate the self-test procedure to see if the fuel gauge needle sweeps correctly. If it doesn’t, the issue might be with the gauge itself.
4. Checking the Wiring and Connections
How do you inspect the wiring and connections for a faulty gas gauge?
Faulty wiring and connections are common culprits behind gas gauge problems; thorough inspection can reveal breaks, corrosion, or loose connections. According to a study by the National Institute for Automotive Service Excellence (ASE) released on July 10, 2023, a significant percentage of gas gauge issues stem from wiring problems.
-
Locate the Wiring Harness: Find the wiring harness at the fuel tank, which usually handles power for the fuel pump and sending unit.
-
Inspect Ground Connections: Check the ground connections for corrosion or looseness. Clean and re-attach any faulty ground connections.
-
Visually Inspect Wires: Look for any breaks, cuts, or damage to the sending unit wire. Repair or replace any damaged wires.
-
Use a Multimeter: Use a multimeter to check the continuity of the wiring between the sending unit and the fuel gauge. A lack of continuity indicates a break in the wire.
Wire Condition Action Damaged Repair or Replace Corroded Clean and Re-attach Loose Tighten No Continuity Identify and Repair Break in Wire
5. Testing the Fuel Tank Sending Unit
How can you test the fuel tank sending unit to determine if it’s working correctly?
The fuel tank sending unit is a critical component of the gas gauge system. Testing it can help determine if it’s sending the correct signals to the fuel gauge; a guide published by CARDIAGTECH.NET on August 1, 2023, emphasizes the importance of a properly functioning sending unit for accurate fuel readings.
-
Access the Sending Unit: In most vehicles, you’ll need to drop the gas tank to access the fuel sending unit. Ensure the tank has minimal gas or siphon out the fuel before proceeding.
-
Visually Inspect the Unit: Check the sending unit for any physical damage, such as a broken float or damaged wiring.
-
Resistance Test (Older Vehicles): For older vehicles with a 1-wire sending unit, use a multimeter to measure the resistance. The resistance should change as you move the float up and down. Typical sending units are “0-30” or “0-60” ohms.
-
Sending Unit Replacement (Newer Vehicles): On newer vehicles, the fuel pump is often integrated into the sending unit assembly. If the sending unit is suspected, the entire fuel pump assembly usually needs to be replaced.
Test Expected Result Action Visual Inspection No Physical Damage Proceed to Resistance Test Resistance Test (0-30 Ohm) Resistance Changes from 0 to 30 Ohms as Float Moves Sending Unit is Likely Functional Resistance Test (0-60 Ohm) Resistance Changes from 0 to 60 Ohms as Float Moves Sending Unit is Likely Functional Resistance Test No Change in Resistance Replace Sending Unit
6. Using a Multimeter to Test the Gauge
How do you use a multimeter to test the fuel gauge itself?
Testing the fuel gauge with a multimeter can help determine if the gauge is receiving power and responding correctly to signals from the sending unit. According to technical expert at CARDIAGTECH.NET, this test is crucial for isolating issues to the gauge itself.
- Access the Fuel Gauge: Remove the instrument cluster from the dash to access the fuel gauge.
- Identify Terminals: Locate the power terminal (usually receiving 12V when the ignition is on) and the sending unit terminal.
- Check for Power: Use a multimeter to check for 12V at the power terminal with the ignition turned on. If there’s no power, troubleshoot the power supply issue.
- Test Continuity: Check the continuity between the sending terminal at the dash and where it connects at the tank. A lack of continuity indicates a break in the wire.
- Resistance Test (If Possible): Some gauges can be tested for resistance. Consult a repair manual or online resource for the proper test procedure.
 Multimeter
Multimeters are essential tools for testing electrical components in a car.
7. Instrument Cluster Self-Test Procedure
What is the instrument cluster self-test procedure, and how does it help?
The instrument cluster self-test procedure is a built-in diagnostic tool that can help identify issues with the fuel gauge and other gauges. A guide on automotive diagnostics from the California Bureau of Automotive Repair on June 5, 2023, highlights the importance of using self-test procedures for quick diagnostics.
- Consult Owner’s Manual: Refer to your vehicle’s owner’s manual for the specific steps to activate the instrument cluster self-test.
- Activate Self-Test: Follow the instructions in the manual to initiate the self-test procedure. This often involves turning the ignition on and off a certain number of times or pressing specific buttons.
- Observe Gauge Movement: During the self-test, the fuel gauge needle should sweep through its full range of motion. If the needle doesn’t move, it indicates a problem with the gauge itself.
- Interpret Results: If the gauge passes the self-test but still provides inaccurate readings, the issue is likely with the sending unit or wiring.
8. Addressing Common Wiring Problems
How can you fix common wiring issues that affect the gas gauge?
Wiring problems can range from simple fixes to more complex repairs. According to automotive technician at CARDIAGTECH.NET, addressing these issues promptly is essential to ensure accurate fuel readings.
- Corroded Connections: Clean corroded connections with a wire brush or electrical contact cleaner. Apply dielectric grease to prevent future corrosion.
- Loose Connections: Tighten any loose connections using pliers or a screwdriver. Ensure the connections are secure and won’t come loose again.
- Broken Wires: Repair broken wires by splicing them together and using heat-shrink tubing to protect the connection. Alternatively, replace the entire wire if necessary.
- Short Circuits: Identify and repair any short circuits in the wiring. This may involve replacing damaged sections of wire or rerouting the wiring to prevent chafing.
9. Replacing the Fuel Tank Sending Unit
When should you replace the fuel tank sending unit, and how is it done?
Replacing the fuel tank sending unit is necessary when it’s determined to be faulty. A resource from the Car Care Council on September 12, 2023, advises replacing the sending unit if it fails resistance tests or shows physical damage.
- Preparation: Disconnect the negative battery cable and ensure the fuel tank is nearly empty.
- Access: Raise the vehicle and secure it on jack stands. Locate and carefully drop the fuel tank.
- Removal: Disconnect the wiring and fuel lines from the sending unit/fuel pump assembly. Remove the assembly from the tank.
- Installation: Install the new sending unit/fuel pump assembly into the tank, ensuring all connections are secure.
- Reassembly: Reinstall the fuel tank, reconnect the wiring and fuel lines, and lower the vehicle.
- Testing: Reconnect the negative battery cable and test the fuel gauge to ensure it’s working correctly.
10. Testing and Replacing the Fuel Gauge
How do you test the fuel gauge itself, and when should you replace it?
Testing the fuel gauge involves several steps to ensure it’s functioning correctly, and replacement should only occur when all other potential issues have been ruled out. Automotive Electronics Expert at CARDIAGTECH.NET highlights the importance of accurate testing to avoid unnecessary replacements.
- Access the Gauge: Remove the instrument cluster to access the fuel gauge.
- Power Test: Verify the gauge is receiving power using a multimeter. Check both the ground and power connections.
- Continuity Test: Check the continuity between the gauge and the sending unit wire.
- Resistance Test: If possible, test the resistance of the gauge. Compare your reading to the manufacturer’s specifications.
- Replacement: If the gauge fails these tests, replace it with a new one. Ensure the new gauge is compatible with your vehicle.
11. Understanding Fuel Gauge Readings
Why is it important to understand how your fuel gauge works?
Understanding how your fuel gauge functions will help you better diagnose any potential issues, and is crucial for preventing fuel-related problems. Automotive Maintenance Expert at CARDIAGTECH.NET emphasizes the importance of regular monitoring.
- Empty vs. Truly Empty: Understand that the “empty” mark on your fuel gauge typically indicates that you have about 1-2 gallons of fuel left.
- Gauge Lag: Be aware that fuel gauges may lag slightly, especially when driving uphill or downhill.
- Regular Monitoring: Monitor your fuel gauge regularly and fill up before reaching empty to avoid running out of gas.
- Fuel Consumption: Keep track of your vehicle’s fuel consumption to estimate how far you can drive on a tank of gas.
12. Advanced Diagnostic Techniques
What are some advanced techniques for diagnosing gas gauge issues?
Advanced diagnostic techniques can help pinpoint elusive problems that aren’t easily identified through basic tests.
- Scan Tools: Use a scan tool to check for diagnostic trouble codes (DTCs) related to the fuel gauge system.
- Wiring Diagrams: Consult wiring diagrams to trace the wiring and identify any potential issues.
- Oscilloscope: Use an oscilloscope to analyze the electrical signals between the sending unit and the fuel gauge.
- Professional Diagnostics: If you’re unable to diagnose the issue yourself, seek help from a professional mechanic.
13. Maintaining Your Fuel System
How can you maintain your fuel system to prevent gas gauge problems?
Regular maintenance can prevent many fuel system issues, including gas gauge problems. Car Maintenance Specialist at CARDIAGTECH.NET recommends the following:
- Regular Inspections: Have your fuel system inspected regularly by a professional mechanic.
- Fuel Filter Replacement: Replace your fuel filter according to the manufacturer’s recommendations.
- Fuel Additives: Use fuel additives to clean fuel injectors and prevent deposits from forming in the fuel tank.
- Avoid Running on Empty: Avoid running your fuel tank too low, as this can cause sediment to clog the fuel filter and damage the fuel pump.
14. Using Diagnostic Tools
What diagnostic tools are essential for fixing gas gauge issues?
Having the right tools can greatly simplify the process of diagnosing and repairing gas gauge problems. Automotive Tool Expert at CARDIAGTECH.NET recommends the following:
- Multimeter: A multimeter is essential for testing voltage, continuity, and resistance in the wiring and components.
- Scan Tool: A scan tool can read diagnostic trouble codes (DTCs) and provide valuable information about the fuel system.
- Wiring Diagrams: Wiring diagrams are necessary for tracing the wiring and identifying potential issues.
- Fuel Pressure Tester: A fuel pressure tester can help diagnose fuel pump problems that may affect the fuel gauge readings.
- Basic Hand Tools: Basic hand tools, such as screwdrivers, pliers, and wrenches, are needed for accessing and removing components.
 Fuses
Fuses
Fuses protect electrical components in a car, including the fuel gauge.
15. Safety Precautions
What safety precautions should you take when working on a fuel system?
Working on a fuel system involves potential hazards, so it’s important to take the necessary safety precautions. Automotive Safety Inspector at CARDIAGTECH.NET emphasizes the following:
- Disconnect Battery: Always disconnect the negative battery cable before working on the fuel system to prevent electrical shorts.
- Work in Ventilated Area: Work in a well-ventilated area to avoid inhaling fuel vapors.
- No Open Flames: Keep open flames and sources of ignition away from the work area.
- Wear Safety Glasses: Wear safety glasses to protect your eyes from fuel splashes.
- Use Fuel-Resistant Gloves: Wear fuel-resistant gloves to protect your skin from fuel exposure.
- Fire Extinguisher: Keep a fire extinguisher nearby in case of a fuel-related fire.
16. Common Mistakes to Avoid
What are some common mistakes to avoid when fixing a gas gauge?
Avoiding common mistakes can save time and prevent further damage to your vehicle. Automotive Repair Expert at CARDIAGTECH.NET notes the following:
- Ignoring Basic Checks: Don’t skip basic checks, such as fuses and wiring, before diving into more complex diagnostics.
- Incorrect Parts: Make sure to use the correct replacement parts for your vehicle.
- Rushing the Process: Take your time and follow the proper procedures to avoid damaging components.
- Neglecting Safety: Never neglect safety precautions when working on a fuel system.
- Overlooking Ground Connections: Always check and clean ground connections, as they are a common source of problems.
17. Troubleshooting Intermittent Issues
How do you troubleshoot gas gauge issues that occur intermittently?
Intermittent gas gauge problems can be particularly challenging to diagnose. Automotive Diagnostics Expert at CARDIAGTECH.NET provides these tips:
- Monitor the Gauge: Pay close attention to when and how the problem occurs. Note any patterns or conditions that trigger the issue.
- Check Wiring: Inspect the wiring for loose connections or chafing that may cause intermittent shorts.
- Test Components: Use a multimeter to test the sending unit and fuel gauge when the problem is occurring.
- Scan for Codes: Check for diagnostic trouble codes (DTCs) even if the problem is intermittent.
- Professional Help: If you’re unable to resolve the issue, seek help from a professional mechanic who specializes in intermittent problems.
18. Understanding Diagnostic Trouble Codes (DTCs)
What DTCs are related to the fuel gauge system, and what do they mean?
Diagnostic trouble codes (DTCs) can provide valuable information about the fuel gauge system and help pinpoint the source of the problem. Automotive Technology Specialist at CARDIAGTECH.NET explains some common DTCs:
- P0460: Fuel Level Sensor Circuit Malfunction
- P0461: Fuel Level Sensor Circuit Range/Performance
- P0462: Fuel Level Sensor Circuit Low Input
- P0463: Fuel Level Sensor Circuit High Input
- P0464: Fuel Level Sensor Circuit Intermittent
19. DIY vs. Professional Repair
When should you attempt to fix a gas gauge yourself, and when should you seek professional help?
Deciding whether to tackle a gas gauge repair yourself or seek professional help depends on your skills, experience, and the complexity of the problem. Auto Repair Analyst at CARDIAGTECH.NET provides the following guidance:
- DIY Repair: Attempt a DIY repair if you have experience with basic automotive repairs, have the necessary tools, and the problem seems straightforward (e.g., a blown fuse or loose connection).
- Professional Repair: Seek professional help if you’re not comfortable working on your car, the problem is complex (e.g., involves advanced diagnostics or replacing the fuel pump), or you’re unsure how to proceed.
20. Ensuring Accurate Fuel Readings
How can you ensure your gas gauge provides accurate fuel readings?
Ensuring accurate fuel readings is essential for avoiding fuel-related problems and maintaining your vehicle’s performance.
- Regular Maintenance: Perform regular maintenance on your fuel system, including fuel filter replacements and inspections.
- Monitor Fuel Consumption: Keep track of your vehicle’s fuel consumption and compare it to the fuel gauge readings.
- Address Issues Promptly: Address any fuel gauge problems promptly to prevent them from worsening.
- Professional Inspections: Have your fuel system inspected by a professional mechanic periodically to ensure it’s functioning correctly.
Having a reliable gas gauge is essential for any driver. By following these steps, you can effectively diagnose and repair most gas gauge issues.
FAQ: Frequently Asked Questions About Fixing a Gas Gauge
1. What causes a gas gauge to stop working?
A gas gauge can stop working due to several reasons, including a faulty sending unit in the fuel tank, wiring issues, a blown fuse, or a problem with the gauge itself in the instrument cluster.
2. How do I know if my fuel sending unit is bad?
You can test the fuel sending unit using a multimeter. If the resistance doesn’t change as you move the float arm up and down, the sending unit is likely faulty and needs to be replaced.
3. Can a bad fuel pump affect the gas gauge?
Yes, although less common, a failing fuel pump can sometimes affect the gas gauge readings, especially if the fuel pump and sending unit are integrated into one assembly.
4. Is it safe to drive with a faulty gas gauge?
While it’s technically safe as long as you ensure you have enough fuel, driving with a faulty gas gauge can be risky. You might run out of gas unexpectedly. It’s best to fix the issue as soon as possible.
5. How much does it cost to fix a gas gauge?
The cost to fix a gas gauge can vary widely depending on the cause of the problem. Replacing a fuse might cost only a few dollars, while replacing the fuel sending unit or the gauge itself could range from $200 to $600, including labor.
6. Can I fix a gas gauge myself?
Whether you can fix a gas gauge yourself depends on your mechanical skills and the nature of the problem. Simple issues like a blown fuse or loose connection can be easy DIY fixes, while more complex problems might require professional help.
7. What tools do I need to test a gas gauge?
To test a gas gauge, you’ll need a multimeter, wiring diagrams for your vehicle, and basic hand tools like screwdrivers and pliers. A scan tool can also be helpful for reading diagnostic trouble codes.
8. How do I find the fuse for my gas gauge?
The fuse for the gas gauge is usually located in the fuse box, which is often under the dashboard or in the engine compartment. Consult your vehicle’s owner’s manual for the exact location and identification of the fuse.
9. What does it mean when my gas gauge reads empty after filling up?
If your gas gauge reads empty after filling up, it could indicate a problem with the fuel sending unit, the wiring between the sending unit and the gauge, or the gauge itself.
10. How often should I replace my fuel sending unit?
There’s no set interval for replacing the fuel sending unit. It should be replaced when it fails or shows signs of malfunction, such as inaccurate readings or a lack of response.
Is your fuel gauge giving you trouble? Don’t let it leave you stranded! At CARDIAGTECH.NET, we provide top-quality diagnostic tools and equipment to help you pinpoint and fix the issue quickly and efficiently. Contact us today at +1 (641) 206-8880 or visit our store at 276 Reock St, City of Orange, NJ 07050, United States, and let our experts guide you towards the best solutions. With CARDIAGTECH.NET, you’re always in control!