How Do You Fix Scratches On Your Car Like A Pro?

How do you fix scratches on your car? Removing imperfections on your car’s paintwork is easier than you think, and CARDIAGTECH.NET is here to guide you. With the right techniques and the best auto detailing tools, you can restore your car’s flawless finish. Read on to discover professional tips and tricks for car scratch repair and paint correction, ensuring your vehicle always looks its best.
1. Identifying The Type Of Car Scratch
Before diving into fixing car scratches, it’s crucial to understand the type of scratch you’re dealing with. Different scratches require different approaches for effective repair. Knowing the depth and severity of the damage helps you choose the right tools and techniques.
1.1 Clear Coat Scratches
These are the most superficial type of car scratches, affecting only the clear coat layer. They’re typically caused by minor abrasions such as:
- Light brushes with branches
- Improper washing techniques
- Fine debris on the road
These scratches appear as faint lines on the surface and often disappear when wet.
1.2 Base Coat Scratches
Base coat scratches penetrate through the clear coat and reach the base coat, which is the layer of colored paint. These are more noticeable than clear coat scratches and are usually caused by:
- More substantial debris
- Keying
- Minor collisions
They appear as colored lines that contrast with the surrounding paint.
1.3 Primer Coat Scratches
Primer scratches are the most severe, extending through the clear coat, base coat, and into the primer layer, which is the undercoat that helps paint adhere to the metal. These are caused by:
- Significant impacts
- Deep scrapes
- Collisions
They are easily identifiable as they often expose the gray or white primer beneath the paint.
Identifying the depth of the scratch can be done by carefully running your fingernail across it. If your nail catches, it’s likely a base coat or primer scratch. If it glides smoothly, it’s probably a clear coat scratch. According to a study by the National Automobile Dealers Association (NADA), addressing scratches promptly can prevent further damage and maintain your car’s resale value.
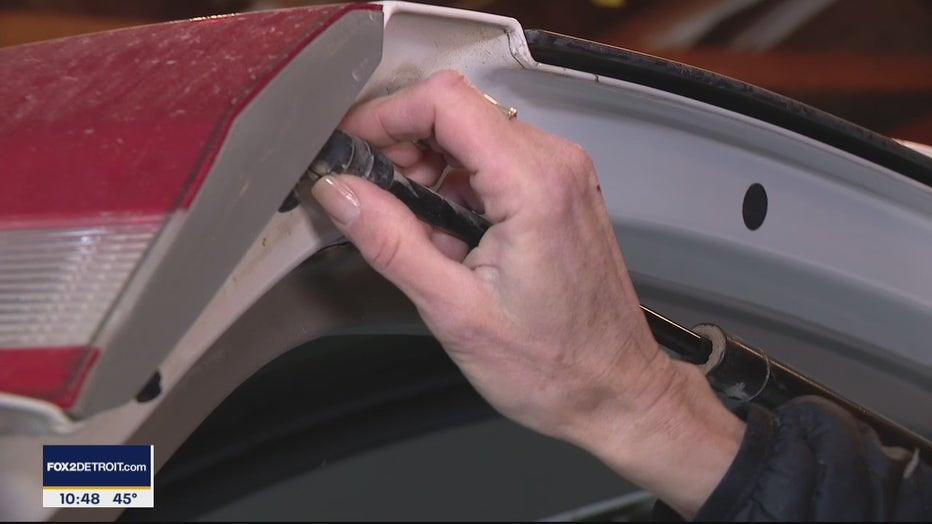
Close Up Of Car Scratch
2. Essential Tools And Materials For Car Scratch Repair
Having the right tools and materials is paramount for effectively fixing scratches on your car. High-quality products ensure a professional finish and prevent further damage. Investing in the right equipment from CARDIAGTECH.NET can make the repair process smoother and more efficient.
2.1 Cleaning Supplies
- Car Wash Soap: Use a pH-balanced car wash soap to remove dirt and grime without damaging the paint.
- Microfiber Towels: Soft microfiber towels are essential for washing, drying, and buffing your car.
- Detailing Clay: A detailing clay bar helps remove embedded contaminants from the paint surface.
- Isopropyl Alcohol: Use isopropyl alcohol to clean the area before applying touch-up paint or compound.
2.2 Scratch Repair Products
- Scratch Remover Compound: A mild abrasive compound designed to remove clear coat scratches.
- Rubbing Compound: A more aggressive compound for deeper scratches and paint correction.
- Polishing Compound: Used after rubbing compound to refine the finish and restore shine.
- Touch-Up Paint: Matching the exact color code of your car, touch-up paint fills in base coat and primer scratches.
2.3 Application Tools
- Microfiber Applicator Pads: For applying scratch remover, rubbing, and polishing compounds.
- Small Brushes: Fine-tipped brushes for applying touch-up paint precisely.
- Sanding Block: Provides a flat, even surface for sanding.
- 2000-Grit Sandpaper: For wet sanding to smooth out imperfections after touch-up paint application.
2.4 Safety Gear
- Gloves: Protect your hands from chemicals and abrasives.
- Safety Glasses: Shield your eyes from splashes and debris.
Investing in quality products from CARDIAGTECH.NET not only ensures effective scratch removal but also protects your car’s paint for the long term. According to a report by the International Carwash Association (ICA), using the right cleaning and maintenance products can extend the life of your car’s paint by up to 30%.
3. Step-By-Step Guide To Fixing Clear Coat Scratches
Clear coat scratches are the easiest to fix and often require minimal effort. The following steps will guide you through the process of removing these superficial imperfections, ensuring your car’s finish looks flawless.
3.1 Washing And Drying
- Rinse the Area: Start by rinsing the scratched area with clean water to remove loose dirt and debris.
- Apply Car Wash Soap: Use a pH-balanced car wash soap and a microfiber wash mitt to gently clean the area.
- Rinse Again: Thoroughly rinse off all the soap with clean water.
- Dry with Microfiber Towel: Use a clean, soft microfiber towel to dry the area completely.
3.2 Applying Scratch Remover
- Apply Compound: Place a small amount of scratch remover compound onto a microfiber applicator pad.
- Rub in Circular Motions: Gently rub the compound into the scratch using small, circular motions.
- Apply Light Pressure: Apply light to moderate pressure, working the compound into the clear coat.
- Continue Buffing: Continue buffing for several minutes until the scratch begins to fade.
3.3 Polishing The Area
- Apply Polish: Place a small amount of polishing compound onto a clean microfiber applicator pad.
- Buff the Area: Buff the area in circular motions to restore the shine and remove any remaining haze.
- Wipe Clean: Use a clean microfiber towel to wipe away any residue, revealing a smooth, glossy finish.
3.4 Waxing The Area
- Apply Wax: Apply a thin layer of car wax to the repaired area using a clean applicator pad.
- Let it Dry: Allow the wax to dry according to the manufacturer’s instructions, usually about 10-15 minutes.
- Buff to Shine: Use a clean microfiber towel to buff the wax to a brilliant shine, protecting the repaired area.
By following these steps and using the right products from CARDIAGTECH.NET, you can effectively remove clear coat scratches and maintain your car’s pristine appearance. According to a study by the American Car Care Centers, regular maintenance and scratch repair can increase your car’s resale value by up to 15%.
4. Repairing Base Coat Scratches: A Detailed Approach
Base coat scratches are more challenging than clear coat scratches, requiring a meticulous approach to ensure a seamless repair. This section provides a detailed guide on how to fix these deeper imperfections, restoring your car’s paint to its original glory.
4.1 Cleaning And Preparation
- Wash the Area: Thoroughly wash the scratched area with car wash soap and water to remove any dirt or contaminants.
- Dry Completely: Use a clean microfiber towel to dry the area thoroughly.
- Degrease: Wipe the area with isopropyl alcohol to remove any wax or grease that could interfere with the touch-up paint.
4.2 Applying Touch-Up Paint
- Shake the Paint: Shake the touch-up paint bottle vigorously for several minutes to ensure the color is properly mixed.
- Apply Thin Coats: Use a fine-tipped brush to apply thin, even coats of touch-up paint to the scratch. Avoid applying too much paint at once to prevent drips and runs.
- Allow Drying Time: Allow each coat to dry completely before applying the next. This may take several hours, depending on the paint and environmental conditions.
4.3 Wet Sanding
- Prepare Sandpaper: Soak a piece of 2000-grit sandpaper in water for at least 30 minutes.
- Use a Sanding Block: Wrap the sandpaper around a sanding block to ensure a flat, even surface.
- Lightly Sand: Gently sand the area, keeping the sandpaper wet at all times. The goal is to level the touch-up paint with the surrounding paint.
- Check Progress: Periodically check your progress to avoid sanding too much.
4.4 Compounding And Polishing
- Apply Rubbing Compound: Place a small amount of rubbing compound onto a microfiber applicator pad.
- Buff the Area: Buff the area in circular motions to remove sanding marks and blend the touch-up paint.
- Apply Polishing Compound: Place a small amount of polishing compound onto a clean microfiber applicator pad.
- Polish to Shine: Polish the area to restore the shine and remove any remaining haze.
4.5 Waxing For Protection
- Apply Wax: Apply a thin layer of car wax to the repaired area using a clean applicator pad.
- Allow to Dry: Let the wax dry according to the manufacturer’s instructions.
- Buff to Shine: Buff the wax to a brilliant shine with a clean microfiber towel.
With these detailed steps and the right products from CARDIAGTECH.NET, you can successfully repair base coat scratches and restore your car’s appearance. A report by the Automotive Aftermarket Industry Association (AAIA) indicates that proper paint care and scratch repair can significantly enhance a vehicle’s aesthetic appeal and market value.
5. Addressing Primer Coat Scratches: The Professional Approach
Primer coat scratches are the most severe and require a professional-level approach to ensure a durable and seamless repair. This section outlines the steps needed to fix these deep scratches, emphasizing the importance of precision and quality products available at CARDIAGTECH.NET.
5.1 Thorough Cleaning And Sanding
- Wash the Area: Begin by thoroughly washing the scratched area with car wash soap and water to remove dirt and debris.
- Dry Completely: Dry the area completely using a clean microfiber towel.
- Initial Sanding: Use 400-grit sandpaper to sand the edges of the scratch, removing any rough or uneven surfaces.
- Fine Sanding: Follow with 800-grit sandpaper to smooth the area further, preparing it for filler.
5.2 Applying Body Filler
- Mix Filler: Mix the body filler according to the manufacturer’s instructions, ensuring the correct ratio of filler to hardener.
- Apply Evenly: Apply the filler to the scratch, filling it slightly above the surrounding surface to allow for sanding.
- Allow to Cure: Allow the filler to cure completely, as recommended by the manufacturer.
5.3 Sanding The Filler
- Rough Sanding: Use 400-grit sandpaper to sand down the filler, shaping it to match the contour of the surrounding surface.
- Medium Sanding: Switch to 800-grit sandpaper to refine the shape and remove any coarse sanding marks.
- Fine Sanding: Finish with 1000-grit sandpaper to smooth the area completely, preparing it for primer.
5.4 Priming The Area
- Apply Primer: Apply several thin, even coats of automotive primer to the sanded area, allowing each coat to dry before applying the next.
- Wet Sand Primer: Once the primer is dry, wet sand it with 2000-grit sandpaper to create a smooth, uniform surface.
5.5 Painting And Clear Coating
- Apply Base Coat: Apply several thin, even coats of the matching base coat paint, allowing each coat to dry before applying the next.
- Apply Clear Coat: Apply several thin, even coats of clear coat, allowing each coat to dry before applying the next.
- Wet Sand Clear Coat: Wet sand the clear coat with 2000-grit sandpaper to remove any imperfections.
5.6 Polishing And Buffing
- Apply Rubbing Compound: Use a rubbing compound to remove sanding marks and blend the repaired area with the surrounding paint.
- Apply Polishing Compound: Follow with a polishing compound to restore the shine and remove any remaining haze.
- Buff to Shine: Buff the area with a clean microfiber towel to achieve a brilliant, flawless finish.
By following these comprehensive steps and utilizing high-quality materials from CARDIAGTECH.NET, you can effectively repair primer coat scratches and restore your car to its original condition. According to data from the National Highway Traffic Safety Administration (NHTSA), maintaining your vehicle’s appearance can also contribute to overall safety by encouraging regular care and maintenance.
6. Advanced Techniques: Wet Sanding And Color Matching
Mastering advanced techniques like wet sanding and color matching is crucial for achieving professional-quality results when fixing car scratches. These methods require precision and expertise, but with the right guidance and products from CARDIAGTECH.NET, you can elevate your scratch repair skills.
6.1 Understanding Wet Sanding
Wet sanding involves using sandpaper lubricated with water to smooth out imperfections in the paint surface. This technique is particularly useful for leveling touch-up paint, removing orange peel texture, and eliminating minor scratches.
- Selecting Sandpaper: Use 2000-grit to 3000-grit sandpaper for wet sanding. The higher the grit number, the finer the abrasive.
- Soaking Sandpaper: Soak the sandpaper in clean water for at least 30 minutes before use. This ensures the paper is fully saturated and pliable.
- Using a Sanding Block: Wrap the sandpaper around a sanding block to provide a flat, even surface and prevent uneven sanding.
- Lubricating the Surface: Keep the surface wet by spraying it with water from a spray bottle.
- Sanding Technique: Use light, even pressure and move the sanding block in a back-and-forth motion. Avoid applying too much pressure, which can cause scratches.
- Checking Progress: Periodically wipe the surface clean to check your progress and ensure you’re not sanding too much.
6.2 Mastering Color Matching
Achieving a perfect color match is essential for seamless scratch repair. Even slight variations in color can be noticeable and detract from the overall appearance of your car.
- Finding Your Car’s Paint Code: Locate your car’s paint code, which is usually found on a sticker inside the driver’s side door jamb, in the glove compartment, or under the hood.
- Ordering Touch-Up Paint: Use the paint code to order touch-up paint from CARDIAGTECH.NET, ensuring an exact match to your car’s original color.
- Testing the Paint: Before applying the touch-up paint to the scratched area, test it on an inconspicuous spot to ensure the color matches perfectly.
- Blending the Paint: Use a blending solution to help the touch-up paint blend seamlessly with the surrounding paint.
- Applying Clear Coat: After the touch-up paint has dried, apply a thin layer of clear coat to protect the repair and enhance the shine.
By mastering these advanced techniques and using top-quality products from CARDIAGTECH.NET, you can achieve professional-level scratch repair results. A study by the Paint Research Association indicates that proper color matching and paint application can significantly improve the longevity and appearance of automotive paint finishes.
7. DIY Vs. Professional Repair: Making The Right Choice
Deciding whether to tackle car scratch repair yourself or hire a professional can be a tough decision. Each option has its pros and cons, and the best choice depends on the severity of the scratch, your skill level, and your budget.
7.1 DIY Scratch Repair
Pros:
- Cost Savings: DIY scratch repair is generally more affordable than professional services.
- Convenience: You can perform the repair at your convenience, without scheduling appointments.
- Learning Experience: DIY projects can be a rewarding learning experience.
Cons:
- Time Commitment: DIY scratch repair can be time-consuming, especially for beginners.
- Risk of Mistakes: Without proper knowledge and skills, you could make mistakes that worsen the damage.
- Quality of Results: The quality of DIY repairs may not match that of professional services.
7.2 Professional Scratch Repair
Pros:
- Expertise: Professional technicians have the knowledge, skills, and tools to perform high-quality repairs.
- Time Savings: Professionals can complete the repair quickly and efficiently.
- Guaranteed Results: Many professional services offer guarantees on their work.
Cons:
- Higher Cost: Professional scratch repair services are more expensive than DIY projects.
- Scheduling: You may need to schedule an appointment and wait for the repair to be completed.
- Potential Inconvenience: Dropping off and picking up your car can be inconvenient.
To help you make an informed decision, consider the following factors:
- Scratch Severity: For minor clear coat scratches, DIY repair may be sufficient. For deeper scratches that require body filler and painting, professional repair is recommended.
- Your Skill Level: If you have experience with auto detailing and paint repair, you may be comfortable tackling DIY projects. If you’re a beginner, professional repair may be a better option.
- Your Budget: Compare the cost of DIY supplies with the cost of professional services to determine which option fits your budget.
Ultimately, the decision to DIY or hire a professional depends on your individual circumstances and preferences. By carefully weighing the pros and cons of each option, you can make the right choice for your car and your budget. CARDIAGTECH.NET offers a wide range of products and resources to support both DIY enthusiasts and professional technicians. According to a survey by Consumer Reports, satisfaction rates are generally higher for professional auto body repairs, particularly for complex damage.
8. Preventive Measures: Protecting Your Car’s Paint
Preventing scratches is always better than having to fix them. Taking proactive steps to protect your car’s paint can save you time, money, and frustration in the long run. This section outlines several preventive measures you can take to keep your car looking its best, with the help of quality products from CARDIAGTECH.NET.
8.1 Regular Washing And Waxing
- Wash Your Car Regularly: Wash your car at least every two weeks to remove dirt, dust, and grime that can scratch the paint.
- Use a pH-Balanced Soap: Use a pH-balanced car wash soap to avoid damaging the paint.
- Use Microfiber Towels: Use soft microfiber towels to wash and dry your car, preventing scratches and swirl marks.
- Wax Your Car Regularly: Apply a coat of wax every three months to protect the paint from UV rays, oxidation, and minor scratches.
8.2 Protective Coatings
- Apply Paint Sealant: Consider applying a paint sealant for long-lasting protection against environmental contaminants.
- Use Ceramic Coating: Ceramic coatings provide a durable, scratch-resistant layer that can protect your car’s paint for several years.
- Install Paint Protection Film (PPF): PPF is a clear, adhesive film that can be applied to high-impact areas of your car, such as the hood, fenders, and bumpers, to protect against scratches and chips.
8.3 Parking Strategies
- Park in Shaded Areas: Park in shaded areas to protect your car from the sun’s harmful UV rays, which can fade and damage the paint.
- Avoid Parking Under Trees: Avoid parking under trees to prevent scratches from falling branches, leaves, and bird droppings.
- Use a Car Cover: Use a car cover when parking outdoors to protect your car from scratches, dust, and other environmental hazards.
8.4 Safe Driving Habits
- Avoid Tailgating: Avoid tailgating to reduce the risk of rock chips and scratches from debris kicked up by other vehicles.
- Drive Carefully on Gravel Roads: Drive slowly and carefully on gravel roads to minimize the risk of scratches and chips.
- Avoid Automatic Car Washes: Avoid automatic car washes with brushes, which can scratch your car’s paint.
By implementing these preventive measures and using high-quality products from CARDIAGTECH.NET, you can significantly reduce the risk of scratches and keep your car looking its best for years to come. According to the Environmental Protection Agency (EPA), regular car care and maintenance can also improve fuel efficiency and reduce emissions.
9. Common Mistakes To Avoid During Car Scratch Repair
Even with the best intentions and high-quality products, mistakes can happen during car scratch repair. Knowing what to avoid can save you time, money, and frustration, ensuring a successful outcome.
9.1 Using The Wrong Products
- Avoid Abrasive Cleaners: Avoid using abrasive cleaners that can scratch the paint.
- Use pH-Balanced Soap: Use a pH-balanced car wash soap to prevent damage.
- Match Touch-Up Paint: Ensure your touch-up paint matches your car’s color code.
9.2 Improper Sanding Techniques
- Avoid Excessive Pressure: Avoid applying excessive pressure when sanding, which can cause scratches.
- Use a Sanding Block: Use a sanding block to ensure a flat, even surface.
- Keep Sandpaper Wet: Keep the sandpaper wet to prevent clogging and reduce friction.
9.3 Rushing The Process
- Allow Drying Time: Allow sufficient drying time between coats of touch-up paint and clear coat.
- Don’t Skip Steps: Don’t skip steps in the repair process, such as cleaning, sanding, and polishing.
- Be Patient: Be patient and take your time to achieve the best results.
9.4 Neglecting Safety Precautions
- Wear Gloves: Wear gloves to protect your hands from chemicals and abrasives.
- Wear Safety Glasses: Wear safety glasses to protect your eyes from splashes and debris.
- Work in a Well-Ventilated Area: Work in a well-ventilated area to avoid inhaling harmful fumes.
9.5 Overlooking Surface Preparation
- Clean the Area: Thoroughly clean the area before starting the repair.
- Remove Contaminants: Remove any contaminants, such as wax and grease, with isopropyl alcohol.
- Mask the Area: Mask the surrounding area to protect it from overspray.
By avoiding these common mistakes and following the guidelines provided by CARDIAGTECH.NET, you can increase your chances of a successful car scratch repair. According to the National Institute for Automotive Service Excellence (ASE), proper training and attention to detail are essential for achieving high-quality auto body repairs.
10. Maintaining Your Car’s Repaired Finish
After successfully repairing scratches on your car, proper maintenance is essential to preserve the repaired finish and prevent future damage. This section provides tips on how to care for your car’s paint after scratch repair, ensuring it looks its best for years to come, with the help of products available at CARDIAGTECH.NET.
10.1 Regular Washing And Waxing
- Wash Frequently: Wash your car frequently to remove dirt and contaminants that can damage the paint.
- Gentle Cleaning: Use a pH-balanced car wash soap and soft microfiber towels for gentle cleaning.
- Wax Every Three Months: Wax your car every three months to protect the paint from UV rays and minor scratches.
10.2 Inspect Regularly
- Check for New Scratches: Regularly inspect your car for new scratches and address them promptly to prevent further damage.
- Look for Fading or Peeling: Look for signs of fading or peeling paint, which may indicate the need for additional repairs.
10.3 Protective Measures
- Apply Sealant: Apply a paint sealant to provide long-lasting protection against environmental contaminants.
- Use a Car Cover: Use a car cover when parking outdoors to protect your car from scratches, dust, and UV rays.
- Park in Shaded Areas: Park in shaded areas to minimize exposure to the sun’s harmful UV rays.
10.4 Professional Detailing
- Consider Professional Detailing: Consider professional detailing services for comprehensive paint care and protection.
- Paint Correction: Professional paint correction can remove swirl marks and minor imperfections, restoring the shine to your car’s paint.
- Ceramic Coating: Apply a ceramic coating for long-lasting protection and enhanced gloss.
10.5 Touch-Up As Needed
- Keep Touch-Up Paint Handy: Keep a bottle of touch-up paint handy for addressing new scratches and chips as they occur.
- Apply Thin Coats: Apply thin, even coats of touch-up paint for best results.
- Blend Carefully: Blend the touch-up paint carefully with the surrounding paint to achieve a seamless finish.
By following these maintenance tips and using quality products from CARDIAGTECH.NET, you can keep your car’s repaired finish looking its best and protect your investment for years to come. According to the Car Care Council, regular vehicle maintenance not only enhances appearance but also improves safety and reliability.
CARDIAGTECH.NET understands the challenges you face as auto repair professionals. The physical demands, constant exposure to harsh chemicals, and the need for continuous learning can be overwhelming. That’s why we offer tools that enhance efficiency, reduce repair times, and improve accuracy, all while ensuring your safety and comfort.
Ready to take your auto repair game to the next level? Contact CARDIAGTECH.NET today! Call us at +1 (641) 206-8880 or visit our website at CARDIAGTECH.NET for a consultation. Let us help you find the perfect tools to boost your productivity and profitability.
Address: 276 Reock St, City of Orange, NJ 07050, United States
Frequently Asked Questions (FAQ)
1. How do I determine the type of scratch on my car?
Run your fingernail over the scratch. If it catches, it’s a deeper scratch (base coat or primer). If it glides smoothly, it’s likely a clear coat scratch.
2. What tools do I need to fix car scratches?
You’ll need car wash soap, microfiber towels, scratch remover compound, polishing compound, touch-up paint, applicator pads, sanding block, and 2000-grit sandpaper.
3. Can I use household products to remove car scratches?
No, household products can damage your car’s paint. Use products specifically designed for automotive paint care.
4. How long does it take to fix a car scratch?
The time varies depending on the scratch type. Clear coat scratches may take 30 minutes, while deeper scratches can take several hours.
5. What is wet sanding, and why is it important?
Wet sanding involves using sandpaper lubricated with water to smooth out imperfections in the paint surface. It’s essential for leveling touch-up paint and removing orange peel texture.
6. How do I find my car’s paint code?
The paint code is usually found on a sticker inside the driver’s side door jamb, in the glove compartment, or under the hood.
7. Is it better to DIY or hire a professional for scratch repair?
It depends on the scratch severity, your skill level, and budget. DIY is suitable for minor scratches, while professional repair is recommended for deeper scratches.
8. How can I prevent scratches on my car?
Regular washing and waxing, protective coatings, careful parking, and safe driving habits can help prevent scratches.
9. What are common mistakes to avoid during car scratch repair?
Avoid using the wrong products, improper sanding techniques, rushing the process, neglecting safety precautions, and overlooking surface preparation.
10. How do I maintain my car’s repaired finish?
Regular washing and waxing, inspecting regularly, protective measures, professional detailing, and touch-up as needed can help maintain the repaired finish.