**How to Fix Paint Chips on Car: A Comprehensive Guide**

Are you troubled by unsightly paint chips on your car? CARDIAGTECH.NET provides a definitive guide on how to fix paint chips on your car, covering everything from DIY touch-ups to professional solutions. Learn effective techniques to restore your car’s finish and prevent further damage, ensuring a pristine look and maintaining your vehicle’s value. Discover paint chip repair, auto paint protection, and DIY car care today.
1. Understanding Car Paint Chips
Car paint chips are a common nuisance, often appearing on the hood, bumper, or fenders. These small areas of damage can be caused by flying gravel, road debris, or even harsh weather conditions. Recognizing the causes and promptly addressing these chips is essential for maintaining your vehicle’s appearance and preventing long-term damage.
1.1. Common Causes of Paint Chips
Paint chips can arise from a variety of sources, making prevention challenging but not impossible. Here are the primary culprits:
- Road Debris: Gravel, stones, and other particles kicked up by tires.
- Winter Salt: Salt and grit spread on roads in winter can accelerate chipping.
- Accidents: Minor collisions or impacts that scratch or chip the paint.
- Environmental Factors: Exposure to extreme temperatures, UV rays, and pollutants can weaken the paint over time.
Road Debris Causing Car Paint Chips
1.2. Why Immediate Repair is Crucial
Addressing paint chips promptly is more than just a cosmetic concern. Left unattended, these small imperfections can lead to significant problems:
- Rust Formation: Exposed metal is susceptible to rust, which can spread and weaken the structural integrity of the car.
- Paint Deterioration: Chips can undermine the surrounding paint, causing it to peel or flake.
- Reduced Resale Value: A car with numerous or poorly repaired chips will have a lower resale value.
2. Assessing the Damage: DIY or Professional?
Before you start fixing paint chips, it’s essential to assess the extent of the damage. Determining whether a DIY approach is suitable or if professional intervention is needed will save you time, money, and potential further damage.
2.1. Identifying Minor vs. Major Damage
- Minor Chips: Small, surface-level chips that haven’t penetrated the primer or metal. These are typically suitable for DIY repairs.
- Major Chips: Deep chips that expose the metal, show signs of rust, or cover a large area. These usually require professional attention.
2.2. When to Seek Professional Help
Consider these situations when deciding to consult a professional:
- Rust Presence: If rust is present, professional rust removal and treatment are necessary.
- Extensive Damage: Numerous chips or large areas of damage are best handled by experts.
- Lack of Experience: If you’re uncomfortable with DIY repairs or lack the necessary tools, a professional repair is the safer option.
3. Essential Tools and Materials for DIY Paint Chip Repair
Equipping yourself with the right tools and materials is crucial for a successful DIY paint chip repair. Here’s a comprehensive list to get you started, available at CARDIAGTECH.NET:
3.1. Required Tools
| Tool | Description | Benefit |
|---|---|---|
| Touch-Up Paint | Matching the car’s paint code for seamless blending. | Ensures color accuracy and professional-looking results. |
| Fine-Tipped Applicator | Small brushes or paint pens for precise application. | Allows for accurate filling of small chips. |
| Cleaning Supplies | Soap, water, and degreaser to prepare the surface. | Removes dirt, grease, and contaminants for better paint adhesion. |
| Sandpaper | Fine-grit sandpaper (2000-3000 grit) for smoothing edges. | Creates a smooth surface for blending the new paint with the existing finish. |
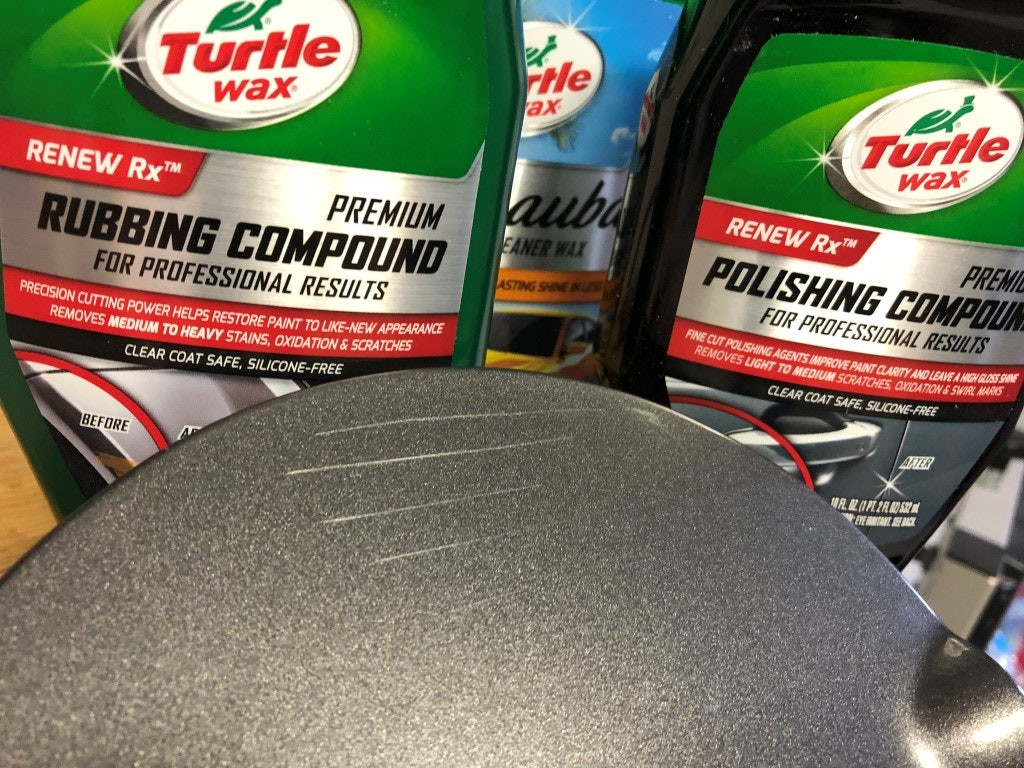
| Polishing Compound | Abrasive compound to restore shine and blend the repaired area. | Removes imperfections and enhances the appearance of the repair. |
| Primer | To prime the bare metal | |
| Clear Coat | To protect the fresh coat of paint | |
| Microfiber Cloths | Soft cloths for cleaning, polishing, and applying products. | Prevents scratching and ensures a clean, smooth finish. |
| Masking Tape | To protect surrounding paint from accidental damage. |
3.2. High-Quality Materials from CARDIAGTECH.NET
Purchasing high-quality materials from CARDIAGTECH.NET can significantly impact the outcome of your repair. Consider these factors:
- Paint Quality: Opt for OEM (Original Equipment Manufacturer) or high-quality aftermarket touch-up paint for the best color match and durability.
- Applicator Precision: Invest in fine-tipped applicators that allow for precise and controlled paint application.
- Sandpaper Grade: Use ultra-fine sandpaper to avoid scratching the surrounding paint during the leveling process.
4. Step-by-Step Guide to DIY Paint Chip Repair
Follow this detailed guide to effectively fix paint chips on your car, achieving professional-looking results from the comfort of your own garage:
4.1. Preparation is Key
- Wash and Dry: Thoroughly clean the area around the paint chip with soap and water.
- Decontaminate: Use a degreaser or wax remover to eliminate any remaining contaminants.
- Dry Completely: Ensure the area is completely dry before proceeding.
4.2. Sanding the Edges
- Wet Sand: Lightly wet the fine-grit sandpaper (2000-3000 grit).
- Smooth Edges: Gently sand the edges of the chip to remove any raised edges or loose paint.
- Clean Residue: Wipe away any sanding residue with a clean microfiber cloth.
4.3. Applying Primer (If Necessary)
- Apply: If the chip exposes bare metal, apply a thin layer of automotive primer to the affected area.
- Dry Time: Allow the primer to dry completely according to the manufacturer’s instructions, typically 30-60 minutes.
4.4. Touch-Up Paint Application
- Shake Well: Thoroughly shake the touch-up paint to ensure proper mixing.
- Apply Thin Coats: Use the fine-tipped applicator to apply thin, even coats of paint to the chip, allowing each coat to dry for 10-15 minutes before applying the next.
- Build Up Layers: Continue applying thin layers until the paint is level with the surrounding surface.
4.5. Leveling the Paint
- Wet Sand: After the paint has fully cured (usually 24-48 hours), lightly wet the fine-grit sandpaper.
- Gently Sand: Carefully sand the repaired area to level the paint with the surrounding surface.
- Clean: Wipe away any sanding residue with a clean microfiber cloth.
4.6. Polishing and Buffing
- Apply Compound: Apply a small amount of polishing compound to a clean microfiber cloth.
- Buff: Gently buff the repaired area in a circular motion to restore shine and blend the repair.
- Inspect: Inspect the repair and repeat the polishing process if necessary.
4.7. Applying Clear Coat (Optional)
- Apply: Apply a thin layer of clear coat to protect the repair and enhance the shine.
- Dry Time: Allow the clear coat to dry completely, typically 24 hours.
- Final Polish: Lightly polish the repaired area for a seamless finish.
5. Advanced Techniques for Challenging Paint Chips
For more complex paint chip repairs, consider these advanced techniques to achieve flawless results:
5.1. Blending Techniques
- Feathering: Lightly blending the edges of the touch-up paint into the surrounding area to create a seamless transition.
- Spot Blending: Using a specialized blending solution to soften the edges of the repair and improve the color match.
5.2. Dealing with Rust
- Rust Removal: Use a wire brush or rust remover to eliminate all traces of rust from the chip.
- Treat: Apply a rust converter to neutralize any remaining rust and prevent future corrosion.
- Prime: Apply a rust-inhibiting primer before proceeding with the paint repair.
5.3. Matching Metallic Paints
- Orientation: Metallic paints require careful application to ensure the metallic flakes are aligned properly.
- Multiple Coats: Apply multiple thin coats to achieve the desired metallic effect and color match.
6. Protecting Your Car’s Paint: Prevention Methods
Prevention is always better than cure. Implement these strategies to protect your car’s paint and minimize the risk of future chips:
6.1. Protective Films
- Paint Protection Film (PPF): A transparent film applied to vulnerable areas to shield against chips and scratches.
- Installation: Professional installation is recommended for the best results and longevity.
6.2. Regular Washing and Waxing
- Washing: Regularly wash your car to remove dirt, debris, and contaminants that can damage the paint.
- Waxing: Apply a high-quality wax to create a protective layer that repels water, UV rays, and minor abrasions.
6.3. Safe Driving Habits
- Distance: Maintain a safe following distance to avoid being hit by flying debris.
- Avoidance: Avoid driving on gravel roads or construction zones whenever possible.
7. Cost Analysis: DIY vs. Professional Repair
Understanding the costs associated with DIY and professional repairs can help you make an informed decision based on your budget and skill level:
7.1. DIY Repair Costs
- Materials: Touch-up paint, applicators, sandpaper, polishing compound, and cleaning supplies typically range from $20 to $50.
- Time Investment: DIY repairs can take several hours, depending on the extent of the damage and your experience level.
7.2. Professional Repair Costs
- Estimates: Obtain quotes from multiple auto body shops or repair specialists to compare prices.
- Factors: Costs vary depending on the location, size of the repair, and type of paint.
A SMART repair (Small to Medium Area Repair Technology) can save time and money because it keeps the repair localized to the damaged area.
Professionals will use color-matching technology to mix the paint, to match your car which is even more accurate and less noticeable than matching a color code. - Average Costs: Professional paint chip repairs can range from $50 to $200 per chip, depending on the complexity of the repair.
8. Maintaining Your Car’s Finish: Long-Term Care
Proper maintenance is essential for preserving your car’s finish and preventing future damage. Follow these tips to keep your car looking its best:
8.1. Regular Inspections
- Routine Checks: Periodically inspect your car for new chips, scratches, or signs of rust.
- Early Intervention: Address any issues promptly to prevent them from worsening.
8.2. Storage Tips
- Garage Parking: Park your car in a garage or covered area to protect it from the elements.
- Car Covers: Use a car cover to shield your vehicle from UV rays, dust, and scratches when parking outdoors.
8.3. Recommended Products from CARDIAGTECH.NET
| Product | Description | Benefit |
|---|---|---|
| Car Wash Soap | Gentle, pH-balanced soap for effective cleaning. | Prevents damage to the paint and wax coating. |
| Car Wax | High-quality wax for protection and shine. | Creates a protective layer that repels water and UV rays. |
| Microfiber Towels | Soft, absorbent towels for drying and polishing. | Prevents scratching and ensures a clean, smooth finish. |
| Paint Protection Film (PPF) | Transparent film for shielding vulnerable areas. | Protects against chips, scratches, and environmental damage. |
9. Real-World Examples: Before and After
Seeing real-world examples of successful paint chip repairs can provide inspiration and confidence for your own project. Here are a few before-and-after scenarios:
9.1. DIY Success Story
- Scenario: A small chip on the hood of a black sedan.
- DIY Approach: Followed the step-by-step guide, using touch-up paint and polishing compound.
- Result: The chip is virtually invisible, and the hood looks as good as new.
9.2. Professional Restoration
- Scenario: Multiple chips and scratches on the front bumper of a white SUV.
- Professional Approach: The auto body shop performed paint chip repairs, blending, and clear coat application.
- Result: The bumper looks flawless, with a seamless finish that matches the original paint.
10. Addressing Customer Challenges: How CARDIAGTECH.NET Can Help
At CARDIAGTECH.NET, we understand the challenges our customers face when it comes to car maintenance and repair. Here’s how we can help:
10.1. Tailored Solutions
- Product Selection: We offer a wide range of high-quality tools and materials tailored to your specific needs and skill level.
- Expert Advice: Our knowledgeable staff can provide expert advice and guidance to help you choose the right products and techniques.
10.2. Enhancing Efficiency
- Time-Saving Tools: Our tools are designed to improve efficiency and reduce repair time.
- Quality Assurance: We ensure that all our products meet the highest standards of quality and performance.
10.3. Cost-Effective Options
- Competitive Pricing: We offer competitive pricing on all our products, ensuring you get the best value for your money.
- DIY Savings: By providing the tools and knowledge for DIY repairs, we help you save on costly professional services.
Are you ready to take control of your car’s appearance and protect its value? Contact CARDIAGTECH.NET today at +1 (641) 206-8880 or visit our website CARDIAGTECH.NET. Let our team of experts assist you in finding the perfect tools and materials for your paint chip repair needs. Located at 276 Reock St, City of Orange, NJ 07050, United States, we are here to provide the solutions you need for a flawless finish!
FAQ: How to Fix Paint Chips on Car
1. Can I really fix paint chips on my car myself?
Yes, you can fix paint chips on your car yourself with the right tools, materials, and techniques. Small, surface-level chips are particularly well-suited for DIY repair.
2. What’s the most important step in fixing paint chips?
Preparation is key. Thoroughly cleaning and decontaminating the area around the chip is crucial for ensuring proper paint adhesion and a long-lasting repair.
3. How do I match the paint color of my car?
Locate your car’s paint code, usually found on a sticker in the driver’s side door jamb or under the hood. Use this code to purchase touch-up paint that matches your car’s exact color.
4. What if the paint chip has rust in it?
Remove the rust using a wire brush or rust remover, then apply a rust converter to neutralize any remaining rust and prevent future corrosion. Follow with a rust-inhibiting primer before painting.
5. How many coats of touch-up paint should I apply?
Apply thin, even coats of paint, allowing each coat to dry for 10-15 minutes before applying the next. Continue applying thin layers until the paint is level with the surrounding surface.
6. Can I use a heat gun to speed up the drying process?
While a heat gun can speed up drying, it’s generally not recommended as it can cause the paint to bubble or blister. Allow the paint to dry naturally for the best results.
7. What’s the best way to level the touch-up paint with the surrounding surface?
After the paint has fully cured, lightly wet the fine-grit sandpaper (2000-3000 grit) and carefully sand the repaired area to level the paint with the surrounding surface.
8. Do I need to apply clear coat after touching up the paint?
Applying clear coat is optional but recommended as it protects the repair and enhances the shine. Allow the clear coat to dry completely before lightly polishing the repaired area for a seamless finish.
9. How can I prevent future paint chips on my car?
Use protective films, regularly wash and wax your car, and practice safe driving habits such as maintaining a safe following distance and avoiding gravel roads.
10. Where can I find high-quality tools and materials for paint chip repair?
CARDIAGTECH.NET offers a wide range of high-quality tools and materials tailored to your specific needs and skill level. Visit our website or contact our experts for personalized assistance.