How Much to Fix a Leak in Car: Costs and Causes
How much to fix a leak in car? This is a common question for car owners. Oil leaks can be a nuisance, but understanding the costs associated with repair and the common causes can help you address the issue promptly and efficiently. At CARDIAGTECH.NET, we’re dedicated to providing you with the insights and tools needed to maintain your vehicle in top condition. Knowing the typical repair costs, identifying the leak’s origin, and taking swift action will safeguard your engine and prevent costly future repairs. Let’s explore oil seepage, fluid escape, and automotive maintenance.
1. Typical Oil Leak Repair Costs
The cost to fix an oil leak can vary widely, ranging from $75 to over $2,000, depending on the cause and complexity of the repair. Here’s a breakdown of common oil leak repairs and their associated costs:
| Repair Type | Cost Range |
|---|---|
| Valve Cover Gasket Replacement | $75 – $500 |
| Rear Main Seal Replacement | $450 – $2,000 |
| Oil Pan Gasket Replacement | $125 – $375 |
| Oil Filter Housing Repair | $100 – $400 |
| Oil Cooler Line Repair | $150 – $500 |
These are estimated costs and can vary based on your location, the make and model of your car, and the specific repair shop you choose. For example, European cars often require specialized tools and expertise, which can increase labor costs.
2. Oil Leak Repair Costs by Car Brand
The make and model of your vehicle can significantly impact the cost of oil leak repairs due to differences in parts availability and the specific skills required. Here are some average oil leak repair costs by car brand:
| Car Brand | Average Oil Leak Repair Cost |
|---|---|
| Audi | $80 – $600 |
| BMW | $90 – $700 |
| Ford | $60 – $450 |
| Honda | $50 – $350 |
| Toyota | $55 – $400 |
| Volkswagen | $75 – $550 |
| Chevrolet | $65 – $425 |
| Mercedes-Benz | $100 – $800 |
These figures represent averages and can fluctuate based on the specific type of leak and the extent of the damage.
3. Is an Oil Leak Serious?
Yes, an oil leak is a serious issue that should be addressed promptly. Oil is essential for lubricating your engine’s moving parts, and a leak can lead to:
- Engine Damage: Insufficient lubrication causes increased friction, leading to premature wear and potential engine failure.
- Overheating: Reduced oil levels can cause the engine to overheat, resulting in severe damage.
- Fire Hazard: Oil leaking onto hot engine components can ignite, posing a significant fire risk.
- Environmental Impact: Leaking oil contaminates the environment and can harm wildlife.
According to the Environmental Protection Agency (EPA), even small oil leaks can contribute to significant pollution over time. Addressing leaks promptly is crucial for both your vehicle’s health and environmental protection.
4. Is It Normal for an Old Car to Leak Oil?
While it was once common for older cars to have minor oil leaks, modern vehicles are designed with tighter seals and more advanced engine technologies to prevent leaks. Any recurring leak in a modern car should be inspected to identify the underlying cause.
However, it’s worth noting that older vehicles may be more prone to leaks due to the natural degradation of seals and gaskets over time. Regular maintenance and timely repairs can help mitigate these issues.
5. Can You Drive with an Oil Leak?
Driving with an oil leak depends on the severity of the leak and the distance you need to travel.
- Minor Leak: If you notice only a few small spots of oil, it’s generally safe to drive a short distance to a repair shop.
- Major Leak: If the leak is significant or you notice a rapid drop in oil levels, it’s best to avoid driving the car and have it towed to a mechanic.
Driving with a significant oil leak can cause further engine damage and create a hazardous situation for other drivers. Always prioritize safety and address the issue promptly.
6. How to Tell If You Have an Oil Leak
Identifying an oil leak early can save you from costly repairs. Here are some common signs to look for:
- Check Oil Level Regularly: Monitor your oil level and note any unexplained drops. A sudden decrease without any visible signs could indicate a leak.
- Inspect Under the Hood: Use a flashlight to examine the engine’s front, back, and sides for wet spots or oil residue.
- Look for Oil Stains: Check the ground under your parked car for oil stains. Place cardboard under the engine overnight to catch any drips and make them more visible.
- Smell Burning Oil: A burning oil smell while driving can indicate that oil is leaking onto hot engine components.
- Check Exhaust Smoke: Blue or grey smoke from the exhaust can indicate that oil is burning inside the engine, possibly due to a leak.
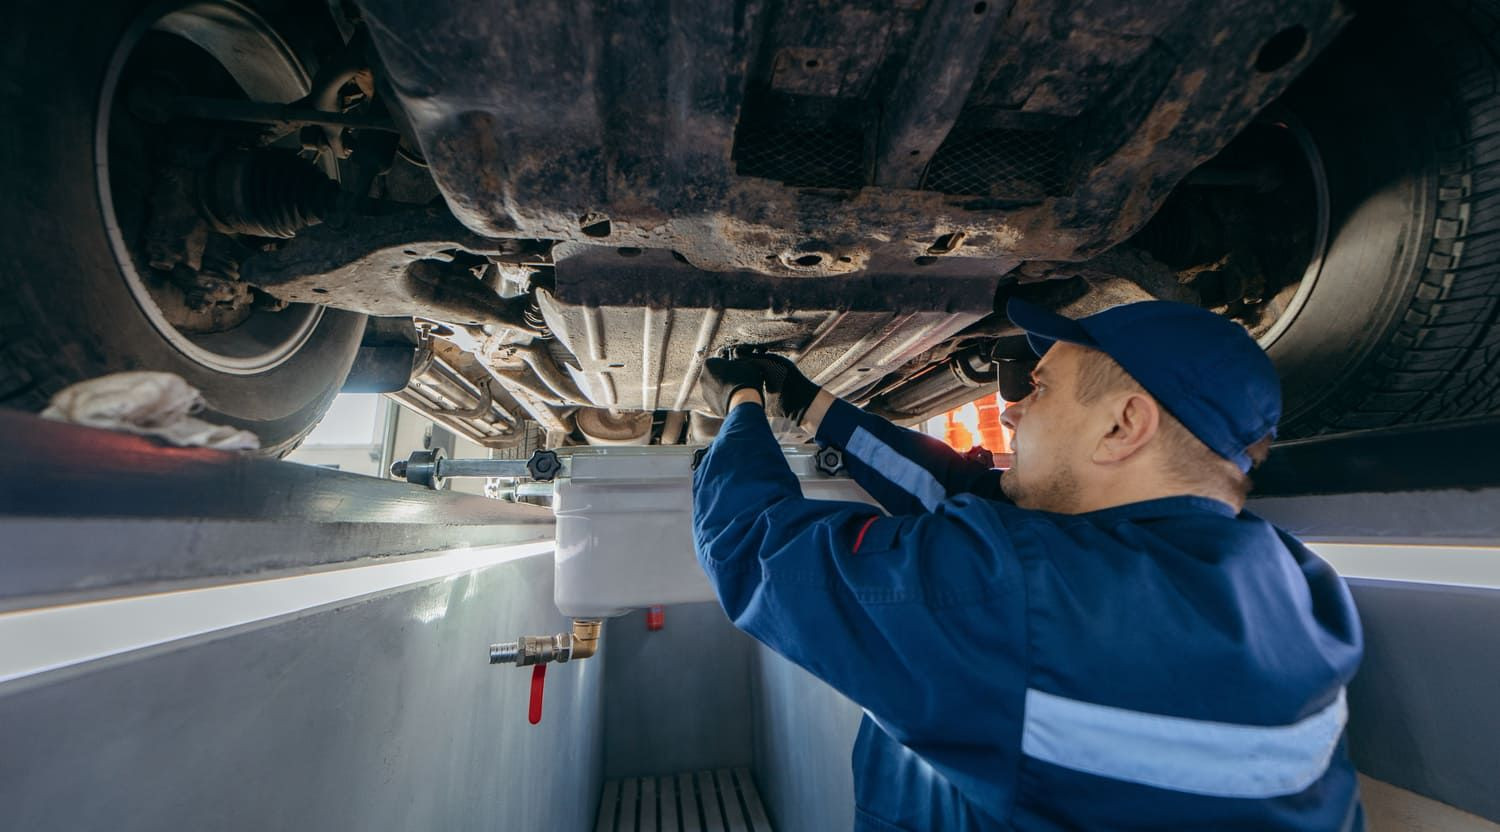
Oil Leak
7. Other Types of Car Fluid Leaks
Before assuming that a leak is an oil leak, it’s essential to identify the type of fluid. Here are some other potential car fluid leaks:
- Power Steering Fluid: Typically red or brown with a distinct odor.
- Transmission Fluid: Reddish-brown and thinner than engine oil.
- Coolant (Anti-Freeze): Green, yellow, or orange with a sweet smell.
- Brake Fluid: Clear to amber with a slippery texture.
- Fuel: Gasoline has a distinct smell and evaporates quickly.
If you’re unsure about the type of fluid, consult a mechanic for diagnosis. Identifying the correct fluid is crucial for effective repairs.
8. Common Oil Leak Causes and How to Check Them
Oil leaks can originate from various points within the engine. Here are some common causes and how to check them:
8.1. Oil Filter Housing or Sump Plug
The oil filter and sump plug are critical components that can leak if not properly installed or maintained.
How to Check:
- Oil Filter: Locate the oil filter and inspect for any oil film or residue around the filter housing. Clean the area and check again after a short drive.
- Sump Plug: Check the sump plug for tightness and inspect for any signs of oil leaking from the drain plug. Replace the crush washer each time you change your oil to ensure a tight seal.
8.2. Overfilled Oil
Overfilling the engine with oil can cause pressure to build up, leading to leaks through the crankcase breather vent.
How to Check:
- Dipstick: Check the oil level using the dipstick. The level should be between the minimum and maximum marks.
- Visual Inspection: Look for oil around the crankcase breather vent, typically located on the engine block.
8.3. Bad Gaskets
Gaskets seal various engine components and can deteriorate over time, causing leaks.
How to Check:
- Valve Cover Gasket: Inspect the top of the engine for wet or shiny patches of fresh oil around the valve cover.
- Timing Chain Gasket: Check the timing chain cover (or belt cover) for leaks, especially along the split lines where it attaches to the engine.
- Sump Gasket: Examine the sump (oil pan) for wet or shiny patches at or below the attachment line.
- Oil Pump Gasket: Located on the front or side of the engine, this gasket may be hard to check without removing parts.
8.4. Broken or Perished Seals
Seals prevent oil from leaking around moving components.
How to Check:
- Rear Main Seal: Look for leaks where the engine connects to the gearbox beneath the car. This may require removing the gearbox for a thorough inspection.
- Camshaft Seal: Located at the top of the engine, the seal where the camshaft exits the head can leak. Oil will typically run down the left side of the engine.
- Crankshaft Seal: Similar to the camshaft seal but located at the front of the engine.
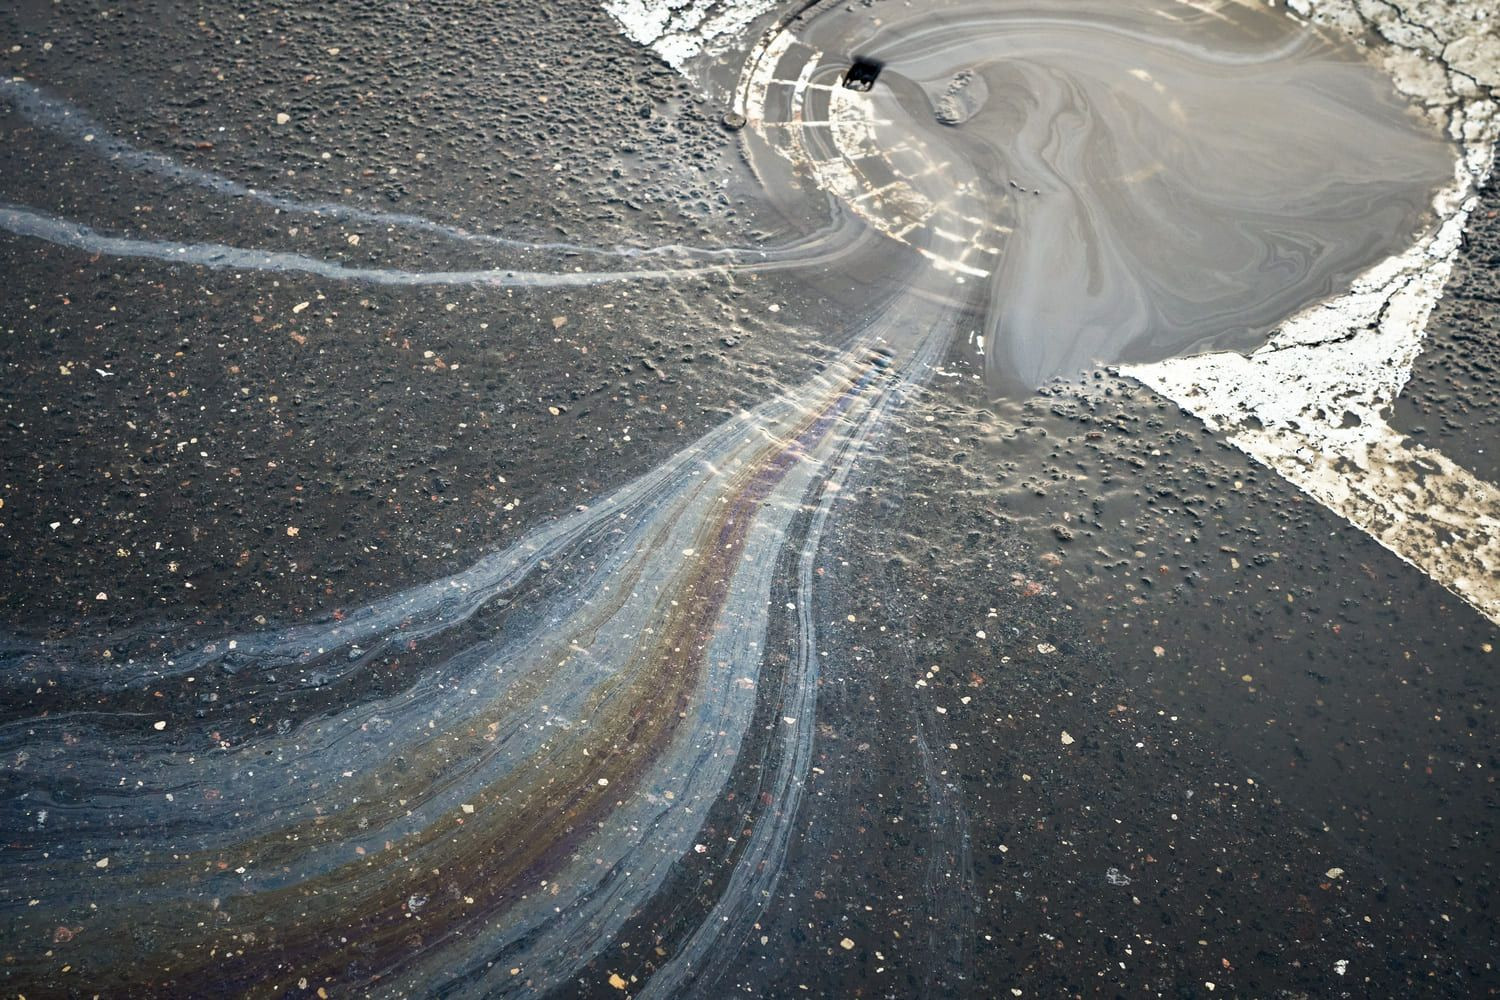 Engine Oil Leak
9. What Does It Mean If Oil Is Dropping But There Isn’t a Leak?
If your oil level is dropping but there’s no visible oil on the ground, the oil may be entering the combustion chamber or coolant system.
- Combustion Chamber: Look for blue smoke from the exhaust, indicating that oil is burning inside the engine.
- Coolant System: Check the coolant reservoir for a yellowish substance or milky appearance, indicating oil contamination.
These symptoms can point to more serious issues, such as worn piston rings or a blown head gasket.
10. Tools and Equipment for Diagnosing Oil Leaks
Diagnosing oil leaks requires a systematic approach and the right tools. Here’s a list of essential equipment:
| Tool | Description | Use |
|---|---|---|
| UV Dye Kit | Includes UV dye, UV flashlight, and safety glasses. | Adding dye to the oil and using a UV light to detect leaks. |
| Inspection Mirror | A small mirror on an extendable handle. | Inspecting hard-to-reach areas of the engine. |
| Mechanic’s Stethoscope | A device for listening to engine noises. | Identifying the source of a leak by listening for hissing or bubbling sounds. |
| Torque Wrench | A wrench that applies a specific amount of torque. | Tightening bolts and nuts to the correct specifications to prevent leaks. |
| Socket Set | A set of sockets for removing and installing bolts and nuts. | Removing and installing various engine components. |
| Drain Pan | A container for collecting used oil. | Catching oil when draining the engine. |
| Jack and Jack Stands | Used to lift the vehicle safely. | Providing access to the underside of the vehicle for inspection. |
| Cleaning Supplies | Includes degreasers, brushes, and rags. | Cleaning the engine to make leaks more visible. |
| Pressure Tester | Used to test the pressure of the cooling system. | Identifying leaks in the cooling system. |
| OBD-II Scanner | Reads diagnostic trouble codes from the vehicle’s computer. | Identifying potential issues that may be related to oil leaks. |
| Multimeter | A device for measuring voltage, current, and resistance. | Testing electrical components related to the engine. |
| Compression Tester | Measures the compression of each cylinder. | Assessing the condition of the piston rings and cylinders. |
| Leak Down Tester | Determines the percentage of cylinder leakage. | Identifying the source of cylinder leakage (e.g., valves, rings, head gasket). |
| Cooling System Tester | A device for testing the pressure of the cooling system. | Identifying leaks in the cooling system. |
| Vacuum Gauge | Measures engine vacuum. | Assessing the condition of the engine and identifying potential vacuum leaks. |
| Timing Light | A strobe light used to check and adjust ignition timing. | Ensuring proper engine performance. |
| Fuel Pressure Tester | Measures fuel pressure. | Diagnosing fuel system issues. |
| Scan Tool | Advanced diagnostic tool for reading and clearing codes, viewing live data, and performing actuation tests. | Comprehensive diagnostics and troubleshooting. |
Equipping yourself with the right tools and knowledge will enable you to diagnose and address oil leaks effectively.
11. Step-by-Step Guide to Fixing Common Oil Leaks
Here’s a detailed guide to fixing some common oil leaks:
11.1. Valve Cover Gasket Replacement
Tools Needed:
- Socket set
- Torque wrench
- New valve cover gasket
- Rags
- Degreaser
Steps:
- Preparation: Disconnect the negative battery cable and remove any components obstructing access to the valve cover.
- Remove Valve Cover: Use a socket to remove the valve cover bolts. Gently pry off the valve cover.
- Clean Surfaces: Clean the valve cover and cylinder head surfaces with degreaser.
- Install New Gasket: Place the new valve cover gasket onto the valve cover.
- Reinstall Valve Cover: Position the valve cover back onto the cylinder head and tighten the bolts to the manufacturer’s specified torque.
- Reassemble: Reconnect any removed components and the negative battery cable.
11.2. Oil Pan Gasket Replacement
Tools Needed:
- Socket set
- Torque wrench
- New oil pan gasket
- Drain pan
- Jack and jack stands
Steps:
- Preparation: Lift the vehicle using a jack and secure it with jack stands. Drain the engine oil into a drain pan.
- Remove Oil Pan: Remove the bolts securing the oil pan to the engine. Gently pry off the oil pan.
- Clean Surfaces: Clean the oil pan and engine block surfaces with degreaser.
- Install New Gasket: Place the new oil pan gasket onto the oil pan.
- Reinstall Oil Pan: Position the oil pan back onto the engine block and tighten the bolts to the manufacturer’s specified torque.
- Refill Oil: Lower the vehicle and refill the engine with the correct amount of oil.
11.3. Oil Filter Housing Repair
Tools Needed:
- Socket set
- Torque wrench
- New oil filter housing gasket or replacement housing
- Drain pan
Steps:
- Preparation: Drain the engine oil into a drain pan.
- Remove Housing: Remove the bolts securing the oil filter housing to the engine.
- Replace Gasket or Housing: If replacing the gasket, clean the surfaces and install the new gasket. If replacing the entire housing, install the new unit.
- Reinstall Housing: Position the oil filter housing back onto the engine and tighten the bolts to the manufacturer’s specified torque.
- Refill Oil: Refill the engine with the correct amount of oil.
12. The Role of CARDIAGTECH.NET in Oil Leak Solutions
At CARDIAGTECH.NET, we provide high-quality tools and equipment that make diagnosing and repairing oil leaks more efficient and effective. Our products are designed to meet the needs of both professional mechanics and DIY enthusiasts.
- Diagnostic Tools: Our advanced diagnostic tools help you quickly identify the source of oil leaks, saving you time and money.
- Repair Equipment: We offer a wide range of repair equipment, including socket sets, torque wrenches, and inspection mirrors, to facilitate oil leak repairs.
- Expert Advice: Our team of experienced technicians is available to provide expert advice and support, helping you choose the right tools and techniques for your specific needs.
By choosing CARDIAGTECH.NET, you’re investing in the reliability and performance of your vehicle.
13. Preventive Maintenance to Avoid Oil Leaks
Preventive maintenance is key to avoiding oil leaks and extending the life of your engine. Here are some essential maintenance tips:
- Regular Oil Changes: Change your oil and filter according to the manufacturer’s recommendations.
- Inspect Hoses and Belts: Regularly inspect hoses and belts for cracks, leaks, or wear.
- Check Fluid Levels: Monitor fluid levels, including oil, coolant, brake fluid, and power steering fluid.
- Replace Worn Gaskets and Seals: Replace worn gaskets and seals before they cause leaks.
- Proper Torque: Ensure that all bolts and nuts are tightened to the manufacturer’s specified torque.
By following these preventive maintenance tips, you can minimize the risk of oil leaks and keep your vehicle running smoothly.
14. Advanced Techniques for Oil Leak Detection
For more challenging oil leaks, advanced detection techniques can be employed:
- UV Dye Kits: Adding UV dye to the oil and using a UV light can help pinpoint the exact location of a leak.
- Pressure Testing: Pressure testing the cooling system can reveal leaks that are not immediately visible.
- Smoke Testing: Smoke testing involves introducing smoke into the engine to identify leaks in gaskets and seals.
These techniques require specialized equipment and expertise, but they can be invaluable in diagnosing difficult-to-find leaks.
15. Common Mistakes to Avoid When Fixing Oil Leaks
When fixing oil leaks, it’s important to avoid common mistakes that can lead to further problems:
- Over-Tightening Bolts: Over-tightening bolts can damage gaskets and seals, leading to leaks.
- Using the Wrong Parts: Using incorrect or low-quality parts can compromise the repair and cause future leaks.
- Neglecting Surface Preparation: Failing to clean surfaces properly before installing new gaskets and seals can prevent a proper seal.
- Ignoring Torque Specifications: Ignoring torque specifications can result in loose or over-tightened bolts, leading to leaks.
- Skipping Diagnostic Steps: Skipping diagnostic steps can lead to misdiagnosis and unnecessary repairs.
By avoiding these mistakes, you can ensure a successful and long-lasting oil leak repair.
16. The Impact of Oil Leaks on Vehicle Performance
Oil leaks can have a significant impact on vehicle performance:
- Reduced Engine Power: Insufficient lubrication can reduce engine power and efficiency.
- Increased Fuel Consumption: A poorly lubricated engine consumes more fuel.
- Rough Idling: Oil leaks can cause the engine to idle roughly.
- Engine Knocking: A lack of lubrication can lead to engine knocking and potential damage.
Addressing oil leaks promptly is crucial for maintaining optimal vehicle performance.
17. Environmental Considerations of Oil Leaks
Oil leaks can have serious environmental consequences:
- Soil Contamination: Leaking oil contaminates the soil and can harm plant life.
- Water Pollution: Oil can seep into waterways, polluting rivers, lakes, and oceans.
- Harm to Wildlife: Oil can harm wildlife, including birds, fish, and mammals.
- Air Pollution: Burning oil releases harmful pollutants into the air.
Properly maintaining your vehicle and addressing oil leaks promptly can help protect the environment.
18. DIY vs. Professional Oil Leak Repair
Deciding whether to tackle an oil leak repair yourself or hire a professional depends on your skills, experience, and the complexity of the repair.
- DIY Repair: DIY repair can be a cost-effective option for simple leaks, such as a loose oil filter or sump plug.
- Professional Repair: Professional repair is recommended for complex leaks, such as a rear main seal or oil pump gasket, which require specialized tools and expertise.
Evaluate your abilities and the complexity of the repair before deciding whether to DIY or hire a professional.
19. Financing Options for Oil Leak Repair
If you’re facing a costly oil leak repair, several financing options are available:
- Credit Cards: Credit cards can provide a quick and convenient way to pay for repairs.
- Personal Loans: Personal loans offer fixed interest rates and repayment terms.
- Repair Financing: Some repair shops offer financing options, allowing you to pay for repairs over time.
Explore your financing options to find the best solution for your budget.
20. Oil Leak Repair Costs – The Takeaway
Oil leaks can occur unexpectedly and from various sources, including gaskets, seals, and the oil filter. Addressing leaks promptly is essential to prevent further engine damage and costly repairs. At CARDIAGTECH.NET, we offer the tools and expertise to help you diagnose and repair oil leaks effectively.
21. Call to Action
Are you experiencing an oil leak and unsure where to start? Contact CARDIAGTECH.NET today at +1 (641) 206-8880 for expert advice and the right tools to get your vehicle back on the road. Visit our website at CARDIAGTECH.NET or stop by our location at 276 Reock St, City of Orange, NJ 07050, United States. Let us help you keep your engine running smoothly and efficiently. Don’t wait, contact us now for a consultation!
FAQ: Frequently Asked Questions About Oil Leaks
-
How much does it cost to fix a minor oil leak?
The cost to fix a minor oil leak can range from $75 to $300, depending on the cause and the repair shop’s labor rates. -
What are the common signs of an oil leak?
Common signs include oil spots under your car, a burning oil smell, and blue smoke from the exhaust. -
Can I drive with an oil leak?
Driving with an oil leak depends on the severity. Minor leaks may be okay for short distances, but major leaks should be addressed immediately. -
What causes oil leaks in cars?
Common causes include worn gaskets and seals, loose oil filter, and overfilled oil. -
Is it worth fixing an oil leak?
Yes, fixing an oil leak is worth it to prevent engine damage and costly repairs. -
How can I find an oil leak in my car?
Check for oil spots, inspect the engine with a flashlight, and use UV dye kits for hard-to-find leaks. -
What is the most expensive oil leak to fix?
The most expensive oil leak to fix is usually the rear main seal, which can cost between $450 and $2,000. -
Can oil leaks cause other problems?
Yes, oil leaks can cause engine damage, overheating, and even fires. -
How often should I check for oil leaks?
You should check for oil leaks at least once a month as part of your regular maintenance routine. -
What tools do I need to fix an oil leak?
Common tools include a socket set, torque wrench, new gaskets, drain pan, and degreaser. Visit CARDIAGTECH.NET for a comprehensive selection of high-quality tools.