How Much To Fix A Wheel Bearing On A Car? Expert Guide
Are you hearing strange noises from your wheels? Concerned about How Much To Fix A Wheel Bearing On A Car? CARDIAGTECH.NET is here to help you understand the costs involved and offer solutions to keep your vehicle running smoothly. Whether you’re looking for a quick estimate or considering a DIY approach, we’ve got you covered. Read on to discover typical wheel bearing replacement costs, DIY tips, and how to extend the life of your wheel bearings. Explore wheel hub assembly prices and reliable auto repair options with us.
1. Understanding Wheel Bearings: What They Are and Why They Matter
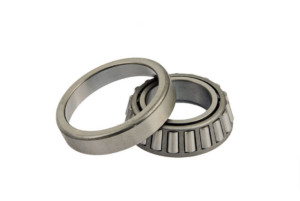
Wheel bearings are vital components that allow your car’s wheels to rotate freely. Located inside the wheel hub, these durable parts contain steel balls or rollers encased in a metal ring. They reduce friction, ensuring smooth wheel rotation and stable handling. Some wheel bearings can be replaced individually, but many modern vehicles use wheel hub assemblies for added convenience. When a wheel bearing fails, it can compromise your safety and lead to costly repairs, making timely replacement crucial.
Key Functions of Wheel Bearings:
- Enabling Wheel Rotation: Wheel bearings allow the wheels to spin smoothly, which is essential for vehicle movement.
- Supporting Vehicle Weight: These bearings support the weight of the vehicle, distributing it evenly across the wheels.
- Reducing Friction: By minimizing friction, wheel bearings improve fuel efficiency and reduce wear on other parts.
- Ensuring Stable Handling: Properly functioning wheel bearings ensure stable and predictable vehicle handling, particularly during turns.
If you are experiencing issues with your wheel bearings and need high-quality tools for repair or replacement, contact CARDIAGTECH.NET at +1 (641) 206-8880 for expert guidance and support.
2. Recognizing the Warning Signs of Failing Wheel Bearings
Identifying the early signs of failing wheel bearings can save you from more extensive damage and higher repair costs. Pay attention to these common indicators:
- Grinding or Humming Noise: A rhythmic sound coming from the wheels, especially during turns, often indicates a damaged bearing. The noise may increase with speed.
- Vibrations or Wobbling: Excessive play in the wheels can cause steering wheel vibrations or a shaky ride. You might feel the vibrations through the floorboard or seat.
- Uneven Tire Wear: Damaged wheel bearings can lead to improper wheel alignment, resulting in irregular tire wear. Check your tires for unusual wear patterns.
- ABS Warning Light: A faulty wheel bearing can trigger the anti-lock braking system (ABS) warning light. This is because the ABS system relies on accurate wheel speed data.
- Looseness or Play in the Wheel: When the vehicle is lifted, you may be able to feel excessive movement or play in the wheel.
- Steering Issues: The steering wheel may feel loose, or the vehicle may pull to one side.
If you notice any of these symptoms, it’s time to inspect your wheel bearings and determine if replacement is needed. Regular maintenance checks can help catch these issues early.
Signs of Failing Wheel Bearings
| Symptom | Description | Possible Causes |
|---|---|---|
| Grinding/Humming Noise | Rhythmic sound from wheels, louder during turns. | Damaged, worn, or dry bearing. |
| Vibrations/Wobbling | Steering wheel vibrations or shaky ride. | Excessive play in the wheel, indicating bearing failure. |
| Uneven Tire Wear | Irregular wear patterns on tires. | Improper wheel alignment due to damaged bearings. |
| ABS Warning Light | Illumination of the ABS warning light on the dashboard. | Faulty wheel bearing affecting ABS sensor readings. |
| Looseness in the Wheel | Excessive movement or play in the wheel when lifted. | Significant wear and damage to the bearing. |
| Steering Problems | Loose steering wheel or vehicle pulling to one side. | Worn or damaged bearings affecting steering alignment and stability. |
Wheel Bearing
3. Factors Influencing Wheel Bearing Replacement Costs
Several factors can influence the cost to replace a wheel bearing. Understanding these can help you budget for the repair and make informed decisions.
3.1. Type of Vehicle
The type of vehicle you own significantly impacts the cost. Larger vehicles like trucks and SUVs often have more robust and expensive wheel bearings compared to compact cars. Luxury or high-performance vehicles may require precision parts, further increasing the overall cost. For instance, a wheel bearing replacement for a standard sedan might cost less than for a high-end sports car due to the differences in parts and labor required.
3.2. Part Quality
Wheel bearings come in various grades, from budget-friendly aftermarket options to premium OEM (Original Equipment Manufacturer) parts. While cheaper options may save money upfront, higher-quality parts typically last longer and provide better performance. Investing in a reputable brand can prevent premature failure and additional repair costs down the line.
3.3. Labor Costs
Labor is a significant factor in the overall cost. Labor rates vary depending on your location, the complexity of the job, and the mechanic’s expertise. Front wheel bearings are often easier to replace than rear wheel bearings, which might require more disassembly. The national average for labor costs can range from $100 to $300 or more per wheel.
3.4. Location
Your geographic location can affect both parts and labor costs. Urban areas with higher costs of living typically have higher labor rates. Additionally, the availability of specific parts can vary by region, impacting the overall price.
3.5. Wheel Hub Assembly vs. Individual Bearings
Modern vehicles often use wheel hub assemblies, which include the bearing, hub, and sometimes the ABS sensor as a single unit. Replacing the entire assembly can be more expensive than replacing just the bearing. However, it may be more practical in some cases, especially if other components are worn or damaged.
3.6. Front vs. Rear Wheel Bearings
The cost to replace front wheel bearings is generally lower than that for rear wheel bearings because the rear suspension system tends to be more complex. Rear wheel bearings, particularly on vehicles with sealed hubs, may require more extensive labor.
Factors Influencing Wheel Bearing Replacement Costs
| Factor | Description | Impact on Cost |
|---|---|---|
| Vehicle Type | Larger vehicles, luxury cars, and high-performance vehicles often require more expensive parts. | Higher costs due to specialized parts and potentially more complex procedures. |
| Part Quality | Aftermarket vs. OEM parts. | Higher quality OEM parts typically cost more upfront but may offer better longevity. |
| Labor Costs | Varies by location and complexity of the job. | Higher in urban areas or for complex rear wheel bearing replacements. |
| Location | Geographic location affecting parts and labor rates. | Higher costs of living usually mean higher labor rates. |
| Hub Assembly | Wheel hub assembly vs. individual bearings. | Replacing the entire assembly is generally more expensive but can be more practical. |
| Front vs. Rear Bearing | Front wheel bearings are typically less expensive to replace due to simpler suspension systems. | Rear wheel bearings are often more expensive due to more complex suspension systems and increased labor. |
If you are looking for high-quality wheel bearings and the right tools at competitive prices, contact CARDIAGTECH.NET at +1 (641) 206-8880. We offer expert advice to help you make the best choice for your vehicle.
4. Typical Wheel Bearing Replacement Cost Range
The cost to replace a wheel bearing can vary widely. Here’s a breakdown of typical price ranges to give you a better idea of what to expect.
4.1. Average Cost per Wheel
On average, replacing a front wheel bearing costs between $150 and $300 per wheel, including labor. If you have a hub-style bearing instead of individual bearing assemblies, the cost could be about $100 to $200 higher. Rear wheel bearings, particularly on vehicles with sealed hubs, may range from $200 to $500 per wheel.
4.2. Professional Shop vs. DIY
For a typical car, the wheel bearing replacement price at a professional shop averages between $250 and $500 per wheel. Luxury vehicles and exotic or specialty models could be more than $700 due to higher part and labor costs. Opting for a DIY approach can save on labor costs, but it requires the right tools, knowledge, and time.
4.3. Regional Differences
Costs can vary significantly based on your location. Metropolitan areas tend to have higher labor rates compared to rural areas. Additionally, part prices can fluctuate depending on local availability and demand.
4.4. Cost Breakdown
A typical cost breakdown for wheel bearing replacement includes:
- Parts: $50 to $250 per bearing (depending on quality and brand)
- Labor: $100 to $300 per wheel
Remember that these are just averages, and actual costs can vary depending on the specific factors mentioned earlier.
Typical Wheel Bearing Replacement Costs
| Service | Cost Range (per wheel) | Notes |
|---|---|---|
| Front Wheel Bearing Replacement | $150 – $300 | Includes parts and labor; may be higher for hub-style bearings. |
| Rear Wheel Bearing Replacement | $200 – $500 | Typically more expensive due to complex suspension systems; can vary based on vehicle model. |
| Professional Shop Average | $250 – $500 | Average cost including parts and labor; may be higher for luxury vehicles. |
| DIY Parts Cost | $50 – $250 | Cost of the wheel bearing itself; additional tools may be required. |
| Labor Cost | $100 – $300 | Can vary widely based on location, shop rates, and complexity of the job. |
Contact CARDIAGTECH.NET at +1 (641) 206-8880 for a personalized consultation on the best tools and parts for your wheel bearing replacement needs. We offer expert advice and high-quality products to ensure the job is done right.
5. Step-by-Step Guide: Replacing a Wheel Bearing Yourself
If you’re a DIY enthusiast with the necessary skills and tools, replacing a wheel bearing yourself can save you a significant amount of money. Here’s a step-by-step guide to help you through the process.
5.1. Gathering the Necessary Tools and Materials
Before you begin, make sure you have the following tools and materials:
- New wheel bearing or hub assembly
- Socket set
- Wrench set
- Torque wrench
- Bearing puller or slide hammer
- Hydraulic press (if needed)
- Bearing grease
- Jack and jack stands
- Pliers
- Screwdrivers
- Gloves and goggles
- Wheel chocks
- Brake cleaner
5.2. Safety Precautions
Safety is paramount when working on your vehicle. Follow these precautions:
- Park the vehicle on a level surface.
- Engage the parking brake.
- Use wheel chocks to prevent the vehicle from rolling.
- Wear safety glasses and gloves to protect your eyes and hands.
5.3. Step-by-Step Instructions
- Loosen the Lug Nuts: Before lifting the vehicle, loosen the lug nuts on the wheel you’ll be working on.
- Lift the Vehicle: Use a jack to lift the vehicle and secure it with jack stands. Never work under a vehicle supported only by a jack.
- Remove the Wheel: Remove the lug nuts completely and take off the wheel.
- Remove the Brake Caliper: Detach the brake caliper and support it so it doesn’t hang by the brake line.
- Remove the Brake Rotor: Take off the brake rotor to expose the wheel hub assembly.
- Disconnect ABS Sensor (if applicable): If your vehicle has an ABS sensor, carefully disconnect it from the hub assembly.
- Remove the Hub Assembly: Depending on your vehicle, you may need a bearing puller or slide hammer to remove the hub assembly. Follow the tool’s instructions carefully.
- Press Out the Old Bearing (if necessary): If you’re replacing just the bearing, use a hydraulic press to press out the old bearing from the hub.
- Install the New Bearing (if necessary): Press the new bearing into the hub using the hydraulic press. Ensure it is properly seated.
- Reinstall the Hub Assembly: Attach the hub assembly to the vehicle, ensuring all bolts are properly tightened to the manufacturer’s specifications.
- Reconnect ABS Sensor (if applicable): Reconnect the ABS sensor to the hub assembly.
- Reinstall the Brake Rotor: Place the brake rotor back onto the hub.
- Reinstall the Brake Caliper: Reattach the brake caliper and ensure it is properly secured.
- Reinstall the Wheel: Put the wheel back on and tighten the lug nuts by hand.
- Lower the Vehicle: Carefully lower the vehicle to the ground.
- Torque the Lug Nuts: Use a torque wrench to tighten the lug nuts to the manufacturer’s specifications.
- Test Drive: Take the vehicle for a short test drive to ensure everything is working correctly. Listen for any unusual noises or vibrations.
5.4. Tips and Considerations
- Consult your vehicle’s repair manual for specific instructions and torque specifications.
- If you encounter any difficulties, don’t hesitate to seek help from a professional mechanic.
- Replacing wheel bearings can be challenging, so take your time and be patient.
DIY Wheel Bearing Replacement Checklist
| Step | Action |
|---|---|
| 1. Prepare Vehicle | Park on a level surface, engage parking brake, use wheel chocks. |
| 2. Gather Tools & Materials | Collect all necessary tools and a new wheel bearing or hub assembly. |
| 3. Loosen Lug Nuts | Loosen lug nuts before lifting the vehicle. |
| 4. Lift & Secure Vehicle | Use a jack to lift the vehicle and secure it with jack stands. |
| 5. Remove Wheel | Remove the lug nuts completely and take off the wheel. |
| 6. Remove Brake Caliper | Detach the brake caliper and support it properly. |
| 7. Remove Brake Rotor | Take off the brake rotor to expose the wheel hub assembly. |
| 8. Disconnect ABS Sensor (if any) | Carefully disconnect the ABS sensor from the hub assembly. |
| 9. Remove Hub Assembly | Use a bearing puller or slide hammer to remove the hub assembly. |
| 10. Press Out Old Bearing (if needed) | If replacing just the bearing, use a hydraulic press to press out the old bearing from the hub. |
| 11. Install New Bearing (if needed) | Press the new bearing into the hub using the hydraulic press. Ensure it is properly seated. |
| 12. Reinstall Hub Assembly | Attach the hub assembly to the vehicle, ensuring all bolts are properly tightened. |
| 13. Reconnect ABS Sensor (if any) | Reconnect the ABS sensor to the hub assembly. |
| 14. Reinstall Brake Rotor | Place the brake rotor back onto the hub. |
| 15. Reinstall Brake Caliper | Reattach the brake caliper and ensure it is properly secured. |
| 16. Reinstall Wheel | Put the wheel back on and tighten the lug nuts by hand. |
| 17. Lower Vehicle | Carefully lower the vehicle to the ground. |
| 18. Torque Lug Nuts | Use a torque wrench to tighten the lug nuts to the manufacturer’s specifications. |
| 19. Test Drive | Take the vehicle for a short test drive to ensure everything is working correctly. Listen for any unusual noises or vibrations. |
Equip yourself with the best tools for your DIY wheel bearing replacement by contacting CARDIAGTECH.NET at +1 (641) 206-8880. We provide expert advice on selecting the right tools, such as bearing pullers, torque wrenches, and hydraulic presses, to ensure a successful repair.
6. High-Quality Wheel Bearing Tools Available at CARDIAGTECH.NET
At CARDIAGTECH.NET, we understand the importance of having the right tools for wheel bearing replacement. That’s why we offer a wide selection of high-quality tools designed to make the job easier and more efficient.
6.1. Bearing Pullers
A bearing puller is essential for removing wheel bearings and hub assemblies without causing damage to surrounding components. Our bearing pullers are designed for durability and ease of use, ensuring a smooth removal process.
6.2. Torque Wrenches
Using a torque wrench is crucial for tightening bolts and lug nuts to the manufacturer’s specifications. This ensures that the wheel bearings are properly secured and prevents premature failure. We offer a variety of torque wrenches to suit different needs and budgets.
6.3. Hydraulic Presses
A hydraulic press is necessary for pressing out old bearings and installing new ones. Our hydraulic presses are built to handle the toughest jobs, providing the force and precision needed for successful wheel bearing replacement.
6.4. Socket Sets
A comprehensive socket set is a must-have for any DIY mechanic. Our socket sets include a wide range of sizes and configurations, allowing you to tackle any wheel bearing replacement job with confidence.
6.5. Other Essential Tools
In addition to the tools listed above, we also offer a variety of other essential tools, such as:
- Wrench sets
- Pliers
- Screwdrivers
- Bearing grease
- Brake cleaner
Recommended Tools for Wheel Bearing Replacement at CARDIAGTECH.NET
| Tool | Description | Benefits |
|---|---|---|
| Bearing Pullers | Used for removing wheel bearings and hub assemblies without damage. | Ensures smooth removal process; prevents damage to surrounding components. |
| Torque Wrenches | Essential for tightening bolts and lug nuts to manufacturer’s specifications. | Properly secures wheel bearings; prevents premature failure. |
| Hydraulic Presses | Used for pressing out old bearings and installing new ones. | Provides the necessary force and precision for successful wheel bearing replacement. |
| Socket Sets | A comprehensive set with a wide range of sizes and configurations. | Allows you to tackle any wheel bearing replacement job with confidence. |
| Wrench Sets | Various sizes and types for different tasks. | Versatile for a range of tasks; ensures you have the right wrench for every bolt. |
| Pliers | Used for gripping, cutting, and bending. | Essential for various steps in the wheel bearing replacement process. |
| Screwdrivers | Various types and sizes for removing screws. | Useful for removing various components during the wheel bearing replacement process. |
| Bearing Grease | Lubricates the new bearing for smooth operation. | Extends the life of the new wheel bearing by reducing friction and wear. |
| Brake Cleaner | Cleans brake components and removes grease and grime. | Ensures clean surfaces for proper brake function after wheel bearing replacement. |
Contact CARDIAGTECH.NET at +1 (641) 206-8880 to explore our selection of high-quality wheel bearing tools. Our experts can help you choose the right tools for your specific needs, ensuring a successful and efficient repair.
7. Extending the Lifespan of Your Wheel Bearings
Proper maintenance and driving habits can significantly extend the lifespan of your wheel bearings, saving you money and hassle in the long run. Here are some tips to keep your wheel bearings in good condition:
- Regular Inspections: Check for signs of wear and looseness during routine maintenance, especially if you frequently drive on rough roads.
- Proper Sealing: Ensure wheel bearings are properly sealed to prevent dirt and moisture from causing corrosion and reducing bearing lifespan.
- Lubrication: Some older vehicles or heavy-duty trucks may require lubrication from time to time. Check your vehicle’s maintenance schedule for specific recommendations.
- Avoid Excessive Weight: Excessive weight can strain the bearings and lead to early failure, so keep within your vehicle’s limits for hauling and towing.
- Address Issues Promptly: Address grinding noises or vibrations at the first sign to prevent further damage.
- Use Quality Parts: Avoid the lowest-cost parts. Cheap bearings may wear out quickly, costing more in the long run.
- Proper Installation: Ensure wheel bearings are installed correctly to prevent premature failure. If you’re not comfortable doing the job yourself, seek help from a professional mechanic.
- Avoid Potholes and Rough Roads: Driving on rough roads and hitting potholes can damage wheel bearings. Try to avoid these hazards whenever possible.
Tips to Extend Wheel Bearing Lifespan
| Tip | Description | Benefits |
|---|---|---|
| Regular Inspections | Check for signs of wear and looseness during routine maintenance. | Catch potential issues early; prevent further damage and costly repairs. |
| Proper Sealing | Ensure wheel bearings are properly sealed to prevent dirt and moisture. | Protects bearings from corrosion; extends lifespan. |
| Lubrication | Some older vehicles or heavy-duty trucks may require lubrication. | Keeps bearings running smoothly; reduces friction and wear. |
| Avoid Excessive Weight | Stay within your vehicle’s limits for hauling and towing. | Prevents strain on the bearings; reduces the risk of premature failure. |
| Address Issues Promptly | Address grinding noises or vibrations at the first sign. | Prevents further damage; avoids more extensive and costly repairs. |
| Use Quality Parts | Avoid the lowest-cost parts; invest in reputable brands. | Ensures better performance and longevity; prevents frequent replacements. |
| Proper Installation | Ensure wheel bearings are installed correctly; seek professional help if needed. | Prevents premature failure due to improper installation. |
| Avoid Potholes and Rough Roads | Drive carefully to avoid potholes and rough roads. | Reduces the risk of damage to wheel bearings and other suspension components. |
For expert guidance on maintaining your wheel bearings and selecting the right tools and parts, contact CARDIAGTECH.NET at +1 (641) 206-8880. Our team is ready to assist you with all your automotive needs.
8. Choosing Between Professional Repair and DIY
Deciding whether to hire a professional mechanic or tackle the wheel bearing replacement yourself depends on your skills, experience, and available resources. Here’s a comparison to help you make the right choice.
8.1. Professional Repair
Pros:
- Expertise: Professional mechanics have the knowledge and experience to diagnose and repair wheel bearing issues accurately.
- Tools and Equipment: Auto repair shops have specialized tools and equipment, such as hydraulic presses and bearing pullers, which can make the job easier and more efficient.
- Warranty: Many repair shops offer a warranty on their work, providing peace of mind.
- Time Savings: Hiring a professional saves you time and effort, allowing you to focus on other tasks.
Cons:
- Cost: Professional repair can be more expensive than DIY, due to labor costs.
- Scheduling: You may need to schedule an appointment and wait for the repair to be completed.
8.2. DIY Repair
Pros:
- Cost Savings: DIY repair can save you money on labor costs.
- Flexibility: You can work on your own schedule and at your own pace.
- Learning Experience: DIY repair can be a valuable learning experience, allowing you to gain a better understanding of your vehicle.
Cons:
- Requires Skills and Knowledge: DIY repair requires mechanical skills and knowledge.
- Tool Investment: You may need to purchase specialized tools, such as a bearing puller or hydraulic press.
- Time Commitment: DIY repair can take more time than professional repair.
- Risk of Mistakes: There is a risk of making mistakes, which can lead to further damage or safety issues.
8.3. Factors to Consider
When deciding between professional repair and DIY, consider the following factors:
- Your Mechanical Skills and Experience: Are you comfortable working on your vehicle? Do you have experience with wheel bearing replacement?
- The Complexity of the Job: Is the wheel bearing easily accessible, or does it require extensive disassembly?
- Your Available Time: Do you have the time to complete the repair yourself?
- Your Budget: How much are you willing to spend on the repair?
Professional Repair vs. DIY: A Comparison
| Factor | Professional Repair | DIY Repair |
|---|---|---|
| Expertise | Knowledge and experience to diagnose and repair accurately. | Requires mechanical skills and knowledge. |
| Tools and Equipment | Access to specialized tools and equipment. | May need to purchase specialized tools. |
| Warranty | Often offers a warranty on their work. | No warranty. |
| Time Savings | Saves time and effort. | Requires more time and effort. |
| Cost | More expensive due to labor costs. | Can save money on labor costs. |
| Flexibility | Less flexible; requires scheduling an appointment. | More flexible; can work on your own schedule. |
| Risk of Mistakes | Lower risk of mistakes. | Higher risk of mistakes, which can lead to further damage or safety issues. |
If you need advice on choosing the right tools for your DIY wheel bearing replacement or prefer to seek professional repair, contact CARDIAGTECH.NET at +1 (641) 206-8880. We can help you assess your needs and provide expert recommendations.
9. Common Mistakes to Avoid During Wheel Bearing Replacement
Replacing a wheel bearing can be a complex task, and it’s easy to make mistakes if you’re not careful. Here are some common mistakes to avoid to ensure a successful repair:
- Using the Wrong Tools: Using the wrong tools can damage the wheel bearing, hub assembly, or surrounding components. Always use the correct tools for the job.
- Improper Torque: Failing to tighten bolts and lug nuts to the manufacturer’s specifications can lead to premature failure or safety issues. Always use a torque wrench and consult your vehicle’s repair manual.
- Neglecting Safety Precautions: Neglecting safety precautions, such as using jack stands or wearing safety glasses, can result in serious injury. Always prioritize safety when working on your vehicle.
- Damaging the ABS Sensor: The ABS sensor is a delicate component that can be easily damaged during wheel bearing replacement. Handle the ABS sensor carefully and disconnect it properly before removing the hub assembly.
- Installing the Bearing Backwards: Installing the wheel bearing backwards can cause it to fail prematurely. Always check the orientation of the bearing before installing it.
- Forgetting to Grease the Bearing: Failing to grease the new wheel bearing can cause it to overheat and fail prematurely. Always apply a generous amount of bearing grease before installing the bearing.
- Using Excessive Force: Using excessive force when removing or installing the wheel bearing can damage it or surrounding components. Use gentle, controlled movements and the appropriate tools.
- Ignoring Warning Signs: Ignoring warning signs, such as grinding noises or vibrations, can lead to further damage and more costly repairs. Address wheel bearing issues promptly.
- Reusing Old Hardware: Reusing old bolts or nuts can lead to failure. Always use new hardware when replacing a wheel bearing.
Common Mistakes to Avoid During Wheel Bearing Replacement
| Mistake | Description | Consequences |
|---|---|---|
| Using the Wrong Tools | Using incorrect tools for the job. | Damage to wheel bearing, hub assembly, or surrounding components. |
| Improper Torque | Failing to tighten bolts and lug nuts to manufacturer’s specifications. | Premature failure or safety issues. |
| Neglecting Safety Precautions | Not using jack stands, safety glasses, or gloves. | Serious injury. |
| Damaging the ABS Sensor | Mishandling the ABS sensor during wheel bearing replacement. | Malfunction of the ABS system. |
| Installing Bearing Backwards | Installing the wheel bearing in the wrong direction. | Premature failure of the bearing. |
| Forgetting to Grease Bearing | Not applying bearing grease before installing the bearing. | Overheating and premature failure of the bearing. |
| Using Excessive Force | Applying too much force when removing or installing the wheel bearing. | Damage to the bearing or surrounding components. |
| Ignoring Warning Signs | Not addressing grinding noises or vibrations promptly. | Further damage and more costly repairs. |
| Reusing Old Hardware | Reusing old bolts or nuts. | Potential failure of hardware. |
Avoid these common mistakes and ensure a successful wheel bearing replacement with the right tools from CARDIAGTECH.NET. Contact us at +1 (641) 206-8880 for expert advice and high-quality tools.
10. Maintaining Your Vehicle After Wheel Bearing Replacement
After replacing a wheel bearing, it’s essential to maintain your vehicle properly to ensure the longevity of the new bearing and the overall health of your vehicle. Here are some key maintenance tips:
- Regular Inspections: Continue to inspect your wheel bearings during routine maintenance. Look for any signs of wear, looseness, or unusual noises.
- Proper Wheel Alignment: Ensure that your wheels are properly aligned. Misalignment can cause uneven tire wear and put additional stress on the wheel bearings.
- Tire Rotation: Rotate your tires regularly to promote even wear. This can help extend the life of your tires and wheel bearings.
- Check Suspension Components: Inspect your suspension components, such as shocks, struts, and ball joints. Worn suspension components can cause excessive stress on the wheel bearings.
- Avoid Overloading Your Vehicle: Avoid overloading your vehicle beyond its recommended weight capacity. Overloading can strain the wheel bearings and lead to premature failure.
- Drive Carefully: Drive carefully to avoid potholes, rough roads, and other hazards that can damage wheel bearings.
- Follow Maintenance Schedule: Follow your vehicle’s recommended maintenance schedule. This will help ensure that all components, including the wheel bearings, are properly maintained.
- Lubrication (If Applicable): If your vehicle requires lubrication of the wheel bearings, follow the manufacturer’s recommendations for the type and frequency of lubrication.
Post-Wheel Bearing Replacement Maintenance Checklist
| Maintenance Task | Frequency | Benefits |
|---|---|---|
| Regular Inspections | During routine maintenance. | Catch potential issues early; prevent further damage and costly repairs. |
| Proper Wheel Alignment | After wheel bearing replacement and periodically. | Prevents uneven tire wear; reduces stress on wheel bearings. |
| Tire Rotation | Every 6,000 to 8,000 miles. | Promotes even tire wear; extends the life of tires and wheel bearings. |
| Check Suspension Components | During routine maintenance. | Prevents excessive stress on wheel bearings caused by worn suspension components. |
| Avoid Overloading Vehicle | Always adhere to the vehicle’s weight capacity. | Prevents strain on the wheel bearings and other components. |
| Drive Carefully | Whenever driving. | Reduces the risk of damage to wheel bearings and other suspension components. |
| Follow Maintenance Schedule | As recommended by the vehicle manufacturer. | Ensures all components are properly maintained. |
| Lubrication (If Applicable) | As recommended by the vehicle manufacturer. | Keeps bearings running smoothly; reduces friction and wear. |
Ensure the longevity of your wheel bearing replacement by using high-quality tools and following proper maintenance practices. Contact CARDIAGTECH.NET at +1 (641) 206-8880 for expert advice and assistance with all your automotive needs.
11. How CARDIAGTECH.NET Can Help with Your Wheel Bearing Needs
CARDIAGTECH.NET is your trusted partner for all your automotive needs, including wheel bearing replacement. We offer a wide selection of high-quality tools and equipment, expert advice, and exceptional customer service.
11.1. Wide Selection of Tools and Equipment
We offer a comprehensive range of tools and equipment for wheel bearing replacement, including:
- Bearing pullers
- Torque wrenches
- Hydraulic presses
- Socket sets
- Wrench sets
- Pliers
- Screwdrivers
- Bearing grease
- Brake cleaner
Our tools are sourced from reputable manufacturers, ensuring durability and reliability.
11.2. Expert Advice and Support
Our team of experienced professionals is available to provide expert advice and support. Whether you’re a DIY enthusiast or a professional mechanic, we can help you choose the right tools and materials for your specific needs.
11.3. Exceptional Customer Service
At CARDIAGTECH.NET, we are committed to providing exceptional customer service. We offer fast shipping, easy returns, and a satisfaction guarantee. We are always available to answer your questions and address any concerns you may have.
11.4. Competitive Pricing
We offer competitive pricing on all our products, ensuring that you get the best value for your money. We also offer discounts and special promotions from time to time.
11.5. Convenient Online Shopping
Our website is easy to navigate and offers a convenient online shopping experience. You can browse our products, place orders, and track your shipments from the comfort of your own home.
Benefits of Choosing CARDIAGTECH.NET for Wheel Bearing Needs
| Benefit | Description |
|---|---|
| Wide Selection of Tools | Comprehensive range of high-quality tools and equipment for wheel bearing replacement. |
| Expert Advice and Support | Experienced professionals available to provide guidance |