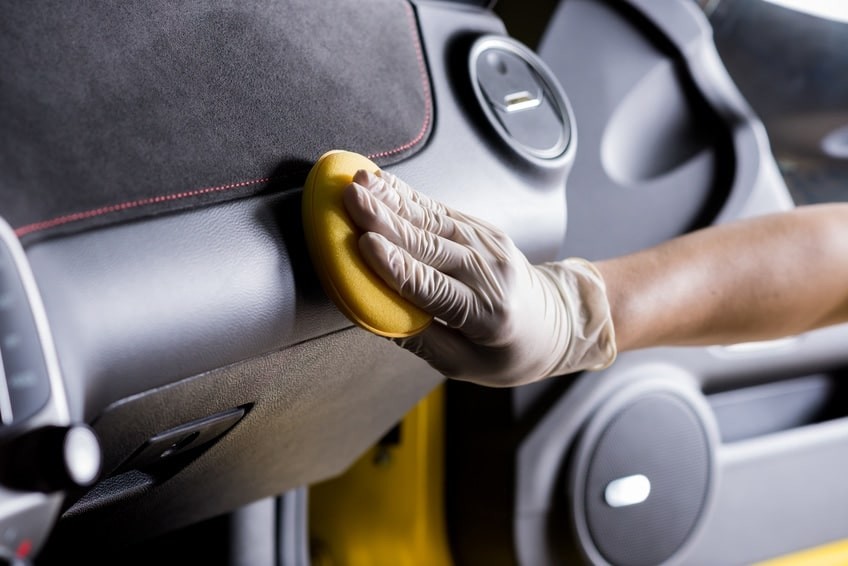
How Much to Fix Headliner In Car: Costs & Solutions
Are you wondering how much it costs to fix the headliner in your car? At CARDIAGTECH.NET, we understand that a sagging or damaged headliner can detract from your car’s interior and overall value. Discover the factors influencing headliner repair costs and explore effective solutions to restore your car’s interior to its former glory, ensuring your vehicle looks and feels its best with professional headliner replacement.
1. Understanding the Factors That Influence Headliner Repair Costs
Several factors determine the cost of fixing a car headliner. Here’s a detailed look:
1.1. Type of Vehicle
The make and model of your vehicle significantly impact the cost. Luxury vehicles or those with complex interior designs often require more specialized labor and materials, increasing the price.
- Common Cars: For models like Toyota Corolla or Honda Accord, aftermarket kits are readily available.
- Luxury Cars: Brands like BMW or Mercedes may require OEM (Original Equipment Manufacturer) parts, which are pricier.
1.2. Material Type
The material of the headliner also plays a crucial role. Premium materials like Alcantara or Ultrasuede are more expensive than standard fabrics.
- Standard Fabrics: Generic “mouse fur” materials are cost-effective.
- Premium Fabrics: Alcantara and Ultrasuede offer a luxurious feel but come at a higher price.
1.3. Complexity of the Design
The complexity of the headliner design, including features like sunroofs, dome lights, and ceiling-mounted speakers, can increase labor costs.
- Simple Designs: Older, smaller cars with minimal trim are less expensive to repair.
- Complex Designs: Cars with multiple sunroofs or integrated entertainment systems will incur higher costs due to the increased labor involved.
1.4. Labor Costs
Labor costs vary by region and the specific shop you choose. Urban areas or specialized auto upholstery shops may charge more.
- Hourly Rates: Typically range from $75 to $150 per hour.
- Time Estimate: A standard headliner replacement can take anywhere from half a day to a full day, depending on the complexity.
1.5. Aftermarket vs. OEM Parts
Choosing between aftermarket and OEM parts can also affect the overall cost. Aftermarket parts are generally cheaper but may not offer the same quality or fit as OEM parts.
- Aftermarket Kits: Economical for common vehicles.
- OEM Kits: Guarantee a perfect match, ideal for maintaining a vehicle’s original condition.
1.6. Condition of the Existing Headliner
The condition of the existing headliner can influence the repair cost. If the cardboard backing is damaged, it may require additional repair work.
- Minor Damage: Simple fabric replacement may suffice.
- Extensive Damage: Requires replacing the entire headliner board.
1.7. Geographic Location
The cost of headliner repair can vary significantly based on your location. Areas with a higher cost of living typically have higher labor rates.
- Urban Centers: Higher costs due to increased overhead and demand.
- Rural Areas: Lower costs due to lower overhead and less demand.
1.8. Additional Features
Extra features like map lights, grab handles, and other integrated components add to the complexity and cost of the repair.
- Basic Features: Minimal impact on cost.
- Advanced Features: Increase the time and skill required for the repair.
Understanding these factors will help you better estimate the cost of fixing your car headliner and make an informed decision. If you’re looking to purchase tools to assist with your car repairs, visit CARDIAGTECH.NET for high-quality automotive tools and equipment.
2. Average Cost Range for Headliner Repair
Based on various sources, the average cost to fix a car headliner generally falls within a specific range. Here’s a breakdown:
2.1. Typical Cost Range
Most headliner repairs range from $250 to $1,000. This range can vary based on the factors mentioned above, such as the car’s make and model, the material used, and the complexity of the design.
2.2. Lower End Estimates
For basic headliner replacements on common vehicles, you might find prices around $150 to $300. These lower estimates usually involve aftermarket kits and simpler designs.
2.3. Higher End Estimates
For luxury vehicles or those with complex designs and premium materials, costs can exceed $1,000, sometimes reaching several thousand dollars.
2.4. DIY vs. Professional Repair
While DIY kits are available, professional repair ensures quality workmanship and can prevent future issues. DIY kits may save money initially but can lead to additional costs if mistakes are made.
2.5. Cost Factors Table
Here’s a table summarizing the cost factors and their typical impact on the overall price:
| Factor | Impact on Cost | Estimated Cost Range |
|---|---|---|
| Vehicle Type | High | $250 – $3,000+ |
| Material Type | Medium | $50 – $500+ |
| Design Complexity | High | $100 – $1,000+ |
| Labor Costs | Medium | $75 – $150 per hour |
| Parts (OEM vs. Aftermarket) | Medium | $50 – $500+ |
| Condition of Headliner | Medium | $50 – $500+ |
| Geographic Location | Medium | Varies by region |
| Additional Features | Low to Medium | $20 – $200+ |
2.6. Real-World Examples
- Toyota Corolla: A basic headliner replacement might cost between $200 and $400.
- Honda Accord: Similar to the Corolla, expect to pay around $250 to $450.
- BMW 3 Series: Due to the complexity and potential need for OEM parts, costs can range from $500 to $1,500.
- Mercedes-Benz C-Class: Similar to BMW, expect to pay $600 to $2,000 or more.
2.7. Price Comparison Across Different Car Models
To give you a clearer picture, here’s a comparison table of estimated headliner repair costs for various car models:
| Car Model | Estimated Repair Cost | Notes |
|---|---|---|
| Toyota Camry | $250 – $450 | Common car, aftermarket kits available |
| Ford F-150 | $300 – $500 | Larger headliner, may require more labor |
| Chevrolet Silverado | $300 – $500 | Similar to F-150, larger headliner |
| Honda Civic | $250 – $450 | Aftermarket kits readily available |
| Nissan Altima | $250 – $450 | Common car, various repair options |
| BMW X5 | $600 – $1,800 | Luxury vehicle, complex design, may require OEM parts |
| Mercedes-Benz E-Class | $700 – $2,000+ | High-end materials, intricate design, potential for higher labor costs |
| Audi A4 | $550 – $1,600 | European car, may require specialized tools and expertise |
| Jeep Grand Cherokee | $350 – $600 | Larger SUV, more material needed, moderate complexity |
| Hyundai Sonata | $250 – $450 | Affordable car, straightforward repair process |
Understanding these averages and examples can help you budget for your headliner repair and make an informed decision on whether to DIY or hire a professional. For those considering a DIY approach, CARDIAGTECH.NET offers a wide range of automotive tools and equipment to help you get the job done right.
3. Step-by-Step Guide to Headliner Replacement
Replacing a car headliner can be a challenging but rewarding DIY project. Here’s a step-by-step guide:
3.1. Gather Your Materials
Before you begin, gather all the necessary materials and tools:
- New headliner fabric
- Headliner adhesive spray
- Foam backing (if needed)
- Screwdrivers (various sizes)
- Pliers
- Socket set
- Utility knife or scissors
- Cleaning supplies
- Gloves
- Safety glasses
3.2. Remove Interior Trim
Carefully remove all interior trim pieces that hold the headliner in place. This includes:
- Sun visors
- Dome lights
- Grab handles
- Seatbelts (if necessary)
- A-pillar and B-pillar trim
Store all removed parts in a safe place to avoid loss or damage.
3.3. Remove the Old Headliner
Gently detach the old headliner from the car’s ceiling. Be careful not to damage the headliner board, as you’ll need to reuse it.
3.4. Clean the Headliner Board
Once the old headliner is removed, clean the headliner board thoroughly. Remove any remaining foam or adhesive residue. A wire brush or scraper can be helpful for this step.
3.5. Apply New Foam Backing (If Needed)
If the foam backing is damaged or deteriorated, apply a new layer. Cut the foam to size and use adhesive spray to attach it to the headliner board.
3.6. Cut the New Headliner Fabric
Lay the new headliner fabric over the headliner board and cut it to size, leaving a few extra inches around the edges for trimming.
3.7. Apply Adhesive
Apply a generous layer of headliner adhesive spray to both the headliner board and the fabric. Allow the adhesive to become tacky for a few minutes before proceeding.
3.8. Attach the New Fabric
Carefully attach the new fabric to the headliner board, starting from the center and working your way outwards. Smooth out any wrinkles or bubbles as you go.
3.9. Trim Excess Fabric
Once the adhesive has dried, trim any excess fabric around the edges of the headliner board.
3.10. Reinstall the Headliner
Carefully reinstall the headliner into the car, making sure it’s properly aligned.
3.11. Reattach Interior Trim
Reattach all the interior trim pieces you removed earlier, including sun visors, dome lights, and grab handles.
3.12. Final Check
Do a final check to ensure everything is properly installed and secure. Clean any smudges or fingerprints from the new headliner.
3.13. DIY Headliner Replacement Checklist
Here’s a quick checklist to ensure you cover all the steps:
- [ ] Gather materials and tools
- [ ] Remove interior trim
- [ ] Remove old headliner
- [ ] Clean headliner board
- [ ] Apply new foam backing (if needed)
- [ ] Cut new headliner fabric
- [ ] Apply adhesive
- [ ] Attach new fabric
- [ ] Trim excess fabric
- [ ] Reinstall headliner
- [ ] Reattach interior trim
- [ ] Final check and clean-up
3.14. Tips for a Successful DIY Headliner Replacement
- Work in a Clean Area: Ensure your workspace is clean to prevent dirt and debris from getting trapped in the new headliner.
- Take Your Time: Rushing can lead to mistakes. Work carefully and methodically.
- Use High-Quality Adhesive: A good adhesive is crucial for a long-lasting repair.
- Watch Videos: There are many helpful DIY videos online that can guide you through the process.
- Ask for Help: If you’re unsure about any step, don’t hesitate to ask a friend or family member for assistance.
By following this step-by-step guide, you can successfully replace your car headliner and save money on professional labor costs. For high-quality tools and materials, visit CARDIAGTECH.NET to ensure you have everything you need for a successful DIY project.
4. Common Problems and Solutions in Headliner Repair
While replacing a headliner, you might encounter some common issues. Here’s how to address them:
4.1. Sagging Headliner
Problem: The headliner fabric starts to sag over time.
Solution: This is usually due to the adhesive failing. Reapply adhesive or replace the headliner entirely. Ensure you use a high-quality adhesive designed for headliners.
4.2. Peeling Fabric
Problem: The fabric starts to peel away from the headliner board.
Solution: Clean the board and reapply the fabric with new adhesive. If the board is damaged, consider replacing it.
4.3. Damaged Headliner Board
Problem: The headliner board is cracked or broken.
Solution: Repair the board with fiberglass or epoxy resin. If the damage is severe, replace the entire board.
4.4. Wrinkles and Bubbles
Problem: Wrinkles and bubbles appear after installing the new fabric.
Solution: Smooth out wrinkles and bubbles while the adhesive is still wet. Use a soft cloth or roller to ensure even adhesion. If bubbles persist, carefully puncture them with a needle and smooth out the fabric.
4.5. Adhesive Failure
Problem: The adhesive fails to hold the fabric in place.
Solution: Ensure you’re using the correct type of adhesive and applying it properly. Clean the surfaces thoroughly before applying the adhesive. Allow the adhesive to become tacky before attaching the fabric.
4.6. Color Mismatch
Problem: The new headliner fabric doesn’t match the car’s interior.
Solution: Order a sample of the fabric before purchasing to ensure a good match. Consider replacing other interior components to match the new headliner.
4.7. Difficulty Removing Trim
Problem: Difficulty removing interior trim pieces without damage.
Solution: Use the correct tools and apply gentle pressure. Consult your car’s repair manual for specific instructions on removing trim pieces.
4.8. Tears and Rips
Problem: The new headliner fabric tears during installation.
Solution: Use a high-quality fabric that is durable and resistant to tearing. Work carefully and avoid pulling the fabric too tightly.
4.9. Dealing with Mold and Mildew
Problem: Mold or mildew growth on the headliner.
Solution: Clean the headliner with a mold and mildew remover before replacing the fabric. Address the source of the moisture to prevent future growth.
4.10. Finding the Right Tools
Problem: Not having the right tools for the job.
Solution: Invest in a set of automotive tools that includes screwdrivers, pliers, and a socket set. CARDIAGTECH.NET offers a wide range of high-quality tools to help you with your headliner repair.
4.11. Troubleshooting Table
Here’s a quick troubleshooting table for common headliner issues:
| Problem | Solution |
|---|---|
| Sagging Headliner | Reapply adhesive or replace headliner with high-quality adhesive |
| Peeling Fabric | Clean board, reapply fabric with new adhesive, or replace board if damaged |
| Damaged Headliner Board | Repair with fiberglass or epoxy resin, or replace entire board |
| Wrinkles and Bubbles | Smooth out while adhesive is wet, puncture bubbles, and smooth fabric |
| Adhesive Failure | Use correct adhesive, clean surfaces, allow adhesive to become tacky before attaching fabric |
| Color Mismatch | Order fabric sample, consider replacing other interior components to match |
| Difficulty Removing Trim | Use correct tools, consult repair manual |
| Tears and Rips | Use durable fabric, work carefully |
| Mold and Mildew | Clean with mold remover, address moisture source |
| Finding the Right Tools | Invest in a quality set of automotive tools from CARDIAGTECH.NET |
By understanding these common problems and solutions, you can tackle your headliner repair with confidence. Visit CARDIAGTECH.NET for all your automotive tool needs.
5. Maintaining Your New Headliner
Once you’ve replaced your car’s headliner, proper maintenance is crucial to ensure its longevity. Here are some tips:
5.1. Regular Cleaning
Clean your headliner regularly to prevent dirt and stains from setting in. Use a soft brush or vacuum with an upholstery attachment to remove dust and debris.
5.2. Spot Cleaning
Address spills and stains immediately. Use a mild detergent and a soft cloth to gently blot the affected area. Avoid rubbing, which can damage the fabric.
5.3. Avoid Harsh Chemicals
Avoid using harsh chemicals or abrasive cleaners, as they can damage the headliner fabric. Stick to mild detergents and upholstery cleaners.
5.4. Protect from Sunlight
Prolonged exposure to sunlight can cause the headliner fabric to fade or deteriorate. Park in shaded areas or use a sunshade to protect your car’s interior.
5.5. Control Humidity
High humidity levels can promote mold and mildew growth. Use a dehumidifier or moisture absorber to keep your car’s interior dry.
5.6. Avoid Smoking
Smoking in your car can cause the headliner to become stained and odorous. Avoid smoking or use an air purifier to minimize the impact.
5.7. Regular Inspections
Inspect your headliner regularly for signs of damage, such as sagging or peeling fabric. Address any issues promptly to prevent them from worsening.
5.8. Professional Detailing
Consider professional detailing services to keep your car’s interior in top condition. Professional detailers have the expertise and equipment to clean and protect your headliner effectively.
5.9. Maintenance Checklist
Here’s a quick maintenance checklist for your new headliner:
- [ ] Clean regularly with a soft brush or vacuum
- [ ] Spot clean spills and stains immediately
- [ ] Avoid harsh chemicals and abrasive cleaners
- [ ] Protect from sunlight
- [ ] Control humidity
- [ ] Avoid smoking
- [ ] Inspect regularly for damage
- [ ] Consider professional detailing
5.10. Long-Term Care Tips
- Use Seat Covers: Protect your seats to minimize wear and tear, which can indirectly affect the overall cleanliness of your car’s interior, including the headliner.
- Ventilate Your Car: Regularly air out your car to prevent moisture buildup and unpleasant odors.
- Avoid Hanging Heavy Items: Don’t hang heavy items from the headliner, as this can cause it to sag over time.
5.11. Maintenance Schedule
| Task | Frequency | Benefits |
|---|---|---|
| Vacuum Headliner | Monthly | Removes dust and debris, prevents stains from setting in |
| Spot Clean | As needed | Addresses spills and stains promptly, prevents permanent damage |
| Inspect for Damage | Quarterly | Identifies issues early, prevents them from worsening |
| Professional Detailing | Annually | Provides thorough cleaning and protection, extends headliner lifespan |
| Check Humidity | Monthly | Prevents mold and mildew growth, keeps interior fresh |
By following these maintenance tips, you can keep your new headliner looking its best for years to come. For more automotive care tips and high-quality tools, visit CARDIAGTECH.NET.
6. When to Hire a Professional vs. DIY
Deciding whether to hire a professional or tackle a headliner repair yourself depends on several factors. Here’s a guide to help you make the right choice:
6.1. Skill Level
DIY: If you have experience with automotive repairs and are comfortable using tools, a DIY approach might be feasible.
Professional: If you’re not confident in your skills or lack experience with interior repairs, hiring a professional is the better option.
6.2. Time Commitment
DIY: Replacing a headliner can take several hours, or even a full day, depending on the complexity of the job.
Professional: A professional can typically complete the repair in a few hours, minimizing downtime for your vehicle.
6.3. Tool Availability
DIY: You’ll need a variety of tools, including screwdrivers, pliers, a socket set, and a utility knife.
Professional: Professionals have all the necessary tools and equipment, ensuring the job is done efficiently.
6.4. Cost
DIY: DIY can save money on labor costs, but you’ll need to purchase the materials and tools.
Professional: Hiring a professional is more expensive upfront, but it can prevent costly mistakes and ensure a high-quality repair.
6.5. Complexity
DIY: Simple headliner replacements on common vehicles are easier to handle.
Professional: Complex designs, luxury vehicles, or extensive damage may require the expertise of a professional.
6.6. Risk of Damage
DIY: There’s a risk of damaging interior components or making mistakes that could lead to additional costs.
Professional: Professionals are trained to handle interior repairs without causing damage, minimizing the risk of additional expenses.
6.7. Warranty
DIY: DIY repairs typically don’t come with a warranty.
Professional: Professional repairs often come with a warranty, providing peace of mind and protection against future issues.
6.8. DIY vs. Professional Comparison Table
| Factor | DIY | Professional |
|---|---|---|
| Skill Level | Experienced with automotive repairs | Limited or no experience |
| Time Commitment | Several hours to a full day | A few hours |
| Tool Availability | Owns necessary tools | Has all necessary tools and equipment |
| Cost | Lower upfront cost | Higher upfront cost |
| Complexity | Simple repairs on common vehicles | Complex designs, luxury vehicles, extensive damage |
| Risk of Damage | Higher risk of damage and mistakes | Lower risk of damage |
| Warranty | No warranty | Often comes with a warranty |
6.9. Scenarios
- Scenario 1: You have a common car with a simple headliner design and some experience with automotive repairs. Consider DIY.
- Scenario 2: You have a luxury vehicle with a complex headliner design and no experience with interior repairs. Hire a professional.
- Scenario 3: You’re on a tight budget and willing to invest the time and effort to learn. Consider DIY with caution.
- Scenario 4: You want a guaranteed high-quality repair and peace of mind. Hire a professional.
6.10. Making the Decision
Ultimately, the decision to hire a professional or DIY depends on your individual circumstances and comfort level. Assess your skills, time, and budget, and weigh the pros and cons of each option. If you choose to DIY, CARDIAGTECH.NET offers a wide range of tools and equipment to help you get the job done right.
7. How to Find a Reputable Headliner Repair Service
If you decide to hire a professional, finding a reputable headliner repair service is essential. Here’s how to do it:
7.1. Ask for Recommendations
Ask friends, family, and colleagues for recommendations. Personal referrals are often the most reliable source of information.
7.2. Check Online Reviews
Read online reviews on sites like Google, Yelp, and the Better Business Bureau. Pay attention to both positive and negative reviews, and look for patterns or recurring themes.
7.3. Verify Credentials
Ensure the repair service is licensed and insured. This protects you in case of damage or accidents.
7.4. Request Quotes
Get quotes from multiple repair services. Compare prices, but don’t base your decision solely on cost. Consider the quality of the materials and the expertise of the technicians.
7.5. Inquire About Warranty
Ask about the warranty offered on the repair. A reputable service will stand behind their work and offer a warranty against defects or premature failure.
7.6. Visit the Shop
Visit the repair shop in person to assess its cleanliness and organization. A well-maintained shop is a good sign of professionalism.
7.7. Ask Questions
Ask questions about the repair process, the materials used, and the technicians’ experience. A knowledgeable and transparent service will be happy to answer your questions.
7.8. Check for Certifications
Look for certifications from organizations like ASE (Automotive Service Excellence). Certifications indicate that the technicians have met industry standards for knowledge and skill.
7.9. Review Portfolio
Ask to see examples of previous headliner repairs. A reputable service will have a portfolio of their work.
7.10. Trust Your Instincts
Trust your instincts. If something feels off or the service seems unprofessional, it’s best to look elsewhere.
7.11. Checklist for Finding a Reputable Repair Service
- [ ] Ask for recommendations
- [ ] Check online reviews
- [ ] Verify credentials
- [ ] Request quotes from multiple services
- [ ] Inquire about warranty
- [ ] Visit the shop
- [ ] Ask questions
- [ ] Check for certifications
- [ ] Review portfolio
- [ ] Trust your instincts
7.12. Online Resources
- Google Reviews: Check Google for local repair services and read customer reviews.
- Yelp: Another great resource for finding local businesses and reading reviews.
- Better Business Bureau (BBB): Check the BBB for ratings and reviews of repair services.
- ASE Certification: Verify if the technicians are ASE certified.
By following these steps, you can find a reputable headliner repair service that will provide a high-quality repair and excellent customer service. Remember to visit CARDIAGTECH.NET for all your automotive tool needs.
8. Cost-Saving Tips for Headliner Repair
If you’re looking to save money on headliner repair, here are some tips to consider:
8.1. DIY Repair
As mentioned earlier, DIY repair can save on labor costs. If you’re comfortable with automotive repairs, consider tackling the job yourself.
8.2. Aftermarket Parts
Opt for aftermarket parts instead of OEM parts. Aftermarket parts are generally cheaper and can provide similar performance.
8.3. Shop Around
Get quotes from multiple repair services and compare prices. Don’t settle for the first quote you receive.
8.4. Negotiate
Negotiate with the repair service. Ask if they offer any discounts or promotions.
8.5. Repair, Don’t Replace
If the damage is minor, consider repairing the headliner instead of replacing it. Repairing can be a cheaper option.
8.6. Use Coupons
Look for coupons and discounts online or in local newspapers. Many repair services offer coupons to attract new customers.
8.7. Timing
Get the repair done during off-peak seasons. Repair services may offer lower prices during slow periods.
8.8. Local Shops
Support local, independent repair shops. They often offer more competitive prices than large chain stores.
8.9. Salvage Yards
Consider sourcing parts from salvage yards. You may be able to find a used headliner in good condition for a fraction of the cost of a new one.
8.10. Insurance
Check if your insurance policy covers headliner repair. Some policies may cover damage caused by accidents or vandalism.
8.11. Cost-Saving Checklist
- [ ] Consider DIY repair
- [ ] Opt for aftermarket parts
- [ ] Shop around for quotes
- [ ] Negotiate with the repair service
- [ ] Repair instead of replacing
- [ ] Use coupons and discounts
- [ ] Get the repair done during off-peak seasons
- [ ] Support local shops
- [ ] Source parts from salvage yards
- [ ] Check insurance coverage
8.12. Additional Tips
- Bundle Services: Ask if the repair service offers discounts for bundling headliner repair with other services, such as interior detailing or window tinting.
- Payment Options: Inquire about payment options. Some repair services offer financing or payment plans.
- Referrals: Ask if the repair service offers a referral program. You may be able to earn a discount by referring new customers.
By following these cost-saving tips, you can reduce the cost of your headliner repair without sacrificing quality. For high-quality tools and materials, visit CARDIAGTECH.NET.
9. The Future of Headliner Materials and Repair
The automotive industry is constantly evolving, and headliner materials and repair techniques are no exception. Here’s a glimpse into the future:
9.1. Sustainable Materials
Expect to see more sustainable and eco-friendly headliner materials, such as recycled fabrics and plant-based fibers.
9.2. Advanced Adhesives
New and improved adhesives will provide stronger and longer-lasting bonds, reducing the risk of sagging and peeling.
9.3. Integrated Technology
Headliners may incorporate more integrated technology, such as ambient lighting, sensors, and entertainment systems.
9.4. 3D Printing
3D printing could revolutionize headliner manufacturing, allowing for customized designs and on-demand production.
9.5. Self-Healing Materials
Self-healing materials could automatically repair minor damage, extending the lifespan of headliners.
9.6. Improved Durability
Manufacturers will focus on creating more durable and stain-resistant headliner fabrics.
9.7. Modular Designs
Modular headliner designs could simplify the repair process, allowing for easy replacement of individual components.
9.8. Augmented Reality
Augmented reality apps could guide DIYers through the headliner repair process, providing step-by-step instructions and visual aids.
9.9. Robotic Repair
Robotic systems could automate headliner repair, improving efficiency and precision.
9.10. Nanotechnology
Nanotechnology could be used to create headliners with enhanced properties, such as improved insulation and sound dampening.
9.11. Future Trends Checklist
- [ ] Sustainable materials
- [ ] Advanced adhesives
- [ ] Integrated technology
- [ ] 3D printing
- [ ] Self-healing materials
- [ ] Improved durability
- [ ] Modular designs
- [ ] Augmented reality
- [ ] Robotic repair
- [ ] Nanotechnology
9.12. Expert Predictions
- Material Scientists: Predict that sustainable materials will become more prevalent as environmental awareness grows.
- Automotive Engineers: Anticipate that integrated technology will transform headliners into multifunctional components.
- Repair Technicians: Believe that modular designs will simplify the repair process and reduce costs.
The future of headliner materials and repair is bright, with innovations promising to improve durability, sustainability, and functionality. Stay tuned to CARDIAGTECH.NET for the latest updates on automotive technology and tools.
10. FAQ About Headliner Repair
Here are some frequently asked questions about headliner repair:
10.1. How long does it take to replace a headliner?
It typically takes 3 to 6 hours to replace a headliner, depending on the complexity of the job.
10.2. Can I drive my car with a sagging headliner?
Yes, but it can be distracting and obstruct your vision. It’s best to repair or replace the headliner as soon as possible.
10.3. What causes a headliner to sag?
The most common cause is the breakdown of the adhesive due to heat and humidity.
10.4. Can I clean my headliner?
Yes, use a soft brush or vacuum with an upholstery attachment to remove dust and debris.
10.5. How much does it cost to replace a headliner?
The cost typically ranges from $250 to $1,000, depending on the vehicle and materials used.
10.6. Is it difficult to replace a headliner myself?
It can be challenging, but with the right tools and instructions, it’s possible to do it yourself.
10.7. What tools do I need to replace a headliner?
You’ll need screwdrivers, pliers, a socket set, a utility knife, and headliner adhesive spray.
10.8. Can I repair a small tear in my headliner?
Yes, you can use fabric adhesive to repair small tears.
10.9. How can I prevent my headliner from sagging?
Park in shaded areas, control humidity, and avoid smoking in your car.
10.10. Are aftermarket headliners as good as OEM headliners?
Aftermarket headliners can be a good option, but OEM headliners offer the best fit and quality.
10.11. FAQ Summary
| Question | Answer |
|---|---|
| How long to replace a headliner? | 3 to 6 hours |
| Can I drive with a sagging headliner? | Yes, but it’s best to repair it |
| What causes sagging? | Adhesive breakdown due to heat and humidity |
| Can I clean my headliner? | Yes, use a soft brush or vacuum |
| How much does it cost? | $250 to $1,000 |
| Is DIY difficult? | Can be challenging but possible with the right tools |
| What tools do I need? | Screwdrivers, pliers, socket set, utility knife, adhesive spray |
| Can I repair small tears? | Yes, use fabric adhesive |
| How to prevent sagging? | Park in shade, control humidity, avoid smoking |
| Are aftermarket headliners good? | Can be a good option, but OEM offers the best fit and quality |
By addressing these frequently asked questions, you can make informed decisions about your headliner repair. For all your automotive tool and equipment needs, visit CARDIAGTECH.NET at 276 Reock St, City of Orange, NJ 07050, United States or contact us via WhatsApp at +1 (641) 206-8880.
Is your car headliner sagging or damaged? Don’t let it detract from your vehicle’s interior any longer! Contact CARDIAGTECH.NET today at +1 (641) 206-8880 for expert advice and the best tools to restore your car’s headliner. Whether you’re a seasoned mechanic or a DIY enthusiast, we have the right equipment to make the job easy and efficient. Visit our website at CARDIAGTECH.NET or stop by our store at 276 Reock St, City of Orange, NJ 07050, United States and let us help you bring your car’s interior back to life.