How To Find and Fix AC Leak In Car: A Complete Guide
Addressing AC leaks in your car promptly can prevent more significant damage and ensure your comfort. This guide will show you how to find and fix AC leaks efficiently using tools from CARDIAGTECH.NET, ensuring you stay cool on the road. Learn about AC leak detection, identify the source of the leak, and understand the repair processes, including selecting the right tools and sealants for a lasting solution.
1. Understanding Car AC Systems and Common Leak Points
What are the common components of a car’s AC system and where are leaks most likely to occur?
The AC system in your car consists of several key components, each playing a crucial role in cooling the vehicle’s interior. Knowing these parts and their functions will help you understand where leaks commonly occur. According to a study by the National Institute for Automotive Service Excellence (ASE), condenser leaks account for approximately 30% of AC system failures. The common components include:
- Compressor: The heart of the system, the compressor circulates refrigerant, increasing its pressure and temperature.
- Condenser: Located at the front of the car, the condenser dissipates heat from the refrigerant, turning it into a high-pressure liquid.
- Evaporator: Situated inside the dashboard, the evaporator allows the refrigerant to absorb heat from the cabin, cooling the air.
- Expansion Valve or Orifice Tube: This component regulates the flow of refrigerant into the evaporator, controlling the cooling process.
- Refrigerant Lines: These hoses and pipes carry refrigerant between the components.
- Receiver/Drier or Accumulator: This filters and stores refrigerant, removing moisture to prevent damage.
Leaks are most likely to occur at connection points, such as O-rings and seals, as well as in the condenser and evaporator due to their exposure to environmental factors.
1.1. Detailed Breakdown of Common Leak Locations
Where exactly should you inspect for AC leaks in each component?
Inspecting each component thoroughly can help pinpoint the exact location of the leak. Here’s a detailed breakdown:
| Component | Common Leak Points | Signs of Leak |
|---|---|---|
| Compressor | Seals, Valves, and Connection Points | Oil residue, reduced cooling, hissing sounds |
| Condenser | Fins, Tubes, and Connections | Physical damage, oily spots, inefficient cooling |
| Evaporator | Core, Connections, and Housing | Musty smell, water inside the cabin, poor cooling |
| Refrigerant Lines | Hoses, Fittings, and Joints | Oily residue, visible cracks, reduced system pressure |
| O-rings and Seals | Connections between components | Oily residue, refrigerant smell, system inefficiency |
| Receiver/Drier | Connections, Body | Corrosion, moisture accumulation, reduced system performance |
1.2. Understanding Refrigerant Types and Their Impact
How does the type of refrigerant used in your car affect leak detection and repair?
The type of refrigerant used in your car significantly impacts how you detect and repair leaks. Older vehicles typically use R-12, which is now phased out due to its ozone-depleting properties. Newer vehicles use R-134a or the latest R-1234yf, which are more environmentally friendly but have different characteristics. According to the EPA, R-1234yf is becoming the standard due to its lower global warming potential.
- R-12 (Freon): Requires specific tools and certifications to handle due to environmental regulations. Leaks are often detected using electronic leak detectors or UV dye.
- R-134a: The most common refrigerant in older modern vehicles. Leaks can be found using electronic leak detectors, UV dye, or soapy water solutions.
- R-1234yf: Found in newer vehicles, this refrigerant requires specialized equipment due to its flammability. Leak detection methods include electronic detectors and UV dye.
1.3. The Role of Pressure in AC System Leaks
How does pressure within the AC system contribute to leaks?
Pressure plays a significant role in the development and detection of AC system leaks. The AC system operates under high pressure when the compressor is running, which forces refrigerant through the lines and components. This high pressure can exacerbate existing weak points, causing leaks to worsen over time. A study from SAE International found that pressure cycling contributes to seal degradation, leading to refrigerant leaks.
- High-Pressure Side: Leaks are more likely to occur on the high-pressure side (compressor to expansion valve) due to the extreme conditions.
- Low-Pressure Side: Leaks can also occur on the low-pressure side (expansion valve to compressor), especially at connections and seals that weaken over time.
Regularly monitoring system pressure can help identify potential leaks early. Using tools like manifold gauge sets from CARDIAGTECH.NET can assist in this process.
2. Identifying the Signs of an AC Leak
What are the most common symptoms of an AC leak in a vehicle?
Recognizing the signs of an AC leak early can save you time and money on repairs. Common symptoms include:
- Reduced Cooling Performance: The most noticeable sign is a decrease in the AC’s ability to cool the car’s interior.
- Hissing Sounds: You might hear a hissing sound coming from under the dashboard or engine compartment, indicating escaping refrigerant.
- Oily Residue: Check around AC components for oily residue, which can indicate a refrigerant leak.
- Musty Odor: A musty or moldy smell inside the car can indicate a leak in the evaporator, which is located behind the dashboard.
- Visible Damage: Inspect the condenser for physical damage, such as bent fins or punctures, which can cause leaks.
- Frequent AC Recharge: If you find yourself frequently recharging the AC system, it likely has a leak.
- Compressor Issues: The AC compressor may struggle or fail if the system is low on refrigerant due to a leak.
2.1. Using Your Senses: Smell, Sound, and Sight
How can you use your senses to detect AC leaks?
Using your senses can be a simple yet effective way to detect AC leaks. Here’s how:
- Smell: A refrigerant leak often has a distinct, slightly sweet, or chemical-like odor. If you notice this smell inside your car, especially when the AC is running, it could indicate a leak.
- Sound: Listen for hissing or bubbling sounds coming from the AC system components. These sounds can indicate escaping refrigerant.
- Sight: Look for visual signs of leaks, such as oily residue on or around AC components. Also, check for damage to the condenser and refrigerant lines.
2.2. Performance Clues: Gauging Cooling Efficiency
How can you assess your AC’s cooling efficiency to identify potential leaks?
Assessing your AC’s cooling efficiency is crucial in identifying potential leaks. Here’s how to gauge it:
- Temperature Test: Use a thermometer to measure the temperature of the air coming from the AC vents. A properly functioning AC system should produce air that is significantly cooler than the ambient temperature. According to the Society of Automotive Engineers (SAE), the vent temperature should be between 40-50°F (4-10°C).
- Time to Cool: Note how long it takes for the car’s interior to cool down. A longer cooling time can indicate a refrigerant leak.
- Consistency: Check if the cooling is consistent. If the AC blows cold air intermittently or only cools when the car is moving, it could indicate a leak or other system issue.
2.3. Recognizing Specific Odors Associated with Leaks
What specific odors indicate an AC leak, and what do they signify?
Specific odors can provide valuable clues about the location and severity of an AC leak.
- Sweet or Chemical Smell: This is the most common odor associated with refrigerant leaks. It indicates that refrigerant is escaping from the system.
- Musty or Moldy Smell: This odor often indicates a leak in the evaporator core, which can lead to mold and bacteria growth inside the HVAC system.
- Burning Smell: While less common, a burning smell could indicate a compressor issue due to low refrigerant levels.
3. Essential Tools for AC Leak Detection
What tools are essential for effectively detecting AC leaks in a car?
Having the right tools is crucial for effectively detecting AC leaks. Essential tools include:
- UV Leak Detection Kit: This kit includes a UV dye that is added to the AC system and a UV light to identify leaks.
- Electronic Leak Detector: This device detects refrigerant leaks by sensing the presence of refrigerant in the air.
- Manifold Gauge Set: This tool measures the pressure in the AC system, helping identify leaks and other issues.
- Bubble Leak Detector: This solution is applied to suspected leak areas, and bubbles form where refrigerant is escaping.
- Inspection Mirror: This helps inspect hard-to-reach areas for signs of leaks.
- Gloves and Safety Glasses: Safety gear is essential to protect yourself from refrigerant and other chemicals.
CARDIAGTECH.NET offers a range of high-quality tools for AC leak detection, ensuring you have everything you need for accurate and efficient diagnostics.
3.1. UV Leak Detection Kits: How They Work
How do UV leak detection kits help in identifying AC leaks?
UV leak detection kits are highly effective for identifying AC leaks. Here’s how they work:
- Add UV Dye: The UV dye is added to the AC system through the low-pressure service port. According to research by the American Society of Heating, Refrigerating and Air-Conditioning Engineers (ASHRAE), using the correct amount of dye is crucial for accurate leak detection.
- Circulate Refrigerant: Run the AC system for about 15-30 minutes to allow the dye to circulate through the system.
- Inspect with UV Light: Use the UV light to inspect the AC components, including the compressor, condenser, evaporator, and refrigerant lines. The dye will glow brightly under the UV light, indicating the location of the leak.
3.2. Electronic Leak Detectors: Sensitivity and Usage
What is the sensitivity of electronic leak detectors, and how should they be used?
Electronic leak detectors are highly sensitive and can detect even small refrigerant leaks. Here’s what you need to know about their sensitivity and usage:
- Sensitivity: Most electronic leak detectors can detect leaks as small as 0.5 ounces per year. Some advanced models can detect even smaller leaks.
- Usage:
- Calibration: Calibrate the detector according to the manufacturer’s instructions.
- Slow Movement: Move the detector probe slowly around the AC components, keeping it close to the surfaces.
- Listen for Beeps: The detector will beep or sound an alarm when it detects refrigerant. The frequency of the beeps indicates the severity of the leak.
- Pinpoint the Leak: Once a leak is detected, move the probe around the area to pinpoint the exact location.
3.3. Manifold Gauge Sets: Reading Pressure for Leak Diagnosis
How can manifold gauge sets be used to diagnose AC leaks by reading pressure?
Manifold gauge sets are essential for diagnosing AC leaks by reading the pressure in the system. Here’s how to use them:
- Connect the Gauges: Connect the high-pressure and low-pressure hoses to the corresponding service ports on the AC system.
- Read the Pressure: Observe the pressure readings on the gauges. A properly functioning AC system should have specific pressure ranges depending on the ambient temperature.
- Analyze the Readings:
- Low Pressure on Both Sides: Indicates a refrigerant leak or a malfunctioning compressor.
- High Pressure on Both Sides: Indicates a blockage in the system.
- Unstable Pressure: Indicates a leak or moisture in the system.
3.4. Bubble Leak Detectors: Application and Effectiveness
How effective are bubble leak detectors, and how should they be applied?
Bubble leak detectors are a simple and effective way to detect larger refrigerant leaks. Here’s what you need to know about their application and effectiveness:
- Application:
- Clean the Area: Clean the suspected leak area with a clean cloth.
- Apply the Solution: Apply the bubble leak detector solution to the area using a spray bottle or brush.
- Observe for Bubbles: Watch for bubbles to form, indicating escaping refrigerant.
- Effectiveness: Bubble leak detectors are most effective for identifying larger leaks. They may not detect smaller leaks that require more sensitive methods like UV dye or electronic detectors.
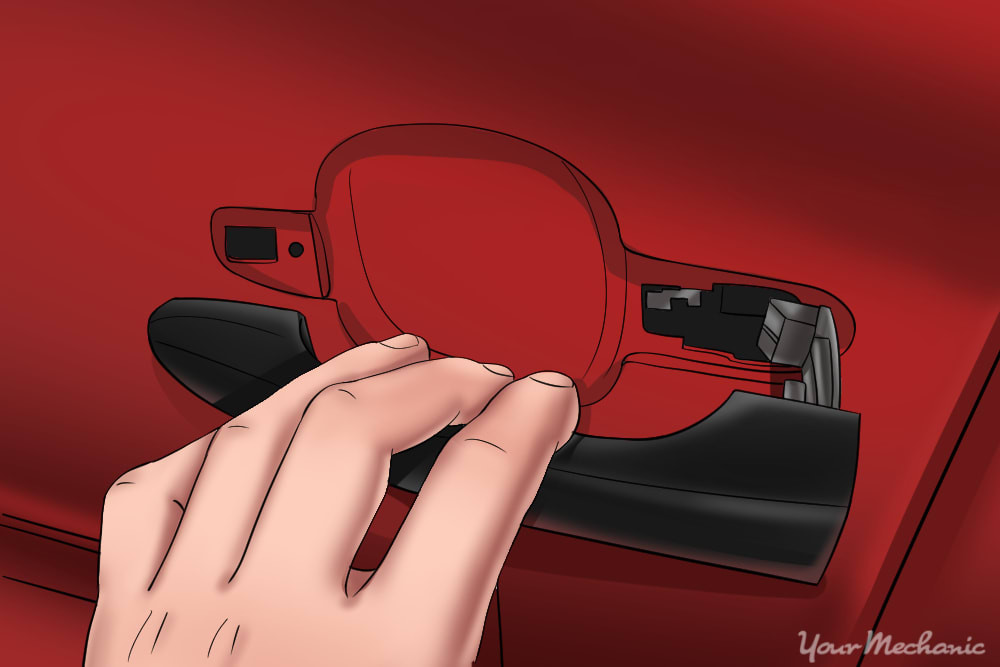
4. Step-by-Step Guide to Finding AC Leaks
What is the step-by-step process for effectively locating AC leaks in a car?
Finding AC leaks requires a systematic approach. Here’s a step-by-step guide:
- Visual Inspection: Start by visually inspecting all AC components for signs of leaks, such as oily residue or damage.
- Use a Manifold Gauge Set: Connect a manifold gauge set to the AC system to check the pressure readings. Low pressure indicates a potential leak.
- Apply UV Dye: Add UV dye to the AC system and run the system for 15-30 minutes. Then, use a UV light to inspect for leaks.
- Use an Electronic Leak Detector: Use an electronic leak detector to check for refrigerant leaks around the AC components.
- Apply Bubble Leak Detector: Apply a bubble leak detector solution to suspected leak areas and watch for bubbles.
- Inspect the Evaporator: Check for a musty odor inside the car, which can indicate a leak in the evaporator core.
- Check the Condenser: Inspect the condenser for physical damage, such as bent fins or punctures.
4.1. Preliminary Inspection: Visual Checks and Basic Tests
What visual checks and basic tests should you perform before using specialized tools?
Before using specialized tools, perform these preliminary inspections and basic tests:
- Visual Checks:
- Oily Residue: Look for oily residue on or around AC components.
- Damage: Check for physical damage to the condenser, refrigerant lines, and other components.
- Corrosion: Inspect for corrosion, especially on connections and fittings.
- Basic Tests:
- Temperature Test: Use a thermometer to measure the temperature of the air coming from the AC vents.
- Listening for Sounds: Listen for hissing or bubbling sounds.
- Smell Test: Check for a refrigerant odor inside the car.
4.2. Using UV Dye and Light: A Detailed Application Guide
How should you apply UV dye and use a UV light to effectively locate AC leaks?
Follow these steps to effectively apply UV dye and use a UV light:
- Preparation: Wear safety glasses and gloves. Ensure the AC system is running properly.
- Add UV Dye: Locate the low-pressure service port on the AC system. Use a UV dye injector to add the dye to the system. Follow the manufacturer’s instructions for the correct amount of dye.
- Circulation: Run the AC system for 15-30 minutes to allow the dye to circulate.
- Inspection: Turn off the engine and use a UV light to inspect the AC components. Darken the area for better visibility.
- Locate Leaks: The dye will glow brightly under the UV light, indicating the location of the leak.
- Document Findings: Take photos or notes of the leak locations for future reference.
4.3. Employing Electronic Leak Detectors: Best Practices
What are the best practices for using electronic leak detectors to ensure accurate results?
To ensure accurate results when using electronic leak detectors, follow these best practices:
- Calibration: Calibrate the detector according to the manufacturer’s instructions before each use.
- Environment: Use the detector in a well-ventilated area to avoid false readings.
- Probe Movement: Move the probe slowly and steadily around the AC components, keeping it close to the surfaces.
- Listen for Signals: Pay close attention to the detector’s audio and visual signals. The frequency of the beeps or the intensity of the light indicates the severity of the leak.
- Avoid Contamination: Keep the probe clean and avoid contact with oil, dirt, or other contaminants.
- Battery Life: Ensure the detector has sufficient battery life for the duration of the inspection.
4.4. Checking the Evaporator Core: A Tricky Task
How can you effectively check the evaporator core for leaks, considering its location?
Checking the evaporator core for leaks can be challenging due to its location inside the dashboard. Here’s how to do it effectively:
- Smell Test: Check for a musty or moldy odor inside the car, which can indicate a leak in the evaporator core.
- Inspect Drain Tube: Locate the evaporator drain tube under the car. Check for water or oily residue draining from the tube.
- Use a Borescope: Use a borescope to inspect the evaporator core through the vents or drain tube.
- UV Dye: If you’ve added UV dye to the system, use a UV light to inspect the evaporator core through the vents or drain tube.
- Professional Inspection: If you suspect a leak but cannot confirm it, consider having a professional mechanic inspect the evaporator core.
5. Repairing AC Leaks: A Practical Approach
What is a practical approach to repairing AC leaks in a car, ensuring a lasting solution?
Repairing AC leaks requires a practical approach to ensure a lasting solution. Common repair methods include:
- Replacing O-Rings and Seals: Replacing worn or damaged O-rings and seals is a common repair.
- Repairing Refrigerant Lines: Small leaks in refrigerant lines can be repaired using specialized repair kits.
- Replacing Components: In some cases, it may be necessary to replace components such as the condenser or evaporator.
- Using Sealants: AC sealants can be used to seal small leaks, but they should be used with caution.
5.1. Replacing O-Rings and Seals: A Detailed Guide
How can you effectively replace O-rings and seals to fix AC leaks?
Replacing O-rings and seals is a common and effective way to fix AC leaks. Here’s a detailed guide:
- Identify Leaking O-Rings: Use UV dye or an electronic leak detector to identify the leaking O-rings and seals.
- Recover Refrigerant: Recover the refrigerant from the AC system using a refrigerant recovery machine.
- Disconnect Components: Disconnect the AC components, such as the compressor, condenser, or refrigerant lines, where the leaking O-rings are located.
- Remove Old O-Rings: Remove the old O-rings and seals using a pick or screwdriver.
- Install New O-Rings: Lubricate the new O-rings with refrigerant oil and install them in the correct positions.
- Reconnect Components: Reconnect the AC components, ensuring the connections are tight.
- Evacuate the System: Evacuate the AC system using a vacuum pump to remove air and moisture.
- Recharge the System: Recharge the AC system with the correct amount of refrigerant.
- Test for Leaks: Test for leaks using UV dye or an electronic leak detector.
5.2. Repairing or Replacing Refrigerant Lines: Options and Steps
What are the options for repairing or replacing refrigerant lines, and what steps should you follow?
There are several options for repairing or replacing refrigerant lines, depending on the severity of the damage.
- Repair Options:
- Hose Repair Kits: These kits include fittings and clamps to repair small leaks in hoses.
- Sealants: Sealants can be used to seal small leaks in refrigerant lines.
- Replacement Options:
- New Refrigerant Lines: Replacing the entire refrigerant line is the most reliable option.
- Custom Hoses: Custom hoses can be made to fit specific applications.
Here are the steps to follow:
- Identify Damage: Locate the damaged section of the refrigerant line.
- Recover Refrigerant: Recover the refrigerant from the AC system.
- Disconnect the Line: Disconnect the refrigerant line from the AC components.
- Repair or Replace: Repair the line using a hose repair kit or replace it with a new line.
- Reconnect the Line: Reconnect the refrigerant line to the AC components.
- Evacuate the System: Evacuate the AC system using a vacuum pump.
- Recharge the System: Recharge the AC system with the correct amount of refrigerant.
- Test for Leaks: Test for leaks using UV dye or an electronic leak detector.
5.3. Condenser and Evaporator Repairs: When to Replace
When should you repair or replace the condenser and evaporator?
The decision to repair or replace the condenser and evaporator depends on the extent of the damage.
- Condenser:
- Repair: Minor damage, such as bent fins, can be repaired.
- Replace: Significant damage, such as punctures or leaks in the tubes, requires replacement.
- Evaporator:
- Repair: Minor leaks can sometimes be sealed.
- Replace: Major leaks, corrosion, or damage require replacement.
5.4. Using AC Sealants: Benefits and Risks
What are the benefits and risks of using AC sealants to repair leaks?
AC sealants can be a quick and easy way to seal small leaks, but they also come with risks.
- Benefits:
- Easy to Use: Sealants are easy to add to the AC system.
- Quick Fix: They can quickly seal small leaks.
- Cost-Effective: Sealants are less expensive than replacing components.
- Risks:
- System Contamination: Sealants can contaminate the AC system, causing damage to the compressor and other components.
- Reduced Efficiency: Sealants can reduce the efficiency of the AC system.
- Temporary Fix: Sealants are often a temporary fix and may not last long.
According to a study by the Mobile Air Conditioning Society (MACS), using sealants can lead to compressor failure if not used properly.
6. Preventing Future AC Leaks
What measures can you take to prevent future AC leaks in your car?
Preventing future AC leaks involves regular maintenance and proactive measures. Here’s what you can do:
- Regular Inspections: Inspect the AC system regularly for signs of leaks.
- Proper Maintenance: Follow the manufacturer’s maintenance schedule for the AC system.
- Refrigerant Level: Maintain the correct refrigerant level in the system.
- Component Protection: Protect AC components from physical damage.
- Use Quality Parts: Use high-quality replacement parts when repairing the AC system.
6.1. Regular Maintenance Tips for Longevity
What regular maintenance tips can extend the life of your car’s AC system?
Following these regular maintenance tips can extend the life of your car’s AC system:
- Annual Inspections: Have the AC system inspected annually by a professional mechanic.
- Filter Replacement: Replace the cabin air filter regularly to keep the system clean.
- System Cleaning: Clean the AC system to remove dirt and debris.
- Belt Inspection: Inspect the compressor belt for wear and tear.
- Refrigerant Recharge: Recharge the refrigerant as needed to maintain optimal performance.
6.2. Protective Measures: Shielding Components from Damage
How can you protect AC components from physical damage?
Protecting AC components from physical damage can prevent leaks and extend their lifespan. Here’s how:
- Condenser Guard: Install a condenser guard to protect the condenser from rocks and debris.
- Hose Protection: Use protective sleeves on refrigerant lines to prevent damage from friction and heat.
- Regular Cleaning: Keep the AC components clean to prevent corrosion.
- Careful Driving: Avoid driving through areas with debris that could damage the AC components.
6.3. The Importance of Quality Parts and Fluids
Why is it important to use quality parts and fluids when maintaining your AC system?
Using quality parts and fluids is crucial for the performance and longevity of your AC system.
- Reliability: Quality parts are more reliable and less likely to fail.
- Performance: Quality fluids, such as refrigerant oil, ensure optimal performance.
- Longevity: Quality parts and fluids can extend the life of the AC system.
- Warranty: Many quality parts come with a warranty, providing added protection.
6.4. Recognizing and Addressing Minor Issues Early
Why is it important to address minor AC issues early, and how can you do it?
Addressing minor AC issues early can prevent them from turning into major problems. Here’s why and how:
- Preventative Measures: Addressing minor leaks or performance issues early can prevent more significant damage.
- Cost Savings: Early repairs are often less expensive than major repairs.
- System Efficiency: Addressing minor issues can improve the efficiency of the AC system.
- Regular Checks: Regularly check the AC system for signs of leaks or performance issues.
- Professional Advice: Seek professional advice if you notice any unusual symptoms.
7. Professional vs. DIY: Making the Right Choice
When should you consider professional help for AC leak repairs, and when can you DIY?
Deciding whether to seek professional help or DIY depends on the complexity of the repair and your skill level.
- DIY Repairs:
- Simple Tasks: Replacing O-rings and seals, adding refrigerant, and cleaning components can be DIY tasks.
- Basic Tools: These tasks require basic tools and knowledge.
- Professional Repairs:
- Complex Repairs: Repairs involving the compressor, evaporator, or condenser should be handled by a professional.
- Specialized Equipment: These repairs require specialized equipment and expertise.
- Refrigerant Handling: Handling refrigerant requires certification and specialized equipment.
7.1. Evaluating Your Skill Level and Available Tools
How should you evaluate your skill level and available tools before attempting AC repairs?
Before attempting AC repairs, evaluate your skill level and available tools:
- Skill Level:
- Knowledge: Do you understand the basics of AC systems?
- Experience: Have you performed similar repairs before?
- Comfort Level: Are you comfortable working with AC components?
- Available Tools:
- Essential Tools: Do you have the essential tools, such as a manifold gauge set, UV leak detection kit, and vacuum pump?
- Quality: Are your tools in good working condition?
- Safety Gear: Do you have the necessary safety gear, such as gloves and safety glasses?
7.2. When Professional Expertise is Essential
In what situations is professional expertise essential for AC leak repairs?
Professional expertise is essential in the following situations:
- Complex Repairs: Repairs involving the compressor, evaporator, or condenser.
- Refrigerant Handling: Handling refrigerant requires certification and specialized equipment.
- System Diagnosis: Diagnosing complex AC issues requires expertise and experience.
- Warranty Concerns: DIY repairs can void the warranty on AC components.
7.3. The Cost Factor: DIY vs. Professional Repairs
How does the cost of DIY repairs compare to professional repairs?
The cost of DIY repairs can be lower than professional repairs, but it depends on the complexity of the repair.
- DIY Repairs:
- Lower Cost: DIY repairs can save money on labor costs.
- Tool Investment: You may need to invest in tools, which can increase the initial cost.
- Potential Risks: Incorrect repairs can lead to further damage and higher costs.
- Professional Repairs:
- Higher Cost: Professional repairs include labor costs, which can be significant.
- Expertise: You are paying for the expertise and experience of a professional.
- Warranty: Professional repairs often come with a warranty, providing added protection.
7.4. Ensuring Safety: A Priority in AC Repairs
Why is ensuring safety a top priority in AC repairs, and what precautions should you take?
Ensuring safety is a top priority in AC repairs due to the potential hazards involved.
- Refrigerant Exposure: Refrigerant can cause frostbite and other health issues.
- High Pressure: AC systems operate under high pressure, which can be dangerous if not handled properly.
- Electrical Hazards: Some AC components involve electrical connections.
Precautions to take include:
- Safety Gear: Wear safety glasses and gloves.
- Proper Ventilation: Work in a well-ventilated area.
- Refrigerant Handling: Follow proper procedures for handling refrigerant.
- Tool Safety: Use tools safely and according to the manufacturer’s instructions.
- Disconnect Power: Disconnect the power supply before working on electrical components.
8. Top Products for AC Leak Repair from CARDIAGTECH.NET
What are the top products available at CARDIAGTECH.NET for effective AC leak repair?
CARDIAGTECH.NET offers a range of high-quality products for AC leak repair, including:
- UV Leak Detection Kits: For locating leaks with UV dye and light.
- Electronic Leak Detectors: For detecting refrigerant leaks.
- Manifold Gauge Sets: For measuring pressure in the AC system.
- Vacuum Pumps: For evacuating the AC system.
- Refrigerant Recovery Machines: For recovering refrigerant safely.
- O-Ring and Seal Kits: For replacing worn or damaged O-rings and seals.
8.1. Featured UV Leak Detection Kits
What are the features and benefits of the UV leak detection kits available at CARDIAGTECH.NET?
CARDIAGTECH.NET offers several high-quality UV leak detection kits with the following features and benefits:
- High-Intensity UV Lights: For bright and clear leak detection.
- Quality UV Dye: For effective leak detection without damaging the AC system.
- Easy to Use: Simple and straightforward application.
- Comprehensive Kits: Includes everything you need for leak detection.
- Durability: Made with durable materials for long-lasting use.
8.2. Recommended Electronic Leak Detectors
Which electronic leak detectors does CARDIAGTECH.NET recommend for accurate leak detection?
CARDIAGTECH.NET recommends the following electronic leak detectors for accurate leak detection:
- High Sensitivity: Detects even small refrigerant leaks.
- Accurate Readings: Provides reliable and consistent readings.
- Durable Design: Built to withstand the rigors of automotive repair.
- Easy to Use: User-friendly interface and controls.
- Audible and Visual Alerts: Provides clear alerts when a leak is detected.
8.3. Manifold Gauge Sets for Precise Pressure Readings
What are the key features of manifold gauge sets at CARDIAGTECH.NET for precise pressure readings?
The manifold gauge sets at CARDIAGTECH.NET are designed for precise pressure readings and include the following key features:
- Accurate Gauges: Provides accurate and reliable pressure readings.
- Durable Hoses: Made with high-quality materials for long-lasting use.
- Easy to Read: Clear and easy-to-read gauges.
- Comprehensive Kit: Includes all necessary fittings and adapters.
- Versatile Use: Compatible with various refrigerants.
8.4. Vacuum Pumps and Refrigerant Recovery Machines
What are the benefits of using vacuum pumps and refrigerant recovery machines from CARDIAGTECH.NET?
Using vacuum pumps and refrigerant recovery machines from CARDIAGTECH.NET offers several benefits:
- Efficient Evacuation: Vacuum pumps efficiently remove air and moisture from the AC system.
- Safe Refrigerant Recovery: Refrigerant recovery machines safely recover refrigerant without releasing it into the atmosphere.
- Compliance: Ensures compliance with environmental regulations.
- Reliability: Built to withstand the demands of professional use.
- User-Friendly: Easy to operate and maintain.
9. Troubleshooting Common AC Problems
What are some common AC problems beyond leaks and how can you troubleshoot them?
Beyond leaks, several other issues can affect AC performance. Common problems include:
- Compressor Failure: The compressor may fail due to wear and tear or lack of lubrication.
- Blocked Condenser: The condenser can become blocked with debris, reducing its efficiency.
- Expansion Valve Issues: The expansion valve may malfunction, causing poor cooling.
- Electrical Problems: Electrical issues can prevent the AC system from functioning properly.
- Moisture in the System: Moisture can cause corrosion and reduce the efficiency of the AC system.
9.1. Diagnosing Compressor Issues
How can you diagnose common compressor issues?
Diagnosing compressor issues involves checking for the following:
- Noise: Unusual noises, such as grinding or squealing, can indicate a failing compressor.
- Clutch Engagement: Check if the compressor clutch is engaging properly.
- Pressure Readings: Use a manifold gauge set to check the pressure readings.
- Visual Inspection: Inspect the compressor for leaks or damage.
- Electrical Connections: Check the electrical connections to the compressor.
9.2. Addressing Blocked Condensers
How can you address blocked condensers to restore AC efficiency?
Addressing blocked condensers involves:
- Visual Inspection: Inspect the condenser for debris, such as leaves, dirt, or insects.
- Cleaning: Clean the condenser with a brush or compressed air.
- Flushing: Flush the condenser with a cleaning solution to remove stubborn debris.
- Condenser Guard: Install a condenser guard to prevent future blockages.
9.3. Expansion Valve Malfunctions
What are the symptoms of expansion valve malfunctions, and how can you address them?
Symptoms of expansion valve malfunctions include:
- Poor Cooling: The AC system may not cool properly.
- Icing: The evaporator may ice up.
- Pressure Issues: Unusual pressure readings on the manifold gauge set.
Addressing expansion valve malfunctions involves:
- Inspection: Inspect the expansion valve for damage or corrosion.
- Replacement: Replace the expansion valve if it is malfunctioning.
- System Evacuation: Evacuate the AC system after replacing the expansion valve.
9.4. Electrical Problems: Checks and Solutions
What electrical checks should you perform, and what are the solutions for common electrical problems?
Electrical checks include:
- Fuse Check: Check the fuses related to the AC system.
- Relay Check: Check the relays related to the AC system.
- Wiring Inspection: Inspect the wiring for damage or corrosion.
- Voltage Test: Test the voltage at the compressor and other components.
Solutions for electrical problems include:
- Fuse Replacement: Replace blown fuses.
- Relay Replacement: Replace faulty relays.
- Wiring Repair: Repair or replace damaged wiring.
- Grounding Issues: Address any grounding issues.
10. AC System Recharge: A Comprehensive Guide
How should you properly recharge your car’s AC system after fixing a leak?
Properly recharging your car’s AC system involves:
- System Evacuation: Evacuate the AC system using a vacuum pump.
- Refrigerant Charge: Charge the system with the correct amount of refrigerant.
- Oil Addition: Add the correct amount of refrigerant oil.
- Pressure Check: Check the pressure readings on the manifold gauge set.
- Performance Test: Test the AC system to ensure it is cooling properly.
10.1. Vacuuming the System: Why It’s Crucial
Why is vacuuming the AC system crucial before recharging?
Vacuuming the AC system is crucial because:
- Removes Moisture: It removes moisture, which can cause corrosion and reduce efficiency.
- Removes Air: It removes air, which can interfere with refrigerant performance.
- Checks for Leaks: It helps identify any remaining leaks in the system.
10.2. Determining the Correct Refrigerant Charge
How can you determine the correct refrigerant charge for your car’s AC system?
Determining the correct refrigerant charge involves