How to Fix a Bad Paint Job on a Car: A Comprehensive Guide
Fixing a bad paint job on your car involves several techniques, from minor touch-ups to complete repaints, depending on the severity and type of paint used. At CARDIAGTECH.NET, we provide the tools and knowledge you need to restore your car’s finish to its original glory or better. Whether it’s addressing imperfections or executing a full-scale repaint, we’re here to guide you through the process with expert advice and quality products. This guide will provide detail on techniques such as color correction, paint blending, and the application of protective coatings.
1. Identifying the Problem
Before diving into the repair process, it’s crucial to accurately diagnose the issues with your car’s paint job. Identifying the specific problems will help you choose the right tools, materials, and techniques for the repair.
- Orange Peel: This texture looks like the surface of an orange peel and is caused by the paint not leveling out properly during application.
- Runs and Sags: These occur when too much paint is applied in one area, causing it to drip or sag.
- Dirt and Contamination: Specks of dirt or other contaminants trapped in the paint can create a rough or uneven surface.
- Bubbles: Air bubbles in the paint can result from improper mixing, application, or environmental conditions.
- Fading or Oxidation: Over time, exposure to the sun and elements can cause the paint to fade or oxidize, leading to a dull or chalky appearance.
- Scratches and Swirls: Improper washing or polishing techniques can leave scratches and swirl marks in the paint.
- Color Mismatch: If touch-up paint doesn’t match the original color of the car, it can create an unsightly spot.
- Adhesion Issues: Paint that doesn’t adhere properly to the surface can peel, flake, or chip.
Understanding these issues and their causes is the first step in fixing a bad paint job. Proper diagnosis will ensure that you address the root of the problem and achieve a long-lasting, professional-looking repair.
2. Essential Tools and Materials
Having the right tools and materials is essential for fixing a bad paint job effectively. At CARDIAGTECH.NET, we offer a comprehensive range of high-quality products to help you achieve professional results.
| Tool/Material | Description | Use |
|---|---|---|
| Sandpaper (Various Grits) | Ranging from coarse grits (e.g., 400-grit) for removing imperfections to fine grits (e.g., 2000-grit) for smoothing surfaces. Made of abrasive materials like aluminum oxide or silicon carbide. | Leveling orange peel, removing runs, and preparing surfaces for painting. Finer grits are used for wet sanding and polishing. |
| Sanding Block | A firm, flat block used to hold sandpaper, ensuring even pressure and a consistent sanding surface. Typically made of rubber, cork, or foam. | Provides a flat, even surface for sanding, preventing uneven pressure and gouging. Essential for achieving a smooth, uniform finish. |
| DA Sander | A power tool that uses a random orbital motion to sand surfaces quickly and efficiently. Features variable speed settings and accepts different sanding disc sizes. | Used for larger areas to quickly remove imperfections, level surfaces, and prepare for painting. Ensures consistent and even sanding. |
| Rubbing Compound | An abrasive paste used to remove scratches, swirl marks, and oxidation from the paint surface. Contains fine abrasives that gently polish the paint. | Corrects paint imperfections, removes oxidation, and prepares the surface for polishing. Essential for restoring shine and clarity to the paint. |
| Polishing Compound | A less abrasive paste than rubbing compound, used to refine the paint surface and enhance gloss. Contains finer abrasives and polishing agents. | Removes fine scratches and swirl marks left by rubbing compound, enhancing the paint’s gloss and clarity. |
| Polishing Pads | Foam pads of varying aggressiveness used with polishing compounds to refine the paint surface. Available in different sizes and materials. | Applies polishing compounds evenly and efficiently, allowing for precise control over the polishing process. Different pads are used for different stages of polishing. |
| Polisher Machine | A power tool used to apply polishing compounds and pads to the paint surface. Features variable speed settings and ergonomic design. | Used to quickly and effectively polish the paint, removing imperfections and enhancing gloss. Ensures consistent and even polishing. |
| Tack Cloth | A sticky cloth used to remove dust and debris from the surface before painting. Made of cotton gauze impregnated with a tacky resin. | Removes dust, lint, and other contaminants from the surface, ensuring a clean painting surface. Prevents imperfections from being trapped in the paint. |
| Automotive Primer | A base coat applied to the surface before painting to improve adhesion and provide a uniform surface. Available in different formulations for different materials. | Improves paint adhesion, fills minor imperfections, and provides a uniform surface for painting. Essential for achieving a long-lasting, high-quality paint job. |
| Automotive Paint | Specifically formulated for use on vehicles, providing durability, color accuracy, and UV protection. Available in various types, including base coat, clear coat, and single-stage paints. | Provides the desired color and finish to the vehicle. Offers protection against environmental elements and enhances the vehicle’s appearance. |
| Clear Coat | A protective layer applied over the base coat to enhance gloss and protect the paint from UV damage and scratches. Typically a two-component urethane or acrylic formulation. | Provides a durable, glossy finish and protects the base coat from scratches, UV damage, and chemical exposure. Extends the life of the paint job. |
| Paint Gun | A tool used to spray paint evenly and efficiently. Available in different types, including HVLP (High Volume Low Pressure) and LVLP (Low Volume Low Pressure). | Applies paint evenly and efficiently, allowing for precise control over the application process. Ensures a professional-looking finish. |
| Masking Tape | Used to protect areas that should not be painted. Available in different widths and materials, including paper and vinyl. | Protects trim, windows, and other areas from overspray. Provides clean, sharp paint lines. |
| Masking Paper | Used to cover larger areas, such as windows and body panels, to protect them from overspray. Available in rolls of various widths. | Protects large areas from overspray, saving time and materials. Ensures a clean and professional paint job. |
| Respirator | Protects against inhalation of paint fumes and particles. Equipped with filters that remove harmful substances from the air. | Protects the respiratory system from harmful paint fumes and particles. Essential for safety when painting. |
| Safety Glasses | Protects the eyes from paint splatter and debris. Made of impact-resistant materials. | Protects the eyes from paint splatter and debris, ensuring safety during the painting process. |
| Gloves | Protects the hands from paint and chemicals. Made of nitrile or latex. | Protects the hands from paint and chemicals, preventing skin irritation and exposure to harmful substances. |
| Mixing Cups | Used to accurately measure and mix paint, primer, and clear coat. Marked with graduated measurements for precise mixing ratios. | Ensures accurate mixing ratios, which is essential for achieving the desired paint properties and finish. |
| Stir Sticks | Used to mix paint thoroughly, ensuring even distribution of pigments and additives. Made of wood or plastic. | Ensures thorough mixing of paint, which is essential for achieving a uniform color and finish. |
| Body Filler (Bondo) | A paste used to fill dents, scratches, and other imperfections in the body panels. Hardens to a sandable surface. | Fills dents, scratches, and other imperfections, creating a smooth surface for painting. |
| Wax and Grease Remover | A solvent used to remove wax, grease, and other contaminants from the surface before painting. Ensures proper adhesion of the paint. | Removes wax, grease, and other contaminants from the surface, ensuring proper paint adhesion. |
Having these tools and materials on hand will ensure you’re well-equipped to tackle a bad paint job and achieve professional-looking results. Always prioritize safety by wearing appropriate protective gear and following manufacturer instructions for all products.
3. Preparing the Surface
Proper surface preparation is critical to achieving a high-quality paint job. A clean, smooth, and properly prepped surface ensures that the paint adheres well and provides a flawless finish.
- Washing the Car: Begin by thoroughly washing the car with soap and water to remove dirt, grime, and other contaminants. Use a dedicated car wash soap and a soft sponge or microfiber cloth to avoid scratching the paint. Rinse thoroughly and dry with a clean microfiber towel.
- Removing Wax and Grease: Use a wax and grease remover to eliminate any residual wax, grease, or silicone from the surface. Apply the remover with a clean cloth and wipe off with another clean cloth. This step is crucial for ensuring proper paint adhesion.
- Sanding: Depending on the condition of the existing paint, sanding may be necessary to smooth out imperfections, remove old paint, or level the surface.
- For Minor Imperfections: Use fine-grit sandpaper (e.g., 600-grit to 800-grit) to lightly sand the affected areas. Use a sanding block to ensure even pressure and avoid creating uneven surfaces.
- For Major Imperfections: Use coarser-grit sandpaper (e.g., 400-grit) to remove significant imperfections or old paint. Follow up with finer-grit sandpaper to smooth out the surface.
- Wet Sanding: Wet sanding involves using water as a lubricant while sanding. This helps to reduce friction, prevent clogging of the sandpaper, and create a smoother surface. Soak the sandpaper in water for a few minutes before using it, and keep the surface wet while sanding.
- Filling Imperfections: Use body filler (Bondo) to fill any dents, scratches, or other imperfections in the body panels.
- Applying Body Filler: Mix the body filler according to the manufacturer’s instructions and apply it to the affected area with a plastic spreader. Apply in thin layers, allowing each layer to dry before applying the next.
- Sanding Body Filler: Once the body filler is dry, sand it down to match the contour of the surrounding surface. Start with coarser-grit sandpaper (e.g., 80-grit) to remove excess filler, and then use finer-grit sandpaper (e.g., 180-grit to 320-grit) to smooth out the surface.
- Masking: Use masking tape and masking paper to protect areas that should not be painted, such as windows, trim, and lights. Apply the masking tape carefully to create clean, sharp lines.
- Applying Primer: Apply a coat of automotive primer to the prepared surface. Primer helps to improve paint adhesion, fill minor imperfections, and provide a uniform surface for painting. Apply the primer in thin, even coats, following the manufacturer’s instructions. Allow the primer to dry completely before sanding lightly with fine-grit sandpaper (e.g., 400-grit).
By following these steps, you can ensure that the surface is properly prepared for painting, resulting in a smooth, durable, and professional-looking finish. At CARDIAGTECH.NET, we offer a wide range of surface preparation products to help you achieve the best possible results.
4. Correcting Common Paint Defects
Addressing common paint defects requires specific techniques to ensure a flawless finish. At CARDIAGTECH.NET, we provide the tools and expertise to help you tackle these issues effectively.
- Orange Peel: Orange peel is a textured surface that resembles the skin of an orange. It occurs when the paint doesn’t level out properly during application.
- Cause: Improper spray technique, incorrect paint viscosity, or environmental conditions (e.g., high humidity) can cause orange peel.
- Correction:
- Wet Sanding: Use fine-grit sandpaper (e.g., 2000-grit) to wet sand the affected area. Use a sanding block to ensure even pressure and avoid creating uneven surfaces.
- Compounding: Use a rubbing compound and a polishing pad to remove the sanding marks and level the surface.
- Polishing: Use a polishing compound and a polishing pad to refine the surface and enhance gloss.
- Waxing: Apply a coat of wax to protect the paint and enhance the shine.
- Runs and Sags: Runs and sags occur when too much paint is applied in one area, causing it to drip or sag.
- Cause: Applying too much paint at once, holding the spray gun too close to the surface, or using incorrect paint viscosity can cause runs and sags.
- Correction:
- Allow to Dry: Allow the paint to dry completely.
- Sanding: Use a razor blade or fine-grit sandpaper (e.g., 400-grit) to carefully remove the run or sag.
- Feathering: Use finer-grit sandpaper (e.g., 600-grit to 800-grit) to feather the edges of the repaired area into the surrounding paint.
- Priming: Apply a coat of primer to the repaired area.
- Painting: Apply a thin, even coat of paint to the repaired area, blending it into the surrounding paint.
- Clear Coat: Apply a coat of clear coat to protect the paint and enhance the shine.
- Dirt and Contamination: Specks of dirt or other contaminants trapped in the paint can create a rough or uneven surface.
- Cause: Painting in a dirty environment, using contaminated paint, or failing to properly clean the surface before painting can cause dirt and contamination.
- Correction:
- Spot Sanding: Use fine-grit sandpaper (e.g., 2000-grit) to carefully sand the affected area, removing the dirt or contamination.
- Compounding: Use a rubbing compound and a polishing pad to remove the sanding marks and level the surface.
- Polishing: Use a polishing compound and a polishing pad to refine the surface and enhance gloss.
- Waxing: Apply a coat of wax to protect the paint and enhance the shine.
- Bubbles: Air bubbles in the paint can result from improper mixing, application, or environmental conditions.
- Cause: Improper mixing of paint, applying paint too thickly, or painting in direct sunlight can cause bubbles.
- Correction:
- Allow to Dry: Allow the paint to dry completely.
- Sanding: Use fine-grit sandpaper (e.g., 2000-grit) to carefully sand the affected area, removing the bubbles.
- Compounding: Use a rubbing compound and a polishing pad to remove the sanding marks and level the surface.
- Polishing: Use a polishing compound and a polishing pad to refine the surface and enhance gloss.
- Waxing: Apply a coat of wax to protect the paint and enhance the shine.
- Fading or Oxidation: Over time, exposure to the sun and elements can cause the paint to fade or oxidize, leading to a dull or chalky appearance.
- Cause: Prolonged exposure to UV radiation, pollutants, and harsh weather conditions can cause fading and oxidation.
- Correction:
- Washing: Thoroughly wash the car to remove any surface dirt and grime.
- Compounding: Use a rubbing compound and a polishing pad to remove the oxidation and restore the paint’s color.
- Polishing: Use a polishing compound and a polishing pad to refine the surface and enhance gloss.
- Waxing: Apply a coat of wax to protect the paint and prevent further oxidation.
By using these techniques, you can correct common paint defects and restore your car’s finish to its original glory. At CARDIAGTECH.NET, we provide all the tools and materials you need to achieve professional-looking results.
5. Applying Touch-Up Paint
Applying touch-up paint is a straightforward way to fix minor scratches and chips in your car’s paint. Here’s how to do it:
- Cleaning the Area: Clean the area around the scratch or chip with soap and water to remove any dirt, grime, or wax. Dry the area thoroughly with a clean cloth.
- Preparing the Surface: Use fine-grit sandpaper (e.g., 2000-grit) to lightly sand the edges of the scratch or chip. This will help the touch-up paint adhere better and create a smoother finish.
- Applying Touch-Up Paint: Apply a small amount of touch-up paint to the scratch or chip using a fine-tipped brush or applicator. Apply in thin layers, allowing each layer to dry before applying the next. Avoid applying too much paint at once, as this can create a raised area that is difficult to blend.
- Blending the Paint: Once the touch-up paint is dry, use fine-grit sandpaper (e.g., 2000-grit) to lightly sand the edges of the repaired area, blending it into the surrounding paint. Use a sanding block to ensure even pressure and avoid creating uneven surfaces.
- Compounding and Polishing: Use a rubbing compound and a polishing pad to remove the sanding marks and level the surface. Follow up with a polishing compound and a polishing pad to refine the surface and enhance gloss.
- Waxing: Apply a coat of wax to protect the paint and enhance the shine.
6. Blending the Paint
Blending paint is essential for achieving a seamless repair that matches the surrounding area. This technique is crucial when applying touch-up paint or repairing larger areas.
- Feathering: Feathering involves gradually thinning out the edges of the new paint so that it blends seamlessly with the old paint. This can be achieved by using a spray gun or an aerosol can to apply thin, even coats of paint, gradually extending the coverage area with each coat.
- Color Matching: Accurate color matching is essential for a successful paint blending. Use the car’s paint code to identify the correct color and purchase touch-up paint or automotive paint that matches the original color.
- Clear Coat Application: Applying a clear coat over the blended area can help to protect the paint and enhance the shine. Apply the clear coat in thin, even coats, following the manufacturer’s instructions.
7. Polishing and Buffing
Polishing and buffing are essential steps in restoring the shine and clarity of your car’s paint. These techniques can remove swirl marks, scratches, and oxidation, leaving the paint looking like new.
- Polishing: Polishing involves using a polishing compound and a polishing pad to refine the paint surface. Apply a small amount of polishing compound to the polishing pad and work it into the paint in a circular motion. Use a polishing machine for larger areas, and apply light pressure to avoid damaging the paint.
- Buffing: Buffing involves using a buffing pad and a buffing compound to remove swirl marks and scratches from the paint. Apply a small amount of buffing compound to the buffing pad and work it into the paint in a circular motion. Use a buffing machine for larger areas, and apply light pressure to avoid damaging the paint.
- Waxing: Apply a coat of wax to protect the paint and enhance the shine. Use a high-quality car wax and apply it according to the manufacturer’s instructions.
8. Applying Clear Coat
Applying a clear coat is essential for protecting the base coat and enhancing the shine of your car’s paint. Clear coat provides a durable, glossy finish that protects against UV damage, scratches, and chemical exposure.
- Preparing the Surface: Ensure that the base coat is completely dry and free of any imperfections. Use a tack cloth to remove any dust or debris from the surface.
- Mixing the Clear Coat: Mix the clear coat according to the manufacturer’s instructions. This typically involves mixing the clear coat with a hardener and a reducer.
- Applying the Clear Coat: Apply the clear coat in thin, even coats using a spray gun. Apply two to three coats, allowing each coat to dry before applying the next. Overlap each pass by about 50% to ensure even coverage.
- Drying and Curing: Allow the clear coat to dry completely according to the manufacturer’s instructions. This may take several hours or even days, depending on the type of clear coat used.
- Wet Sanding (Optional): If necessary, wet sand the clear coat with fine-grit sandpaper (e.g., 2000-grit) to remove any imperfections, such as orange peel or runs.
- Polishing and Buffing: Polish and buff the clear coat to restore the shine and clarity of the paint. Use a polishing compound and a polishing pad to refine the surface, followed by a buffing compound and a buffing pad to remove any swirl marks or scratches.
- Waxing: Apply a coat of wax to protect the clear coat and enhance the shine.
9. Paint Correction Techniques
Paint correction is the process of removing imperfections from your car’s paint to restore its shine and clarity. This involves using a variety of techniques, including compounding, polishing, and wet sanding.
- Compounding: Compounding involves using an abrasive compound to remove scratches, swirl marks, and oxidation from the paint surface. Apply a small amount of compound to a polishing pad and work it into the paint in a circular motion. Use a polishing machine for larger areas, and apply light pressure to avoid damaging the paint.
- Polishing: Polishing involves using a less abrasive compound to refine the paint surface and enhance gloss. Apply a small amount of polishing compound to a polishing pad and work it into the paint in a circular motion. Use a polishing machine for larger areas, and apply light pressure to avoid damaging the paint.
- Wet Sanding: Wet sanding involves using water as a lubricant while sanding. This helps to reduce friction, prevent clogging of the sandpaper, and create a smoother surface. Soak the sandpaper in water for a few minutes before using it, and keep the surface wet while sanding.
10. Protecting Your New Paint Job
Protecting your new paint job is essential for maintaining its shine and durability. Here are some tips for protecting your car’s paint:
- Washing Regularly: Wash your car regularly to remove dirt, grime, and other contaminants. Use a dedicated car wash soap and a soft sponge or microfiber cloth to avoid scratching the paint.
- Waxing: Apply a coat of wax to protect the paint and enhance the shine. Use a high-quality car wax and apply it according to the manufacturer’s instructions.
- Avoiding Harsh Chemicals: Avoid using harsh chemicals, such as household cleaners or degreasers, to clean your car. These chemicals can damage the paint and cause it to fade or peel.
- Parking in the Shade: Park your car in the shade whenever possible to protect it from UV radiation. UV radiation can cause the paint to fade and oxidize over time.
- Using a Car Cover: Use a car cover to protect your car from the elements. A car cover can protect your car from UV radiation, rain, snow, and other environmental hazards.
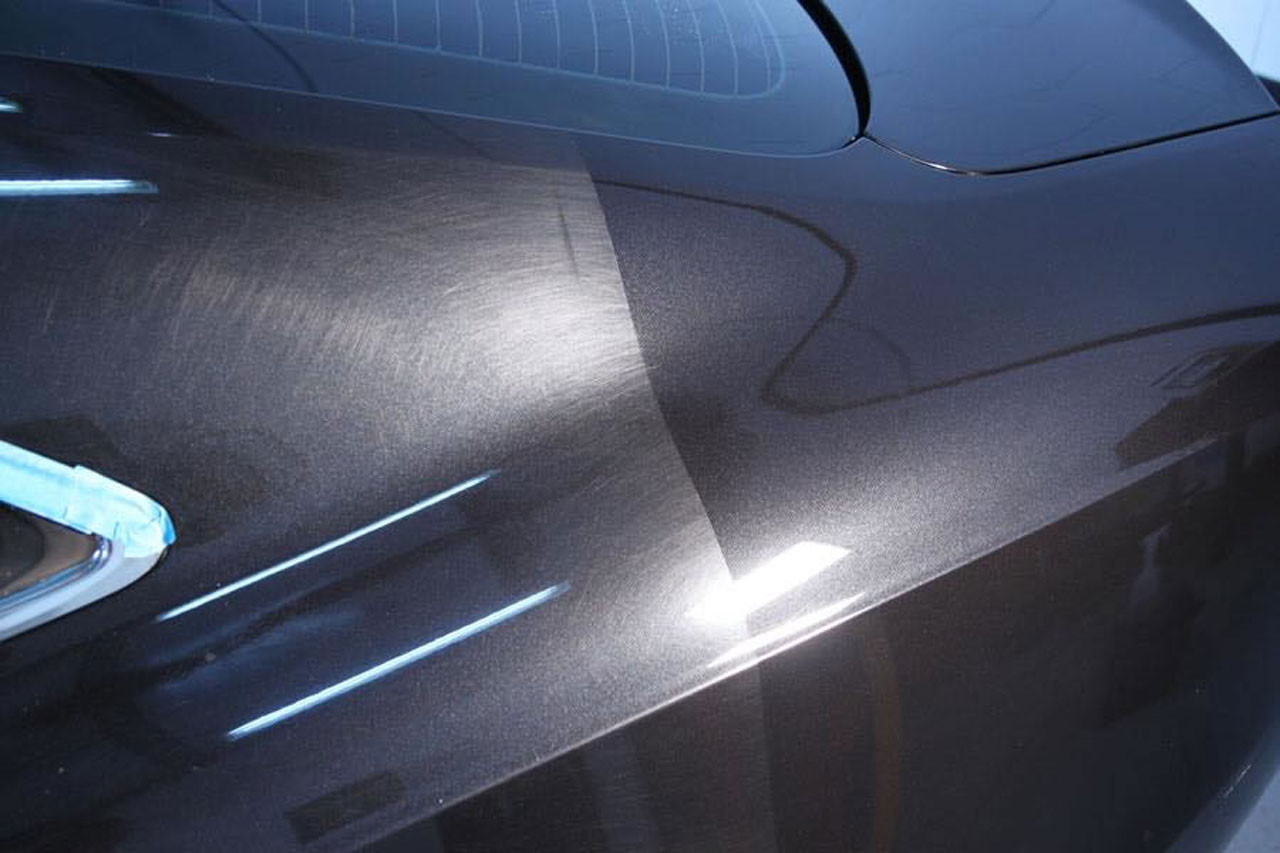
Car paint correction showcasing the meticulous process of removing imperfections.
By following these tips, you can protect your new paint job and keep your car looking its best for years to come.
11. Understanding Paint Types
Different types of automotive paints offer varying levels of durability, finish, and application requirements. Here’s a breakdown of common paint types:
- Lacquer: Lacquer paints dry quickly and provide a smooth, glossy finish. However, they are less durable than other types of paint and are prone to chipping and fading. Lacquer paints are also solvent-based, which means they require proper ventilation and safety precautions during application.
- Enamel: Enamel paints are more durable than lacquer paints and provide a hard, glossy finish. They are also more resistant to chipping and fading. Enamel paints can be either solvent-based or water-based.
- Acrylic: Acrylic paints are water-based paints that offer good durability and color retention. They are also easy to apply and clean up. Acrylic paints are a good choice for DIYers and those who are new to painting cars.
- Urethane: Urethane paints are the most durable type of automotive paint. They provide a hard, glossy finish that is resistant to chipping, fading, and chemical damage. Urethane paints are also the most expensive type of automotive paint.
12. The Importance of Color Matching
Achieving a seamless paint repair hinges on accurate color matching. Here’s why it’s crucial and how to ensure you get it right:
- Paint Codes: Locate the paint code on your vehicle. This code is usually found on a sticker located on the driver’s side door jamb, in the glove compartment, or under the hood. The paint code will help you identify the exact color of your car’s paint.
- Professional Matching: Take your car to a professional automotive paint supplier or body shop. These professionals have the tools and expertise to accurately match the color of your car’s paint. They can use a spectrophotometer to analyze the paint and create a custom match.
- Test Area: Before applying the new paint to your car, test it on a small, inconspicuous area to ensure that it matches the original color. This will help you avoid any surprises and ensure that the repair is seamless.
13. When to Seek Professional Help
While many paint repairs can be tackled as DIY projects, certain situations warrant professional intervention.
- Extensive Damage: If your car has extensive paint damage, such as large scratches, dents, or rust, it’s best to seek professional help. A professional body shop has the tools and expertise to properly repair the damage and restore the paint to its original condition.
- Color Matching Difficulties: If you’re having trouble matching the color of your car’s paint, it’s best to seek professional help. A professional automotive paint supplier or body shop can accurately match the color of your car’s paint and provide you with the correct touch-up paint or automotive paint.
- Lack of Experience: If you’re not experienced in painting cars, it’s best to seek professional help. Painting a car requires skill and expertise, and if you’re not careful, you can end up with a poor-quality paint job.
14. Cost-Effective Solutions
Repairing a bad paint job doesn’t always require a full repaint. Here are some cost-effective solutions:
- Spot Repairs: Spot repairs involve repairing small areas of damage, such as scratches or chips. This can be a cost-effective solution for minor imperfections.
- DIY Kits: DIY paint repair kits are available for repairing small scratches and chips. These kits typically include touch-up paint, sandpaper, and other materials needed for the repair.
- Mobile Repair Services: Mobile paint repair services offer on-site repairs for scratches, dents, and other minor damage. These services can be a convenient and cost-effective solution for busy individuals.
15. Environmental Considerations
Automotive painting can have a significant impact on the environment. Here are some environmental considerations to keep in mind:
- Use Water-Based Paints: Water-based paints are more environmentally friendly than solvent-based paints. They contain fewer volatile organic compounds (VOCs), which can contribute to air pollution.
- Dispose of Waste Properly: Dispose of waste paint, solvents, and other materials properly. Do not pour them down the drain or into the environment. Contact your local waste management company for information on how to dispose of these materials properly.
- Use Proper Ventilation: Use proper ventilation when painting to minimize exposure to harmful fumes. Paint in a well-ventilated area or use a respirator to protect yourself from inhaling harmful fumes.
Assortment of automotive paint tools necessary for achieving a flawless finish.
16. Safety Precautions
Safety should always be a top priority when working with automotive paints and chemicals.
- Wear Protective Gear: Wear protective gear, such as gloves, safety glasses, and a respirator, to protect yourself from harmful chemicals and fumes.
- Work in a Well-Ventilated Area: Work in a well-ventilated area to minimize exposure to harmful fumes.
- Follow Manufacturer’s Instructions: Follow the manufacturer’s instructions for all paints, chemicals, and equipment.
- Store Materials Properly: Store paints, chemicals, and other materials properly, away from heat, sparks, and flames.
17. Enhancing Resale Value
A well-maintained paint job can significantly enhance your car’s resale value. Potential buyers are more likely to be interested in a car that looks well-cared for, and a fresh paint job can make a car look newer and more appealing.
- Regular Maintenance: Regularly wash, wax, and detail your car to keep the paint looking its best.
- Repairing Damage: Repair any scratches, dents, or other damage to the paint as soon as possible to prevent further deterioration.
- Professional Repainting: Consider having your car professionally repainted if the paint is faded, damaged, or in poor condition.
18. DIY vs. Professional Repainting
Deciding whether to tackle a repaint yourself or hire a professional depends on your skills, budget, and the desired quality of the finish.
- DIY Repainting: DIY repainting can be a cost-effective option for those who are experienced in painting cars. However, it requires a significant investment in tools and materials, as well as a dedicated workspace.
- Professional Repainting: Professional repainting is the best option for those who want a high-quality finish and are willing to pay for it. A professional body shop has the tools, expertise, and equipment to properly prepare the surface, apply the paint, and achieve a flawless finish.
19. Future Paint Technologies
The automotive paint industry is constantly evolving, with new technologies and innovations emerging all the time.
- Self-Healing Paints: Self-healing paints are designed to repair minor scratches and swirl marks automatically. These paints contain special polymers that react to heat or sunlight, causing the scratches to disappear.
- Color-Shifting Paints: Color-shifting paints change color depending on the angle of view. These paints contain special pigments that reflect light in different ways, creating a unique and eye-catching effect.
- Environmentally Friendly Paints: Environmentally friendly paints are formulated with sustainable materials and processes. These paints contain fewer VOCs and other harmful chemicals, making them a more environmentally responsible choice.
20. Maintaining a Showroom Finish
Achieving and maintaining a showroom finish requires consistent effort and attention to detail.
- Regular Washing: Wash your car regularly to remove dirt, grime, and other contaminants. Use a dedicated car wash soap and a soft sponge or microfiber cloth to avoid scratching the paint.
- Waxing: Apply a coat of wax to protect the paint and enhance the shine. Use a high-quality car wax and apply it according to the manufacturer’s instructions.
- Detailing: Detail your car regularly to remove swirl marks, scratches, and other imperfections. Use a polishing compound and a polishing pad to refine the paint surface, followed by a buffing compound and a buffing pad to remove any swirl marks or scratches.
- Protection: Protect your car from the elements by parking it in the shade or using a car cover.
By following these tips, you can maintain a showroom finish and keep your car looking its best for years to come.
FAQ: Fixing a Bad Paint Job
- What causes orange peel in a paint job?
- Orange peel texture results from paint not leveling properly during application due to incorrect spray technique, paint viscosity, or environmental conditions.
- How do I fix paint runs and sags?
- Allow the paint to dry completely, carefully sand down the runs or sags, feather the edges, prime, and then apply thin, even coats of paint, followed by a clear coat.
- What’s the best way to remove dirt and contamination from a paint job?
- Spot sand the affected area with fine-grit sandpaper, then use rubbing compound and polishing compound to level and refine the surface before waxing.
- How can I prevent bubbles in my car’s paint?
- Ensure proper mixing of paint, avoid applying paint too thickly, and do not paint in direct sunlight. If bubbles occur, sand, compound, polish, and wax the area after the paint dries.
- What’s the process for repairing faded or oxidized paint?
- Wash the car thoroughly, use a rubbing compound to remove oxidation, polish to enhance gloss, and apply wax to protect the paint and prevent further oxidation.
- Can touch-up paint really fix scratches?
- Yes, touch-up paint can effectively fix minor scratches and chips. Clean the area, lightly sand the edges, apply thin layers of touch-up paint, blend, compound, polish, and wax.
- Why is color matching so important when painting a car?
- Accurate color matching is crucial for a seamless repair. Use the car’s paint code to ensure the touch-up paint matches the original color.
- Is it better to DIY or hire a professional for a full car repaint?
- DIY repainting is cost-effective for experienced individuals, while professional repainting ensures a high-quality finish due to expertise and specialized equipment.
- What are some new technologies in automotive paint?
- Emerging technologies include self-healing paints that repair scratches automatically, color-shifting paints, and environmentally friendly paints with fewer harmful chemicals.
- How do I protect my new car paint?
- Regular washing, waxing, avoiding harsh chemicals, parking in the shade, and using a car cover are essential for protecting and maintaining your car’s new paint job.
At CARDIAGTECH.NET, we understand the challenges you face in your profession. Whether it’s the physical demands, the constant need to update your skills, or the pressure to deliver timely and high-quality service, we’re here to help. We offer a range of tools and equipment that can enhance your efficiency, accuracy, and safety. Contact us today at +1 (641) 206-8880 to discover how our products can transform your work. Visit our website CARDIAGTECH.NET or visit us at 276 Reock St, City of Orange, NJ 07050, United States. Let us help you take your automotive repair business to the next level. We look forward to hearing from you and providing the solutions you need.